Film cameras
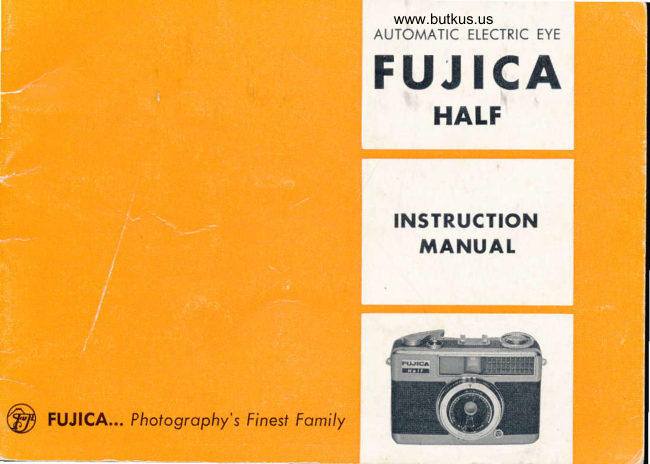
FUJICA HALF 1.9 User manual
User manual for FUJICA HALF 1.9. 24 pages in English. Read the original PDF, download or print a copy without registration.
24 pagesEnglish2.2 MB PDF

Loading your manual…Open PDF directly
Document details
- Brand
- Fujica
- Model / document
- FUJICA HALF 1.9
- Document type
- User manual
- Language
- English
- Pages
- 24
- File size
- 2.2 MB
- Category
- Film cameras
- Document date
- Not specified in catalog
Search available document text
Find a term, then jump to its page in the original PDF. Image-only pages may not be searchable; check the PDF for exact wording and diagrams.
Page 3 · Read text
shutter.  .. even candid shots in  available
  FUJTCAHALF 1.9          light,Whenor youindoorconsideraction inthat,full alongcolor. with
                                                      this  professional performance, you get
  Doublesthe'numberof perfect      twice the usual number of pictures with
      picturesfrom any roll           each roll of fllm, you know you made the
     of standard35 mm film.            right  choice of camera.                                               This booklet will show you how to get
                                               the best results  with  your  Fujica Half
                                                   1.9... how to use the electric eye control
                                      and other automatic conveniences... how    It won't take you long to discover that                                                    to make the most  of  the unique view-your  Fujica  Half  1.9 performs as hand-                                                finder control  center... how  to handlesomely as  it  looks.  What's more, you                                         problem  situations.  Read  it  carefully,will enjoy every easy step along the way.                                       and you  will  be on the way to enjoying
  Soon you  wiII see the  flnal  proof-in       better pictures than ever before.
your first pictures. Whether you project
them larger-than-life  on your screen or
print  them as enlargements as big as
l6'tx20tt, you will see the crisp definition
-the  sparkling, life-like color you expect
from a fine, full-size 35 mm camera.
  Nor does the Fujica Half  1.9 limit  you
to  fair  weather  photography.   There's
hardly a situation you can't handle with
the fast Fujinon f/1.9 lens and high-speed
                           www.orphancameras.com
ENTIRECONTENTSCOPYRIGHTEDI965 FUJI PHOTOOPTICALPRODUCTSINC.
View original page 3Page 4 · Read text
(See next page for identificationPracticethesesimplesteps        of each feature)


 l. Setthespeedof yourfilm
The Film speed Set-
tting  Dial  is located  Speed Selector until   the  focusing  lever,   side  of  the  flnder.
on the  front  of  the   the desired speed is   Iook into the finder.  Turn the Lens Open-                                                                                  'Ringcamera, in the upper   lined up with the red  See the  bar  move   ing  Selector
corner.  Lift  the out-   dot.  The numbers,  along the  left  edge   until you will see the
er ring  and turn   it    of course, represent  as  you   shift   the  moving  bar  within
until  the lred dot  is   fractions of a second:  Iever ?  Simply  line   the wide part  of the
next to the ASA  or   50.0:175ggrn second,  up the bar  with  the   vertical   line.  You
DIN  rating  of your   250:Ll250th, etc. Pic-   symbol for your sub-  are now set to shoot
film.  This rating  is   ture  labove  shows   ject-portrait,  group   a  correct  exposure
shown on the instruc-   speed set at  Ulzltln   or distant  scene-to    at the chosen shutter
tion sheet that comes   of a second.           bring  the  lens  into   speed.
with your  fllm.                              proper focus.
View original page 4
Page 6 · Read text
Theprecisioncomponentsof yourFujicaHalf1.9
   Every feature designed to help you take better pictures than ever before.


                               l 5                         t6                         t7
                          AutomaticExposure     Rewind Button                                      Tripod Socket                                Counter.
                                  Self-resetting
View original page 6Page 8 · Read text
Howto LoadFilm dure(Basiconsteps-seenext pages)full proce-


A.  Beforeinsertingfilm cartridge,push film cartridgespindle
    u p .  ( N o . 2 1 )


 B.  After insertingf ilm cartridge,push spindledown.
View original page 8Page 9 · Read text
Howto load
     your
                                SET FILM SPEED
                                                             Lift  the outer  ring  of  the Film  Speed Fujica Half 1.9           Setting Dial (10) and rotate   it  until  the
                                                aligning  dot  (9)  is  next  to  the ASA
                                      number  for  your film.  Release the ring
                                                    to lock the setting.


INSERTFILM CARTRIDGE                                  I N S E R TE N D O F F I L M
Push up the Film Cartridge Spindle (21).     SIip the end of the film under the Take-
Drop  in  the  film  cartridse  with  the    Up Spool Catch (25) until the fllm shows
sprocket holes of the  film Ieader down.      clearly  all  the way  to the head of the
T-hen, push the Film Rewind (18) aII the     arrow cut-out.
way down to insert the spindle into  the
cartridge.
                             www.orphancameras.com
View original page 9Page 11 · Read text
Howto unload
      your
                                     When vou reach the  last frame,  the
                                                  Exposrire Counter (16)will  tead"72", or
                                                                  on the film   FujicaHalf 1.9            "46". ot "24". depending                                                    load.'and the Film Advance Lever will
                                                  stop part waY out. DO NOT TRY TO
                                                      rontet rr  Att rHE wAY.  This  is your
                                                     signal that you have used up the flIm.


       Filp up-pushinethe Rewind Crank (18). Then,      while          the Rewind Button (15)
     on the-bottom  of the camera  all  the
     wav  in. turn the crank in the direction
       of ihe arrow until no more resistance
        is felt.  The film  is now fully rewound
       into the cartridge.          www.orphancameras.com
r0
View original page 11Page 12 · Read text
Twofingerscontroleverything
             on the FUJICAHALF 1.9

                                           Your  left index finger
                                         on  the  focusing  Iever
                                            focuses the lens for close-
                                         up portraits,  groups or
                                           scenics...enablesyou to
                                        change focus as fast as
                                         you wish.


 A complete explanatior.r of focusing and how the elec-
tric eye assures correct exposure for you automatically
is pictured and described on the foilowing pages.
                                                                                                                                        I t   l
View original page 12Page 13 · Read text
Focusingyour
          Fujica
          Half1.9


     The simplicity  of  its focusing system     tom):  portraits,  at  about  3 to 4 feet;
     is typical  of the many ways the Fujica     groups, at about 7 to 12 feet; and dis-
    Half  1.9 makes your picture-taking  easy      tant scenes,ftom about 25 feet to infinity.
    -sure-completely   enjoyable. By simply     As you move the Focusing Lever (3),you
    matching a symbol to the kind  of picture     see an indicator  bar swing  over these
    you're shooting, you can bring  the lens     symbols.  Simply  center the bar on the
     into sharp focus for clear, crisp pictures.     symbol matching  your  subject'  That's
                                                                    all there's to  it.
   R A P I DF O C U S I N GT H R O U G HT H E         USING THE FOOTAGESCALE
   V I E W F I DN E R                            You can, also focus your  Fujica  Half
     Look through the finder and note the     1.9 by means of  its Focusing Distance
    3 symbols in  the luminous band along     Scale (4),1ocatedright under the Focusing
    the  left  side.  They  represent  distance     Lever. Move the lever to align the white
     settings for  typical subjects (top to bot-     dot on its top edge with  the  figure  cor-                              www.orphancameras.comt 2
View original page 13Page 14 · Read text
responding to  the  subject distance  (in     ing with flash (see page 18).
       feet). At that point, the lens will  be  in      Even  if your focus is not  " on the but-
      sharp focus.                                  ton ", you  will   still  get a sharp picture
      Use this  scale whenever you want  to     with your Fujica Half  1.9. The tremen-
      focus with greatest accuracy, particularly     dous  depth-of-field  of  its  high-qualityI     for  close-ups.   It  also serves you  to     Fujinon  lens gives you an extra safety
     check and control depth-of-field (see page     margin  for possible error.I     20). And you will refer to  it when shoot-


                                    Over

il
I                                  Under


                                                                    r3
View original page 14Page 15 · Read text
The electric eye of your  Fujica  Half
                                                  1.9 not only measures the light but also
                                                              tells you when the camera is set correctly   Howthe ElectricEyeControl                                          and how it  is set.  It's accurate, fast and
     assurescorrectexposure,   easy. Here's how  it works:
                                         You already "programmedl'  the auto-
          automatically           matic  control  into  operation when you
                                                   set the ASA  or DIN  film  speed (first
                                                step  in  loading  the camera) and then
                                                selected a shutter speed. Now, place your
                                                         right  index flnger on the Lens Opening
       @rzffi,o\                         flnder,SelectortowardsRing (12)theandrightlookside.into the view-
                                         See the indicator bar swing over the
                                               luminous, frame  line as you rotate the
                                                 Selector Ring ?  Simply  turn  the  ring
                                   Over                  until  the bar  is within  the uside portion
                                                        of that  line.  We'll  caII this  the correct
                                            exposure area.  At  that  point, the lens
                                            opening  is set to  give you correct ex-             ! a
                                            posure  at  the  selected shutter  speed.
                                   Now you can snap the picture and be
                                               sure it  will be perfect.

                                   Under         CHANGlNGTHE ELECTRICEYE                                                                                           . , P R O G R A 'M'
                                             Sometimes, due to the  light  situation,
                               www.orphancameras.com
l 4
View original page 15Page 16 · Read text
the  indicator  bar  will  not  reach the    DETERMININGEXPOSUREWITH
       correct exposure  atea,  !\o matter  how    ASA 64 FILM
       far you rotate the Selector Ring. Chang-      The ASA Dial setting  for  this  fllm  is
       ing the shutter speed will usually over-     the same as for ASA 100. To compensate
     come this problem.  Reduce the speed if       for the difference, the viewfinder provides
      the bar remains below the  correct ex-     a special control  feature:  the thin  line
     posure atea;  increase the speed  if  the    headed by the numeral '64' just outside
      bar remains  too  high.  Now  rotate the     the right  edge of  the luminous frame.
      Selector Ring  again.                        With ASA 64 film  only, this line serves
             If the bar  still  fails  to reach the cor-     as your  correct exposure area.  Follow
       rect exposure area, this means the light      the above procedure, using  this iine in-
        is either too bright  or too dim to permit      stead of the wide portion  of the frame
                                                               in Iocating the indicator bar.
                aOver

t )    on page 17)
             If  no amount  of  speed adjustment
      helps you bring the bar onto any part of
      the fiame  lin6.  don't  shoot.  You'd be
      wasting  film.                                                   'B'     CAUTION:DO NOTSETTHESHUTTERON
    WHENUSINGTHE ELECTRICEYECONTROL!                                        Under
     Check the shutter speed scale visible  in
      the viewfinder above the luminous frame.
                                                                                                                                                          t 5                          J
View original page 16Page 17 · Read text
FOLLOW.FOCUSFOR SHARPACTION
      Usingthe Viewfinder      SHOTS
            asa                    systemYour enablescamera'syouvisibleto keepfocuseven controla mov-
                                                   ing subject.in. sharp focus. When you      CreativeControlCenter        see the subject goming closer or moving
                                            away, simply  shift   tle  focusing  leve-r
                                                            until the indicator bar reaches the symbol
                                             matching the subject's new positioir.
                                       Remember too.  that  the tremendous
                                                     depth-o!-field  of your  lens assures you
     You've pqobably realized by now  that,      of excellent sharpness even without  this
   once you- flnished loading  the camera,     adjustment,  except when  the change in
    your eye has never left the viewfinder-       subject distance  ii  fairly  great (see dhart
    never lost sight of your subject. This is     on page 20).
   1_o-4ccide.nt;_the  flnder  of your  Fujica    S U I T T H E E X P O S U RTEO T H E S U B J E C T
    Half  1.9 is designed to serve as control      The electric eye control  automatically
    center for the entire picture-taking proc-     gives_ you the coruect lens opening for     ESS.                                                  the shutter speed you selectedbriginally.
   C O M P O S I N TGH E P I C T U R E                But you can 6hange this combination and
                                                                          still get a perfectly exposed picture.


                                             reasons for increasing the original shut-
                                                        ter speed:t 6                             www.orphancameras.com
View original page 17Page 18 · Read text
1. Greater " action stopping power "  to     desired direction beyond the critical area
     prevent subject movement from caus-     (but not beyond the extreme ends of the
     ing a blurred image.                   frame line).
   2. Reduced depth-of-field (through  the    You can " bracket " shots professionally
     automatically increased Iens opening).     with 3 exposures: one "on the nose" and
,    This helps concentrate attention  on    one off-center  in  each direction.  You
     the  subject by  throwing  the back-    may iprefer  the darker  slide for projec-
    ground out of focus.                        tion and the  lighter  for  prints,  or feel
 Or, you may want to reduce the shutter      that  the  "off"  exposure renders the
 speed to achieve other effects:               subject to better effect.
   1. Deliberately blur a moving subject to    C O M P E N S A TFEO R T H E B A C K G R O U N D
    emphasize the impression of motion.    An excessively bright or dark background
   2. Maximum  sharpness from  front  to     can overwhelm the exposure value of the
    back through increased depth-of-fleld      subject.  Here  are two ways  to com-
     resulting  from   the  automatically     pensate for  it:
    decreasedlens opening.                                    I . Walk up to the subject (if convenient)
 However, avoid hand-held shooting  at        and set the exposure  in  the usual
 speeds slower than U60th second.              way;  then  return  to your  original                                             '8 CAUTION:DO NOTSETTHESHUTTERON              position  to take the picture  at that
 The electric eye does not $'ork at the'B'"         close-up setting.
 setting.  See page 19 for  the time  ex-       2. With a dark background, Iine up the
 posures.                                            indicator  bar  to show slight under-
 SPECIALEXPOSUREEFFECTS                 exposure; with a bright background,
 You can also use the electric eye control          set it for  slight overexposure.
 to  deliberately  over  or  underexpose.
 Simply move  the  indicator  bar  in  the
                                                                                                                                                  t 7
View original page 18Page 19 · Read text
FLASH-INDOORS
      ANDOUT


     Your Fu.iica-electronicHalf  1.9 is  fully  synchro-     manufacturer  of the bulbs or electronic    nized for             flash at  all speeds,     unit.  Set the shutter speed first, then
    and  for  Class M  flashbulbs  at  U30th     the lens opening by means of. the Selector
    second.  No  ad.iustment-cord       is  required;     Rins  (12t. Yo-u may  find   it  easiest to    simnlv  pIuE the        of  the  flash unit      cheik  both  on  the  camera's external
     into the^Flish  Connection Outlet  (2) on
    the  front  of the camera. The flash unit
     itself  is attached by means of  the Ac-
    cessorv Shoe on the-top of the Fujica or,
     with     i  suitable  brack-et, to  the  Tripod
    Socket on the bottom of the camera.
      Flash exposure is determined  in  ac-
    cordance with  the guide supplied by the
t 8                             www.orphancameras.com
View original page 19Page 20 · Read text
TIMEEXPOSURES
  For exposures longer than  1/8th second. set the Shutter                  'BY.SpeedSeiector to      Pressing the Release Button will now
nota tne shutter open until  the- Button  is released.
  Your Fujica  Half  1.9 should be mounted on a tripod  or
other firm"support  for time exposures {in fact, for  ali shots
at speeds slo'nirerthan 1/60th setondl.  It"s also a good idea
to use a cabie release, which  is screwed into the thread of
the Shutter Release Button.  Or. for the smoothest possible
release, use the Self-Timer (see below).


  You can set the Fujica Half  1.9 to snap the picture  auto-
matically  after a delay of up'yourselfto 10 seconds. This gives you
time to Let into the picture                 , after you've placedihe
camera on a tripod or a handy, flat surface.
 When everything  is ready for the exposure, set the  SeIf-
Timer  Slide (20) to  'L'  and wind the Self-Timer Ring (19)
clockwise.  Wind   it  until   it  locks.  Then, move the  Self-                   'S'                and take your place in the picture. TheTimer Slide to
camera does the rest.
  You can also use the Self-Timer  to release the shutter  of
the tripod-mounted camera for slow-speed or time exposures
withorit the slightest jalring.   Remember-at  slow shutter
speeds even thl  slighlest cdmera movement will  inevitably
cause the picture to be blurred.
View original page 20Page 21 · Read text
HOW CONTROLLINGYOUR "DEPTH.OF.FIELD"GIVESYOU BETTERPICTURERESULTS
  With  the  chart below you can easily      instructions  in focusing and using  the
plan how sharp the area in front  and in      viewflnder  control  center.  Since the lens
back of your subject will  be in the  fin-     openinE is coupled to the speed selector
ished picture.  This area of sharp focus      ring, b! m.erely"chalging th-e speed.you
is called " depth-of-field ".   It varies with      get a choice of  different lens openings.
the size of the lens openins and with the    The depth-of-field for each lens bpening
distance from  the c^amera to  the main       at  var^vinE distances  is shown  in  the
subject. A small lens opening t22) will     boxes 6el<jw. The top row  in each box
give you a greater depth-of-flel-d. A wide     shows the depth-of-field  in meters.  The
lens openine (1.9) wiII  result  in a nar-     bottom row in feet.
rower depth of field. FoIIow the previous

                                                                 20
                                   4.60-5.49 | 6.23-7.99  8.49-l 2.16    r 4.76-30.9I
                                   4.42-5.75 | 5.92-8.57  7.e3-t3.55  I 3.| 3-4 r.98
                                          4 .2 1 -6 .1 5    i  5 .5 5 -9 .4 7   7.28-r5.95 11.45-78.82

                                  3.96-6.77 I 5.r2-r r.05  6.56,-20.9I     9.7'l-q
                                          3 .6 4 -8 .0 7   |  4 .6 0 -1 4 .6 6  5.73-39.4 r    8.02--
             2.25-4.31              3.30-10.27| 4.07-24.88
             2.01-5.43   2.50-9.93 | 2.86-r9.71
               1.85-7.84    |  2.15-22.60 |  2.46-*
                            www.orphancameras.com
View original page 21Page 22 · Read text
iw
                                            Three types are most widely used: Yellow,'#                                         which ddrkens a blue sky to emphasize
          Filterscan              Green. which  not  orily lightens  foliagei*                                                clouds, and also improves  skin  tones;
        helpyou take            green,and  distineuishesbut a-=Isodiminishesdifferentskin shadesblemishesof
                                        makes clouds stand out against a drama-        betterpictures             to  a  great  extent;  Red, which  reallyt                                                          tically  darkened  sky  and  also adds                                                 sparkle to water scenes.
     By  simply  placing  the  right   filter   in    FILTERFACTORS
     front  of your lens, you can often trans-     Since filters absorb part of the light, you
    form an ordinary snapshot into a truly     have to increase the exposure to com-
     flne  nhotoeranh.  Use  onlv  ihe  best     pensate.  The required increase. which
     quality filte"rs;-an inferior  fifter  will  not      iraries among diffeient filters, is described
    permit your  lens to perform  at its best.     as  the  filter  factor.  You  can achieve
    Your  Fl.iicLIalf     1.-91accepts screw-in      correct  exposure by  dividing  the  film's
     filters of 43mm  diameter.              ASA number by the fllter factor and pro-
       In color photography, you will  find two     gramming the eiectric eye for the res'ult-
      filters  particularly   helpful.  The conver-      ing-mediumlower number.  For example:  Using
    sion filter (Type A, Nol85 etc., depending     a           yellow   fllter,  which  has  a
    on the film) enables you to use tungsten      factor  of 2. and a flIm rated  at ASA  100.
    type  film  in  daylight.   The skylight  (or     you set the ASA Ring on the camera to
    UV) filter  is used with daylight type film      50.
     to  penetrate  ultra-violet   Itaze and  to       For manual exposures, you compensate
    imnrove the bluish aDpearanceof subiects    by  either increasing the lens opening or
    in'open  shade on 6-bright  day. Many     reducing the shutter speed.-the  Assume that,
     othei types are available  for advanced      in the a6ove examnle.    exnosure with-
     color work.                                    out  fllter  is f/8 at-Ul2lth  secbnd.  Using
       Filters  ean bring  about marked  im-      the   filter,  you would open the  lens  to
    provements  in black and white  pictures.       f/5.6 or set the shutter  at 1/60th second.
                                                                                              2l*,n
View original page 22Page 24 · Read text
or two of special lens cleaning  fluid and
                                                                                                       to                                                                              optical lens                                                                                        tissue                                                         the lens                                                                    with      YourFujicaHalf1.9          wipe                                                                                  a                                                                            use                                           remove                                                     any                                                         smudges.                                                                     Never
                                                      solvent, nor  facial  tissue  or a handker-           will staylike new                                                        chief to clean the lens. ALWAYS  remove
                                                        fingerprints   immediately-they    contain       withminimumcare
                                                    acid  which  wiII  soon damage the  lensl'ff                                            coating   if  left undisturbed.
      While your Fujica  Half  1.9 is  built  as      Keep  in  mind  that  needless rubbing
    ruggedly as modern technology can pro-     does not improve the lens. Clean it only
    vide,  it   is  also a  precise instrument.     when actually  necessary.itr    Treat it with reasonable care. and  it  will    DON'T NEGLECTTHE INSIDE
    give  you many  years  of  trouble-free        After  every 3 or 4 film loads, clean out
    service.                                   accumulated dust and fi1m particles which
      Protect the camera by keeping  it in the    may  settle on the lens or  fllm.  Use a
    leather pouch, with the lens capped, when     blower brush or  similar  device to blow
   you are not actually taking pictures. Do     out loose particles.  Treat the rear of the
    not leave the shutter cocked when you've     Iens same as  the  front.   Lens  tissue
    finished shooting;  it's better to make one    wrapped around a toothpick will help you
   more exposure and not operate the Film      clean hard-to-reach  spots (but not  the
   Advance Lever  afterwards.  Be careful      lens). Do not use anything  metallic on
    not  to bang  it against anything  or drop      either  the  inside  or  the  outside  of the
       it.                                       camera.
   KEEPTHE LENS CLEAN
 ffi   Use a lens brush  to remove dust  or
    other particles from  the surface as the
      first  step. Then you may  apply  a drop
                                                                23
View original page 24Related documents and language editions
From the M. Butkus archive. Original publisher and archive notices are retained.
Check the model and edition against your equipment.
PDF verified 2026-10-10.