Film cameras
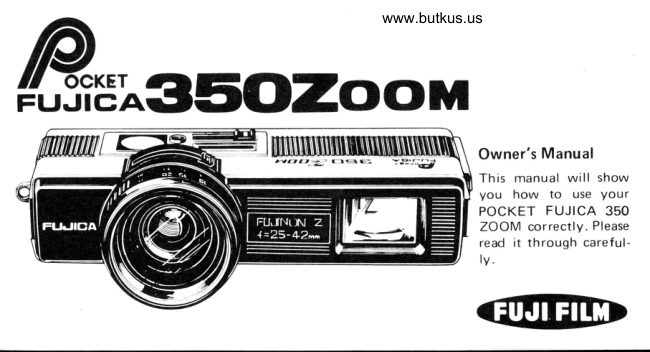
Fujica Pocket 350 Zoom User manual
User manual for Fujica Pocket 350 Zoom. 16 pages in English. Read the original PDF, download or print a copy without registration.
16 pagesEnglish1.5 MB PDF
Loading your manual…Open PDF directly
Document details
- Brand
- Fujica
- Model / document
- Fujica Pocket 350 Zoom
- Document type
- User manual
- Language
- English
- Pages
- 16
- File size
- 1.5 MB
- Category
- Film cameras
- Document date
- Not specified in catalog
Search available document text
Find a term, then jump to its page in the original PDF. Image-only pages may not be searchable; check the PDF for exact wording and diagrams.
Page 2 · Read text
r CONTENTS                       r SPECIAL FEATURES
Special features                   2    o This snappily-built camera is designed for carrv-
Specifications                   3      ing in your coat pocket or handbag. You'll be
Names of parts                   4      surprised at the beautiful color pictures "it will
1. Putting the camera away in its             take.
  case                        6   o Film loading and unloading is extremely simple.                                You just drop in and drop out the cartridge   no2. Attaching the handstrap      6                                                     -                                      need to bother with ASA speed setting or film3. Loading the cartridge            7      rewinding.
4. Taking outdoor pictures       ..... 8     .  lt  is equipped with a regular zoom lens to let you
5. Zooming                    9      bring your subject up close to the camera to take
6. Aiming the camera .....        .....12      close-ups of only the interesting parts of your
7. Taking   f lash pictures        .......13      subject without moving the camera. Framing and
8. Unloading the cartridge     .....14     composing are easy because the lens is inter-
9. Camera care .....        .........-.-....15      locked with the camera's special "zoom finder."                                     o Other features include: simple exposure control
                                           via weather symbols; accurate focusing from  1
                                       meter (about 39 inches) to infinity via meter/feet
                                                   scale; simplified flash photography with a special,
                                     compact electronic flash (FUJICOLOR STROBO
                                                P
View original page 2Page 3 · Read text
TSPECIFICATIONS
                                              www.butkus.us
Film              1 1 0 cartridge film, 1 3x 1 7mm      F lash         Hotshoe for cordless electro-
                                    f rame size.                      Photography   nic flash; X-synchronization
Lens          6-component, 7-element                         at 11125-sec.
                                                                                                  release             1 : 5.6 f=25 - 42mm           Others        Tripod socket, cable
             zoom; 34mm0, O.5mm-pitch                      socket, handstrap eyelet.
                  screw-i n  f ilter.                  Dimensions    125x66x28mm, 2009.
Focusing      Eye and scale.             & Weight
Shutter        11125-sec.  f ixed-speed me-     Included      Handstrap, lens cap, soft
                chanical shutter.                  Accessories      case.
Exposure      Via aperture switchover with     Optional     FUJICOLOR STROBO P.
Control       weather symbols.                  E xtras
Viewf inder     Direct vision Albada optacal
         zoom  f inder with  bright
                                        f rame and provision for
                 parallax correction.
F ilm       Thumb wheel; provision for
Advance       double exposure prevention.
View original page 3Page 4 · Read text
Venmo @mike-butkus-camera  Ph. 2083
PayPal Name  Lynn@butkus.org      www.PayPal.me/lynnbutkus
View original page 4
Page 7 · Read text
1. PUTTING THE CA.    2. ATTACHING THE HANDSTRAP
  MERA AWAY IN ITS   The handstrap is easy to at-
  CASE                    tach and detach. Make sure
                              the camera is held with your          -<
                              hand passed through the strap
                         hoop to prevent dropping it
                                   inadvertently.


                                                                               1. Open the strap fastener by
                                                                      stretching  it out and turn-
First, set the Zoom Knob at                                          ing it 180 degrees.
N and the Focusing Ring at
oo, then put the camera away
in its case as shown.
View original page 7Page 8 · Read text
3. LOADING THE CARTRIDGEwww.butkus.us


2. Hook the fastener on to   Use 1 1O-size cartridge-loaded     Camera Back and apply a
  the Handstrap Eyelet and    film.                              slight pressure so that  it
  close it by turning it 18O   Example: FUJICOLOR F-II       locks with a click.
  degrees.                              Pocket Film.        The Film Conf irmation
                                         1. Open the Camera Back by    Window shows you the
                                 pressing down the Back     type of film loaded in the
                              Cover Lock.                  camera and the number of
                                  2. Insert the cartridge in the     exposures  it will yield, as
                           Cartridge Chamber as     well as the number of
                         shown, then close the     frame to be exposed next.
View original page 8Page 9 · Read text
4. TAKING OUTDOOR
                                            PICTURES
                                                            .(Exposure setting)
                          7-


3. Turn the Film Advance to    4. The number "1" (frame 1l
                                                                    www.butkus.us  the left until it locks by it-     can now be seen in the  l_-l[ffi.r
   self and can be turned no       right hand side of the Falm   In bright sunlight, set the
  fufther. (lf the Film Ad-     Confirmation Window as  vance is locked and cannot     shown. This means that   ilf                                                                                         ',ff ,,f^',1'13,1 I F*:  be turned, press down the     you are ready to take pic-  and under a cloudy-bright
  Shutter Release to unlock         tu re s.                         sky, set it at6.However,  if
    it.l                                       you are taking ocean and
                                                 snow pictures in bright sun-
                                                                          light, set the Exposure Con-
View original page 9Page 10 · Read text
(Focusing)        www.butkus.us5. ZOOMTNG
   7


trol at ffi,o  compensate for   Estimate the distance from   The Zoom Knob will let you
the excess light reflected from   camera to subject and set the   move your subject close to
your subject.                 Focusing Ring to that dis-   or away from the camera
o When the cartridge is in-    tance. (The white bar oppo-   while keeping the camera sta-
  serted, the weather sym-     site the Focusing Ring is the    tionary.
                               Distance Setting Mark.)  bolswill move from rc  tOEffi.
View original page 10Page 11 · Read text
(Taking normal pictures)                                  (Others)


        '   Bright Gotd Frame


To take normal pictures,   seen inside the bright gold  You can also take pictures
shoot with the Zoom Knob    frame in the viewfinder) will    with the Zoom Knob set any-
set at N.                           register on the film and the   where between N and T.
This setting is also suitable    depth of field will be suffici-
for taking quick shots be-    ently deep.
cause a wide area (everything
View original page 11Page 13 · Read text
6. AIMING THE CAMERA


tion marks make the field     1. Hold the camera steady    2. Press the upper arms tight-
of view correspond to that     between the thumbs and        ly against the sides of your
included by the lens so that       fingers of both hands with     chest to prevent camera
you won't  inadvertently     the index finger of  the     shake and take your pic-
crop out anything you in-      right hand resting on the       ture by squeezing the Shut-
tended to include in your      Shutter Release as shown.       ter Release gently down.
picture.
View original page 13
Page 14 · Read text
7. TAKING FLASH PICTURES
                                            www.butkus.us  T
                     llliE@
                   t'-u-o\7
                                                                    www.butkus.us
3. To take your next picture, With a flash, you can take    2. Switch the Exposure Con-
  advance the film and cock   beautiful color pictures under        trol to t 4^i
  the shutter by turning the  a dull and overcast sky as     3. The rest of the procedure
  Film Advance with your  well as indoors and at night.      is the same as that for
  left thumb until it locks The procedure  is as folloun:      taking outdoor pictures in
  by itself and can be turned   1. Clip the flash securely into       bright sunlight.
  nono further.further.                      the Accessory Shoe.
 While advancing the film,
 be careful not to touch the
 Shutter Release.
View original page 14Page 15 · Read text
8. UNLOADING
                            are more than 3 meters    THE CARTRIDGE
                            away from the camera, use                                                                                 1. After exposing the entire                          a cordless electronic flash                                                                                     roll of film, turn thd Film                                 with a larger guide number.
                            o For best resu lts, always trip     Advance until it locks by
                             the shutter a few seconds         itself  . (Stop turning as soon                                                               as it locks. Do not force  it                                     after the flash ready lamp                                                          any further.)                                     turns on.                                           o !f you are unloading the                                 * Guide number                                                                         film in the middle of a roll,   o The recommended flash is    Guide number is the pro-                                                        be sure to advance at least   FUJICOLOR STROBO P.     duct of aperture and flash-                                                         two extra blank  f rames be-   With a negative type color      to-subject d istance. In other                                                                     fore taking the film out of    film in your camera, it will     words, the larger the guide                                                      the camera so that the     let you take perfectly ex-    number, the greater the                                                                       light will not reach the    posed pictures between 1.5      light intensity.
   and 3 meters  f rom the                                               last exposed frame.
    camera.
  o lf you,want to take flash
t4   pictures of subjects which
View original page 15Page 16 · Read text
r CAMERA CAREwww.butkus.us
                              o Keep your camera and film away from heat, moisture and
                                      direct sunlight. Do not leave them in the glove compart-
                                     ment, trunk, or on the rear window shelf of your car or any
                                    other place where heat can accumulate.
                              o Use a soft brush or an air blower to dust off your camera.
                                     Fingermarks and dirt on the lens glass and viewfinder win-
                           dow are removed by first breathing on the glass to form a
                                    mist and wiping off the mist with a piece of soft, lintless
                                            cloth.
     2. Next, press down the Ca-     For best results, use Fuji Lens Cleaning Fluid and Fuii Lens
      mera Back Lock, open the      Cleaning Paper.
      Camera Back, turn the ca-   o lf you are not using the camera for some time, keep it
t     mera over and drop the     where it is cool and dry, preferably in a container together
   I       cartridge out into the palm     with some form of desiccant. Do not keep it in a closet
       of your hand.                   containing moth repel lents.


      I   o Always send your exposed

    I    I      film to your photofinisher
     i      as soon as possible.


  i
View original page 16From the M. Butkus archive. Original publisher and archive notices are retained.
Check the model and edition against your equipment.
PDF verified 2026-10-10.