Film cameras
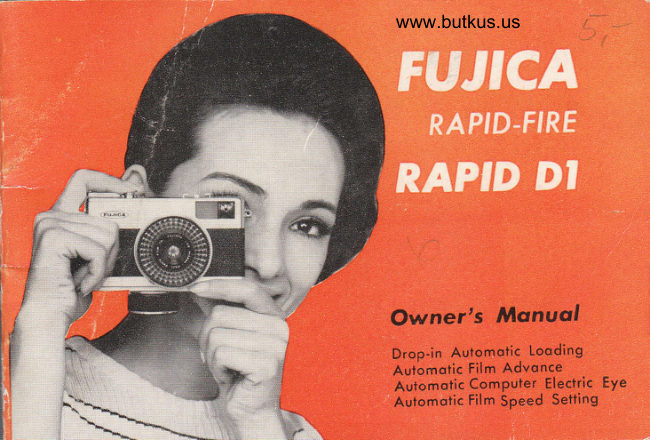
FUJICA Rapid-fire Rapid D1 User manual
User manual for FUJICA Rapid-fire Rapid D1. 24 pages in English. Read the original PDF, download or print a copy without registration.
24 pagesEnglish5.8 MB PDF
Loading your manual…Open PDF directly
Document details
- Brand
- Fujica
- Model / document
- FUJICA Rapid-fire Rapid D1
- Document type
- User manual
- Language
- English
- Pages
- 24
- File size
- 5.8 MB
- Category
- Film cameras
- Document date
- Not specified in catalog
Search available document text
Find a term, then jump to its page in the original PDF. Image-only pages may not be searchable; check the PDF for exact wording and diagrams.
Page 2 · Read text
is   Your FUJICA          speedautomatically(from ASAset into25 totheASAelectric400)eye
                                                                                                           ei-       Rapid-Fire                circuit. There's no film threading                                      ther. The film automatically spools
                                                     itself into the take-up cartrrdge.    Ropid Dl

  Your new Fujica Rapid-Fire Rapid
D1 is a fast and easy camera to use.
As the name indicates, it enables you
to take pictures one after the other
rapidly. A powerful spring motor drive
advances the film automatically for
1-ou instantly after each exposure...
1-ou're always ready for the next shot.
RAPID LOADING is another wonderful
convenience. You simply drop in the
easy-load Rapid cartridge and your film
View original page 2Page 3 · Read text
www.butkus.us
    TAKING THE ACTUAL PICTURE is most     in Rapid cartridges. The compact size
      convenient of all. You focus and press     of the cartridge enables you to take a
      the button. The computer electric eye     half dozen with you in your pocket or
      takes care of all settings automatically    purse. You get 24 pictures from each
        ... both shutter speed and lens open-     cartridge with the Fujica Rapid-Fire
     ing. You can't make an incorrect ex-    Rapid Dl. Each is in the new half
     posure because a built-rn warning sig-     frame size, 18 x24mm. Color slides can
      nal tells you when the light's not right.     be projected beautifully onto the larger
    And, if you wish you can switch to     screens and sharp and clear enlarge-
     manual exposure control and make any    ments can be made of black and whites.
     combination of settings you wish.                                      Read the simple directions on the
     SHARPER PICIURES are also automati-     following pages. You will find that
      cally yours with the Fujica. Built into    the more you know about your new
      the inside of the back cover is a pres-     Fujica, the more fun you will have.l
      sure plate. This keeps the film flat to
     assure sharper pictures.Il    Att KINDS OF Fl[M, both color and black
     and white, are now pre-packed in drop-

      iie
View original page 3Page 4 · Read text
Venmo @mike-butkus-camera  Ph. 2083
PayPal Name  Lynn@butkus.org      www.PayPal.me/lynnbutkus
View original page 4
Page 5 · Read text
How the
FUIICA Rapid                              JustDrop-indrop loodingthe Rapid film
                                                                    side of the camera, close theInstant Loading                                    back.cartridge into the right hand
System Works..
No Threqding
When you close the baek, thebuilt-in fiIm pressure plate
inside the back cover of the
Fujica, guides the film into
the empty take-up cartridge
on the left hand side of thecamera. fmmediately afteryou press the button, themotor drive advances thefilm right into the take-up
cartridge automatically and                          ;sets the counter at 24.
No Rewinding
                                        The Pressure                                                                 Plqte                                  the                                                                 film                                          entire                                                      roll                                                of                                   nE;;                                           you                                                    open                                      empty)                                            loi                                                   Shown (,the-. IVhenex-posureyou havecounterfinished_willexposingshow                                                                    above is the                                                                                                 built-inthe !aq\ and take out the now full cartridge--Ti;in"ahe-i"fi     pressure plate that keeps thehand side of the camera and have it pioielSea.-- Ni, ii*irra:     film flat. Sharper picturesing of fiIm necessary.                                         are nov/ automatie  !
View original page 5Page 8 · Read text
www.butkus.us
Ropid Dl
   TENS HOUSING.BOTTOM VIEW                   SIDE VIEW


  Shown above is the Shutter Speed Setector
  set for automatic operatlon
                                            Camera Back Lock (Slide up to open)
View original page 8Page 9 · Read text
Easiest Loading


                                                                                                                                                         :)l
                                                                                                                                      . d.,s
                                                                                              :F
Open the bock. push up on the recessed
button on the left side of the camera with
y_our fi.ngernail. The back will swing open.             lsslYou will find an empty cartridge in the'leftside take-up chamber.                                                                                               $l;l


 Insert film. 5;po1y drop the new film car-trrdge into the right hand feed-chamber. yolr
will see a red arrow on the bottom of this    www.butkus.uschamber. Do not pull out the film. Be sure
the arrow on the cartridge points toward
the center of the camera. ?ress the camera
back shut. It will lock itself. The letter" S " will appear in the automatic exposure
counter window to indicate the start of aroll.
View original page 9Page 10 · Read text
Automoticwww.butkus.usFilm Advonce. Wincl the big
                                       knob at the bottom of the camera, clockwise,
                                      as far as it will go. Now push the shutter
                                              release button. You will hear a series of
                                           buzzes and clicks. This sound tells you that
                                           the film is being fed into the take-up car-
                                                tridge and you are all set to take your first
                                            picture. One complete winding-of the knob
                                                    will automatically advance the film for you I                                            for approximately 15 different pictures.  If;                                     you c-annot depress the shutter release, wind
                                           the knob again.

 I
It                                       counterAutomoticnowExposureshows theCounler.number The" 24",framethe                                    number of exposures you have on the roll.
                                      Each time the film'is advanced, the exposure
                                             counter shows you exactly how many frames
                                             are left to shoot. After you have exposed the
                                                entire roll, the letter " E " for empty will ap-
                                           pear in the exposure counter. You can then
                                       open the back to remove the cartridge from
                                              the left chamber for processing. The counter
                                                    wili automatically reset itself to " S " (start).
View original page 10Page 11 · Read text
How the FUIICA
Ropid Df makes all
 settings for you when
set at automatic!

  Set the camera for automatic operationby lining up the ,,A " on the lens bpenins
control dial with the red line. The dlectriE
eye circuit is now in operation.
  Look into the viewfinder. ComDose vour
pjcture_ .within the bright, whit-e frlme.Everythlng you see here will appear in vour
finisfis6 picture. To avoid cutiihg off hLads
and feet when focusing in clo*r than 6
reet. frame your subject below the two hori.
zontal bars that appear near the top of thevlewnnder-
View original page 11
Page 12 · Read text
www.butkus.us
       Notice the two columns of numbers      the camera is set at " A " (automatic),     that appear at the left side of the     can also be used to get better close-up
    frame. The black numbers are the     pictures. For example: You wish to
     lens openings, the white are shutter     shoot a picture of someone lvhile they
      speeds.                                 are standing against a very bright or
     When you press the shutter release     very dark background. You simply
    button halfway down, you will see a      step up close to your subject and press
     red bar swing up and select the best    the shutter release button halfway
     exposure combination as determined     down. This locks the right combination
    by the computer electric eye. At the      of lens opening and shutter speed into
    same time, this combination of settings     the camera.
    has been made for you inside the       Keeping the button depressed half-
    camera. You can now press the button     way, step back to the position you
       all the way down and take the picture.     wish to shoot from, focus the camera
           If there isn't sufficient light for a good      arrd press the button all the way down.
      picture, the bar will remain in the red    Your Fujica Rapid D1 has automati-
     area at the lower left hand corner of       cally compensated for the wide variance
     the viewfinder. This is your signal to     in lighting between your subject and
      srvitch to flash. (See page 17)              the background.
                                              Focusing is simple. See the next page.

    CTOSE-UP LIGHT LOCK

II     The automatic selecting and setting
I      of lens opening and shutter speed when
I
I                                                                                                    It
t.
View original page 12Page 13 · Read text
Simplified Focusing

 The focusing ring on the front of
the lens enables you to focus fast from 2
feet to infinity or any distance in bet-
ween. Two groups of numbers appear.
The front row is in feet and the back
row is in meters. You simply judge
the distance between yourself and the
subject and turn the ring to align the
distance with the red line. The letters
"P" and "G" also are engraved on
the focusing ring. Align the " P " with
the red line for Portraits and the " G  '
with the red line for Group shots. The
infinity mark co is aligned with the red     IJ.IICA RAPIE' I}l
line for Scenics.                                      t,t..*a,--*-*   fi*www.butkus.us
View original page 13
Page 14 · Read text
www.butkus.us
Focusing ring setting      Focusing ring setting      Focusing ring setting
for Portroits              for Group pictures        for Scenics
View original page 14
Page 15 · Read text
Switch to Manual             stage. You can switch from fully                                   automatic to manual control and
                                                                      shutterOperation.  . .and make     make any combination of                                  gpeed and lens opening you wish.
                                                         done.any combination               Here's how it is
                                You select your lens opening firstof settings you wish        by just rotating the lens opening
                                       selector ring. The range is from  The Fujica Rapid Dl is ready for    f/2.8 (wide open) to fi22 (smallest
you when your interest in photo-    opening). Shutter speed is selected
graphy goes into the more advanced   by moving the speed selector to


 Lens Opening
 Selector Ring


                                            www.butkus.us
View original page 15Page 16 · Read text
www.butkus.us
desired speed. The range is from    over "8". When you press the ex-
1/30th of a second to U300th. In   posure button down, the shutteraddition, there is " B " which is   stays open until you release the
used for time exposures.               button.
  During manual operation the elec-                                                                                                   to                                                                 back                                                            to switck                                                     If you wisk
                                                                              using                                                                 operation                                                                             aftertric eye bar will not move since   IVOTE: automaticthe electric eye circuit is automati-               tke camera rnanually, just turn
cally disconnected.                            the lens opening ring back to
                                                            "r!". Tke shutter speed selector  Time exposures can be made by                will skift to autornatic by itself
moving the shutter speed selector            from any rnanually set speed.


Sh utter Speed
Selector
View original page 16Page 17 · Read text
U n loading
   After your last exposure (the exposure counter
  will read number 1), push the shutter release button.
 You will hear a series of buzzes and clicks in quick
  successioil. This is the automatic film transport in
  operation moving the last exposure into the take-
 up cartridge. The exposure counter will now read
  " E " (empty). Open the camera back, and remove
  the take-up cartridge. Do not push the film into
  the cartridge. (The Rapid System eliminates the
 need for rewinding the film into the original cart
  ridge.) Have the film processed as soon as pr,rssible,
   r for best results.
    Prior to loading your next full cartridge, take the
 now empty original cartridge from the right hand
  side of the camera and place it in the left hand
  side with the arrow pointing towards the center of
  the camera. It will now be the take-up cartridge
  for the new full cartridge.

I6
View original page 17Page 18 · Read text
www.butkus.us
     Shooting with Flash
        Your new Fujica Rapid Dl  is
       synchronised for  electronic flash
       and also class M flash bulbs. The
         flash gun plugs into the camera's
        standard flash contact and attaches
         to the camera either at the accessory
        shoe or tripod socket.
         Set the Shutter Speed Selector at
        the A position. This automatically
       sets the shutter at U30 th of  a
       second. Set the Focusing Ring for
             distance between you and yourI       the        subject. Then set the lens opening
         ring in accordance with the instru-
        ctions that come with your flash
        equipment or flash bulbs.
View original page 18Page 19 · Read text
Self Timer
    The self timer on your Fujica
    Rapid D1 permits you to get into
    the picture yourself. Be sure the
    film advance knob is wound uo.
   Move the green button to..L" tLockt.
   Wind the self timer knob in the
    direction of the red arrow as far as
      it will go. Compose your picture
    through.the viewfiinder and focus
    the camera. The camera should be
    in a firm, fixed position such as on
   a tripod or table. When you are all
     set, move the green button to ,,S "
     (start). You have about 10 seconds
    to get into the picture. Do not de-
   press the shutter release button.
   The self timer, at the end of about
    J0 seconds, will do that for you.

I8
View original page 19Page 21 · Read text
and more observant of  back-Better                                  grounds. The background can be
                                                                            orPicture Taking            a compliment to your subject                                                     it can be a distraction. An extra
Hints                           few seconds devoted to positioning
                                  your subject can make all the dif-
Hold the comero sleody             ference in the world between an
  Holding the camera steady is     ordinary good shot and an excellent                                           picture.the key to improving picture qual-
ity. If you move the camera rvhile
shooting, a blurred picture will     Close-ups
result. Your Fujica has a socket
                                                                 Rapidat the bottom if you wish to at-     The lens of your Fujicatach a tripod.               D1 can be focused down to 24
                                       inches, so frame-filling close-ups
Compose your picture              can be made easily. In shooting a
                                        face, try several shots from dif-
 As you take more and more     ferent angles with the person zol
pictures, you will become more     looking directly into the camera.
View original page 21Page 22 · Read text
www.butkus.us
    Cqndid Piclures                    Action Piclures
       Since your Fujica can be operated     When shooting action, keep the
     quickly and quietly, unposed pic-    moving subject in the viewfinder
     tures can be easily taken that are    and follow the action by turning
    charmingly natural. In shooting     your body from the waist up. KeepI   candids, a good idea is to first    your feet firmly planted in one
    focus in on the general area so     position. The finished picture will
     that all you have to do is simply     have a feeling of movement. The
    aim and shoot.                     background will come out blurred
                                        but your subject will be sharP.
    Group Piclures
    A group picture can frequently
*  befrommoreone sideinterestingor the otherwhen rathertaken
     than full front. Try it and see the
     difference in the overall effect.
*                                                                                        2l
 g
View original page 22Page 23 · Read text
FUJICA One-Step RAPID SFUJICA                'TiHE                                                        I   is an incredibly simple camera to
                                   use. After dropping in the cartridge
                                   only one step is necessary beforeOne-Srep
                                       shooting. You simply set the camera
                                             for sunlight or shade.RAPID S            No fuss with focus, no guessing
                                     speeds or lens openings.  . . just aim
                                    and shoot. Easy to see through view-
                                          finder. Superb picture taking results
                                        with ASA 100 film. Takes wonderful
                                               flash pictures too. Synchro-flash ter-
                                   minal set conveniently in accessory
                                shoe on top. After each exposure                              www.butkus.us
                                  your thumb turns the conveniently
                                      located film advance and you are
                                       ready for the next shot. Window on
                                           top tells you how many shots are still
                                                     left to take.
View original page 23Page 24 · Read text
www.butkus.us
  /l camera that does PracticallY-f\everything  automaticallY, and       FUTICAglves you 16 perfect 24mmx24mm
color slides from one Rapid cartridge.               ComPUlerBuilt-in computer electric eye sets
correct exposure for you in a broadrange of light situations from low light    Electrilc EYe
to bright light.  .  . with a broad range offilm speeds ASA 25 to 200. The extra    RAPTD 52bright viewfinder shows you a visible
signal to warn of under or over ex-
posures. The optically precise lens is
the fast, Fujinar-K  f 12.8 to make every
picture sharp and clear. Automatically
programmed shutter speeds from
1/30th to 1i250th plus flash synchro-
nization. Focusing is simple and the
film advance lever also activates the
picture counter.  . .you always know
how many shots are left.
View original page 24
From the M. Butkus archive. Original publisher and archive notices are retained.
Check the model and edition against your equipment.
PDF verified 2026-10-10.