Film cameras
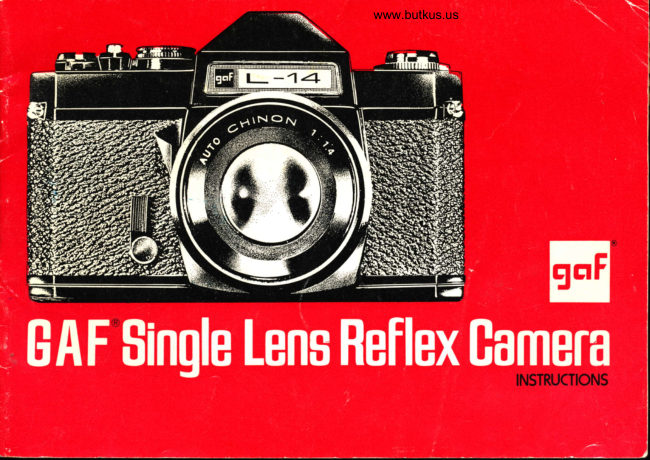
GAF L-14 User manual
User manual for GAF L-14. 17 pages in English. Read the original PDF, download or print a copy without registration.
17 pagesEnglish4.1 MB PDF
Loading your manual…Open PDF directly
Document details
- Brand
- Gaf
- Model / document
- GAF L-14
- Document type
- User manual
- Language
- English
- Pages
- 17
- File size
- 4.1 MB
- Category
- Film cameras
- Document date
- Not specified in catalog
Search available document text
Find a term, then jump to its page in the original PDF. Image-only pages may not be searchable; check the PDF for exact wording and diagrams.
Page 2 · Read text
Digitally signed by Mike ButkusMike                DN: cn=Mike Butkus, o=Butkus
                            camera manuals, ou=butkus.org,
                               email=mike@butkus.org, c=USButkus             Date: 2021.07.26 00:06:35 -04'00'
View original page 2Page 5 · Read text
r
                                                                     For detar led
    CONDENSED INSTRUCTIONS              rnformat on
      l.lnsertbattery                       ....4
        2. Load camera
        3. Set ASA film speed                                  8
        4. Advance film to  f irst  f rame    ,                      o
                             meter                                      switch,        5.         Push down                   exoosure                                                set shutter                                                      I                                      ring                                                untll needle         speed,               and                       adjust  f /stop
            is centered                                                     I                           vt'o        6. Observe subject through viewfinder                11
        7. Focus                                                    1l
          I  llcnrcqq shrtter rclpase                            12
     READ ENTIRE BOOKLET FOR DETAILS


     LOADING BATTERY
    A mercury battery (Mallory PX-625 or equivalent)
      powers the built-in exposure meter. lt is supplied
       with the camera, either installed or packed sepa-
         rately in the canrera box
      To inslall battery:
       Using a coin, unlock battery cornpartment cover by
        turning  rt counterclockwise 9O degrees (Fig 1) Re-      Fig.3                                 Fig. 4
      move cover. Place battery in conrpartment wlth plus
        side up (Fig 2) Replace cover.                             to remove deposits. Average battery life is about one
       Clean battery bef ore irse't ng and thcreafter at regu-      year. Since the battery rnay develop a leal^., remove
         lar intervals. Wipe both sides with a rough material           it before the camera is stored.
View original page 5Page 6 · Read text
www.butkus.us
   TESTING BATTERY
   To test battery, look into viewf inder eyepiece and de-
    press battery test button* (Fig.3). lf the battery is in
   good condition, a green light will appear above the
    viewfinder image (Fig. 4). Replace the battery if
   green light does not appear or if it is very dim.
  *To prevent excessive battery drain, hold button de-
   pressed lor only a second or two.
  LOADING CAMERA
   Use 20- or 36-exposure 35mm film in standard mag-
    azine. GAFe films are available for making color                                                  Fis. 6
    slides, color prints, or black-and-white  prints.
   To load camera:
   1. Pull out film rewind knob (Fig. 5) until camera
   back is released, then swing camera back open all
    the way.
    2. Keep film rewind knob pulled all the way out, in-
    sert magazine into chamber with protruding end
    towards bottom of camera (Fig. 6). Push in film re-
   wind knob. lf it does not go back all the way, turn
   knob until  it does.
    3. Insert end of film into slot in take-up spool (Fig.
'    7). Place thumb lightly over film on bottom sprocket
   wheel and operate film advance lever until upper        Fig.7                                Fig. I
    sprocket wheel also engages film perforations and
     filnr is securely wrapped around take-up spool (Fig.
     8). When the film advance lever locks, free it by de-
    pressing the shutter release. Close camera back.
View original page 6Page 7 · Read text
4. To make sure film has been loaded properly, op-
erate film advance lever (Fig. 9) until it locks. Now
turn rewind knob clockwise until a resistance is felt.
Do not force it. Keep observing film rewind knob;  ll
should turn counterclockwise every time the film is
arlvanr:orl  uvv,f)pnrpqqvuJ   qhUtterv'       '      release whenever the
film advance lever locks. Operate  f ilm advance lever
until figure "1" is opposite the pointer in the expo-
sure counter window (Fig. 10). Do not press shu/ler
release when the figure "1" ls opposile the index
mark.
Camera is now ready for the first exposure.                                                                       Fig.9
lf the film rewind knob does not turn while lhe film
advance lever is being operated, the camera was                                              The next higher   f igure moves to the index line every
not loaded properly Either the film became de-      time the  f ilm advance lever is operated.
lached from the take-up spool, or the sprockets did                                           When the camera back is opened to remove film, thenot engage the perforations. Open camera back, re-                                                       counter automatically returns to "S" (start).move and reload film; follow steps 2,3, and 4
caref ully.                              UNLOADING THE CAMERA
                                                     Unload camera when (with a 20-exposure roll of lilm)EXPOSURE COUNTER                                                         the red figure "20". is opposite the index line in the
The number of exposures already made is indicated      exposure counler wrnoow.
by the numbers in the exposure counter window ad-                                                     Unload a 36 exposure roll of  f ilm when the red figure
jacent to the film advance lever. As there is no space     "36"* is oooosite the index line.to show every number, some ligures are indicated
by dots. Each dot represents the figure following the    Do not open camera back unlil the unloading pro-
one before it. ln Fig. 11 for example, the dot next to     cedure has been completed.
the figure "-l" stands for figure "2", the following dot     Steps for unloading camera:
(adjacent to index line) for iigure "3"                        1. Unfold rewind crank.
View original page 7Page 8 · Read text
www.butkus.us

2. Depress rewjnd button on camera boltom all the
way.
3. Turn rewind crank clockwise. A tension is felt as
the film is being rewound into the magazine. Stop
turning the rewind crank when the tension is re-
lieved, indicating that all the   f ilm has been returned
to the magazine.
4. Open camera back by pulling out rewind knob all
the way.
5. Lift out film cartridge.
Have film processed without delay.
'Afler the 20th or 36lh prclure one or more frames maV sl ll be                                              Fig. 12
availab e. These frames may be ul lrzed by operating the  f ilm
advance lever after the red  f gure 20 or 36 has been"  I ned up
with lhe ndex  I ne in the exposure counler. Piclures may then
be laken unl I a res stance during the operalion of lhe film ad-
vance lever nd cales thal the end of lhe lilm has been reached.
Do not lorce lilm advance lever bcyond thal point.
While th s procedure provides one or more additional exposures
per roll, it is nol recommended as the film may become sepa-
rated from the spool. The separated film cannot be rewound.
jts removal from the camera requires a darkroom operatton.
SETTING THE SHUTTER SPEED
The figures on the shutter speed dial indicate frac-     To set the shutter speed, turn dial until the desired
tions of a second. The figure 125, for example, in-      {igure is lined up with the black line adjacent to the
dicates a shutter speed of 1 /1251h of a second.          shutter speed dial on lhe camera body. In Fig. 12,
The "B" setting is used when a longer than one      for example, the shutter is set for a 1/125th of a
qccond cxnnsrrrc is rporrircd Thp shrtlpr will re-     second exoosure.
main open as long as the shutter release is held
depressed.
View original page 8Page 9 · Read text
FILM SPEED SETTING
The ASA speed of the film is specified on the box or
in the instruction sheet packed with the film'
Pull up ring around shutter speed dial and rotate  it
until the ASA* index of the film is aligned wlth the
line at the center of the ASA wlndow on the shutter
speed dial. In Fig. 12 for example, ASA 100 has
been set at the index line. When the ring is released,
the selected ASA speed automatically locks into
place.
Due to the lack of space on the dial, some film speed
numbers are represented by dots. The following chart        Fig. 13
showsthe ASA and DIN numbers represented by dots.


             ASA Speed
r600 .  .   8oo a  a nnn a  a 2nna a 100 a5ar   40|2ia  16O 0
                                                                            t    tfll      Ill f-"-tlllllllllt'-f  r   t  I   t  I     r250 r000    640 soc   320 250  160 125  80  50  32  20   t2

                DIN Speeo
            30a a 27a a 24a a 21.  19a    |] o  t5 o  t3 a  ll
                                                                                                           I                       rrlll                                                                   l                                      16                                          14    l2        'The same inslructions apply to tilms calibrated accordlng  to      33a.tl32 3l     29il28  26il?5   2ill22  20l     18
                                                              the European DIN speed ratrng system. Line up the DIN frgure
                                                                     with the index line under the window marked "DlN".

                                                   R
View original page 9Page 10 · Read text
www.butkus.us
     AUTOMATIC/ MANUAL SWITCH
       Theswitch shown in Fig. 13 is used to select auto-
       matie or manual f/stop operation. For automatic
        operation, push switch down all the way. Now the
          letter "A" is visible above the switch (as in Fig. 13).
1      With the switch in this position, the lens is open at
            its widest  f /stop to provide a bright viewf inder image.
I       At the instant of exposure, the automatic mechanism
        closes the diaphragm to the opening set on the  f /stop
          flng.
       For manual operation, pull switch up all the way.
     Now the letter "M" is visible below the switch (Fig.
        14). With the switch in this position the diaphragm
          is always set at the opening indicated by the  f /stop
          ring.

     EXPOSURE
      The camera features a match-needle type semi-auto-
        matic CdS exposure system. For accurate exposures
       the user has only to center the needle in the view-
I       finder, as shown in Fig. 15.
      To cenler needle:
)       1. Set Automatic/Manual switch on the lens at "A"
        (as described above).                                                                                         Fig. 16
        2. Push down switch shown in Fio. 16to turn on ex-
       posure meter.                                                   5. Turn f/stop ring, first  clockwise, then counter-
        3. Set desired shutter soeed.                            clockwise, until needle  is centered, as shown in
        4. Observe subject through the viewfinder.                Fig. 15.
View original page 10Page 11 · Read text
6. Push up exposure meter switch to return lens
     diaphragm to automatic operation.
     Exposures will now be accurate. Turn on exposure
     meter and re-center needle whenever a change oc-                                                                                                                                                                                                         {
      curs in subject brightness or illumination.                                                                                                      T
            lf the needle stays above the horizontal position (Fig'                                                                                                                                                                                                                                                                                             II
                                                                                                                                                                                                                                                                   1     17) even after the f/stop ring is set at the sma//est
                                       to                                     dial                         shutter                     turn          opening,      lens                                       af aster speed. This                                                                                                                        II                                      needle.          permit                                   of                              the                    centering                the       will                                                                                                                                                                                                                                                                                                                                                                                           l
    When the needle remains below the horizontal posi-
     tion (Fig.'18) even after the f/stop ring is set at
                                                                                         17                                Fig. 18     the /argesf lens opening, turn the shutter dial to a        Fig.
     slower speed to allow the centering of the needle'      provide adequate exposure. Change to a faster film
      For example, if at a 1/125 second shutter speed and      (with a higher ASA number) or use flash.
     an t/16 lens opening the needle is above the hori-     Since the CdS electric eye measures the entire
      zontal position (as in Fig. 17), resetting the shutter    image area, a background that is much brighter or
     speed to a 1 /2501h of a second or faster speed will      darker than the principal subiect may cause an ex-
      bring the needle below the horizontal position. The     posure error. A close-up reading will minimize the
     needle can then be centered by turning the f/stop      effect of such backgrounds. Aim the camera at the
       ring.                                           most important part of the subject (the face in the
         lf at a 1/1251h of a second shutter speed and the     case of a portrait) from a distance of about six inches
      largest lens opening the needle remains below the    and center the needle; then return to the original
      horizontal position (as shown in Fig. 1B), resetting     camera position and make the exposure.
a!L     the shutter to a 1/60th of a second or slower speed    When the pictures are consislently over- or under-
       will raise the needle above the horizontal position;  it     exposed, the film may be more or less sensitive than
     can then be centered by turning the f/stop ring.            its rated speed. This can be easily corrected by us-
          lf even at the largest lens opening and the slowest      ing a higher or lower ASA (or DIN) speed than the                                   !      practical shutter speed the needle remains below    one printed on the film box or in the instruction                                  i
     the horizontal position, the light level is too low to      sheet. Use a higher ASA number to correct for over-
                                                       10                                                                                                                                                                                                                                                                                             lJ
                                                                                                                                                                                      --l
View original page 11Page 12 · Read text
www.butkus.us
exoosure and a lower ASA number to correct for
underexposure. For example,  if pictures made on a
ASA 100 film are consistently overexposed, set ASA
                                                       '1                 60, depending on the degree ofspeed at 125 or
overexposure.  lf films are underexposed, set ASA at
80 or 64.
EXPOSURE METER RANGE
Virtually all situations encountered in average use
lall within the operating range of the exposure meter.
When the few seldom used film speed/shutter speed
combinations that are outside this range are set on
                                                                            19                              Fig. 20the camera, a red flag appears in the viewfinder
(Fig. 19). The appearance of the red flag indicates
that the meter is not operating, necessitating the use    FOCUSING
of a separate exposure meter.                       Observe subject through viewfinder. Turn focusing
The following table shows the ASA film index and      ring first in one direction, then in the opposite direc-
shutter speed combinationS that are within the op-      tion, until image is sharpest-, The brighter micro-
erating range of the exposure meter:                     prism area in the center of the viewfinder is provided
                                                               to facilitate focusing.
  Film Speed               Shulter Speed Range          The distance scale may also be used for focusing.
                                                         Estimate or measure the camera-to-subject distance up io ASA 25        From 1 secto1/1000sec                                                                       in feet or meters, then turn the focusing ring until the
     ASA 50        Fromlsectol/1000sec             figure representing that distance is aligned with the
     ASA 1OO       From1sectoI/1000sec            red diamond. In Fig. 2C for example the camera  is
                                                 focused for subjects at a distance of 4 feet from     ASA 2OO       From  l l2 sec to 1 / l000 sec                                                        tne camera.
     ASA 4OO       From 1 / 4 sec to 1 /1000 sec           *Users of infrared film must adjust the distance setting:
                                                            Note the figure that after focusing is adjacent to the red dia-
     ASA BOO       From 1 /B sec to 1 / 1 000 sec         mond on the distance scale then move that figure over to the
                                                                 red "R" found to the right ol the red diamond.      ASA 1 6OO       From 1 /1 5 sec to 1 /1000 sec
                                                             11
View original page 12Page 13 · Read text
DEPTH OF FIELD
"Depth of field" designates the near and far limits
of the area that will be sharp in the picture (in front
of and beyond the subject). Depth of field is con-
trolled by the f/stop. The larger the lens opening
(f/stop), the shallower is the depth of field. The
smaller the lens opening, the greater the depth of
field will become.
The depth of field may be checked visually or it can
be arrived at with the use of the depth of field scale.
For a visual check in the viewfinder, push down ex-
posure meter swilch. This closes the diaphragm to        Fig.21                           Fig.22
the lens openlng set previously with the  f /stop ring.
lmage sharpness can now be observed.
The depth of field scale indicates (after focusing)
the approximate area that will be sharp in the pic-
ture. Note on the f/stop ring the figure lined up with
the red diamond. Locate on the depth of field scale
the corresponding palr of figures. Their position on       finder is centered, take the picture by depressing the
the adjacent distance scale indicates the extent of       shutter release. To prevent camera motion, press re-
the area that will be sharp in front of and beyond the      lease softly, with an even pressure of the finger.
subject. In Fig. 21 for example, the lens is focused for     Wherever feasible, use a tripod when the shutter
subjects at a distance of 15 feet from the camera      speed is set at 1 /30 second or slower.
and  f / 1 1 is lined up with the red diamond. Checking                                        SELF.TIMERthe distance scale over the pair of 11's. it is found
that objects from about 1O feet to 30 feet will be     The self-timer enables the photographer to get into
charn in lho nielrrro                                    the picture. Use a tripod or place camera on a firm
                                                           support. Get camera ready for exposure. Move self-
TAKING THE PICTURE                              timer lever counterclockwise, as far as it will go
After the lens is focused and the needle in lhe view-       (Fig.22).
                                                                     lz
View original page 13Page 14 · Read text
www.butkus.us
Start self-timer by depressing shutter release, then
take position in front of the camera. Exposure will
take place approximately 8 seconds after shutter re-
lease has been depressed.
USING FLASH
Use flash when the exoosure meter indicates that
the existing light level is too low for providing ade-
quate exposure (when the meter needle cannot be
brought to the horizontal position even by using the
largest lens opening and the slowest practical shut-
ter speed).
Electronic flash and conventional flash units using       Fig. 23
flashbulbs or flashcubes may be used.
The camera has a hot shoe (accessory shoe with
built-in flash contact) and two standard P.C. out-
 lets: one marked "M", the other "X".
                                              For AG-1, AG-18, M-2, M-28 flashbulbs and allElectronic and conventional flash units having a foot                                                     flashcubes, plug flash unit into outlet marked "X"with built-in contact may be used without a connect-
ing cord. Just slide the foot of the flash unit into the   and use 1/30 second or slower shutter speed.
accessory shoe all the way. As the hot shoe has "X"    For 6, 68,.26, and 268 flashbulbs, plug the P.C.
type synchronization,  it can be used with electronic    cord into the "M" outlet and use any shutter speed
                                                                                                     1 /125 second.flash at a 1/125 second or slower shutter speed.    between  'l /30 and
With AG-1, AG-18, AG-38, M-2, M-28 flashbulbs                                              Use the guide number system to establish flash ex-and flashcubes in conventional flash units, use a'll30 second or slower shutter speed. The two P.C.    posure*. Find guide number for speed of film being                                             used in the instructions supplied with flash unit or
outlets on the camera (Fig. 23) accept the P.C. cord             f lashbulb.plug or flash units.                                                     -So
Plug electronic flash units into outlet marked "X''     exposurecalledwithout"automatic"calculations.electronicFollowflashinstructionsunits orovideprovidedcorreclwith
and use 1/125 second or slower shutter speed.          the unit.

                                                    13
View original page 14Page 15 · Read text
To arrive at the f/stop to be used, divide the guide      exoosure switch to the left once more, operate film
     number by the distance in feet between subject and     advance lever to wind shutter, then depress shutter
       flash. For example, with a film having ASA 64 speed,       release. This can be repeated any number of times,
     a flash unit with a guide number of 32 for that film,     When the required number of exposures have been
    and a flash-to-subject distance of B feet, a lens     made, transport film for the next exposure by oper-
     opening oI  f /4 will provide correct exposure be-       ating film advance lever (without moving the multiple
                                                        exoosure switch),                                               /A\     cause: 32 (guide number) _ aa *\r/'+/'            B (drstance m feet) -                                             lf after moving the multiple exposure switch to the
                                                                                               lefI, but before operating the film advance /ever, it is
                                                       decided that a double exposure is not wanted,  it
                                              may be canceled by moving the switch back to its
                                                                    original position (to the right).    MULTIPLE EXPOSURES                              *When                                                                                  the multiple exposure switch is in that position, the area
    When desired, the shutter can be rewound without        adjacent to it on the right is red to warn the user that the camera
     transporting the film. This feature permits making           is set for double exposure.
     double or multiple exposures on a single frame of
       film.
     Place camera on a rigid tripod. Take first picture                                             FILTER SIZE     the usual way. Betore operating film advance lever,
     slide multiple exposure switch to the left (towards     The f/1.7 lens accepts Series Vll filters in 52mm
     release button), as far as it will go". Operating the      diameter x .75mm pitch screw-in mounts. or 54mm
      film advance lever will now wind the shutter without      slip-on mounts.
     advancing the film. Be careful not to move the cam-      Thef /1.4 lens accepts Series Vll filters in 55mm di-
     era while the shutter is being rewound.                ameter x .75mm pitch screw-in mounts, or 57mm
     Deoress the shutter release to make a second ex-      slio-on mounts.,lt|     posure on the same frame. Operating the shutter                                              FILM PLANE INDICATOR     release returns the multipl0 exposure switch auto-
     matically to its originat position (to prevent acci-       In certain types of work it ls necessary to know ex-
     dental double exposures). lf a third exposure  is       actly the location of the film plane. The mark -+-     desired on the same frame. iust move the multiole     on the camera top indicates film position.
View original page 15Page 16 · Read text
www.butkus.us
      CHANGING THE LENS
         Before lens is removed always disconnect exposure
         meter by pulling up switch (Fig. 2a). Keep turning
          lens counterclockwise (shov,rn in Fig. 24) until it is
         separated from the camera body.
       To replace lens, insert threaded end into opening in
        camera body and keep turning lens clockwise until
                 It is firmly seated. Do not force  it.
        The camera is equipped with a Pentax-type mounr,
                 It accepts a great variety of wide angle and telephoto
           tenses.

      CAMERA CARE                                               Ftg.24
       The GAF Single Lens Reflex Camera is a precision
          instrument. Used with care, it will provide years of
          servrce.                                      IMPORTANT: The original bill of sale (dated sales
                                                                        slip with name and address of dealer) is novr ac-          Protect the camera from dirt, rain, dampness, and
         excessive heat. Avoid touching the lens. To clean    cepted as proof of purchase for establishing the
          lens, breathe on it, then wipe  it gen|y with a soft,    warranty period. No warranty card is provided. To
           lintless cloth or tissue. Do not use eyeglass tissues    help identification in case of loss or theft, keep
         as they might damage the lens coating.              among your personal records the camera model and
                  lf anything goes wrong, do not try to repair  it. Take  it     serial numbers.
         to a dealer or send it to the nearest GAF photo
        Equipment Repair Center shown in the list on the
        back cover.


                                                                                                                         1Ftc
'-\^                                                                                                                              |
View original page 16Page 17 · Read text
-ulF-


                                                                                                   Corporation                   WARRANTY                             GAF                                                                                          Photo Equipmenl RePair Cenier                                                                      GAF
    G A F Corporation warrants the G A Fo Single Lens Ref lex Camera to be     Emma Street
      free from defects in material and workmanship for a period of twelve        Binghamton, N.Y. 13902
       (12) months   f rom the date of original purchase. The camera will be re-       3500Chicago,Northlll.Kostner60641  Ave.
      paired or replaced, at GAF's option, without additional charge to the       16217 Kittridge Street
      purchaser,  if returned prepaid to the nearest GAF Photo Equipment      Van Nuys, Calilornia 91406                                                                                              39-22 30th Street      Repair Center shown in the adjacent list, specifying the difficulty en-       Long lsland City, N.Y. 11101
      countered and attaching a copy of your bill of sale showing date and        P.O. Box 490
                                                                                                    Ore.97207                                                                                                            Portland,      place of purchase. Remove battery when camera is stored and return                                                                                                Chapel Road                                                                                      4601                                                                                                   Winlers
     camera well packed and insured, as GAF is not responsible for dam-        P.O. Box 47999
     age caused by a leaky or defective battery and for damage that oc-         Atlanta, Ga. 30340
      curred during shipment. Cost of work performed at repair shops not       IN CANADA
      authorized by GAF shall not be reimbursed. GAF DOES NOT MAKE,     GAF (Canada) Lld.                                                                      GAF Photo Equipment RePair Center
    AND SHALL NOT BE LIABLE FOR ANY WARRANTY OF FITNESS FOR                                                                                      70 Alexdon Road    A PARTICULAR PURPOSE OR MERCHANTABILITY OR ANY OTHER       Downsview, Ontario
    WARRANTY WHATSOEVER, EXPRESS OB IMPLIED, WITH RESPECT        941 1 Cote De Liesse
    TO THE GAF SINGLE LENS REFLEX CAMERA EXCEPT AS HEREIN-        Dorval,1 1 95 WeslQuebecI Ave.
    ABOVE SPECIFIED.                                                              Vancouver 9. Brit, Col.
                         I@
             TIt  t!  ll
                   Consumer PhotolDivision  | 140 West 51 Street
                   Consumer Photo Products I New York, N.Y. 10020


                                                                                                                                                        10681Printed in Japan 33                                                        B


                                                                                                                                                                                         .                                     n.lr-
View original page 17From the M. Butkus archive. Original publisher and archive notices are retained.
Check the model and edition against your equipment.
PDF verified 2026-10-10.