Film cameras
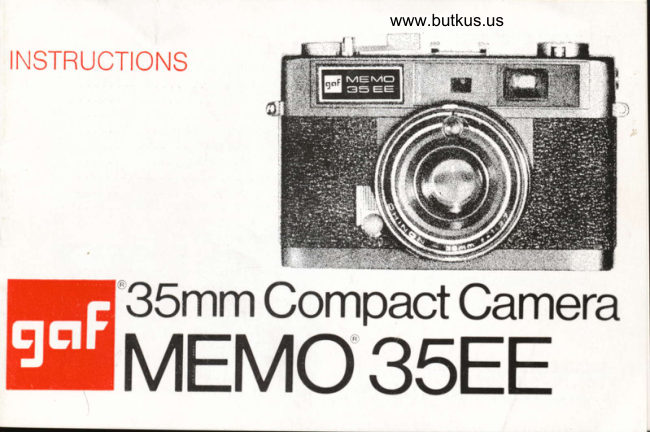
GAF Memo 35EE User manual
User manual for GAF Memo 35EE. 16 pages in English. Read the original PDF, download or print a copy without registration.
16 pagesEnglish2.4 MB PDF
Loading your manual…Open PDF directly
Document details
- Brand
- Gaf
- Model / document
- GAF Memo 35EE
- Document type
- User manual
- Language
- English
- Pages
- 16
- File size
- 2.4 MB
- Category
- Film cameras
- Document date
- Not specified in catalog
Search available document text
Find a term, then jump to its page in the original PDF. Image-only pages may not be searchable; check the PDF for exact wording and diagrams.
Page 3 · Read text
www.butkus.us
INSTALLING BATTERY                     Current is drained only when light reaches
The CdS electric eye is powered by a long-     the electric eye (located above lens). To
life 1.3 volt mercury battery (Mallory PX-675     prolong life of baltery, keep the lens cap
or equivalent).  lt is supplied with the cam-     on when camera is not in use.
efa, either installed,  r)f packed separately    The average life of lhe battery is one year.
in the camera box.                                     Install a new battery at leasl once a year.
Use a coin to unscrew battery-compart-     Clean battery and camera conlacls at reg-
men: cover on bottom of camera (Fig. 1).      ular inlervals. Wipe both sides of battery
Insert battery with plus (J ) side up, facing     with a rough malerial. Since the battery
lhe battery compartment cover (Fig. 2).    may leak in time, remove  it when camera
Replace cover.                                        is stored {or a prolonged period.  '


                                    FILM
                                 Use 35mm film in 20- or 36-exoosure
                                          magazine. GAF@ films are recommended;
                                           they are available for making black-and-
                                            white or color prints and color slides.

  www.butkus.us                     LOADING THE CAMERA
                                 Load and unload camera in subdued
                      F'9,2                    light (not in direct sunlioht).
                                                                                           3
View original page 3Page 5 · Read text
1. Pull up Iilm revrind knob until camera-
back pops open (frg.3). Swing open ca'r-
era back (Frg.    ).
2. Pull out rewind knob all the way and
insert film magazine jnto chamber with
protruding end toward bottom of camera
(Fig. 5). Press-in film rewind knob. lf  it
does not go in all lhe way, turn  it untjl  it                                   www.butkus.us
does.
3. Insert end of film into a slot in lhc
lake-up spool and enga0e second perfo-                                 Frg. 5
ratron of film with tooth in spool-slot (Fig.
6). Place thumb Iightly over  f ilm on bottonr
sprocket wheel (shown in Fig. 7) and op-
erate   f ilm advance lever (shown in Fig. 10)
until upper sprocket wheel engages filnr
perforations and film is securely wrapped
around take-up spool. When advance levcr
stops, free it by depressing shutter release
on top of camera. Make sure that   f ilnr lies
Jlat between guide rails (Fiq B). Closc
camera back firmly.
                                                         Fig. 4
View original page 5Page 7 · Read text
vanced. lf it does not, the camera was
 not loaded properly; either the film be-
came detached from the take-up spool, or
 the sprockets did not engage the perfora-
 lions. Open the camera back, remove and
 reload film, following steps 2, 3, ancl 4
 caref ully.

UNLOADING          THE            CAMERA
                   "20"When the red frgure                          or "36" (corres-        Fig. .13                 Frg. 14
ponding to 20- and 36-exposure  rolls)
appears in lhe exposure counter window     Steps for revrinding film into magazirre.
opposite the index mark (Fig. 12), the end      1. Unfold crank on rewind knob (Fig. 13)
of the film has been reached.
                                                     2. Press in all the way rewind release but-
                                                ton on canrera bottom (Fig 14).
                                                     3. Turn rewind crank clockwisc. A tension
                                               is felt as the film is rewound from the
                                         take-up spool into the magazine. Stop
                                            rewinding when the lension is relieved.
                                    Open camera back (by pulling oui rewincl
                                            knob all the way) and llft out {ilm magazine.
Fis                                    Have lilnt processed wtlhout dolay.
View original page 7Page 8 · Read text
www.butkus.us
AUTOMATIC EXPOSURE
 1. Set film speed. The ASA (or DIN) speed
 of the film is specified on the lilm box or
 rn the instruclion sheet packed with the
 film. Turn the milled lilnr speed sctling
 ring arcund lhe front end of the lens barrel
 Lrntil the ASA index of the film appears  in
the nolch on top or the lens barrel (1he
DIN speed appears in thc notch on thc
bottom of the lens barrel). In Fiq. l5, for    Fig 15                   Fig. 16
example, the film speed is set at ASA 64                                                  shutter speed for the prevailing light con-
The lilm specd setting ring must be turned       d itions.
lo lhe clrck-stop at the ASA (or DIN) film    Do not obstruct the electric eye located
uvvuv,,vu,u,^.66.f {;^,,/^  ;t hr,.t ^^t be Sef hCfween      just above the lens and do not let the sun
numDets.                                      shine direclly into  it.
2, Sel control ring to "A" (automatic).
Depress control ring release on the bottonr                               USING THE VIEWFINDERol the lens barrel (Fig. 16) and turn control                                                appears                                                                                 frame                                                                within                                                                 the                                                                                bright-linering until the letter "A" clicks into position    What                                                     viewlinder                                                     in the                                                                           the picture.                                                      be in                                                                             willopposite the index line (Fio. 17)
                                            For sublects at a distance of 5 feet or less
At the "A" setting the camera aulomati-     from the camera. lhe rrage area is indt-
cally adjusts the lens opening and the     cated by the bright line in lhe top left
View original page 8Page 10 · Read text
www.butkus.us
               f)I
                                                                  \5 I
          t-ro 20                        Fig.21                                                                 ftq 22l

    OUTDOOR PICTURES                      red segnrents.
       Set control to 'A , place subject within   When the needle touches the red segnrent         bright-line frame in viewfinder, and focus.                                         on the bottom, the light level is too low.      The black needle irr the viewfinder indi-                                          Move sublect into a more brightly illumi-        cales the lens opening (black figures) and                                                   nated area, or use flash. When the needle       lhe shutter speed (yellow ligures) set by                                                touches the red segment at the top, the       the electric eye. In Fig. 23, for example,                                                                 light is too bright        the needle indicates a lens opening of  f /4
       and a shutter speed of 1 / 1 25 second. De-   To prevent double exposures, lhe shutter
       press shutter release when lhe needle is     release locks after each exposure  until
       anywhere in the yellow bar between thc     the   f ilm is advanced {or the next picture.
View original page 10Page 11 · Read text
INDOOR PICTURES (wirhour flash)
  Follow procedure described under "Out-
  door Pictures."

 CLOSE-UP EXPOSURE READING
  Since the CdS electric eye measures lhe
  entire area covered by the lens, a back-
  ground that is much brighter or darker
  than the principal subject may cause an
  exposure error. A close-up reading will
  minimize the effect of such backgrounds.     underexposed, the film may be more or
  Aim the camera at the most imoortant Dart     less sensitive than its rated speed. This
  of the subject (the face, In case of a por-    can be easily corrected by using a higher
   trait), {rom a distance of six inches. press     or lower ASA (or DIN) speed than the one
  down the shutter release about one quar-     printed on the   f ilm box or instruction  ter of the way and hold it there; then     sheet. Use a higher ASA number to correcl
  return to the original camera position and      for overexposure, and a lower number lo
  depress the shutter release all the wav to      correct for underexposure.
  make the uxDosure.
                                           For example,  it pictures made on ASA 64
                                                    film are conslstently overexposed, set lhe
 CORRECTING A CONSISTENT         ASA speed at B0 or                                                                                                                                                                                                                                   .l 00 (depending on the
 EXPOSURE "ERROR''                   degree of overexposure).  lf films are un-
 When pictures are consislently over or     derexposed, set ASA speed at 50 or 40.
10
View original page 11Page 14 · Read text
www.butkus.us
The camera automatically adjusts the lens
opening as the lens is locused. The focus-
ing range is automatically limited: the lens
cannot be focused when the subjecl  is
closer to the camera than the shortest dis-
tance thal will provide correct exposure.
For example, when lhe flash-dot is lined
up with the guide number of 90, the lens                                       www.butkus.us
cannot be focused closer than 6 feet.
With "feet" guide numbers 32 and 45 (10     Fig,26               Fig,27
and 14 jor meters) the camera also limits
lhe far end of the locusing range: the lens                                 SELF.TIMERcannol be focused on subjecls moro dri                                      The self-trmer permits the photographer totant than the far limit ol correct exposure.                                                get jnto the picture.With flash units having a higher guidc
number, observe lhe far end of the dis-     Place camera on tripod or other firm sup-
lance range listed in the chart above.          port (tripod socket is on bottom of camera).
                                         Get ready for exposure as usual: advanceWhen the camera is set for flash photog-                                                     film, focus. check exposure needle posi-raphy, the shutter speed is 1/25 second.                                                tion in viewfinder, use flash in poor light.
                                    Push sell limer lever into positlon shown
                                                     in Fig. 26. Depress shutter release to start
                                                    self-timer. Exoosure will be made B sec-
                                      onds afler the release has been pressed.
                                                                                                   1Q
View original page 14Page 15 · Read text
TIME EXPOSURE                             Protect the camera from dirt, rain, damp-
Depress control ring release and move      ness, and excessive heat. Avoid touching
"8" opposite the index line (Fig. 27). At     the lens. To clean lens, breathe on it, then
the "8" setting the lens opening is fixed     wipe  it gently with a soft, lintless cloth or
at t/2.7 (full opening). The shutter opens      tissue. Do not use eyeglass tissues as
when the release is depressed, stays open     they might damage the lens coating.
as long as the release is pressed down,           lf anything goes wrong, do not try to repair
and closes when the release is oermitted           it. Take it to a dealer or send  it to the near-
to return to its original position.              est GAF Consumer Photo Service Cenrer
For time exposures the camera must be    shown in the followino  list:
on a tripod to prevent camera motion dur-
ing exposure. The use of a cable release
is recommended (the cable release socket
is in the top of the release button).
At the "8" setting exposure time has to be
determined with the help of an exposure
guide or exposure meter.

CAMERA CARE
The GAF ..,EMO 35 EE camera is a
sion instrument. Used with care,
provide years of service.
View original page 15
Page 16 · Read text
www.butkus.us
     GAF Corporalion                                  IN CANADA
     Consumer Photo Service Center                                         GAF (Canada) Lld.
     Emma Street                               Consumer Photo Service Cenler
       Binghamton, N.Y. 13902
                                                   2403 Stanfield Road
      3500 North Kostner Ave.                             Mississauga,  Ont.
      Chicago, 111.60641
                                                   9411 Cote De Liesse
      16217 Kittridge Street                               Montreal 760, Quebec
      Van Nuys, California 91406
                                                                                1 195 West 8 Ave.
       39-22 30th Street                                Vancouver 9. Brit. Col.
      Long lsland City, N.Y. 11101
i      t.o.l.      Portland,Box 4eoOre.97207

    GAF FILMS                        ,,-
     For sparkling color pictures, use GAF
      Color Print Film or GAF@ Color Slide Films   PROJECTORS
     (ASA 64, 200, 500 for daylight pictures,     Project sharp, brilliant pictures, present
    ASA 100 for indoor pictures). They are       thrilling slide shows with GAF@ Slide Pro-
      guaranteed: pictures that satisfy or a new      jectors. They are available in several mod-
        roll free. Available at photo Cealers.             els, at photo dealers,
                                                                                                         15
View original page 16From the M. Butkus archive. Original publisher and archive notices are retained.
Check the model and edition against your equipment.
PDF verified 2026-10-10.