Film cameras
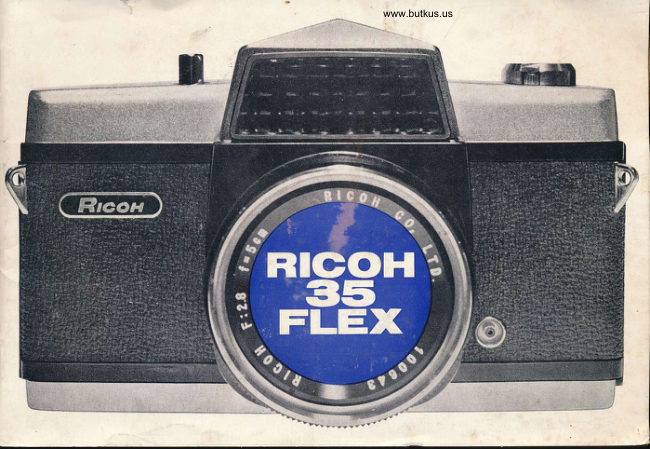
Ricoh 35 Flex User manual
User manual for Ricoh 35 Flex. 12 pages in English. Read the original PDF, download or print a copy without registration.
12 pagesEnglish1.2 MB PDF
Loading your manual…Open PDF directly
Document details
- Brand
- Ricoh
- Model / document
- Ricoh 35 Flex
- Document type
- User manual
- Language
- English
- Pages
- 12
- File size
- 1.2 MB
- Category
- Film cameras
- Document date
- Not specified in catalog
Search available document text
Find a term, then jump to its page in the original PDF. Image-only pages may not be searchable; check the PDF for exact wording and diagrams.
Page 2 · Read text
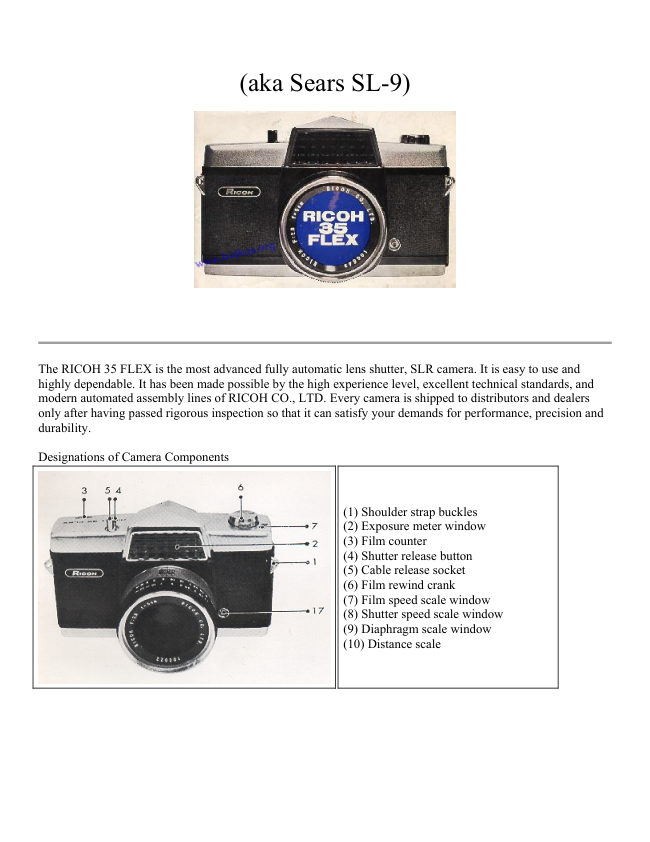
(aka Sears SL-9)


The RICOH 35 FLEX is the most advanced fully automatic lens shutter, SLR camera. It is easy to use and
highly dependable. It has been made possible by the high experience level, excellent technical standards, and
modern automated assembly lines of RICOH CO., LTD. Every camera is shipped to distributors and dealers
only after having passed rigorous inspection so that it can satisfy your demands for performance, precision and
durability.

Designations of Camera Components


                                                              (1) Shoulder strap buckles
                                                              (2) Exposure meter window
                                                              (3) Film counter
                                                              (4) Shutter release button
                                                             (5) Cable release socket
                                                              (6) Film rewind crank
                                                              (7) Film speed scale window
                                                              (8) Shutter speed scale window
                                                              (9) Diaphragm scale window
                                                         (10) Distance scale
View original page 2Page 4 · Read text
• Photographing Procedure


1. Load camera with film.
2. Set ASA (DIN) speed dial at the speed of your film.
3. Set shutter and diaphragm at "A".
4. Take up film.
5. (a) Look into finder and decide on composition. At the same time, bring camera into focus. (h) Make sure
that exposure meter pointer is not on the overexposure or underexposure warning mark.
6. Press shutter button.
7. When film is finished, rewind it into the cassette.


• How to load Film


Use 35 mm film sold in cassettes. When loading film, keep it out of direct sunlight.
1. Pull back cover lock and open back cover.

2. Draw out film rewinding crank and load new film.
View original page 4
Page 5 · Read text
3. Push in crank in such a manner that film rewinding crank spindle fits into the groove of cassette spindle. If
crank does not fit in well, turn crank slightly right and left while pushing it.

4. Turn film take-up spool gear right and left to make film insertion slot face upward.

5. Draw out the free end of film and insert it firmly in take-up spool slot in the direction indicated by arrow.

6. Take up film while being careful to keep upper and lower sprocket teeth properly meshed with film
perforations.

7. Close back cover after having made sure that film take up functions properly.

8. The film counter will be in "S" position. Since the first few frames of film are likely to have been exposed
during the loading operation, repeat film take-up and shutter release until film counter indicates


                                                                    www.butkus.us


                                        • How to advance Film
                                     1. Turn film take-up lever until it reaches the point where it
                               cannot be moved further.
                                     2. Release lever, and it will return to its original position.
                                     3. The above operation advances film by one frame. At the same
                                  time, shutter is set.
                                     4. When film has been advanced an shutter set, mark in finder
                                  disappears.


                                        • How to make sure that Film is being taken up
                          Look at film rewinding crank while taking up film. When film is
                               being taken up properly, crank turns correspondingly.
View original page 5Page 6 · Read text
• How to Determine Exposure


Setting ASA (DIN) Speed Dial
Set ASA (DIN) speed scale at the speed of your film. Marks between figures on film speed scale indicate the
following speeds:

Adjusting Exposure
Set diaphragm adjusting knob at "A" (automatic). Make sure that shutter adjusting knob, too, has been set at
"A" by this operation. Since adjusting knobs are of an automatic setting type, shutter adjusting knob should be
automatically set at "A" when diaphragm adjusting knob is set at "A".

• Improper Exposure Warning Mark

There
are red
marks at
the
upper
and
lower
right-
hand
corners
of view
finder.
These
are
improper
exposure
View original page 6
Page 7 · Read text
warning
marks.

Proper exposure is obtained when exposure meter pointer is not on either of these marks.

• View Finder


                           View finder presents the same image as produced on film.
                                There is absolutely no parallax.
                            The interior of finder consists of a fresnel lens, sharpness ring
                               and split image.


• Focusing
Look into finder and obtain a clear image through sharpness ring or split image by turning focusing ring.
View original page 7Page 8 · Read text
Out of Focus                   In Focus                Out of Focus


• Depth of Field
It is a characteristic common to all lenses that the smaller the f-stop, the larger the range of distances becomes,
ahead and behind the photographic subject, through which the lens remains in focus. Conversely, the larger the
stop, the smaller the depth of field. In this case, the scene farther or nearer than the subject in focus tends to be
blurred.
You can utilize this characteristic of the lens for effective picture results. For instance, in taking a portrait, the
blurring of the background by using a wide opening will make the person stand out. On the other hand, when
taking a group picture where people are standing in rows, a small opening becomes necessary to ensure that the
focus is sharp on every subject.
Suppose the subject in focus is two meters away and the aperture has been set at F/8. Then a clear image is
obtained for a distance of 1.7 to 2.5 meters.

• How To Hold Camera


                                                  Camera can be held horizontally or
                                                                       vertically. In either case, hold it
                                                               firmly against your face with both
                                                        hands and press shutter button
                                                               gently so that the shutter releasing
                                                              operation will not move the
                                                          camera.


• After Finishing the Roll of Film


                                                       When film has
                                                                      been finished,
                                                                               replace it in
                                                                                    cassette by
                                                                            following
                                                                             procedure:

                                                                                    (1) Set rewinding
View original page 8Page 10 · Read text
This operation enables you to enjoy photography without depending on automatic exposure. Although exposure
meter pointer in finder moves in this case, too, meter is not coupled to exposure control mechanism.

Diaphragm scale indicates the following
                          A     2.8        •      5.6        •      11        •      22
values:

                                                                (4)               (8)              (16)


In manual operation, shutter cannot he adjusted if diaphragm adjusting knob is set at "A". After finishing
manual operation, turn the diaphragm adjusting knob back to "A".

• Flash Photography


                                  When you want to take a picture of a quickly
                                        moving subject at night or in a dimly lighted
                                           room, or when you want to take a nicely toned
                                                   picture under a glaring counter sunlight, flash
                                            photography provides the solution.

                                       The RICOH 35 FLEX has an X contact, which
                                        makes possible the use of M-and F-class flash
                                               bulbs and electronic flash.


1. Mount the special flash bracket designed specifically for this camera, and mount the flash unit on it.
2. Connect flash gun cord to flash terminal of camera and put a flash bulb in gun.
3. Set shutter adjusting knob at "A" and diaphragm adjusting knob at the value indicated by flash Guide
number.

• Exposure
In flash photography, exposure is determined by the luminosity of the flash bulb and the distance between the
bulb and the subject. These relations are shown by guide number in summarized form. Flash bulbs have their
respective guide numbers for particular film speeds and shutter speeds.

• Method of Calculation
Guide number (in meters or feet) DIVIDED BY Distance to subject (in meters or feet) = Diaphragm value
Suppose you use ASA 100 film at a shutter speed of 1/30 second. Given these conditions, you can pick out the
proper Guide number from the table printed on the flash bulb package.
If the number is expressed in meters and given as 60, and if you are going to film a subject five meters away,
then diaphragm value is obtained as below:
60 DIVIDED BY 5 = 12
Hence F/11 closest to 12.
View original page 10Page 11 · Read text
• Telephoto and Wide Angle Lenses
These additional lenses are attached in front of the current lens. They are very hard to find new or used.


                         You can convert your camera into telephoto or wide angle
                             camera by attaching telephoto or wide angle conversion lens in
                                    front of standard lens of your camera.

                                        • How to mount Conversion lens
                              Thread conversion lens into front ring of standard lens. Turn it
                                       until you cannot turn conversion lens any more. Do not force, it
                                  takes little effort to attach them.

                                        • Focusing and Diaphragm Adjustment

                           The attachment of either conversion lens to camera does not
                                cause any change in the focusing procedure. Take the focus by
                                  turning focusing ring in the same way as when standard lens
                                 alone is used. Since either conversion lens is F/2.8, all stop
                                 values of camera can be used with it either in automatic
                                  operation or in manual operation.
View original page 11Page 12 · Read text
• Accessories
The following accessories are available for those who
want to enlarge the scope of their photographing
activity and produce more effective photographs.
View original page 12
Related documents and language editions
From the M. Butkus archive. Original publisher and archive notices are retained.
Check the model and edition against your equipment.
PDF verified 2026-10-10.