Film cameras
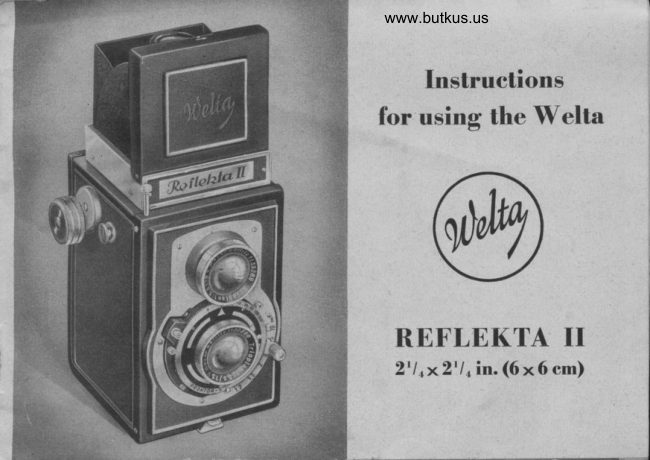
THE WELTA REFLEKTA II User manual
User manual for THE WELTA REFLEKTA II. 17 pages in English. Read the original PDF, download or print a copy without registration.
17 pagesEnglish3.0 MB PDF
Loading your manual…Open PDF directly
Document details
- Brand
- Welta
- Model / document
- THE WELTA REFLEKTA II
- Document type
- User manual
- Language
- English
- Pages
- 17
- File size
- 3.0 MB
- Category
- Film cameras
- Document date
- Not specified in catalog
Search available document text
Find a term, then jump to its page in the original PDF. Image-only pages may not be searchable; check the PDF for exact wording and diagrams.
Page 1 · Read text
www.butkus.us

    Instructions
for using the Welta


 RI]FLI]KTA II
  2'1,x2'l,in.(6x6em)
View original page 1Page 4 · Read text
www.butkus.us


  8. l)istant.e  st.ale

  8 a. l)iaphragrrr  st:ale

  9. Lighthootl r.over rvith sports   f inrler

 l(1. Speed arljrrstnrent ring

 I l. llagrrilier  firr r,ritical firr.using

12. l)elrth-ol'-Iirr.rrs rable

13. Parr Irr()te(.ti()n wirtrlou

14. Knolr lirr p:rn proter.tion slirlt
View original page 4
Page 5 · Read text
15. (lalrtera back

16. 'I'riporl lrushing

17. Neckstrap holtler

[$. [ipper spool bearer

 |.9. [,ot'er sl)()ol l)(:artrr

20. Spool slide

 21. l,att'h lor opening the ligltthoorl

 22. Filnr'sliding rollers


  l1l. 3
View original page 5
Page 6 · Read text
www.butkus.us


                                                                                             i'
rt. l.,oading
   anrl Ohanging the F ilm
     'l'hr'  llt'flckta    | | takes the stanrlard
      21'r)1ii1,',1 in. ((r. 9 r'rn) roll lilln on Ii-l l-
    spools. giving l2 lrictures 2t',' :2t ', irr.
     ((r: 6 r'rrr).

I. O1x'rtittg   tltt'  ('(uner(I  bttt'A'
   llold thr' ('ilnr('ra in tlre lcl't hanrl. s ith
    tlrt' lcnses lxrintirrg tonards the palrrt
    {lll. No. il). Opcn thc hinged latch (l)
  at the lrasc ol'tlre   ('.rnr('ra rvith  tlrt'
View original page 6Page 7 · Read text
index finger or thumb of the right hand and pull the camera back away as shown in
                  illustrations No. 3 and 4.
             2. Loading the film
              Swing out the lower spool bearer (19. Ill. 3) and push the spool slide (20, Ill. 3) to the
                   right. Insert the new film spool, so that the colored (red) surface of the protecting paper
                   lies on the outer side (Ill. 3) push back the spool slide and swing the spool bearer back
                   into its bed. Pull out the film-transport knob (2, Ill. I and 2) and fix it by a slight backward
                 turn. The upper spool bearer can now be swung out and an empty spool placed into it'
                the notched end of the spool facing the film-transpoft knob. *
                                                                                                                               3)            Draw the paper tongue projecting from the film across the two sliding rollers (22" Ill.
            'and push it into the longer elit of the empty spool (Ill.4), folding  it upwards when it
               comes through on the other eide.
              Make sure that the film spool lies perfectly straighto and swing the spool bearer back into its
                bed. Turn the film-transport knob slowly forward until its catch snaps into the notch of
                the film-spool. The film is straightened out by two or three rotations of the film'transport
             knob and must run quite evenly, without rubbing the flanges of the spool'
I
View original page 7Page 8 · Read text
www.butkus.us

     3. Closing the carnera
       Fold up the camera back and press it to the body. The hinged latch must click in and
        lock easily. It is advisable to use a little extra p"essu"e.
I
     4. Opening the film window
      Push up the pan protection knob (14, Ill.2) on the right, underneath the film window,
      and the red film window becomes open to view. The light circle which is visible when
       the film window is closedo now disappears.
     5. Transporting the film
       Rotate the film-transport knob (2, Ill. I and 2) until, after the caution signo the number I
        appears in the film window.
    6. Closing the film usind.out
      Push the pan protection knob (t+, nl.2) down into its former position, and the light
        circle in the film window becomes visible again. The camera is now ready for the
           first exposure.
View original page 8Page 9 · Read text
Theperformances4to6arerepeated.everytimeanexposulehaebeenmade,that
  means 12 times with each film, After the twelfth exposure' the film'winding knob must                                                         I  be turned until the film is fully wound up and the protective paper strip can no longer
  be seen in the film window'                                                                  I
7. Remouing the film
  open the camera as described in paragraph 1o pull out the film-transport knob (2) and
   give it a short backward turne so that the upper spool-bearer (18, rll. 3) with the exposed
   spool can be swung out. Remove the exposed film carefully and paste d'own the gumstrip'
  Take the empty spool from the lower spool bearer and immediately place it into the
   upper epool bearer, so that it will be ready to receive the new film' In this way the camera
   always contains an emPty sPool'
B. The Teehnique of ExPosini
 7. Opening and, closing the tighthood
   push the latch (2I, Ill.2) to the left, and the lighthood will spring up' To close thelight'
View original page 9
Page 10 · Read text
www.butkus.us


                Itr,,rrl. fitlrl tlorl lt tllc l'rottt  ('rt\ ('r  ( q' lll'   I )'

                                                           t'lttst^t u itltI             rrlirltlsltt'rr'lrrirr itrrrltlre tltcrcarli!-{hthoorll'lap attlolttittit'itllr
              lrl  :l(r(lilrlr','lickirrg  ttl' tlrt' lttclr'

        ).  Iiot'ttsirtg
               'l'r, lirctt.  tlrr' .rrlriccl'  lll()\ t'  tltt'  lr'r cr
               ( t.  lll.   | ) alorlg the rlistlnce scale attrl
           r'lrcck rht' slrlrlrtrt'ss ol' tltr' pictttrr'  ort
                        I ltc  grotrrrrl-glass  s('rt'('tl  (lll'      '-l )'  'l'1tc
                 .lrit r1  r ltt'.s clttt   I rt' rcgrr latcrl  {'rr tttr  i rr I  i lr it r
                 \ r'\   lrt it rlislitttcc ol' 1.2 rrr.'l'ltc crlrostrl
             pilttrrt'   r't,rrt'sltt,lltl- 1'rccisr'lr to  tltc
              I'irrrlcr itttagr'. ou ittg to tlte I'act tlrat the
        tuo lt'trst's are t'otltrt't'tr'tl.
I
View original page 10Page 11 · Read text
t),). Criticul .focusing
                            For  criti<:al focusing,  lift  the magni'
                                         I'ving lens (l l.  lll. 1) in the lighthoorl.
                           and the center part of the iltrage rrill
                              appear in tn'oftrld enlargettrent.
                                               t. The sports .finder
                                       is incorporated in the lighthootl antl
                            can be usetl as desiretl instead of the
                                     groun<l-glass.
                                  ()n olrening the lighthood, you  rvill
                               always see the image on the grtlund'
                                  glass. If vou intend rrsing the sl)orts
                                  push in  tlte center part of the a                               finder,
 6                               (iont  c()ver bearins the  trade-ntark
 o
 o
-ix*t
View original page 11Page 12 · Read text
www.butkus.us


                                   can                                  now                                                 viewI          untilyour youeubjecthearaeit shownclick in.in youill. No.                                                Before                                          6.
1

;l           cloeing the lighthood, the center part has first
a         to be brought into ite original poeition by
          pushing aside the latch (21, IlI.2), whereupon
          the lighthood can be folded down.

      5. Setting the shutter speed,s
       a) The Prontor S Shutter for inetantaneous expo-
         sures from I to risosth eecond and for time
          exposures of any deeired length (B).
          rnstantaneous exposures: Turn the milled ring (R, Ill. ?) until the indicator (K) pointe to
         the deeired number' wind up the shutter by puehing the lever (sp) downward as far ae it
           will go. The exposure ie made by pressing the releaee (?, IlI. l). From I to rir''th eecond,
        inbetween lengthe can be chosen (e. g. between l/uth and l/roth eecond), there being a
         gradual rise in the speede over this range.
View original page 12Page 13 · Read text
Instantaneous expoeures with delayed action:
                                            For speeds fronr I to 1/s6oth eecond (self-releaee).
                                              After setting the speed and the lever (Sp), move
                                        the lever (V) in the upper part of the shutter
                                    downward as far as it will go. Pressure on the
                                            release knob (7) in the camera body firet sets
                                  the delayed action spring working (about
                                        l0 seconds), whereupon the exposure takes
                                                  place.
                                   Time expoeuree (B): Turn the rnilled ring (R)
                                             until the indicator (K) points to the B mark,
and push the lever (Sp) downward ag far ae it will go'
The shutter is opened by pressure on the release knob and remains open until, after any
deeired length of timeo the pressure is relaxed. For time exposures,  it is advieable to uee a
tripod and a cable releaee. A tripod bushing (16, Ill. 3) ie built into the bottom of
the camera.
View original page 13Page 14 · Read text
www.butkus.us

b) The Automatic Shutter 'ovelax'o for instantaneous exposures from 1/r6th to r/2eqth second
  and for time exposures of any desired length (B).
   Irrstantaneous exposureg: Turnthe milledring (R, Ill. B) until the desired number stands
  under the M mark. The corresponding exposure is made by pressure on the ehutter release (?).
  Time exposures: Turn the milled ring (R) until the o'B" stands against theM mark. The
   shutter opens by pressure on the release knob (?) and remains open untilo after the
   desired length of timeo the pressure ie relaxed. For time exposures, it is advisable to use
  a tripod and a cable release.
6. Setting the d,iaphr(rgrn
  The diaphragm, between the largest aperture f/3,5 and the smallest f/16, is adjusted by
  means of the movable indicator on the lower part of the shutter.
   Important ! The smaller the aperture, the longer will have to be the exposure. The depth
   of sharpnesso however, increases with the smaller apertures.
  For example: When set at 3 metree with an aperture of  f / 3,5, the depth of sharpness
   reaches from 2,63 to 3050 metres, but at tlS ft reaches ftom.2,25 to 4,50 metreg. (Compare
  the chart [12, Ill.2] on the camera.)
View original page 14
Page 15 · Read text
I

                                                                                                                                                                                                     I

                                                                                                                                                                                                     I
7. Releasing the shutter
  The shutter is released by pressure on the body shutter release (7, Ill. l), as described
   above. This is done most conveniently with the thumb of the right hand, while the camera
   is held firmly between the right and left handso as shown in illustration No. 5. In this
   position the camera is well protected against unsteadiness. A flexible wire release can, if
   desiredo be screwed into the nipple of the release knob.
  In order to auoid faulty or blanh exposures, the release knob must be pressed down as
  far as it utill go when making the exposure.
B. Loclt against double exposures
  When the shutter is being releasedo the lock against double exposures which is coupled
   with the shuttero is put into action. Not until the film has been transported by advancing
   the transport knob (2), can the shutter be released again. The camera is ready for the next
   exposure as soon as the following number of the film appears in the film window (f 3).
9. Flash synchronization
  The shutters in the Reflekta II are synchronized for regular flashes. The contact for
View original page 15Page 16 · Read text
www.butkus.us

         Prontor S is in the shutter itself (E, Ill. 7), for Velax it is built into the camera front
           slightly below the finder lens.
     C. A few Winks for the Photographer
          l. Do not forget to turn the film on to the next number immediately after each exposure.
       2. Shutter speed and diaphragm are closely connected. The more the penetration of light is
         reduced by setting the diaphragm atBo ll, or a larger number, the longer must be the time
          of exposure. If, for instanceo the speed at a 5,6 aperture hae to be                                                                                                        1/roo th secondo the same
         exposure can be made at f/B and 1/5s th eecond or f/ll and 1/2u th second. (These figures
        can be continued in an upward. or downward sequence). The only difference lies in the
        depth of sharpness of the picture.
       3' The advantage of the small aperture (Bo ll,  16, etc.) is an extensive depth of sharpness,
  1t'      which means that the foreground and background will appear sharp. The advantage of the
   I       wide aperture: Shorter exposure time and less risk of blurring the picture by unsteadiness.
  i       Rapidly moving objects must in any case be taken at a high.speed setting.


|                         .rdrr,:r*ir-;r...              ,i'.tw,
View original page 16Related documents and language editions
From the M. Butkus archive. Original publisher and archive notices are retained.
Check the model and edition against your equipment.
PDF verified 2026-10-10.