Film cameras
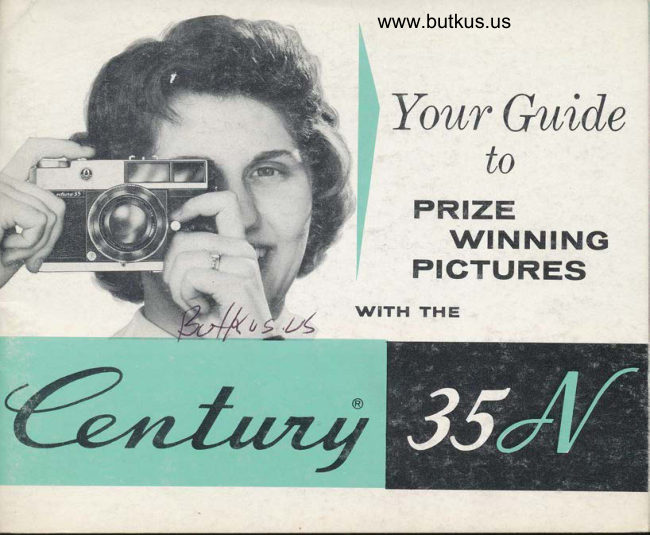
Graflex Century 35N User manual
User manual for Graflex Century 35N. 25 pages in English. Read the original PDF, download or print a copy without registration.
25 pagesEnglish2.3 MB PDF
Loading your manual…Open PDF directly
Document details
- Brand
- Graflex
- Model / document
- Graflex Century 35N
- Document type
- User manual
- Language
- English
- Pages
- 25
- File size
- 2.3 MB
- Category
- Film cameras
- Document date
- Not specified in catalog
Search available document text
Find a term, then jump to its page in the original PDF. Image-only pages may not be searchable; check the PDF for exact wording and diagrams.
Page 3 · Read text
Your Century 35 is a precision can'Iera with outstanding ease of opera-
tion. Its tnany fine features put it into the fine camera class, yet its       o
amazing simplicity of operation will allow you to produce beautiful color
slides or black and white pictures your very first try'                   o
  This book provides detailed information on the many features of the
Century 35 and how it operates. Familiarize yourself with its basic       o
operation belore you load. the first roll of f'[tn. This will acquaint you
with the camera and help you to prevent missing an important picture
through the lack of familiarity with its operation.
View original page 3
Page 5 · Read text
.'@',

                         6


             Use any 20 or 36 exposure 35mm film-either color or black and white.
              Superior color snapshots, color slides, or black and white prints may fi\ms             be made depending upon the type of film you load into your camera.
            Your dealer will be happy to help you select the right kind.
                 Before you use your new camera to photograph some special event,
              or to record your vacation trip, expose a roll or two for 'practice.
Loading  Always load or unioad cal)rel'a in subdued light since bright sunlight
               nrav fog film.
4
View original page 5Page 6 · Read text
www.butkus.us
                                                              !$J.ii'.-\


                     e


tr'ilm Reminder D'ial
     The instruction sheet packed with each roll of film
      indicates the film index or speed number. Use the
     two raised posts to turn the fllm reminder dial until
      this number is opposite proper dot on the outer
      stationary portion of the dial.
View original page 6Page 7 · Read text
Picture Taking Settings
                                  Your Century 35 Camera incorporates a new simplified
                           EV system of camera settings whereby a single number
                                           value may be set to determine exposure instead of using
                                            the traditional  / and shutter speed numbers. At the front
                                              of the shutter you will find three rows of numbers and two
                                           rotating rings. The numbers on the black ring are EV
                                     numbers (1, the lowest; 77, the highest).
                                     The black numbers on the first bright ring are shutter
                                        speed numbers (B, L, I12,714,718, 1/15, 1/30, 7160, L1725,
                                              11250, 1/500). Shutter speed controls the length of time
                                           that light will pass through the lens and is useful in stop-
                                        ping action as well as in controlling exposure. (When set
                                           at B the shutter will open when the trip button is held
                                    down and will close when  it is released.) Always use a tri-
                                          pod or some other steady support and a cable release when
                                          using this setting to prevent camera motion.
                                     The next row of black numbers are / numbers and refer
                                                 to lens diaphragm openings which are useful in controlling
                                         depth of field (area of sharpness) as well as the amount
                                              of light which will pass through the lens-/2 is the largest
                                        opening and /16 the smallest.
Wi

   Conventional Lens Settings
        If you are setting the lens and diaphragm by the familiar
     shutter speeds and lens diaphragm openings,  first set the
     shutter speed using the black ring; turn  it until the de-
      sired shutter speed is opposite the index line on the lens
     barrel next to the camera. Then turn the black ring again
     generally in the opposite direction until the desired /
    number is set opposite the index line.
View original page 7Page 8 · Read text
www.butkus.us

EV Settings
 If using EV numbers from a meter or
exposure table with these numbers,
turn the black ring until the correct
number on it is opposite the index mark
of the front of the lens barrel. Remem-
ber that each higher EV number halves
the exposure and each lower number
doubles  it. 10 produces half as much
exposure as 9 and twice as much as 11.
   If more depth of field is required,
turn the knurled chrome ring between
the  shutter speed and diaphragm
scales until a smaller diaphragm open-
ing such as /16 is opposite the index
line. The shutter speed will change
correspondingly so that the same ex-
posure will be maintained; you will
note now that the shutter is set for a
slower speed such as 1/30 second. Con-
versely,  if more action is to be stopped,
rotate the bright knurled ring to the
desired shutter speed. The lens open-
ing will automatically change to com-
pensate, thereby maintaining  the                                                                l'bkt,
same exposure.                                                            IE                                                                                      r*
View original page 8
Page 9 · Read text
Depth of Field
The depth of field scale indicates how
many feet in front and back of the sub-
ject will be in acceptably sharp focus.
This depth of field varies with the dia-
phragm settings. Example:  If the cam-
era is focused at 10 ft. and the dia-
phragm is set at f5.6, material between
8 ft. and 15 ft. will be in acceptably
sharp focus.
  For convenience, the number 15 is in
red, indicating "universal" focus. Un-
der average picture taking conditions
(/11), subject material from 8 ft. to
50 ft. from the camera will be in ac-
ceptably sharp focus.

                                                                                   Digitally signed by mike
                                                                   butkus         mike         DN: cn=mike butkus,
                                                                 o=orphancameras, ou=29,
                                                                    email=mike@butkus.org, c=US
                                                                         Date: 2019.08.06 16:23:43
                                                                                  -04'00'         butkus
                                       Scale
                                       Focus'i,ng
View original page 9Page 10 · Read text
www.butkus.us

                            Rangeflnder Focusing
                                       Look through the finder: two images
                                                       will be seen; one filling the full frame
                                      and a smaller, brighter one superim-
                                            posed over the center of it.
                                         Turn the focusing ring by the knob
                                            while viewing the subject to register
                                            the moving image in the bright rec-
                                             tangular field with the image in the
                                               stationary field. The camera is now
                                               properly focused on that subject.
                                                After you have focused the camera,
                                                    direct your attention to the picture.
                      kt.il


The distance scale (feet) is on the rotating ring at the rear of the
lensmount. It  is used with the depth of field scale and rangefinder.
View original page 10Page 11 · Read text
Making the Picture
                                      To make the picture, hold the camera
                                                 as indicated in the photo. What is seen
                                                 within the Bright Line Finder Frame
                                                            will be recorded. Compose carefully for
                                                      better pictures. You will notice that the
                                                  Bright Line Finder Frame moves as the
                                          camera is focused, thereby indicating
                                             the exact picture area at all subject
                                                      distances.
                                               Hold the camera steady against your
                                           eyebrow with your arms close to your
                                             body as in the photograph. Take a deep
                                             breath-let part of it out-hold it-
                                                   squeeze the release with your forefinger
                                         and you will have made another pfize
                                        Winning Picture.

  Bulbs
      When using Class "M" flashbulbs (No. 5, 2b,M-E) set the synchro lever at the
       yellow "M." IJse clear flashbulbs with black and white film and indoor type
        color films. Use blue flashbulbs for daylight type color film. M-2, M-zs, SF and
     SM flashbulbs may be used with speeds of 1/30 ancl 1/60 second with the synchro
        lever at the red "X."
10
View original page 11Page 12 · Read text
www.butkus.us

      ,   Attaching
             F lash llnit
To attach a flash unit to your Century
35, simply slide it into the clip on the
top of the camera. Attach the cord to
the flash outlet-follow the film and
fl ashbulb manufacturers' recommenda-
tions for shutter speed and lens set-
tings, or use the guide at the back of
this booklet as a starting point.

 Electron'ic trlaslr,
    When using Strobomite, Stroboflash or other electronic flash units, place the
      synchro lever: at the 1gd '()("-use any black and white film or any daylight type
       color film. Use Graflite Connecting Cord, Cat. No. 2271.
        Follow the instructions in the Strobomite or Stroboflash manual when usinn
       these units.
                                                                                           11
View original page 12Page 13 · Read text
Keep your pictures simPle, a         Have your subject engage in            Don't "jab" at the shutter re'                                                                                                           it gentlY tosingle subject element of in-         some activity in order to make          lease-squeeze
terest tells a more appealing          your pictures "live."                  avoid camera movement.
story.


                  Ttps                     for Better Ptctures                                         I
I2                                                I
View original page 13Page 17 · Read text
Double Er'posures
              If  it is desired to make double exposures for some trick effect,
           place the camera on a firm support and make the first exposure in
            the usual manner. Move the rapid advance lever all the way to the
                                                       come back onlE             right, bringing the next frame into position; let it
          aiout h,alf wag; the shutter may now be released. To recock the
           shutter for the second exposure, move the advance lever all the
        way to the right again and let it return in the normal way. The
           second exposure may now be made'
                                                                advances          The film counter will now count incorrectly since it
          each time the shutt'er is cocked. subtract the number of double
           exposures made from the figure on the film counter dial to indicate
           the actual number of frames you have exposed'


               Cuut'i,ovL
                     When operating the camera rapidly, you may find
                            that you cannot recock it. This is caused by hold-
                            ing the advance lever to the right as you trip the
View original page 17Page 18 · Read text
www.butkus.us
Self T'imer
   When the self timer lever has been
  moved toward the flash fitting,
   shutter tripping will be delayed
   about 8 seconds after the release
   button has been pressed. This will
   permit you to be included in the
   picture. Note that the sync lever
  must be at "X" before the self
   timer lever can be moved. Unless
   using electronic flash, keep the
   synchro lever at "M".to avoid acci-
   dental setting of the self timer.
   Once the self timer has been cocked
   the shutter must be tripped to
   move the lever back.


shutter. Release it; then press down again on the
shutter release button and the advance Iever may
be moved in the normal way.
View original page 18
Page 19 · Read text
Prize Winnilx;g Pictures as Simple as A B G
                1. Load the camera (in subdued light)-gl6sg the back-advance the film
            and trip twice-advance the film a third time.
               2. Set the proper exposure.
               3. Focus on your subject by rotating the focusing ring.
               4. Compose your picture within the Bright Line Finder Frame.
               5. Squeeze the shutter release.
                6. Advance the film with one full stroke of the advance lever.
               7. To unload (in subdued light), press down the rewind crank release but-
              ton and wind the film with the rewind crank in the direction of the black
            "R" until the film transport indicator stops, indicating the film is com-
                pletely rewound. Release the cartridge-return it to its can and send it to
              the photo finisher.


   Flush
               1. Fit flash unit to camera. 3. Set lens opening (see guide number chart).
               2. Set synchro lever.         4. Focus, compose and squeezethe shutter release.
18
View original page 19Page 21 · Read text
A
                         G EN ERAL    GRAFLEX  PRECISION
                                     C OMPANY

            A SUBSIDIARY OF GENERAL PREC     EQUIPMENT CORPORATION


GRAFLEX, INC.                  GRAFtEX, IilC.               GRAFtEX. INC.
3750 Monroe Avenue              Midwest Division               Western Division
Rochester 3, New York            1345 Diversey Parkway        800 North Cole Avenue
                                 Chicago 14, lllinois             Box 38606
GRAFTEX OF                                                     Hollvwood 38. California
CANADA LIMITED                GRAFLEX, INC.
47 Simcoe Street                50 Rockefeller  Plaza
Toronto 1. Ontario. Canada          Suite 922
                            New York 20. N. Y.
View original page 21Page 24 · Read text
www.butkus.us

    than faulty materials and workmanship. Such equipment will be serviced at
    factory-established  rates  ;
C. To Equipment which has been tampered with or serviced by other than
    Graflex personnel;
D. If adaptations or accessories of other than Graflex recommendations  have been
   made or attached:
E. If the equipment has not been registered with Graflex by means of the attached
    registration card or appropriate substitute within 60 days from date of purchase.
No liability is assumed for film which is damaged or is _unsatisfactory for an1'
reason (dui: to equipment malfunction or otherwise), nor is Graflex, Inc., obligated
to replace such film. No liability is assumed for expertses or damages resulting from
interruptions in operation of equipment.
   In order that we may be able to pursue our continuing program of product im-
provement, Graflex reserves the right to make chanpJes in design, or add improve-
ments to any product without incurring any obligation to include such revisions
in equipment previously produced.
   Tliis-warranty  is made in lieu of any other guaranty, warranty, or liability ex-
pressed or implied. It is valid only to the original purchaser as indicated by the
iegistration card. Graflex's liability under the within warranty is limited to repair
or replacement as herein provided.
Graflex Seruice   f acilities are at the  f ollouing locations:
Rochester.                     .  3750 Monroe Avenue.                          .Rocht'ster  3, N. Y.
New York Alea..            96 Gold Street .                                  ... .lNew York 38. N. Y.
Midrvest Division.          1345 Divelsey Palku'ay.                              . . . . .  . Chicago 14, Ill.
Westcln Division.            800 N. Cole Avc., P. O. Box 38606..        Hollyu'ood  38, Calif.
Canada.                   47 Sirncoe Stleet.                                              . . .Totonto. Ont.. Canada
 Record here the serial numbel'for y,rur insurance file and future reference.

        GRAFLEX, lNC., Rochester 3, N. Y.
View original page 24Page 25 · Read text
YouR CEI{TURY 351{E .AMERA
WARRANTY:
 f'o the initial purchaser of this carnera:
 Skilled craftsmen have pr.duced this camera. They have built into  it a level of
 rluality and performance which will insurr- y,ur enjoyment in the making of
 fine pictures.
  Each new camera is warranted to be free from faulty materials and workmanship,
except as hereinafter set forth. If any time during your first year of ownership,
any servicing is necessitated by faulty material or workmanship, it will be pr6vicled
 (or the equipment replaced at our option) wirhout charge except for transporta-
tion charges, by your ncarest Graflex Service facility. Returns for servicing should
be made through your Graflex Dealer; or if this is not convenient, the equipment
should be carefully packed in a stifi container with adequate packing  ( not
excelsior) . Attach name and address and any specific instructions to the package,
which should be adequately secured and fully insured.
This warranty is not apJrlicable:
  A. To any non-(iraflex manufactured accessory items:
  B. To Equipment which in our judgment has been damaged, abused, or requires
      replacement of parts due to wear and tear from use, or for any reason other
View original page 25From the M. Butkus archive. Original publisher and archive notices are retained.
Check the model and edition against your equipment.
PDF verified 2026-10-10.