Film cameras
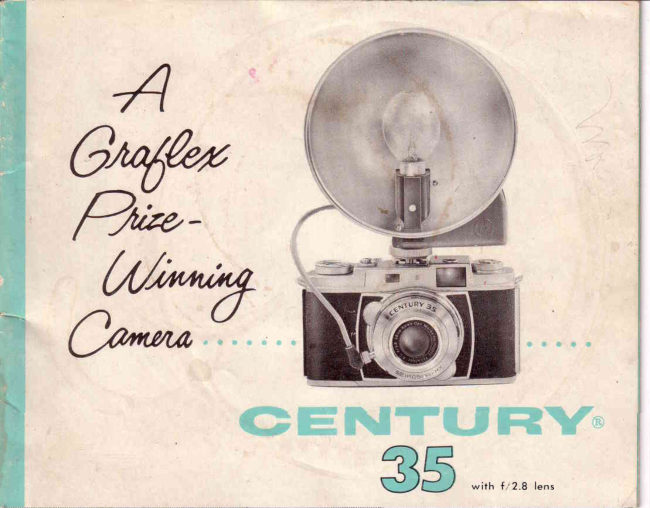
Graflex Graphic Century 35NE User manual
User manual for Graflex Graphic Century 35NE. 22 pages in English. Read the original PDF, download or print a copy without registration.
22 pagesEnglish2.2 MB PDF

Loading your manual…Open PDF directly
Document details
- Brand
- Graflex
- Model / document
- Graflex Graphic Century 35NE
- Document type
- User manual
- Language
- English
- Pages
- 22
- File size
- 2.2 MB
- Category
- Film cameras
- Document date
- Not specified in catalog
Search available document text
Find a term, then jump to its page in the original PDF. Image-only pages may not be searchable; check the PDF for exact wording and diagrams.
Page 5 · Read text
p  ffi


               Use any 20 or 36 exposure 35mm film-either   color or black and white.
                  Superior color snapshots, color slides, or black and white prints may  tr'ilms
                be made depending upon the type of film you load into your camera.
                 Your dealer will be happy to help you select the right  kind.
                      Before  you use your new camera  to photograph  some special  event,                                                                                                                                                                                                        I                       or  to  record  your  vacation    trip,  expose  a  roll  or  two   for  practice.
  Loading   Always  load or unload camera  in subdued   light   since  bright  sunlight
                may  fog  film.    www.orphancameras.com  4
View original page 5Page 6 · Read text
tin a


     F'ilm,Inder SelectorD'ial
          Rotate  the  film  index  selector  dial  by  the  bright
          knurled   knob   until   the  proper  ASA   film  index
          (speed) number  is opposite the index mark  on the
           lensbarrel.  This  number   will  be found  on the  in-
           struction  sheet packed  with  each  toll  of  film.
View original page 6Page 7 · Read text
Sett'ins    it"t9.lqtt4il?',iilL"iiL?i                           "",T;thec amerai#!fli'":"lt;,:i'";,'iilf;bright knurled ring.
Point the camera at the subject. Note the index
line under  the meter  pointei.  Rotate  the black
expo-suresetting dial to bring the proper color bar
of  the meter  to  this  line. With  the- proper-and filmspeed set on the film index selector scale     the rMproper_indicator  ba_r opposite the meter pointer
you will always make correctlywww.orphancameras.comexposed pictures.
View original page 7
Page 8 · Read text
All  exposure meters,  in ordel'  tofJs'ing                              indicate  correct  exposure,  must
                          be used  czrrefully.  For  best  ex-Erposure                           posures,  meter  leadings  should
                          be made  as follor,vs:M eters
1. Point  the cat"uera at the subject, tipping    it dor'vn slightly
    to  avoid  including  too much  skylight   in  your  leading.
2. For most accurate  readings  hold the catnera so that  the
   rneter  is no farthel  from  the principle  subject than  the
    ..vidth of the  subject.  If  this  is not convenient, make:r
   substitute  reading  of the back of your  hand.
 li. l'r'equently,  an average  of the exposures  f,or the- bright-
   est ind  dar:kest portions  of the subject  r'vill produce  the
   best picture.
.1. Be  careful   rvith  side and back  lighted  subjects  not  to
    ailorv  light  to  shine  directly  onto  the meter   cell.  (See
   palagraph   2.)  Reflections   f rom  shiny  lenshoods can
    inflate  tleter  leadings.


When
U s'ing
F'ilters                   speed indicator  dial  to be moved from 200 to p0;  other.-filt-er
                          fictors  and other film speeds may be accommodated similarly.
                 After  removal of filters be sure to reset the film index
                selector dial to prevent making overexposed pictures.
View original page 8Page 11 · Read text
Making the Picture
                                                 To make  the  picture,  hold  the camera
                                                     as indicated   in the photo. What   is seen
                                                             within  the  Bright   Line  Finder  Frame
                                                                          will be recorded. Compose carefully   for
                                                             better  pictures. You  will  notice that  the
                                                            Bright  Line Finder  Frame moves as the
                                                camera   is focused,  thereby  indicating
                                                          the  exact  picture   area  at  all  subject
                                                       distances.
                                                       Hold the camera steady against  your
                                                 eyebrow  with  your  arms  close to your
                                                  body as in the photograph.  Take a deep
                                                             breath-let     part   of   it  out-hold      it-
                                                 squeeze the release with  your  forefinger
                                                 and you  will  have made another  pfize
                                                 Winning   Picture.

  Bulbs
         \\rhen using Class "M"  flashbulbs (No.  b, 2s, M-s)  set the synchro lever at the
          1'ellorv "NI."  llse  clear  flashbulbs  with  black and  white  film  and  incloor type
         color  filn,s. LIse hlue flzrshbulbs for  daylight  type  color  filrn. M-2, M-25, sF  ancl
      SM flashbulbs may be used with speerls of 1/ii0 anri 1i60 second with the svnchr<r
         lcver  at the  ret(l "X."
1 0                          www.orphancameras.com
View original page 11Page 12 · Read text
I                                              ,*-3      I
                                                    {$
         Attaching
            Flash llnit

To attach a flash unit to your Century
35, simply slide it into the clip on the
top of the camera. Attach the cord to
the flash outlet-follow   the  film and
fl ashbulb manufacturers' recommenda-
tions for  shutter speed and lens set-
tings, or use the guide at the back of
this booklet as a starting  point.

 trlectronictrlash,
        \\Ihen  using  Strobomite,  Stroboflash  or  other  electronic  flash  units,  place the
                                     t(["-use       s.y-nchrolever at ihe 1g1l          any black and white  fihn or any daylight  type
       color filnr. LJst:(iraflitc  (lonnecting  Or;r'rl,O.rt. No. 2?71.
          Follolv thc  instrr-rctions in thc'Strobomitc  or Strobofl:rsh manual  wltetr usiug
              t h c s e u r r i t s .
                                                                                1 1
View original page 12Page 13 · Read text
Keepyourpicturessimple,a                                        Don't"jab" at the shuttbrre-
singlesubjectelementof in-                                    lease-squeezeit gently to
teresttells a moreappealing                                     avoidcameramovement.
story.


                             www.orphancameras.com
View original page 13Page 14 · Read text
Don'tcut off heads-compose         Don'tforgetto focus.          Don'tshootdirectlyinto the
yourpicturecarefully,making                                  sunor brightreflections-use
surethatall of the subjectis                                      a lenshadeto avoidthis con-
withinthe BrightLineFinder                                          dition.
Frame.


\-our' ('r,ntr.rrv i:i5   is bLrilt Lo givc ]'ou ttxcellent relsults,
lrirt, it  is  irp to  t'ou  ttt t'ntrke tht't'tt gootl picturcs  as  lvt'll.
View original page 14Page 16 · Read text
Spec'ificat'ions
            Fifm  Size: Standard  20 or 36 exPo-       Speeds:B, 1 sec.,l/2,l/4,  L/8, L/15,
            sure  rolls  of 35mm  fiIm-black    and          l/30,  L/60, l/L25, l/250 and 1/500.
            white  or  color   (prints   or  transpar-          Shutter  is cocked when film  is ad-
            encies)                                 vanced
            Slide Size: Standard  2 x 2 (35mm)          Exposure  Meter:  Built-in   coupled
              Print  Size:  Standard   jumbo   photo         single dial exposure setting
              finishers   enlargement   -   black  and          Built-in Self Timer
            white  or  color                                                        Flash:  Fully   synchronized  at   all
            Lens:  6  element,  coated,  color  cor-         shutter speedsfor Class M bulbs (5,
             rected 45mm    f /2  Prorninar                   25, M-5)  and Class X  (electronic
           Focusing:  Infinity   to  3'-   fingertip          flash) and M-2, M-25, M-258, SM
           adjustment                             and SF up to 1,260sec. Cat. No. 2721
                       f - n u m b e r s i f / 2 , 2 . 8 , 4 , 5 , 6 , 8 , 1 1 , 1 6         Graflite  Connecting Cord accepted.
            Viewfinder:  Large,   brilliant,   direct,        Construction and Size: All metal pre-
           eye  level  with   automatic   parallax          cision die-cast 33/ax 23/+x 5Y2".
             c o r r e c t i n g   B r i g h t   L i n e   F i p d e r                                                    Weight: 1 lb., 131/zoz.          Frame
           Rangefinder: Precision superimposed         Filter Mount Diameter: (slip-on)
            type   viewed   through    viewfinder        42rnm-40.5 screw-in adapter rings
           window                                  accepted
            Shutter: Copal SLK                      Accepts Series 6 lens accessories.


:
     Other Features:
               r Tripod Socket o Cable Release           o Automatic  exposure counter reset
           Socket o Single stroke rapid  film          o Film Transport indicator
           advance o Film Reminder Dial           o Standard accessory clip
                                                                          1 5
View original page 16Page 17 · Read text
Caut'i,on
                        When operating the camera rapidly, you may find
                                    that you cannot recock it. This is causedby hold-
                                  ing the advance lever to the right as you trip the
1 6                           www.orphancameras.com
View original page 17Page 18 · Read text
shutter. Releaseit; then press down again on the
shutter releasebutton and the advancelever may
be moved in the normal way.
View original page 18
Page 19 · Read text
Prize Winning P'icturesas S,impleas

             1.  Load the camera  (in subdued light)-close    the back-advance   the  filnr
             and  trip  trvice-advance   the  film  a third  time.
           1a. Set  Filni  Index  Selector dial.
            2.  Set the propel exposure.
            3.   Focus on your  subject by  rotating  the focusing  r.ing.
              '1.  Compose your  picture  rvithin  the Br.ight Line F inder Flame.
             5.  Squeeze the shutter  lelease.
             6.  Advance the film rvith one full  stroke of the advance lever.
            7.  To unload  (in subdued light),  press dorvn the lewind  crank  release
               button and rvind the film  rvith the rewind  crank  in the direction  of the
               black "R"  until  the  film  transport  indicator  stops, indicating  the  film
                    is completely  rervound. Release the cartridge-return        it  to  its can and
             send  it  to the photo  finisher.

  Flash

       1. Fit flash unit to camera.  3. Set lens opening (see guide number chart).
        2. Set synchro lever.          4. Focus, compose and squeezethe shutter release.
                               www.orphancameras.com1 8
View original page 19Page 21 · Read text
Film index selectordial markings

Some  Century  35NE  Cam-
eras are marked  as illustrated
in  the  manual   while  others
have intermediate  index lines.
The Century 35NE  film index
selector  dial,  Iike most cam-
era meter  scales, cannot   in-
clude   aII   of   the  exposure
index numbers  and  therefore
is  calibrated    in  accordance
with   general   practice,    to
include   every    third    figure
with  scale lines showing  the
setting  for intermediate  num-     In  the case of your  camera  the more  frequently
bers. Every   third  number  or   used nuneber 10 has been selected as the  lowest
Iine  represents  a 2X  change   number  rather  than  12; therefore,  three scale lines
in exposure.                    appear between 10 and 25.

                           www.orphancameras.com
View original page 21Page 22 · Read text
using                /ilters


When using filters, a filter factor must be employed since the filter holds
back some light thereby actually changing the effective speed of the film.
The simplest method of compensation is to change the fiIm speed setting
on the film index selector. Since a difference of three scale lines on the
film  index selector is equivalent  to a 2X exposure difference, a  filter
factor of two  is accommodated by moving the selector dial three scale
Iines toward a slower film speed. (i.e. from 100 to 50.) A filter factor of
4 requires that the fiIm index selector dial be moved 6 scale lines toward
a slower film speed (i.e. from 100 to 25); other fi.lter factors can be ac-
commodated similarly.
After removal of filters be sure to reset the fiIm index selector dial to pre-
vent making over exposed pictures.
The illustration  on the other side of'this sheet indicates the intermediate
calibrations  of the film index selector dial.
View original page 22
Related documents and language editions

From the M. Butkus archive. Original publisher and archive notices are retained.
Check the model and edition against your equipment.
PDF verified 2026-10-10.