Film cameras
Graflex No 10 Cirkut User manual
User manual for Graflex No 10 Cirkut. 17 pages in English. Read the original PDF, download or print a copy without registration.
17 pagesEnglish3.5 MB PDF
Loading your manual…Open PDF directly
Document details
- Brand
- Graflex
- Model / document
- Graflex No 10 Cirkut
- Document type
- User manual
- Language
- English
- Pages
- 17
- File size
- 3.5 MB
- Category
- Film cameras
- Document date
- Not specified in catalog
Search available document text
Find a term, then jump to its page in the original PDF. Image-only pages may not be searchable; check the PDF for exact wording and diagrams.
Page 1 · Read text
www.butkus.us


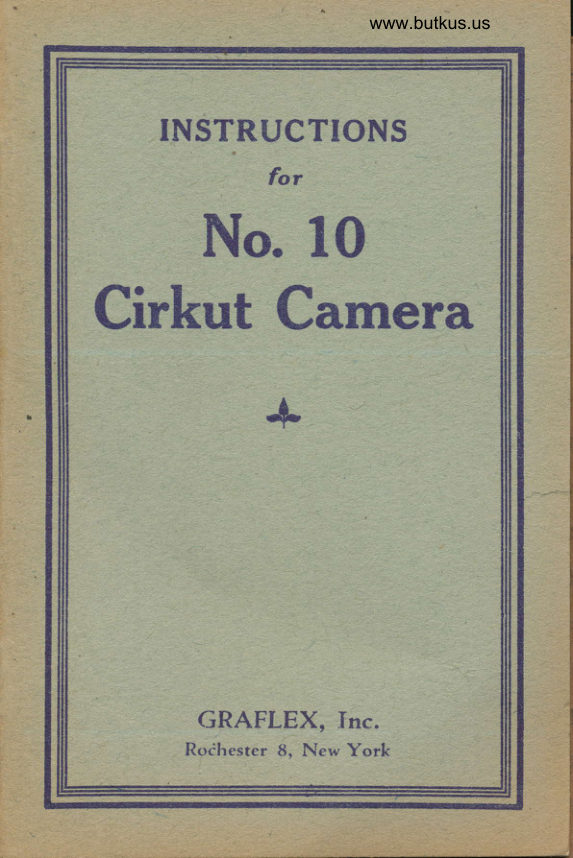
   INSTRUCTIONS
               for
    No. 10
Cirkut Camera
     +


      GRAFLEX, fnc.
         Roihester 8, New York
View original page 1Page 2 · Read text
Instructicins for operating the
 No. 10 Cirkut Camera
-|IIESE   instmctions are for the No. 10
  I  Cirkut t'amera, fitted .rvith a convertible
lens lvith focal lengths of |\yz, 18 ancl 24
inches. These instructions are also applicable
to the use of other lcnsc,s.


                                  Fie. 1
       Loading the Film Box
  Unserew the milled head A, Fig. 2, disconnect-
ing the motor from the winding drum. Turn the
small winding key B, Fig.2, until the number 126
appears in the opening. Turn the lower milled
head C, Fig. 2, until the white line is opposite
number 6. Open the film box by pressing the
View original page 2Page 4 · Read text
Venmo @mike-butkus-camera  Ph. 2083
PayPal Name  Lynn@butkus.org      www.PayPal.me/lynnbutkus
View original page 4
Page 5 · Read text
center fits into the slot in the end of the spool.
When raising the lower spool center, the locking
bar will fall into the slot, securing the center in
the eorrect position. Release the clamp, for


                                     Fie. 3
holding the black paper on the drurn, by pressing
upward catch D, Fig. 3, and inserting the end of
the black paper under the clamp, which should
then be pressed firmly into position, allowing the
projecting teeth to perforate the paper. Make
sure that the catch at the upper end of the drum
has engaged the clamp before closing the film
box.
View original page 5Page 6 · Read text
www.butkus.us
   The paper must be started true and even;
 otherwise an unevenness of motion will be
  noticed, causing blurred portions in the negative.
  Close the cover of the film box by pressing down
 on the side arm G, Fig. 3. See that both the top
 and bottom catches are securely locked. Turn
 lower milled head C, Fig. B, one and one-half
 revolutions, bringing the white line to zero and
 causing the key B, Fig. B, to turn until O appears
 in the opening.
   This last operation has wound the black paper
 from the receiving drum and brought the film
 into position for an exposure. The milled head
 A, Fig. 3, should now be screwed down firmly.
 This engages the motor with the receiving drum.
 Set the camera on the tripod, open the front by
 pressing the concealed button on the top near
 the handle, and draw dqwn the bed. Level the
 camer& carefully by the spirit level on the bed
 of the camera. Do not turn the tripod screw too
 tight or an unsteady movement will be caused,
 producing vertical lines in the negative.

      To Focus wirh Doublei
         or Complete Lens
  Draw out the lens standard until the pointer,
at the left on the front standard, indicates 100
feet on the rear scale H, Fig. 4. Release the
ground glass focusing back, by pressing the con_
View original page 6Page 7 · Read text
www.butkus.us

a                                                         l'ig. 4
     cealed buttons J, J, I,'ig. 5, on each sicle of the
     camera, and draw it out as far as it will come.
    when it will lock in position.
      The ground glass is divided so that the left
                                          5
View original page 7Page 8 · Read text
www.butkus.us
half swings out of the w&y, folding over the right
half. When focusing, the hinged portion should
be swung back until it catches, the camera is
then focused in the usual manner bv the milled


                                                                                                            ri
                                                                                       .i                                  Fig. 5
focusing screw U, Fig. 9. The camera should be
swung from side to side, to make sure that every-
thing desired in the view is included. The rising
View original page 8Page 9 · Read text
and falling front can be raised or lowered to
        secure a well balanced picture and include the
         required sky or foreground, by turning the milled
        screw head V, Fig. 9. The lens board may be


              www.butkus.us

*
                                         Fie.6
         tilted by releasing the set screw Z, Fig.9, when
       photographing groups of several rows of figures.
View original page 9Page 10 · Read text
www.butkus.us
  When the subjeet is properly foeused, swing
 the left half of the ground glass out of the way,
 leaving the left half of the camera open as in
 Fig. 5. Press in on the top of the two side arms
 Y, Fig. 6, holding the focusing panel, and push      {
 the focusing screen back into the camera body
 until it is held by the catches J, J.                       {
   Select the gear wheel indicated by the pointer
 on the rear left scale H, Fig. 4.  If the pointer
 falls midway between two numbers, select the
 gear wheel indicated by the next higher number.
Screw the shaft of the gear selected firmly into
 the round opening K, Fig. 10, on the bottom of
the film box. Insert the key into the square
opening L, Fig. 10. Be sure to wind the motor
spring fully.
  Place the film box on the back of the camera
making sure that all four hooks are engaged.
Turn the camera until the lens points to the ex-
treme left of the subject, and slide it forward on
the tripod top until the gear wheel engages the
rack on the tripod head. Do not mesh the gears
too closely, about half way is sufficient. If the
gears are meshed too closely the camera will
vibrate and cause vertical and irregular lines in
the picture.                          J
             Exposure                      I The scale and pointer M, Fig. 2, page 2,
indicates speeds from Ll2 to UL2 of a second.
                                E
View original page 10Page 12 · Read text
www.butkus.us
Estimate the exposure required and set, the
pointer at the nearest figure on the scale to the
estimated exposure. Open the lens shutter and
                                           t


                                    Iig. I
 set the diaphragttt at the required opening. The                                                                                                                                                                                                 st'+. scale, Fig. 7, shows the relative value of the stops
 when used with the different lens combinations.                              I
  To start the camera turn the depressed key N,
 Fig. 2, page 2, near the speed indicator; this
                                 lo
View original page 12Page 13 · Read text
opens the exposure slot and simultaneously starts
        the motor. When the camera has revolved a
           sufficient distance to include the required view,
                                           closes the ex-*       give the key another turn; this
          I        posure slot and stops the motor.


          I
  I?


                                               Fig. 10
           In the center of the back of the film box there
          is a concealed button O, Fig. 2, page 2, which,
       when pressed at the termination of the exposure,
          perforates the film, showing where to cut it apart,
       when more than one negative is made on the
        I
       same roll of fihn.+fl
            To Remove the Film
1         Loosen the rnilled head A and turn the small
        crank P, Fig. 2, page 2, at the top of the film
        box, in the direction indicated by the arrow.
View original page 13Page 14 · Read text
www.butkus.us
This will rewind the film from the receiving drum
and bring the black paper into position. The
film may now be removed from film box in day-
light.
 To Remove Film Box from Camera
  Press backward the metal button on the right
side of the film box W, Fig. 1, and at the same
time raise the box which can now be readilv re-
moved.
     Focusing with Rear Single
          Lens (18 inch)
  Draw out the front of the camera to the 100-
foot mark on the forward, left scale, R, Fig. 4,
page 5. Unscrew the front cell of the lens and
remove it from the shutter. Focus on the ground
glass panel, as previously directed, and select the
gear wheel indicated on the front left scale R
(18 inches) and proceed with the exposure,
following instructions on page 8.
    To Focus with Front Single
         Lens (24 inch)
  Remove the front and the rear cells of the
lens from the shutter. Place the front cell in the
baclc of the shutter. Draw the lens standard out
to the edge of the bed, and rack it forward until
the pointer indicates the proper gear on scale S
(24 inch), Fig. 4, page 5, on the right of the bed.
                                 t2
View original page 14Page 15 · Read text
To Determine Amount of
          Film Required
   The scale around the top of the tripod, Fig. 11,
 indicates the amount of film required, in inches,
 for the different number of degrees that the view
 will embrace. When focusing, the lens should
 be pointed to the extreme left of the subject to
 be photographed and the black tab, by which the
 scale is moved around the tripod top, should be
 moved until it is directly under the center of the
 back of the camer&, as indicated by the black
 line T, Fig. 11, on the revolving platform.


                                  Fig. 11
  The lens should then be pointed to the extreme
right of the subject, permitting the sliding scale
to remain in position. The black line T will then
indicate the number of degrees the picture will
include, and also the length of film, in inches,
with either the l0r/2-, 18- or Z4-inch lens, as
shown in Fig. 8, page g.
  To determine the amount of film used, by the
indicator on the top of the Film Box, add to the
                                 t3
View original page 15Page 16 · Read text
www.butkus.us

number appearing in the small opening, the num-
ber indicated by the white line on the milled
head C, Fig. 2, page 2. This will give the total
amount of film used at anv time.

   Sequence of Operations
       Level the camera.
       Adjust the ground glass foeusing screen.
       Focus the camera.
      Open the ground glass foeusing screen.
       Attach the film box.
      Wind the motor.
       Attach the proper gear.
       Set the speed indicator.
       Adjust the diaphragm or lens stop.
      Make the exposure.
       Stop the motor.
       Puncture the film.
      Note the amount of film used, and
        amount rematning.
  14. Rewind film or make other exposures.
View original page 16Page 17 · Read text
Cirkut Film
   'When         ordering film for the No. 10 Cirkut
 Camera, be sure to specify " White Label Cirkut
 Film for No. 10 Cirkut Camera. " Both Veri_
 chrome and Super XX pan Film may be
 ordered in the follou'ing sizes:
              6in.x 5ft.
                     6 in. x 10 ft.
              8in.x 5ft.
                   8 in. x 10 ft.
                  10in. x  4ft.
              10in.x 6ft.
                 10 in. x 10 ft.

    For Prices See Your Regular FiIm Dealer.

           GRAFI]EX, INC.
         Rocnpsmn 8. N. Y.


63A-34?                                  Printed in U. S. A.
View original page 17From the M. Butkus archive. Original publisher and archive notices are retained.
Check the model and edition against your equipment.
PDF verified 2026-10-10.