Film cameras
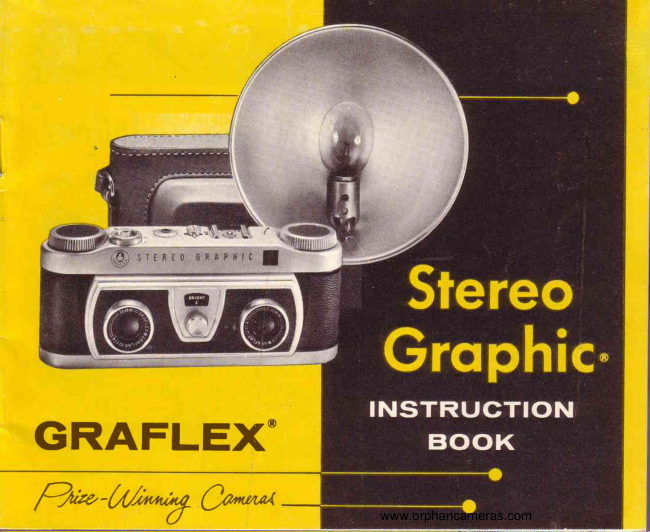
Graflex Stereo Graphic User manual
User manual for Graflex Stereo Graphic. 25 pages in English. Read the original PDF, download or print a copy without registration.
25 pagesEnglish3.6 MB PDF
Loading your manual…Open PDF directly
Document details
- Brand
- Graflex
- Model / document
- Graflex Stereo Graphic
- Document type
- User manual
- Language
- English
- Pages
- 25
- File size
- 3.6 MB
- Category
- Film cameras
- Document date
- Not specified in catalog
Search available document text
Find a term, then jump to its page in the original PDF. Image-only pages may not be searchable; check the PDF for exact wording and diagrams.
Page 3 · Read text
I
                            Page
Easy A  . . B  . . C picture taking..     3
Parts of the Stereo Graphic. .. . . .    4-5
What kind of film to boy..           6     YOU NOW OWN A
What kind of flash bulbs to buy..     6
Taking careof your camera.... . .     7                Stereo Grqphic
l,oading your Stereo Graphic.  . . .   B-9
Setting the exposure dial              t0         Your  Stereo Graphic goes beyond
Daylight and Flash settings                      l 1          the  capabilities  of previous stereo
Taking the picture                l2-13        cameras in that   it gives you maxi-
          "B"-bulbUsing the             setting... . .     t4      mum three dimensional effect with-
Tripod & Cable Release.             t4          out having to manually focus your
Rewinding the film                    l5         camera.  For  this  camera has  a
Unloading the camera                 l5         unique  and  exclusive method  of
How to take flash pictures.       t6-17         focusing  known  as  Depthmaster
Installing flash batteries. . .       1B-r9         Auto-focus. Even a beginner can get
Stereo Graphic Accessories       20-21            thrilling   lifelike  three dimensional
Stereo Graphic Viewer            22-23          pictures with the Stereo Graphic.


                                                www.orphancameras.com
View original page 3Page 4 · Read text
{ 1

A.                                                                                       ; there are'five
            positionsmarked Cloudy,Hazy, Bright, BrUliant andf l16 for
            Color Film (alsoidentified by f/numbers).


     a                        .

C.                                                                                      ; this automati-
              cally cocksthe shutter, preventsdouble exposures,and turns
            the film counter dial.


      our new Stereo Graphic is different from other stereo cameras. The
Depthmaster lens system used in the Stereo Graphic eliminates the need
for a focusing mechanism and gives you greater depth of field than other
stereo cameras under normal conditions. Compare the slides taken with
any other stereo camera and the slides taken with a Stereo Graphic and you
will see the difference. Stereo Graphic slides are always in focus from fore-
ground to background.
                                           www.orphancameras.com
View original page 4Page 6 · Read text
our Stereo Graphic camera is a precision instrument designed and built by
        the world's most skilled photographic craftsmen. They have for years
          built  the famous Speed Graphic cameras used by  press photog-
        raphers around the world.


                                                                     Co ble
                                                                           Releose Socket


     Rewind
  Releose Button

                                            www.orphancameras.com
View original page 6Page 7 · Read text
Atry type  of 35 rnrn. film can be used in the Stereo Graphic,  but you
wili finA that  the easiest and least expensive is color  filrn that  gives you
a full  color positive  transparency.  This  includes:  Kodachrome,  Ansco-
chrome.  Ilkfachrome,  Ansco Color and several others  that  your photo
dealer can recommend.
   All  color  films  are identified   for  outdoor   (daylight)  use or  indoor
(tungsten)  use. You can use either type and get excellent  pictures  as
long-as you carefully  follow'the  instructions  on pages 10 and 11.
   fn***   films come in 20 and 36 exposure rolls. NOTE: on a 20 enposure
 roll you  witt get 16 pairs of stereo pictures; on a 36 enposure ryll you will
get ig  pairs oy  tttrio  pictures. Kodachrome   film  is also available  in size
5lS, ,nud* especially lor stereo cameras, which gives 20 pairs of pictures
on a roll.


Your  Stereo Graphic  is synchronized  for  all M type bulbs such as No. 5
and  I.{o. 25 (M-t  bubs  can also be used provided  you have the M-2
Graflash B-C  unit).
  These bulbs are available with  clear or blue glass. {Jse blue bulbs (No.
58 and No. 258)  for daylight  type color film and clear bulbs (No. 5 and
No. 25) for black and white  or tungsten  (indoor)  type  color  film-  F-or
detailed instructions see pages 10 and 11.
                                www.orphancameras.com
View original page 7Page 8 · Read text
rotect it from dust, dirt and rain. It is a good idea to k'eepthe
                camera in the leather carryirg case with the cover fl"p
                  closed whenever the camera is not in use.
  Do not attempt to oil or repair your STtrREO GRAPHIC  yourself. Re-
member that on general principles it is a good idea to have your photo dealer
check your camera every few years to make sure it is irr tip-top operating
condition.

  The surface of the lenseshas a hard coating which will reduce internal re-
flections and help make clearer, brighter color transparerlcies.To preserv€
the coating, clean the lenseswith a soft camel's hair brush or lens tissue,
Moisten the lens tissue with a drop or two of lens cleaner. Do not apply the
lens cleaner directly to the surface of the lenses.When cleaning the lenses,
wipe them with smooth, easy motions. Avoid scrubbitg the lenses.


                                              www.orphancameras.com
View original page 8Page 9 · Read text
l. Ilernove thecarnera  frorn t,he
leather    carrying    case   by
loosening   the   large   t,humb
screw  (fiS. 1) on the  bott,orn.


2. Turn  Lhe Lock lever on  t,he
bot,t,orn of  the  camera   in  a
count,erclockwise  direction
(fig. 2).


3. ]\ow  that the camera rs'urr-
Iocked,  t,he bot,tom and back
can  easily  be  slipped  down
about, %  inch  and  lifted   off
(lig. 3).


                   www.orphancameras.com
View original page 9Page 12 · Read text
*             ,DAY.LI,G.HT$TTTIilGS
                                                   Daylieht  Color Films.    Kodachrome A
                                               Kodachrome    Ektachrome       (indoor)
                                               Ansco  Color   Anscochrome   No. 85 Filter
Beach; water and snow scenes in bright sun        Brilliant                           Brilliant
                                                tl1r                  f lL6                    f ILL
Nearby'subjects     of ayerage  color,  sunny,            Bright          Brilliant         Bright
clear sky                                             fls            tlLL            tls
Hazy,   light  elouds,  tqansparent  shadows,           Hazy          Bright         Hazy
with  no sharply   defined  edges                     tls.6          fls          tls.6
Cloudy,sky,   oYercast,; no shadow**               Cloudy       Hazv        Cloudy
                                                            tl4           t15.6            fl4
Open shade.**  Subject  in open with ample  light     Cloudy        Hazy        Cloudy
from  sky  overhead,  but  not  in  direct  sunlight.          fl4          tls.6           tl4
   **Note   that  pictures  taken  under  these ccinditions -may have an ex@ssive bluish  cast.  Picture
    takins   is not iecommended  under  these conditions  because of  difficulty   -of judging   light  values.
   Try  o-ne exposure at indicated  setting, and  if poseible, tine with  the next  larger lens opening.   xFor         Siereo Gruphic  with  shutler  seleclor  3ol sl  "1."


                                           www.orphancameras.com
View original page 12Page 14 · Read text
When using any
                                         stereo camera it is important to hold the cam-
                                        era perfectly straight and leael. Pick up with
                                        both hands and hold as shown in frg. 2. Hold
                                          the camera tightly  against your face so that
                                    you can see through the viewfinder window.
                                              Pull your elbows in close to your body so
                                             that the camera will be as steady as possible.IJ
                                      -To  get the best pictures from your camera,
                                       consider the sceneyou see through the view-
                                             finder  . . .
                                      Get the subject in the center of the picture.
                                           Don't be afraid to get close when photo-                    frg. 2                                              gr aphing peopte andpets (y our Ster eo Gr aphic
                                                       will give you sharp focus as close as four feet).
                             Check to make sure that  horizon lines are not                                fig. 3                                           tilted  at an angle.
                             Keep trees, poles and buildings  vertical so they
                             do nof appear fo be falling oYer.
                            Make sure your picture has a pleasitg backgroundl                            because it  will be sharp from foreground to infinity.
                                                       -Simply  press the Shutterffi                             ReleaseButton  in the center of the Shutter Selector                                                                             "click"                                            (fig. 3). You will hear an audible       as the shut-
                                        ter opens and closes. Wind  the  film  for the next
                              exposure by turning the Winding Knob.
                                                    www.orphancameras.com
View original page 14Page 15 · Read text
with each roll of film you buy. When using your
         STEREO GRAPHIC  at slow speeds it  is recom-
           mended that you use a tripod and cable release.
          Rememberthut the shutter wiII remain open as long
            qs the shutter release is depressed.

                                                              - Y o u r S T E R E O
          GRAPHIC  has a standard tripod socket (fiS. 1)'
             Just screw your camera into position.

                                                     -Atty  stand-
               ard  European    or American-made cable
                release  will    fit   the Cable Release Socket
                 (fie.2).


ft1.2                                www.orphancameras.com
View original page 15Page 16 · Read text
Iig. I

                                                           -Turn   the rewind re-
                                                                               "R."                                    lease button  until the bar points to      Hold
                                      the button down with  the lock pins engaged in
                                      the key slot until the film is completely rewound
                                                 (fig. 1).
                                     Turn  the rewind knob  in the direction of the
                                   arrow  (fig. 2). Rewind  the  film  until  the knob
                                       turns very freely  (to check-release  the button,
                                                                      if  the knob  continues to turn  freely, you may
                                remove the back and take out the film).                                                                                           "L"                                     Free the rewind releasebutton and turn  it to
                                   so that  it cannot be accidentally depressed. If  it
                                    should be accidentally depressed with  film in the
                                  camera, the exposure counter  dial  will  not cor-
                                            rectly register the number of exposures left to be
                             made on the film.
                                   fte. 2                                                             fie. 3
                                    -After   the film has been
rewound release the Lock on the bottom  of the camera
(fig. 3). Slip the back down  tl"  and  lift  off. Remove
the film cartridge.  'Have       a new roll of film handy so that you can imme-
diately reload your camera, and it will always be ready
for use.
  Exposed film should be processed promptly.  Take  it
to your camera dealer or follow the processing instruc-
tions packed with  the film.
                                               www.orphancameras.com
View original page 16Page 18 · Read text
Your Stereo Graphic will accept,three Graflash units.
The P-L uses pholoflash pen{ight batteries, and the
B-C and M-2 B-C accept a 22ll  volL photoflash bar-
        'I'he tery.        lirst two units uccepl the bayoneL base
 f arnps such as t,henurnber 5, 25, SNt and SF lamps,
ancl the last riccepls the srnall N'I-2 lamps, Lhe small
reflecLor providing ellicienL distribution  of lighL.


                        -Graflash   unifs  connect
direcLly to the Stereo Graphic canrera wilhoul cor.ds
or special mounLs. Inserl the foob of the flash uniL
inlo the flcint of t,hecamerii shoe (located on the top
of the camera) rnoving the unit backwarcl as far as it
will go freely. Grasp Lhecamera and flash firmly and
slide the unit unlil Lhe curved section of the foot is
llush with the fore parb of the shoe. This compleles
the fitting and prepares the equipmenl for use. To
rernoye the unit apply pressure Lo Lhe rear of Lhe
flash case, gripping Iirmly so t,haLit does noL dr:op
out of the shoe when free. Do nol  lit or renlove the
Graflash with  iin un{ired flash lamp in place as it
may {ire accidenlally during {itLing or removal.

                                                www.orphancameras.com
View original page 18Page 19 · Read text
The Graflash units are offered less batteries in order
    that, fresh ones can be supplied and installed at the
    tirne of purchase.
                     Obtain  two  penlight  batteries
    identified  for photooraphic use. Loosen the slotted
   screw attaching the outer case correr with a coin or
    finger tips. Remove the plate exposing the interior.
    Install  the batteries observing the arrows conYen-
    iently imprinted  into the inner portion of the case.
   Always insert the batteries so that the contact or top
   end is inserted in the direction of the arrow which
    will be behind iL. Replace cover and tighten down.
                          -Loosen  the large screw
   on the side plate with a small coin or finger tips. Re-
   morre the plate exposing the interior. With  the re-
    flector facing left,, see illustration, the bottom of the
   battery should also face left,  i.e. minus  (-  )  left,
   plus (*)  right. After the batLery has been positioned
   replace the cover and tighten with the screw. With
   good care the battery should last 1-2 years. NOTE:
   Longer battery  life can be expected if lamps are not
     left in the unit when not in use.
                                        Groflosh  P-[ ond Groflosh B-C-The  Gra-
    flash reflector accepls the standard bayonet type M and F lamps, To  fit the larnp, slide
   the base portion into the socket as far as it will go freely. Apply pressure to the top at the                                                                    'fhis
1g same time pulling forward slightly (seeillustration).        will allow the catch to lock the
                                                   www.orphancameras.com
View original page 19Page 20 · Read text
lamp base into  position and the  unit  will  then be
ready  for  use. To remove the lamp  depress the
ejector at the base of the socket.

M-2 Graflqsh B-C-TheM-2lamp  has a pinlessbalse
and does not have to be turned or aligned in any
special way. Merely press the base of the lamp into
the reflector socket until  it locks in place. To eject,
simply push the ejector button on the back of the
reflector.
                   -It   is good practice to check the equip-
ment from time  to time  for  battery  strength and
continuity  of the circuit. For this obtain from your
photo dealer a suitable test lamp. Fit the lamp into
the  Graflash reflector socket as described above.
With  the camera unloaded or with the lens covered
trip once or twice at a slow shutter speed. Each time
that  the shutter  is tripped  the lamp should glow
momentarily. Batteries may lose their e{ficiency with
age as well as with  use. Strong batteries are your
best assurance for constant results. We recommend
replacement  of  penlight  batteries  approximately
eyery six months and 22rl  volt  batteries approxi-
mately eighteen-twenty-four   months.
            -On  one side of theGraflashB-C units
will be found an outlet  for a two-prong household
plug. This accepts a standard connecting cord for
Graflite Extension Flash which your dealer will be
glad to show you.                                              www.orphancameras.com                           l 9
View original page 20Page 22 · Read text
Grqflex Speed Tripod

     gog{tlipod    is one of the most useful of accessories. The Graflex  $
  Pry:{ tiip:d  is an idealunit fo1vo-qrsrereoGraphic.It is r.rss"J,   [grr.tyeigh!,  comp_act. opens  to 67 inches,  cloies  to 28 in"cies.
  w.gtghs only^A/2  lbs. Complete  with  Pan-Tilt  Head and  lateral
  adjustment  for leveling the ^cgmpra. Quick  acting and lockffi-iee
  extensions with  shake proof  lock nuri  ar rhe t"F.  D;rLi;;;i;;--
  sion  center  post   for  quick   height   adjustm*ofi.    li;;;"r"t";liy
  priced, too.


 LENSSHADE & FITTERS     CARRY-AIL CASE
Filters  for  color  films  especially   Handsome  grey  top  grain  cow-
4esigned fgr the Stereo Graphic".    hide. A deluxe case lo carry cam-
Supplied  _in  pairs  with   slip-on     era,  flash,  flash  bulbs,   filrn,   fil-
mounts.  Lens shades eliminate     ters, lens shade, exposure meter
undesirable   reflections  on  the    and other small equipment.  Solid
camera   lenses.  Slip-on   design    reinforced  construbtion.    Full
permits  use of  filters, sunshades,    leng,th shoulder  strap  and  pad.
or  both.  Camera  case may  be    Lock and kev.
closed while  filters  are on lenses.                     www.orphancameras.com           z
View original page 22Page 23 · Read text
The Stereo Graphic Viewer has a built-in  battery  operated light and
ground glass diffusion screensfor best possible illumination of the
slide. You will find it easy and quick to adjust and easyto use.
,i,.itlti:ririr',r,::'i,:i-ii',i-Dropa slide in the slot in the top of the viewer with
the slide turned  in accordance with  the directions printed on  it. Hold
the viewer in either the right  or left hand and press the red bar in the
base of the viewer to turn on the light.  (l\ote-fresh   batteries should
be supplied when the viewer is purchasedfrom your dealer. See below
for loading.) Focus the viewer with either the right  or the  left hand
red knob at the sides of the viewer. To gain proper stereo effect,  it
may be necessary to adjust the separation of the lenses. The control
knob  for  this  is conYeniently located at the upper right hand corner                                                                          '
of the front of the viewer.
 .. , .',  ,,,*;'1.:., ,'..i:     ,   '   :-Loosen  the 2 screws in the base of the
viewer. A coin can be used for the purpose. Separate the top and bot-
tom halves of the rear part  of the viewer.  Insert 2 size D standard
 batteries for photoflash or industrial  use. Be sure to insert them with
 the tops poiniing  in the same direction as in a flashlight.  Refit the top
and bottom sections, sliding them into place, so that they will properly
 connect with the front  part of the viewer. The screws are held in place
 with retainers, so that they cannot be lost. A coin can be used to re-
 tighten them.                                www.orphancameras.com
View original page 23
Page 24 · Read text
SIDE
ADJUSTS FOR, EYES.
FOCUSING KNOB.


BOTTOM

PUSH BUTTON.
LOOSEN sCREWs TO
REMOVE COVER.


  TOP WITH
COVERREMOVED
FLASHTIGHT BULB.
D-SIZE FLASHLIGHT BATTERIES.            o

                                              www.orphancameras.com          23
View original page 24From the M. Butkus archive. Original publisher and archive notices are retained.
Check the model and edition against your equipment.
PDF verified 2026-10-10.