Sewing machines
Grover & Baker Family — User manual
User manual for Grover & Baker Family. 36 pages in English. Read the original PDF, download or print a copy without registration.
36 pagesEnglish86.1 MB PDF
Loading your manual…Open PDF directly
Document details
- Brand
- Grover & Baker
- Model / document
- Grover & Baker Family
- Document type
- User manual
- Language
- English
- Pages
- 36
- File size
- 86.1 MB
- Category
- Sewing machines
- Document date
- Not specified in catalog
Search available document text
Find a term, then jump to its page in the original PDF. Image-only pages may not be searchable; check the PDF for exact wording and diagrams.
Page 1 · Read text
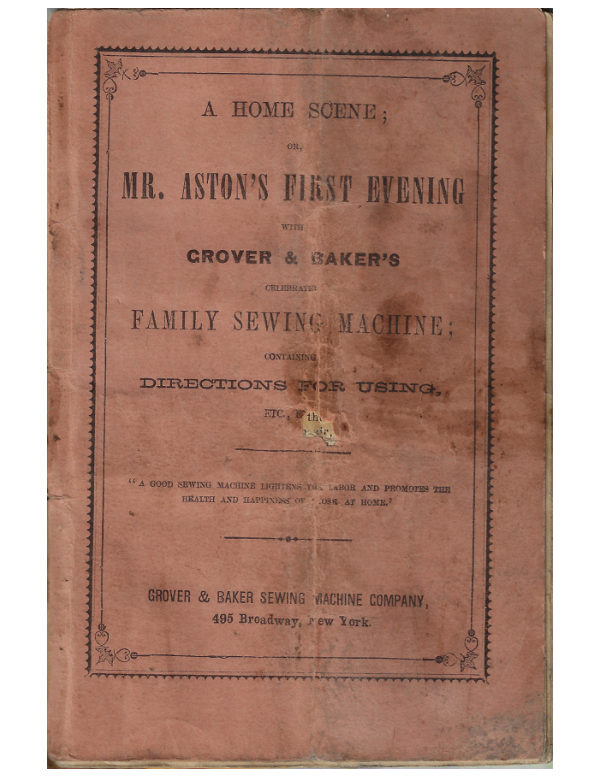
A HOME SCENE;


                            OR,

MR. ASTON'S FEST EVENING

                          WITH

    GROVER & BAKER'S


                           CELORRATE:

 FAMILY SEWING MACHINE;


                          CONTAINING
 DIRECTIONS FOR USING,


 66 A GOOD SEWING MACHINE LIGHTENS TOA LABOR AND PROMOTES THA
          HEALTH AND HAPPINESS OF OSS AT HOME, *


   GROVER & BAKER SEWING MACHINE COMPANY,
            495 Broadway, few York.
View original page 1Page 3 · Read text
A HOME SCENE.


   In a cosily furnished room of a neat house in East - Street,

 were a family group, consisting of father, mother, and three
children, the latter reading from a book in a low tone, but an

 occasional comment in a loud one, would startle their nervous

 mother, who, at last rising from her seat, exclaimed with im-
patience: "I can stand this no longer; I must have the chil-
 dren sent to bed." Ringing the bell, she summoned Jane to
take them away, that she " might have a chance to breathe,
 as she expressed herself.
  Mrs. Aston was not what would be called an impatient
mother; but at the close of the day, wearied and worn, her

 work still unfinished, she felt that of the cares of this life she

possessed a large share. Her husband sat with his newspaper
reading; but the nervous manner of his wife arrested his at-
tention, and he thought of the time when her brow was as
serene as the Summer sky, and her step buoyant and light.
" It is plain," he soliloquized, "that Mary needs more com-
pany, more exercise in the open ar, to restore her wonted
calmness. I will give up my paper this evening and take her
out." He addressed her, saying: " I see there is a concert
given at Niblo's to-night, Mary; suppose we attend. It will
do you good."
  Mary glanced at the work piled on the table, which at that
particular moment seemed to rise mountain high, and sighed
as she replied :
    "I would enjoy the music very much, but am so much in
arrears with my sewing, that I can not afford the time. I must
devote every moment to work, for the children must have new
clothes. I find it difficult to get a seamstress in the house;
besides, it is harder to give directions and make one under-
stand what my wishes are, than to perform those duties
myself."
 A shade of disappointment passed over Mr. Aston's face, as
his eyes followed the direction in which his wife's were fixed
To his dismay, he saw the pile of unfinished garments she har
View original page 3Page 4 · Read text
2

spoken of. He hitched about uneasily in his chair, and finally
resumed his paper, having arrived at the conclusion that sew-
ing was a troublesome thing. How to get rid of it he could
not tell.After attempting to read intently for some minutes,
haunted all the while, however, by the work on the table at
his elbow, the bright colors and cheerful patterns of which
seemed changed into so many mischievous elves, who were
 trying to destroy his happiness and render him uncomfortable,
a change at last passed over his countenance, as his eye rested
on an advertisement, and he exclaimed half aloud: "Ihave
it now." Heread:
   66 THE GROVER & BAKER SEWING MACHINE COMPANY,having
 greatly increased their facilities for manufacturing their cele-
 brated FamilyMachines, with all the recent improvements,
 offer for sale a New Style Machine of beautiful finish, at greatly
reduced prices.''
  And in a louder tone, so as to be certain of attracting his
 wife's attention, he continued to read:
   • It is no longer questioned that these Machines are the best
 in use for family sewing."
  " But," interposed Mrs. A., " I don't think they will do my
 sewing well enough. I am very particular, as you know."
  Mr. A., without answering, read further:

 manner." They, hem, fell, gather, and stitch in the most superior
  And then inquired: " What more can you have, Mary?"'
  Mrs. A. answered: "I am afraid I have not mechanical
 skill enough to manage a machine. It would be a failure in
my hands."

   "" AndWell,arelistenthe again,"only Machinessaid Mr.inA.,the" marketto what thatI willarereadso well:"
 and simply made, that they may be sent into families with no
 other instructions than are contained in a circular which ac-
 companies each Machine, and from which a child of ten years
 may readily learn how to use them, and keep them in order."
   Mrs. A. paused awbile, but at length said, interrogatively :
   "I wonder how fast they will sew? I feel that I am getting
 interested "
   In answer, Mr. A. read :
  "They make upward of fifteen hundred stitches a minute."
View original page 4
Page 5 · Read text
3

  "But it is so much money to give just for sewing," said
Mrs. A.

   " Not at all, Mary. I am told they last a lifetime," replied
 the husband, reading again:

    " And will do the sewing of a family cheaper than a seam-

sters can do it, even if she works at the late of one cent an

   After pausinga minute, as if in deep thought, Mr. A. re-
sumed his reading:
  " Is there a husband, father, or brother in the United States,
who will permit the drudgery of hand-sewing in his family,
when a Grover & Baker Machine will do it better, more expe-
 ditiously, and cheaper than it can possibly be done by hand?"
  Throwing aside the paper, he started to his feet and said :
  " I can not withstand that appeal! I must go and see these
Machines! I must have one! Mary, you shall have your
evenings, aye, and your afternoons, too, for relaxation and
mental culture! I must bave been asleep not to have seen
through all this before!"


gentlemanOn a fine wereSpringto morning,be seen leavinga few daysa housethereafter,in Easta -ladyStreet,and
whose purpose might have been discovered, if one had accom-
panied them a short way. But there was no mystery about
it; they were going to select the fest Sewing Machine that
could be found, with a view to purchase; and after calling at
the different depots for the sale of machines, and making ex-
aminations of the sewing and mechanism of all the various
kinds on sale, they decided that the GROVER & BAKER Machine
was the one which would best suit their purpose. They found
it simple, its use easily learned, and required no keeping in
 order-that it would always be ready for work-that it made a
very beautiful and durable seam, that would not rip, if the
thread broke-that (unlike all other machines) it required no
rewinding of thread; but sewed from the two spools, as ob-
tained in the stores; that it was adapted to all kinds of thread
and material, by a mere change of spools, and sewed an elas-
tic seam, that would permit it to stretch in washing and iron-
ing, without breaking the thread. Mrs. Aston was especially
delighted, that while the machine would sew a seam that was
as durable as the fabric in wear, it could easily be removed by
View original page 5Page 6 · Read text
untieing three stitches of that part of the seam that had last
been sewed. She was also gratified to find that she would
not be obliged to have recourse to the hand-needle in finishing
the garments-that the machine itself did it.
   It was purchased, and Mrs. Aston sat down to receive in-
structions for the use thereof. An hour sufficed to accomplish
this; and with a gratified smile, she returned home in time to
welcome her little assistant, which was to do so much for her
relief. The elder children were silent with curiosity; baby
was so much amused by the gentle murmuring sound, that he
fell into a sweet slumber.The mother glanced triumphantly
at the pile of work on the table, which had been cut out and
prepared for the next month's sewing; she seated herself and
took the first garment, which was a dress for Miss Mary, the
eldest daughter, the seams of which were finished in the next
twenty minutes.Then a jacket for Master Fred was finished
all but the button holes.Then baby's turn came next, and
the skirt of a little dress was tucked and ornamented in a style
that Mrs. Aston would have thought impossible, if she had
been obliged to do it by hand. Then a Summer cloak was
embroidered for the little fellow, and when the tea-bell rang,
and Mr. Aston rose to go to the dining-room, a more smiling,
gratified face he had not seen his wife wear for a long time.
At table, the only subject of conversation worthy of attention
was the new machine.
  Mr. A., after tea, jocosely remarked: " I think I will make a
goodoperator, Mary;"' and seating himself at the machine.
said: See me; I take hold of the lower part of the wheel
with my right hand,and pull it in a downward direction.
What now? it does not run in the same manner in which I
started it.'
  " Well," answered Mrs. Aston; " you do not keep up a
regular                    with your foot.
terested in watching the needle, the motion of your foot is
arrested, and the wheel runs the contrary way before you are
aware. To avoid this, keep as good time as if you were play.
 ing a melodeon: press first on the heel, then on the forepart of
the foot, without raising the toes."
  6 Very true? responded Mr. A.: 6 the motion, as well as
the needle, requires some thought at first.  I did not think of
    Now I have gained that point, and placed my work un-
der the needle, it does not feed through."
  Mrs.A. came to the rescue, saying: "Perhaps you have
carelessly placed the work on the feed in a manner that permits
it to be caught between the needle-plate and the feed, which
View original page 6Page 7 · Read text
5


 can be avoided if care be taken in putting the work under.
 The real cause now is, that you have forgotten to lower the
 presser, which keeps the work in place.  Raise it by means
 of this little handle above it, to put the work in, and lower it
 by the same means, before you commence sewing."
    "Mary, you see I am not as apt a scholar as yourself."
   Mrs. A , with a quiet smile, replied: " You are doing very
 well; but the thread is broken!">
   " What is the cause?" asked Mr. A
    "Perhaps your tension is too tight. You can remedy that
 by turningto the left the thumb nut near the tension disks
 through which the upper thread passes— taking care to loosen
 the thread a very little. Ifloosened too much, a jagged or
 fringed seam on the under side will be the result.  If the under
 thread break, the cause will be the same. Loosen it by turn-
ing the brass thumb-nut at the under spindle post, toward
 you."
  "Well, Mary, you have told me all this, but the thread
 breaks in spite of tension." Mr. Aston looked as if about to
 discontinue his lesson, but his wife playfully insisted that he
must be proficient, as she expected to hire him to operate.
     " There are several causes of the thread breaking, which I
 may as well state now: Too tight a tension-the crowding of
 he thread against the needle-hole-the thread too large to lie
 in the groove of the needle-and a rough circular needle, gen-
 erally occasioned by the vertical needle striking against it,
when the latter is not properly set. Especial care should be
 taken that the circular needle does not get injured. The cause
of the broken thread now," continued Mrs. A.,is that you
 have pushed the needle to one side, and, in its descent, it crowds
 the thread against the sharp edge of the plate, and cuts it off.»
  " Ah! I see," answered Mr. A.;   "I suppose I must spring
the needle to make it go in the centre of the hole; which can
 easily be done with the fingers.  Well, if I am to be employed
 oy you, l must know the manner in which you set the vertical
needle."

     6 Take it between the thumb and finger of the left hand, the
 eye being directly in front of you; the outside of the curve of
the needle to the left. Pass it into the little groove in the
lower part of the needle-arm, under the needle screw; fasten
it in by means of the screw-driver, and then to test the accu-
racy of its position open the plate through which the needle
passes, and see if the loop which the upper thread throws out
after it has passed through the fabric,and just as it com-
mences to rise, is situated so that the point of the circular
neeale passes into the centre of the loop mentioned.  Care
should be taken to have the needle just right, as occasionally a
long stitch will be the result, if the circular needle does not
pass into the centre of the loop."
View original page 7Page 8 · Read text
6
  6 Now I understand all that.I can sew nicely; but if I
want to change the thread?  I have been sewing with cotton;
suppose I want to sew with silk, or any other sized thread,
how shall I proceed?"
  6 Place the upper spool upon the spindle at the extreme
right of the machine: pass the thread between the two disks
which are above the spindle on which the spool is placed;
thread-springbring the threaddownforwardwithtothethelinger,left ofandthe machine,pass    presend
plagush theTheslotunderin thethreadpostneedmoonnotwhichbe changed,the threadspringas the underis
or binding thread is never seen on the upper side, and its whole
office is totie the upper thread after it has passed through;
but if silk be preferred, open the plates at the extreme left of
the machine, where will be seen a spindle, like
upper spool, upon which place the underspool so that the
thread will come from the under side; bring the thread up
and lay it between the disks."
    " Now show me how to thread the circular needle, Mary."
  6 This little instrument conveys the under thread through
the loop of the upper thread in a very ingenious manner.
is to be threaded in three places, as you will see; a groove
lies between these places, in which the thread must lie in pass-
ing from one to the other. Now see me: First thread the heel
and middle eyes, then turn the wheel so as to bring the point
in front; pass the thread from the outside to the inside of the
eye in the point; pick it up and guide it into the groove, before
drawing it tight. A large nin or needle will best accomplish
this. Now let me show you how to thread the upper or verti-cal needle (we left it passed through the slot in the post) ;
bring it down between the nippers, and draw it through the
eye of the needle till there is an end about three inches long.
After you have sewed four or five stitches, pass this end under
    the left side of the presser, where it will be carried out of
the way. The end of the under thread need only be brougat to
the upper side of the plate, and there left.Do you see?"'
    " Yes pray continue to have patience with my dullness.
Will you show me how to take the work out of the machine ?"
    Slacken the upper thread; cutit off close to the work; raise
the presser; lift the work carefully, so as to bring the under
thread up one or two inches, and cut it off close to the work,
so as to leave the circular needle threaded.  With care, this
needle need not be unthreaded till the spool is used up."
  In taking the work out in the manner described, Mrs. Aston
                             after the lapse of a minute, laugh-
ing,examinedsaid toithercarefully,husbandand? You have sewed this seam on the
wrong side; a mistake which will sometimes occur with the
most experienced seamstresses.I will show you how to take
it out: Begin from the end where you left off sewing; pick up
View original page 8Page 9 · Read text
7

 three stitches on the upper side; this will leave a thread on the
under side; take both of these threads up, and pull them at the
same time, in opposite directions.
                            The seam will ravel as easy
canas onestopcouldjust here.wish, butCutiftheI dothreadsnot wishoff toandriptheit allworkthe willway, e
as strong as ever. While this peculiarity does not affect the
strength of the seam, every seamstress can at once realize the
benefit of this convenience."
    " Ah! yes, I see it is a seam that will rip if necessary; but
will not rip when not desired. How convenient that is; it
must be one of the chief merits of the machine."
  "But as you are going to be an operator, you must learn to
take care of the machine. Now, as you are going to leave it,
we will wipe out all the oil; then to morrow morning before
using it, it will have to be oiled afresh with the best SPERM
oil, wherever two parts of the machine come together, so as
to create friction.  The ' nipper-spring,' which grasps the
thread, should be oiled twice or three times during the day.
The lifter of the presser and pivots which hold the needle-arm,
need only be oiled once a week; also the running gear, wheel,
treadle, etc., need to be oiledonce a week; one drop of oil
applied to the different parts is sufficient."
           Mary.  am glad you prove so patient a
teacher.
good" Thanka knowledgeyoust confessof the machine,I was incredulousand to testthatit, feltyoudesiroushad so
of seeing how far you could help me out of any difficulty I
could get into.I am more than convinced of its simplicity.
and think, with a large majority of people, that the Grover &
baker is the best made and most easily managed machine, for
family use, that can be purchased.I feel that I have made a
 capital investment for saving time and labor, and gained with
the Sewing Machine an assortment of sweet smiles, pleased
and contented looks; and many pleasant evenings we will
have on account of the freedom which the Sewing Machine will
give you, Mary."
  And there the machine stood, an implement wholly domestic
in its character; but its influence extended itself into the
drawing-room, on the promenade, at the church, or other

public laces,Mrs. Astonaston nothelongereleganthoughtand stthatat andshe robecouldd notthe
                                    music was looked overspare time for accomplishments.Her
and some of the delightful songs of oldwere practiced and
sung in her former excellent style; and in the merry pastimes
of the winter evenings, Mr. Aston's thoughts reverted back
to the time when there was " no time to spare," and he felt
that the Sewing Machine had done more than he had expected
from it, and Mrs. A.'s assertion, two years after, proved that
they were not mistaken, " for," said she,6 if I could not pur-
chase another, a fortune could not buy my Sewing Machine."
View original page 9Page 10 · Read text
K the Under Spool:


                                                                                                      Q, the Driving Pin on the side of the Feed Cam;


-1, the Ted Picce: B, the Presser Arm; C, the Needle Arm; D, the Presser: E, the Presser Lifter ¿ 7, the Veer


    EXPLANATION.-


                                              tical Needle; G, the CirculartearNeedleat; it petey dae immediatelyhat a no cutebacktee,of this!ce: can ac the V,chanNeedle; the aStitchtheRegulator;calW, the Gaugé ; 1, the Gauge Screw.
View original page 10Page 11 · Read text
DIRECTIONS FOR USING

                      THE

 GROVER & BAKER FAMILY SEWING MACHINE.

   These directions are written as simply as possible, and in
 most cases will enable parties who give them proper attention
 to operate the Sewing Machine without further instruction.
  Before using the michine, observe carefully the position of
 the threads and needles. The engraving on the opposite page
 represents the machine with the plates, or slides, removed,
 and part of the bed-piees cut away, in order to show its work-
ing parts. The reference marks will enable the operator to
 follow the instructions understandingly.

                TO OPERATE THE TREADLE.
   Familiarity with the motion of the treadle is first to be learn.
 ed, and practice is necessary in order to give a steady and
uniform revolution to the wheel, but before practicing, both
needles should be unthreaded, and the presser which holds
 the work in place on the feeder should be raised by pressing
 back the lifter at the top of the presser arm, to prevent the
feeder from injury by contact with it. Having placed the right
foot on the treadle, with the heel resting against the iron
ridges which rise at the back of the treadle, start the wheel
with the right hand by revolving it to the right, as shown
by the arrow on the wheel, taking care to give it impetus
enough, or it may stop before you get your foot in motion;
 Keep up a regular movement by pressing alternately with the
heel and ball of the foot with equal effect.This should be
practiced until a uniform motion of the wheel is obtained.

               TO SET THE VERTICAL NEEDLE.

  Turn the wheel until the needle-arm rises to its extreme
highest point. Take the needle between the thumb and finger

of the left hand with the flattened side ofits shank toward you ;
place the needle-shank into the small groove under the head

of the needle screw upon the end of the needle arm, and tight-
en said screw slightly.
View original page 11Page 12 · Read text
10

  Apply the needle gauge, as shown in the following engrav-
 ing, with one of its equal straight sides resting on the needle-


plate, and one of its points extending upward to the needle-
eye. The needle-eye must be exactly level with the point of
the gauge. After the needle is thus set, the needle-screw
should be fully tightened. Turn the wheel slowly and care-
fully, and see that the point of the needle in descending enters
    and passes downward through the needle hole, so that every
part of the needle is equally distant from the edge of the hole
in passing. If necessary, the needle may be sprung to the
right curve with the fingers.The upper needle should be so set,
that, in rising, the point of the circular needle will pass through
the loop of the thread of the vertical needle in crossing it.
  Unless the curve of the needle is true, the needle will crowd
the work to one side and make a crooked seam.
  If the needle is set in the machine when received, do not
remove it till necessary, as it is correctly set.
  The needle-point should be carefully examined every day,

and if dull or rough, pointed on an oil-stone.
View original page 12Page 13 · Read text
11

                 NEEDLES AND THREAD.

   Much care should be taken to adapt the size of the needie

 to the size of the thread; so that in passing through the fabric

 the thread will lie in and fill the groove without crowding.
   The needles are numbered 00, 0, 1, 2, and 3; the 00 being

 finest, and suited for Swiss or other very fine material; the 1

is used for shirt work or under garments, quilting, etc., or
cloth; No. 2 is used where the material is thicker; ITo. 3 for

 the heaviest sewing.
    No. 00 needle to be used with 100, 110, or 120 cotton.
    No. O needle to be used with 80 or 90 cotton.
    No. 1 needle to be used with 60 or 70 cotton.
    No. 2 needle to be used with 45 or 50 cotton.
    No. 3 needle to be used with 24, 30, or 40 cotton.

               TO PLACE THE UPPER SPOOL.

   Place the upper spool upon the spindle at the right of the
machine; pass the thread between the two disks which are
above the spindle which holds the spool; bring the thread for-
ward to the left of the machine, press the thread-spring down
with the finger, and pass the thread through the slot in the
thread-guide upon which the thread spring is placed, causing
it to lie between the nippers above the needle. All which will
be readily understood by reference to the engraving, on
 page &.
              TO PLACE THE UNDER SPOOL.

  On the left of the machine, will be seen a spindle like that
for the upper spool, upon which place the under spool so that
the thread will come from the under side; bring the thread
up, and lay it between the disks. The thread used upon the
under spool should NEVER be more than one half as large as
that used upon the upper.

            TO THREAD THE CIRCULAR NEEDLE.

  Pass the end of the thread through the eyes in the heel and
middle of the circuar needle, turn the wheel so as to bring the
point of the needle in front, and then pass the thread from the
outside to the inside of the eye in the point, letting the thread
lie in the groove and leaving about two inches lying upon the
bed-piece.
View original page 13Page 14 · Read text
12

            TO THREAD THE VERTICAL NEEDLE.

  Pass the thread from the upper spool (after having proceed-
ed as above) down between the nippers, and through the eye
of the needle, from you, pulling it through about two and a
half inches.

         TO REGULATE THE LENGTH OF THE STITCH,

  Open the plate at the left hand of the machine, where will

be found a lever called the stitch regulator, stretching across
the aperture which strikes the feeder. Move the lever TOWARD

you to make a long stitch, and FRou you for a short one. In
making a short stitch, do not press the lever too far back, or
the feeder will not act. A very little way will be enough to
alter the stitch. It is best, before commencing to sew, to try
the length of the stitch on a small piece of muslin.

               TO REGULATE THE TENSION.

   The tension of the thread is regulated by the tension -nut near
the tension disks. Turn it to the RIGHT to tighten, and to the
LEFT to slacken the tension. When the tension is once regu-
lated, there is no need of altering it for a new spool of thread
 of the same size may be put on without change of tension.
Care should be taken not to havethe UPPER thread TOO LOOSE, a s
a fringed or rough seam will be the result ; but, if Too TIGHT, the
thread is apt to break. If the UNDer thread should break, the
tension is generally Too TIGHT When working with silk a
much greater tension can be obtained than with cotton. For
woolen goods, the tension needs to be tight. For materials that
 are to be washed often, the tension should be rather loose. If
in working on Swiss or Nansook the work has a drawn appear-
ance, the fault will be with the under thread, which will be
found too tight. In ordinary sewing, the upper should be
kept tight, and the under loose, but not to the extreme in
 either case.
                    THREADS AND SILK.

   The BEST thread should invariably be used on the Sewing
Machine, as the strain required is greater than that which the
hand gives, in drawing up the thread in hand sewing. Patent
 or glazed thread is not so good, as it does not sink into the
View original page 14Page 15 · Read text
13


 cloth readily, leaving more thread on the surface than is deem-
 ed necessary, and is very liable to snarl.  A poor or indifferent
 thread WILL ALWAYS GIVE MORE OR LESS TROUBLE. Silk can be
 purchased on spools, andthis will be found the best way to
 use the silk, as the winding, being done by machinery, will
 give a more even strain than winding by hand.
 muslin, the thread need not be coarser than 60 or 70 for the
     UPPER spool, and NEVER COARSER than 110 or 120 for the
 UNDER spool. No fear need be entertained that THESE SIZES
 WILL BE TOO FINE, when we take into consideration that the
 thread is to be crossed several times; that it takes BETTER
 material to make a FINE thread of first quality,and when this
 is doubled, as is the case with the Grover & Baker stitch,
seam will be found to be quite strong enough. The best sized
 silk to be used for ordinary family purposes will be O silk.
The spools are numbered 000, 00,0, A, B 0, and so on,
 000 being the finest. Care should be taken that the thread
 for the vertical needle be in proportion to the needle.  If TOo
 COARSE TO LIE IN THE GROOVE OF THE NEEDLE, in its descent
through the fabric, it will break. Cotton may be used on the
 under spool, as the under thread is never seen on the upper
 side.
                 TO COMMENCE SEWING.

  Place the edges of the material together. If a long seam is
 to be sewed, pins placed a few inches apart will answer the
place of basting. Place the work in the machine so that the
bulk of the work pass to the left hand. This will be better
 than to pass the most of the material under the needle arm.
  A little care should be exercised in laying the work on the
 feeder, so that it can not press between the feeder and needle-
 plate, and that the presser be brought down upon it before
 turning the wheel. Avoid pushing or pulling the work through
while stitching®
                    TO CROSS A SEAM.
  When sewing cotton goods with much dressing, it may
require some care in crossing seams, when there are a num-
ber of thicknesses-where hems and fells come together, for
instance the crossing will be facilitated by pressing the seam
fat, and rubbing a little wHIre soap on the thick part. A
small piece of soap kept in the work-basket will be found
useful for softening the tough places which often occur in
sewing. Many ladies follow this practice in hand-sewing where
the goods are hard to sew.

                  TO TURN A CORNER.

  Stop the wheel without raising the needle more than half
way out of the work; raise the presser, and turn the work in
the manner desired, using the vertical needle as a pivot.
View original page 15Page 16 · Read text
14

                TO TAKE THE WORK OUT®

  Slacken the UPPER thread; cut itoff close to the work;
raisethe presser; lift the work carefully, so as to bring the
UNDER thread up one or two inches, andcut it off close to
the work. The needles will then remain threaded, and the
machine be ready for the next garment. Many ladies have a
small strip of muslin conveniently by them, which they run
under the presser,WITHOUT RAISING, attheend of straight
seams.It serves the purposeof fastening the threads, and
when a new seam is to be commenced the strip may be dis-
 placed by feeding the garment under the presser in the same
manner.

                THE BELT OF THE WHEEL
 Sometimes stretches, and the wheel will then fail to move the
 working part of the machinery.  It may be tightened by first
 unscrewing the thumb-screw under the cross-bar, shoving the
 wheel to the right, and then screwing tight again.


                   TO OIL THE MACHINE.

   When in constant use, all working parts of the machine
  should be well cleaned with cotton waste or other soft material
 and then oiled with the best sperm oil wherever there is friction,
 which is in the following places:
   The bearings of the treadle, the pitman, and the wheel.
   The two bearings of the pulley-shaft upon the machine, for
 which oil holes will be found on each side of the pulleywhen
 the plates are removed.
   The parts of the cam which raise and move the feeder; the
  bearings which go through the feeder to hold it in place and
  on which it slides. Also the driving pin on the side of the
 cam.   The spiral post carrying the circular needle.
   The cup of the shank of the circular needle®
   The nipper guide between the arms near the needle.
     It is very important that the cup and guide should be frequent-
  ly oiled.   The two bearings, or centres, upon the top of the bed-piece
  at the right, on which the needle arm vibrates.
   The bearings in which theslide of the presser moves up
  and down.  Apply the oil on the top of this slide.
    Neglect of such seemingly small matters Theoftenwheeloccasionand  much trouble and vexation to operators.
  treadle need not be oiled as often as the main parts of the
  machine.
View original page 16Page 17 · Read text
15


                     THE GAUGE.


   The gauge is attached to the bed-piece of the machine by
 the gauge-screw, and can be adjusted, by means of the slot, at
any required distance from the needle, so as to assist the ope-
rator in guiding the work and making straight seams. It is
always attached to the machine when received, and is gen-
erally allowed to remain on the machine, even though not re-
quired for use, as it does not interfere with the work. It is
also used over the hemmer, tucker, and corder, etc., as it
renders them more secure than when attached alone.


                     THE TUCK GUIDE.


  Place the slot over the screw-hole in the bed-piece nearest
 the needle for ordinary tucks, and for very wide ones use the
hole furthest from the needle. Adjust the tucker so that the
 groove in the right end will be distant from the needle the de-
 sired width of the tuck, then fasten it with the gauge-screw.
No attention need be paid to the groove on the left hand of
the tucker. The tucksare to be measured as in ordinary
 hand-sewing.
View original page 17Page 19 · Read text
17

           THE HEMMERS.


  There are two kinds of hemmers, and different numbers of

sizes of each kind.  The obverse hemmer turns the hem on

the upper or right side of the material, and the reverse hem-
mer turns the hem on the under or wrong side.


       Directions for Using

           THE OBVERSE HEMMER.


   This hemmer is secured to the bed-piece of the machine by
 passing the slot under the gauge and tightening the gauge
 screw. The hemmer should be so adjusted that the outer
 edge of the tube will be on a direct line with the inside edge
 of the left toe of the presser-foot, and close to but not touch-
 ing the latter. Fold up the edge of the article to be hemmed
 on the right side, about the length of an inch, as if for basting,
 and place the first fold inside the tube at the large end, draw-

  ing it through until the feeder takes hold of the goods, after

  which it will only be required to keep the tubes full, which can

  be done by inclining the edge of the goods upward with the
 thumb and forefinger of the right hand. While enteringthe
 goods in the tubes of the hemmer, the presser should be
  raised, and let down when the fold of the hem reaches the
  feeder and before the machine is operated. Reference to the
  illustration on the opposite page will show the manner in
  which the hemmer is adjusted, and otherwise aid the operator
  in following the directions.
View original page 19Page 21 · Read text
19


      Directions for Using

           THE REVERSE HEMMER.


  The reverse hemmer is attached to the bed-piece of the

machine in the same manner as the obverse hemmer, and

should be adjusted with the point of its tube in a line with the

inside edge of the left toe of, and close to, the presser-foot.

Enter the edge of the goods at the large end of the tube,

under the large flange, and push it along the tube, under the
small flange at the small end, and on to the feeder, the press-
er being raised. If the goods are properly entered, they
will emerge from the small end of the tube with the folds of
the hem turned under ready for the needle. To insure the
proper fold, the edge of the goods, when entering the hemmer,
should be held between the thumb and forefinger of the right
hand, and inclined under, so that as it passes. through the
tube, it will fold around the curves of the hemmer and fill the
tube, and this downward inclination of the edge of the goods
should be maintained until the hem is finished. The forefinger
of the left handshould press on the goods, between the
flanges of the hemmer, to guide the edge through the small
end of the tube, until the feeder has caughtit. When the fold
 of the hem reaches the feeder, lower the presser, and operate
the machine as for ordinary seams.. See illustration on
 opposite page.
View original page 21Page 23 · Read text
21


       Directions for Using

                THE FELLER.


  Place the two pieces of cloth which are to be felled, one

 over the other, so that the edge of the upper layer shall be

about one-eighth of an inch within the edge of the under

layer, at the side where the fell is to be made, and stitch the

pieces together close to the edge of the upper layer. When

this seam is stitched, remove the goods from the machine, and

 pass the slot of the feller under the gauge, and adjust it to

the bed-piece by the gauge screw, so that its point shall be

 close to the presser, and in a line with the point of the

needle. Then take the pieces which have been stitched

 together, and enter the edge of the under layer, at the end

last stitched, in the folds of the feller from the right hand
 side; push the goods well on to the feeder, and turn over
 the upper layer to the left (as shown in the engraving), until
it lays flat on the bed-piece. The machine may then be
 operated, and the fell will be properly finished by the feller
if the goods are passed smoothly to, and evenly guided over,
 the feller by the hands of the operator.
View original page 23Page 25 · Read text
23


      Directions for Using

                THE FRILLER.


   This attachment is used for frilling orgathering. It is ad-
justed to the machine by sliding it over the left toe of the
   presser-foot, the presser being raised, with the hooked side
underneath, until the opening at the back fits close around the
slide of the presser, as shown in the engraving on the oppo-
site page. Use No. 40 or 50 cotton on the upper spool, and
No. 100 cotton on the under spool. Have both tensions tight,

and lengthen the stitch. The tighter the tension, and the

longer the stitch, the greater will be the degree of fullness ob-
tained. Place the goods to be gathered under the friller, lower
the presser, and operate the machine as for an ordinary seam,
sewing close to the edge. If it is desired to produce puffing,
a similar seam on the other edge of the goods will effect it, as
will be seen by the illustration. For gathering and sewing on
the band at the same time, the band should be held tightly
with the right hand in an elevated position, and the goods to
be gathered pushed underneath toward the friller with the left
hand, so that the band or upper piece, when stitched on, will
present an even seam, while the goods underneath will be
gathered as a frill or ruftle.
View original page 25From the ISMACS International. Original publisher and archive notices are retained.
Check the model and edition against your equipment.
PDF verified 2026-10-11.