Film cameras
Haka-autoknips model II User manual
User manual for Haka-autoknips model II. 1 pages in English. Read the original PDF, download or print a copy without registration.
1 pagesEnglish0.3 MB PDF
Loading your manual…Open PDF directly
Document details
- Brand
- Haka-Autoknips
- Model / document
- Haka-autoknips model II
- Document type
- User manual
- Language
- English
- Pages
- 1
- File size
- 0.3 MB
- Category
- Film cameras
- Document date
- Not specified in catalog
Search available document text
Find a term, then jump to its page in the original PDF. Image-only pages may not be searchable; check the PDF for exact wording and diagrams.
Page 1 · Read text
www.butkus.us

               Instructions for use of the

                                                  Nr. 391579„HAKA-AUTOKNIPS“

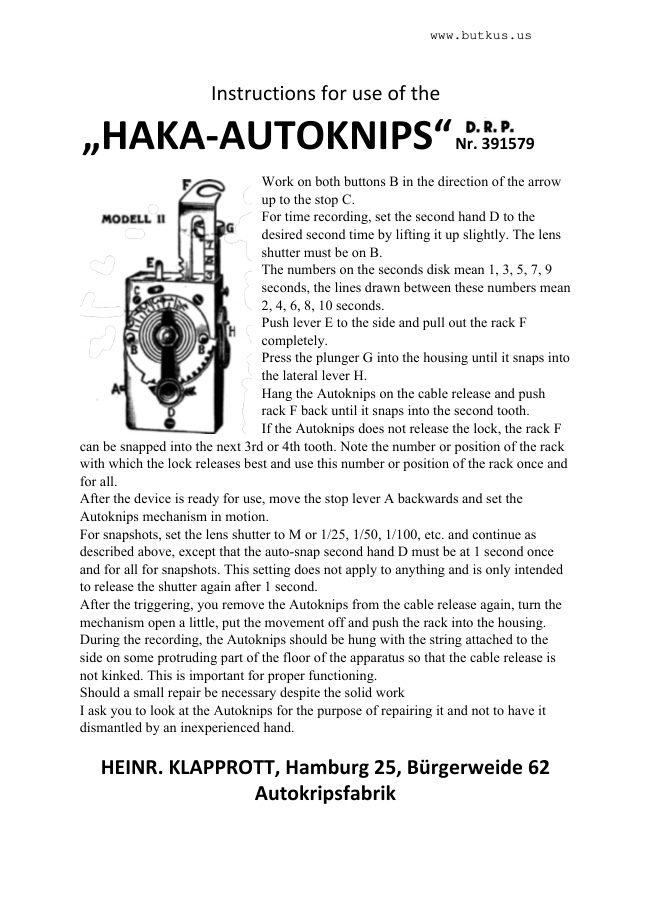
                       Work on both buttons B in the direction of the arrow
                          up to the stop C.
                            For time recording, set the second hand D to the
                               desired second time by lifting it up slightly. The lens
                                 shutter must be on B.
                         The numbers on the seconds disk mean 1, 3, 5, 7, 9
                              seconds, the lines drawn between these numbers mean
                                  2, 4, 6, 8, 10 seconds.
                          Push lever E to the side and pull out the rack F
                              completely.
                              Press the plunger G into the housing until it snaps into
                               the lateral lever H.
                        Hang the Autoknips on the cable release and push
                              rack F back until it snaps into the second tooth.
                                       If the Autoknips does not release the lock, the rack F
can be snapped into the next 3rd or 4th tooth. Note the number or position of the rack
with which the lock releases best and use this number or position of the rack once and
for all.
After the device is ready for use, move the stop lever A backwards and set the
Autoknips mechanism in motion.
For snapshots, set the lens shutter to M or 1/25, 1/50, 1/100, etc. and continue as
described above, except that the auto-snap second hand D must be at 1 second once
and for all for snapshots. This setting does not apply to anything and is only intended
to release the shutter again after 1 second.
After the triggering, you remove the Autoknips from the cable release again, turn the
mechanism open a little, put the movement off and push the rack into the housing.
During the recording, the Autoknips should be hung with the string attached to the
side on some protruding part of the floor of the apparatus so that the cable release is
not kinked. This is important for proper functioning.
Should a small repair be necessary despite the solid work
I ask you to look at the Autoknips for the purpose of repairing it and not to have it
dismantled by an inexperienced hand.

  HEINR. KLAPPROTT, Hamburg 25, Bürgerweide 62
                   Autokripsfabrik
View original page 1From the M. Butkus archive. Original publisher and archive notices are retained.
Check the model and edition against your equipment.
PDF verified 2026-10-10.