Film cameras
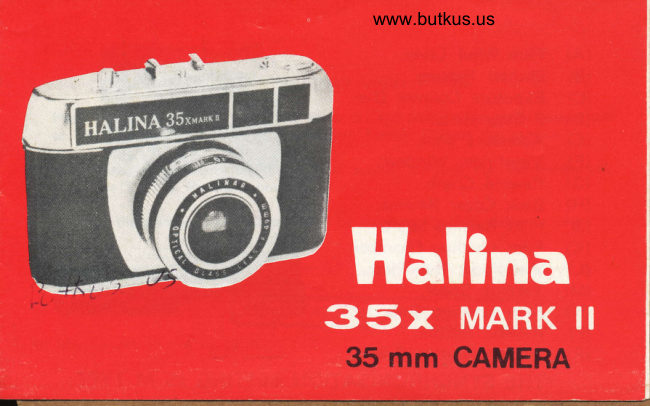
Halina 35x Mark II User manual
User manual for Halina 35x Mark II. 7 pages in English. Read the original PDF, download or print a copy without registration.
7 pagesEnglish1.7 MB PDF
Loading your manual…Open PDF directly
Document details
- Brand
- Halina
- Model / document
- Halina 35x Mark II
- Document type
- User manual
- Language
- English
- Pages
- 7
- File size
- 1.7 MB
- Category
- Film cameras
- Document date
- Not specified in catalog
Search available document text
Find a term, then jump to its page in the original PDF. Image-only pages may not be searchable; check the PDF for exact wording and diagrams.
Page 4 · Read text
www.butkus.us
Loading Your Camera

Always load your camera in subdued light.
using standard 35mm black and white or
colour films, (20 or 36 exposures).
To open camera for loading, press down
Back Cover Release (H). Push up Rewind
Crank (G) by pushing up Film Rewind Shaft
(J). Place film cassette into Film Loading
Chamber (K) with protruding end down. Push down on Rewind Crank and turn  it
slightly until it is  f irmly seated and engages film cassette.
Advance Film Wind Lever (A) until Film Loading Slots (N)arevisible on top. Pull
out a few inches of Film leader and insert end of leader into nearest Film Loading
Slot. Continue to feed until you see it coming out of the second Film Slot. Rotate
knurled rim of Take-up spool (M) and as film becomes taut check to see that both
sets of sprocket teeth are engaged in film perforations (see above photograph).
When excess film slack has been taken up and sprocketsproperly engagefilm,close
camera back and snap it shut. Advance Film Wind Lever (A) twice, depressing Ex-
posure Button each time. Advance the Lever once more and Exposure Counter will
automatically set to "1", ready for your  f irst picture. The Exposure Counter moves
one marking each time you advance the Film Wind Lever, indicating how many ex-
posures have been made. The exp-osure counter automatically returns to zero when
the camera back is opened.
View original page 4
Page 5 · Read text
TAKING PICTURES IN DAYLIGHT
After the correct loading procedure has been completed, your camera is ready for
taking pictures.  lt is advisable to always use your camera under favourable condi-
tions, i.e. sunlight, bright and hazy conditions
EXPOSURE CONTROL
Dependant on the ligtrt conditions, the Exposure Mark has to be set against
the correct Exposure Control Symbol on either the Sun symbol for sunny con-
ditions, or the Cloud symbol for cloudy and overcast conditions (also when using
flash see paragraph under heading Taking Pictu.res By Fla-sh).


FOCUSI NG
The Halina 35 cameras have fixed focus lenses,therefore, regardless of thedistance
between the camera and the subject to be taken no setting has to be made.
TAKING PICTURES
Your camera is now ready to take a picture, hold the camera steady and depress the
Shutter Release (B) making sure that the camera does not move as this would result
in blurred pictures. After an exposure, advance the film as previously instructed
with one single stroke of the Film Advance Lever (A).
View original page 5
Page 6 · Read text
www.butkus.us
TAKING PICTURES BY FLASTI
1. Adjust the Exposure Mark to the Cloud symbol setting.
2. Place the flashgun in the Accessory Shoe (E) and plug the synchronization  lead
  on the flashgun into the Synchronization Socket (R) on the camera.
3. Hold the camera steady and sight your subject through the Viewfinder and
   press the Shutter Release smoothly
4. Advance the film for the next exposure by stroking the Film Advance Lever.

RECOfVIMENDED CAMERA    SUBJECT DISTANCES FLASH CHART
Afl colour film 4   10 ft.  THE  SYNCHRONISATION 5ETTIIIG 15 M TYPE
All black/white film 4    12  ft.
View original page 6
Page 7 · Read text
Unloading the Film
Before the camera back is opened, the film must be reiruound as follows:-
Press down the Rewind Button (P) and whilst holding this Button down, turn
the Rewind Crank (G) in a clockwise direction. Continuing holding the Button
down, turn the Rewrnd Crank (G) untif the film has been full rewound into the
film cassette., When the film has been returned to the cassette there will be a
lessenrng of tension on the Rewind Crank (Gl.
Open the camera back, pull the Rewind Crank (G) up and remove the film
cartridge.
Your film is now ready for processing.
View original page 7
Related documents and language editions

From the M. Butkus archive. Original publisher and archive notices are retained.
Check the model and edition against your equipment.
PDF verified 2026-10-10.