Flashes & lighting
Herbert George Imperial flash User manual
User manual for Herbert George Imperial flash. 25 pages in English. Read the original PDF, download or print a copy without registration.
25 pagesEnglish3.6 MB PDF
Loading your manual…Open PDF directly
Document details
- Brand
- Herbert
- Model / document
- Herbert George Imperial flash
- Document type
- User manual
- Language
- English
- Pages
- 25
- File size
- 3.6 MB
- Category
- Flashes & lighting
- Document date
- Not specified in catalog
Search available document text
Find a term, then jump to its page in the original PDF. Image-only pages may not be searchable; check the PDF for exact wording and diagrams.
Page 1 · Read text
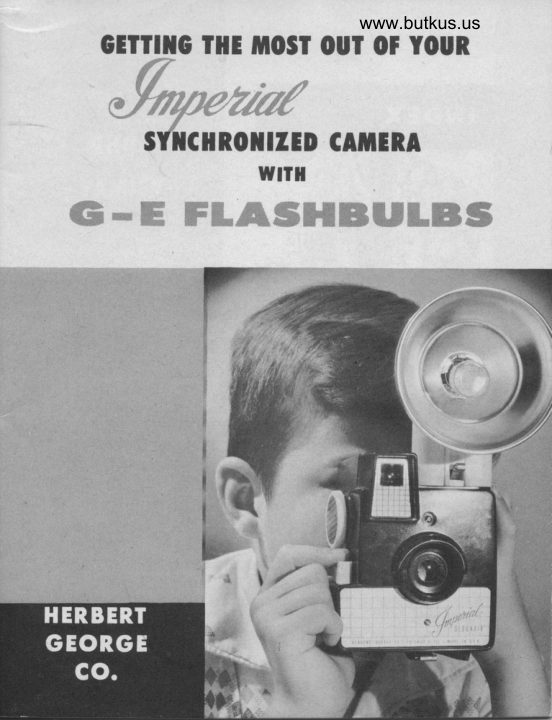
www.butkus.us
GTTIIilG THT MOST OUT OT YOUR


    SYIIC  II RO]I IZ ED CATIERA
              WIIH

                  7W
View original page 1Page 2 · Read text
IMPERIAL Photo Outfits
  and Travel Kits                          4-5
 Ffow to Operate the
  IMPERIAL DEBONAIR Camera     6_7
  IMPERIAL DELUXE
    REFLEX Camera                   g_9
  IMPERIAL MARK XII Camera    10-11
  M2 PLUS FLASH GUN            I2-T3
  IMPERIAL II FLASH GUN          14-15
  B11O REFLECTOR FLASH GUN       16
Recommended Films & Flashbulbs     17
Pictures Like an Experr                   18-19
How to Use Flash                        20
Suggested Range of Picture Distances    Zl
Rules to Remember for Better pictures 22-23
View original page 2Page 4 · Read text
Venmo @mike-butkus-camera  Ph. 2083
PayPal Name  Lynn@butkus.org      www.PayPal.me/lynnbutkus
View original page 4
Page 5 · Read text
MARK XII COTORAMA TRAVET KIT
   The compact Mark XII  flash
    camera in your choice of colors
    in its own handsome leatherette
    dispatch case. Complete with
     flash attachment, 6 bulbs, 2 bat-
      teries, roll of film.

DEBONAIR COIORAMA TRAVET KIT
    For the traveler who wants to
     take pictures wherever he goes!
    Debonair Colorama camera  ( grey,
    maroon, or black), flash attach-
    ment, 6 bulbs, 2 batteries and
     roll of fiI"m. All in a handsome
    compact carrying case.

   DETUXE REFTEX TRAVET KIT
   The versatile Deluxe Reflex cam-
    era in your choice of black or
    grey, flash attachment, 6 bulbs,
   2 batteries, roll of film and neck
    strap in a sturdy, good-looking
    carcying case.
View original page 5Page 6 · Read text
www.butkus.us


 MARK XII COTORAMA OUTFIT
 Imperial Mark XII camera, flash
 unit, 4 bulbs, 2 batteries, roll of
 film, and professionally styled
 canyall bag! Choice of camera
 colors  : blue, green, beige, maroon.

 DEBONAIR COTORAAAA OUTFIT
 Here's everything the new pho-
 tographer could want in  a
 handsome presentation package:
Imperial Debonair Colorama
camera in grey, maroon, or black,
 flash attachment, 4 bulbs, 2 bat-
teries, roll of film and carryall
b^9.

DETUXE REFTEX OUTFIT
A versatile twin lens reflex cam-
era that lets you see your picture
before you snap it. Outfit in-
cludes camera (black or grey),
flash attachment, 4 bulbs,l but-
teries, roll of film and carrying
strap, plus handsom e carr'y all bag,
View original page 6
Page 7 · Read text
A GROUND GLASS
                                        VIEW FINDER

VINDING KNOB

                                               VIEV/ING IENS


                                         TAKING LENS

iHUTTER RETEASE

             Mike Butkus       Digitally                                                                                                             DN:ou=butkus.org,Date:cn=Mike2022.07.09signedButkus,email=mike@butkus.org,by16:26:57Mikeo=ButkusButkus-04'00'camera manuals,c=US
      Your Debonair Camera is a fine precision in-
       strument, designed to take consistently clear
      and beautiful pictures. Use 620 film.
   HOW TO IOAD THE CAIUIERA
.ffi='e-::#"1.*5"S:lif#:i*#.'j;
             Camera with one hand and with
-i:[1Z-=-      other slide front of Camera forward.6
View original page 7Page 8 · Read text
www.butkus.us
 2. Load or unload film in shade, never in direct
 sunshine. Place roll of film in the lower portion
 of the focal box opposite winding knob. This is
 done by fastening the spool into the two pivots.
 Be sure the back side of the film is
 downward and roll is placed over the
 retainer spring. You will see empry
 spool on opposite side held by the
 winding knob. To be sure, turn the
 winding knob several times ro see
 that empty spool turns with knob.

 3. Thread pointed end of the paper
 into the Targe slot of empry spool.
Be sure paper is centered on empry
spool so it will wind evenly. Give
 the winding knob one full turn just enough to assure a fi,rm grip on-
the spool.

4. After Camera has been loaded propedy, in-
sert focal box into back of Cameia ind'riid"
g.T+y all the. way to the original position.
  After position ls ser, press vour fbre-    _-Efinger f-irmly on the^centlr of the  t'4ii:  ;\
ls'l.gd"J",Y,*f                     ffiif:ft?f                6il  -lockingof                 1ffi',         edge as                         it *ifi                           ;;;;;F'
into position. )
View original page 8
Page 9 · Read text
A GROUND GTASS
                                VIEW FINDER


                                   VIEWING LENS


 NECK CORD


Youl Imperial Deluxe Reflex Camera is a fine
precision instrument, designed to take consist-
ently clear and beautiful pictures. Use 620 film.
HOW TO LOAD THE CATUIERA
  Load or unload film in shade, never in direct
sunshine.:. RemoveRemove backback covercover bvby liftinglifting thethe
        clip at the top of your Imperial De-
        luxe Reflex Camera, pull a:wa.lr gently.
          (Illust. 1) Lift spring pivot opposite
       winding knob. Insert the empty spool.
 a)
View original page 9Page 10 · Read text
www.butkus.us
Connect the end closest to the knob kev first
by turning the knob several times. Next'align
spool with spring pivot opposite
 (Illust. 2) until it slips securely into
the spool slot and lower the pivot and
engaged spool into the camera. Lift U
spring in bottom of camera and insert
a roll of #620 film into the pivots.
Gently press back into camera. Carry
the pointed end of the film paper
 (Illust. 3) across camera and fit it on
the film track located at top of focal
box. Thread pointed end of paper into
slot of empty spool now held by the
winding knob. Be sure that paper is
centered on the empty spool to insure
even winding. Give the winding knob
two full turns (the knob turns only
one way)    enough to bind pupetand assure firm-   grip of spool.
  You are now-re^udy ti r"place the
back by locking it in its proper place
at.bottom  first, and then firmly closing
clip at the top of the camera (Illusil
4). Now turn the winding knob until
the figure 1 appears in the red window
in the back of the camera. Your camera
is now ready to take your first picture.
View original page 10
Page 11 · Read text
Your Imperial Mark XII Camera is a fine pre-
       cision instrument, designed to take consistently
       clear and beautiful pictures. Use 620 film.
   HOW TO LOAD THE CATUIERA
                       l. Remove the front of Camera by
  I       t     -[   gently forcing the locking clip at bot-
rril                          IIIlll\  tom of Camera downward. Hold back
                                            and                           securely                                   one hand                of Camera                               with -ElllE{plllllE--t--II                                       front                    other                         gently slide                                           of Cam-                               ttltl  with
              [/t  era forward. Place back of Camera
           down gently.
l0     --lt
View original page 11Page 12 · Read text
www.butkus.us
 2. Place this roll of film in the lower                                        '{-tut portion of the focal box opposite the II[|                     Uwinding knob. This is easily done by  lln.l
 fastening the spool securely into the  I lU k rwo pivots. Be sure that the black side llllfl   tof the film is downward and the roll  V:.
 is placed over the retainer spring. You
 will see an etnpty spool on rhe opposite side
held securely by the winding knob. To be ab-
solutely sure, turn the winding knob several
times to see that the empty spool turns with
the knob.
3. Thread the pointed end of the
papef into the large slot of the empty
spool. Make sure the paper is centeied
on the empty spool in order that it
will wind evenly. Now give the wind-
ing knob about one full turn     iustenough to bind the paper and- assure
a firm grip on the spool.    W
4. After Camera has been loaded properly, in-
sert focal box into back of Camera ind-slide
gently all the way to the original position.
   fr'rlcrAfter positionp()srrl()n lsis sefrset, presspress vour  t(forefingerfirmly oi the cenrer of^ the locking
glip which will snap locking edge
     position. (Do not press-tip ofitrrglocking edge as it will nbt snap-into
position. )
                                     TI
View original page 12Page 13 · Read text
UIIIQUE FEAIURES TAI(E II EASY IO OPERAIE


       REFLECTOR                                 EJECTOR I-EVER
                                              PUSH DOWN
                                              TO
                                                    EJECT BUI-B


                                             COVER

                                                        I-        PINS.FITCAMERAINTO
                                               SOCKETS
      The amazing M2 Plus Flash Gun has the
      newest scientifically designed reflector for
        better and easier all around flash photography.
       The M2 Plus has been engineered so you
      can use the new, revolutiort?rf; low priced,
     G-E PowerMite M2 or PowerMite M2B Bulb,
       as well as the manv bavonet based bulbs. with-
      out adjustments, or udupt"rs, necess ary on all
      other flash guns. Just insert bulb into socket
      and you are ready for picture taking.12
View original page 13Page 14 · Read text
www.butkus.us
           Try it! You'll love its versatility and ease of
            use.
             Patented'r features makes easy operation and
           better flash pictures.

       TO REMOVE BACK
      To remove back, push
  I     cover latch in firmly
        with a downward mo-
          tion. Be careful not ro
       drop cover.

                        TO INSERT
                            BATTERIES
                        Push batteries down
                                against battery springs
                     and slip into place.
                         One tip up and one tip
                     down in accordarrce
                              with instructions on in-
                                      side of Flash Gun Body.
 I
 t     TO REPLACE BACK         lnsert cover ears into
      hody recess and press       bottom of cover dbwn
       against body. Make
        sure cover latch is in-
       side body and passes
        thru hole.
             *Porent Apptied For                                                                       r3
L
View original page 14Page 15 · Read text
The Imperial II Flash Gun has the newest
    scientificall.y designed reflector for better and
   easier all 'round flash photography.
    The Imperial II has been engineered so you
  can use the new revolutionary low priced
  PowerMite M2 or PowerMite M2B Bulb. Just
   insert bulb into socket and you are ready for
   picture taking.
    Try it! You'll love its versatility and ease of
    use.
       Unique teolures tches Eosy Operotion
      ond Better Ilosh Piclures.
              EJECTOR LEVER                                                                                                                                                                                                                             I
              (PUSH DOWN)                  REFIECTOR
 BACK COVER

                                                                                                                                                                                                                                                                  ,l
 SIOT FOR
 REMOVING
BACK COVER
View original page 15Page 16 · Read text
www.butkus.us

  EASY TO OPERATE IIISTRUCTIOIIS

      IO REIhOVE BACK
To remove cover, pry open by
 inserting coin or finger nail
 into slot on sides and twist.
Cover will come off easily.


                TO I]ISENT BATTTRIES
            Push batteries down against
                battery springs and slip into
                 place. One tip up and one tip
           down in accordance with  iil
               struction on inside of Flash
          Gun Cover.


   TO RTPI.ACE BACK
Put cover back into posi-
tion and press gently.
View original page 16Page 17 · Read text
How to assemble and attach
                       flash gun: To insert the batteries,
                          lift off metal cover from the
                     plastic housing as illustrated in
                Figure 1. Insert two penlight
                                          ( any make ) batteries with the
                   tops in opposite direction as il-
                     lustrated in Figure 2. Make sure
                    that solid contact is made. (You
                 can be sure of positive insertion
                  by determining that the batteries
                  have been placed exactly as those
               on the metal cover.  )
                  Figure 3 demonstrates how
                metal cover is easily snapped
                  into proper place by pressing
                    lightly with right thumb.


                                          METAT COVER TIFTS OFF


                                            NGS FIT INTO
(CAUTION! Remove bol-                               SIDE OF CAMERA ieries when comero i3
 nol in use!)
                                                           INSTATL
                                                    BATTERIES HERE            v{
                                         BULB                                                  EJECTOR                                       _l6             REFLECTORPUSH                                             DROPS                                                   OUT                                   & BUIB
View original page 17Page 18 · Read text
www.butkus.us
 TIlM:
   Size is 620. Standard film such as
 Verichrome Pan, All \$fleather Pan
 is best for all around use, indoors
 and outdoors and with flash bulbs.
  .You-will ge-t better pictures on dull days with the fast films, like Tri-X and Super Pan
 Press. Fast film will let you take in more in
 yolr flash pictures too, iairly large interiors
 and groups.
c010R, T00
  You can make beautiful flash color portraits
at around 6 feet with your Imperial^ camera.
Color needs a lot of light of thle right color,
so we recommend G-E PowerMite M2 or # 5
flashbulbs. \fhen taking color shots up close,
put an inexpensive portrait attachrnent on
the lens.
AlfD, ;lAsll
  Always use flash, and you will always ger the     -
picture, p_articularly when taking snaps[ots of
people. Naturally, /ou'd use sunihine to make
a pictyre o{ a scenic view. But for anything up
to 15 feet from camera, flash is your best guar-
antee of getting your picture every time.-fhis
is particularly true outdoors on a brightly
sunlit dav.J

                                                                                t:
View original page 18Page 19 · Read text
P1 AT
        . Expert pictures tell a story-of a new baby-
     baptism-a first day at scho.ol-confirmation
         party-a picnic-a wedding.    -a    BE READY
       Decide on the main pictures you want-and
     have plenty of film and flash bulbs on hand
          them all.     -get    GET IDEAS
       There are plenty of free helps for your use.
    Read the instruction leaflets that come with
      film and flashbulbs. Ask your dealer for leaf-
       lets and folders that are crammed with tips for
      better pictures.
    USE II.ASH
        tVith flash you do not have to Pose people.
      S/hat you see, you get, at the Press of a button.
     Vith adults, children, or pets, have your finger
     on the release, then concentrate on what the
      subiect is doing. rVhen.yqo-:ee a good
     or expression, shoot, wind film, replace Po:.ebulb
     and be ready for another shot. Shoot plenty-
         it's your best bet to get that really outstanding
      photo.
l8
View original page 19Page 20 · Read text
www.butkus.us
sltPlt;Y
   It',s a very common error to try to get too
much into the picture. The best professional
photos are simple.
  Take down wall decorations and move fur-
niture if you must, to get simple backgrounds
ano surrounqrngs.
DIRECT YOUR SUBIECTS
  Give them something to do-read a book,
knit, play with a pet, handle a f.avofite obiect
or tov. Get their attention off the camera.
Flash'lets you get these interesting pictures
of people doing things they like to do.
ITITAIE
  rVhen you see a picture in a newspaper or
magazine that you particularly like-clip it out
and save it. Then try to make one of your own
as nearly like it as possible the next time you
use your camefa.
DO]I'T BE SIIY
  Picture taking is fun. Sometimes at a palrty
or in a public place you may hesitate to start
making flash pictures because you attract
attention. Actually people will be interested
in what you are shooting, frLy even ioin inand help yourto get in on the fun, once you
get started.
                                              t9
View original page 20Page 21 · Read text
Your Imperial Flash Gun makes your Im-
perial camera the equal of the finest profes-
sional equipment for the kind of pictures
you'll take, around home, on travel and vaca-
tion. Use flash   and you'll always get thepicture. It's like- having your own sunlight.
  See how the right combination of fiIm and
bulb (next page) lets you shoot from 5 to 30
feet'i', indoors or out, day or night. Look what
a few extra flash bulb pennies do for you:
   1. You can shoot indoors, day or night, utitb
all tbe roonz ligbts on. lt's easy to see what
you'll get, and your subjects will be at ease.
  2, Even af.tet dark, outdoors, the flashbulb
gives plenty of light for sunshine bright pic-
iures. (By the wa.lt if you plan pictures of pic-
nics, Halloween fun, etc. outdoors after dark,
be sure to have a flashlight along, to see the
numbers when you wind film. )
   3. In sunlight, don't make your subjects
look into the sun, or they'll squint or frown.
Face them away from the sun, or make them
comfortable in the shade. Then use flash. You'll
be sure to get the picture   and it will bebetter, with better, relaxed -expressions.
*Depending on type of fash unit used.
View original page 21
From the M. Butkus archive. Original publisher and archive notices are retained.
Check the model and edition against your equipment.
PDF verified 2026-10-10.