Film cameras
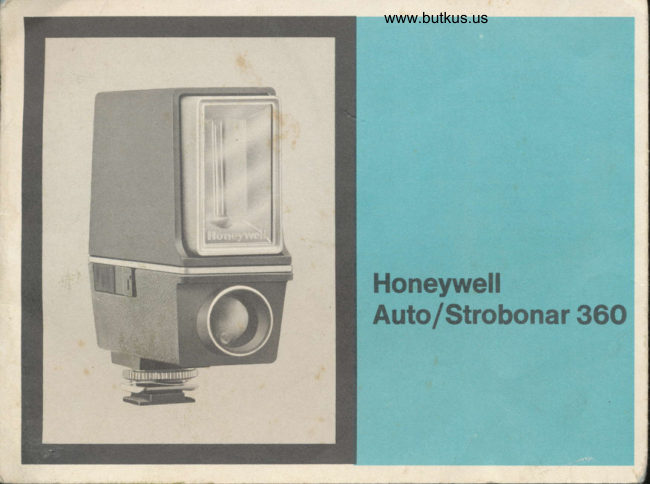
HONEYWELL AUTO/STROBONAR 360 User manual
User manual for HONEYWELL AUTO/STROBONAR 360. 14 pages in English. Read the original PDF, download or print a copy without registration.
14 pagesEnglish2.1 MB PDF
Loading your manual…Open PDF directly
Document details
- Brand
- Honeywell
- Model / document
- HONEYWELL AUTO/STROBONAR 360
- Document type
- User manual
- Language
- English
- Pages
- 14
- File size
- 2.1 MB
- Category
- Film cameras
- Document date
- Not specified in catalog
Search available document text
Find a term, then jump to its page in the original PDF. Image-only pages may not be searchable; check the PDF for exact wording and diagrams.
Page 5 · Read text
Nomenclature
  1. Battery switch           A manual containing instructions in English, French, German
 2. Center contact            and Spanish languages may be obtained by writing to the
 3. Mounting foot               address below.
 4. Knurled locking nut
 5. Open flash button          Pour obtenir le manuel  contenant le mode d'emploi en
 6. Automatic sensor             anglais, en frangais, en allemand et en espagnol, pridre
 7. Shutter connector              d'6crire i I'adresse ci-dessous:    lock
 8. Shutter connector           Ein Handbuch mit den Anweisungen auf Englisch, Franz6-
    receptacle                   sisch, Deutsch und Spanisch ist auf Wunsch erhdltlich.
  9. Charger receptacle            Diesbeztigliche Anfragen bitte an folgende Adresse richten:
10. Calculator
11. Maximum range           Puede solicitarse un manual de instrucciones en alemdn,
    index                                     espafrol, franc6s e ingl6s escribiendo a la siguiente direc-12. Automatic/Manual                                     cion:    selector lever
13. Medium range index
14. Minimum range
    index
15. Manual mode index             HONEYWELL INC.
16. Ready light                                      Photographic Products Division17. ASA index                                    Customer Services18. Charger
                                         P.O. Box 22083
                                       Denver, Colorado 80222 U.S.A.
View original page 5Page 7 · Read text
First - Set charger voltage
Your Honeywell Rapid Charge unit can be used to charge the built-in nickel cadmium batteries
on either 115 volt AC (standard U.S.A.) or 230 volt AG (many European and other countries).
Set the charger voltage selector on the bottom of your rapid charge unit to match the line
voltage you will use. Use a ballpoint pen or similar object, position in the slots as shown, to
set the voltage selector.
                                    CAUTION: The charger voltage selector must
                                       be set to the voltage you are using to prevent
                                    damage to your charger.
                             A wall outlet AC adapter may be necessary in
                                some countries to adapt the two-prong plug
                                on your charger to the AC wall outlet. The
                                        adapter may vary from country-to-countrv or
                                                  within a particular country.
Before you use your unit the first time
Charge the nickel cadmium batteries for 24 hours and form the storage capacitor. The 24-hour
charge conditions the batteries for normal rapid charge use.
To charge, set the voltage selector as described above. Gonnect the charger as shown on
page 3 and set the Battery switch (1) to OFF, white dot not visible.
To lorm the capacltor, set the Battery switch (1) to ON, white dot visible, and fire the flash
about 5 times by pressing the Open Flash button (5). Wait about 30 seconds between flashes.
flOIE: When operatlng the charger at 90 to 100 volts AC (Japan), set the Voltage Selector to 115V. The number
of lfashes per minute ol charge wlll be less than ghown In the chart on gage7.
View original page 7Page 8 · Read text
www.butkus.us
Use your unit frequently.
Your Auto/Strobonar thrives on frequent use. Use it often. lf you can't, charge the batteries
and form the capacitor as described on page 6 at least once every 30 days. lf you don't use
your 360 for several weeks, it is normal for the batteries to lose some of their charge and the
storage capacitor to deform. A deformed capacitor causes longer recycle time for the first few
flashes and less flashes per battery charge.  lf you are in a hurry, form the storage capacitor
by using your Auto/Strobonar  in your photographic situation. Just remember that your recycle
time will be longer for the first few flashes.

Battery charging
The Honeywell battery saving circuit lets you charge the batteries for weeks without damage.
 It is good practice to charge the batteries after each use. Always charge the batteries  if the
ready light (16) takes 30 seconds or longer to turn on. Charging the batteries tor 24 hours every
30 days is good for your batteries.

                     Minutes of Charge           5      20      180
                      Flashes (Average)            5      15      40
The batteries degrade when they are not charged periodically or if they are stored at tem-
peratures above 95 degrees Fahrenheit (35 degrees Centigrade). Therefore, always charge
the batteries for at least 24 hours if you are not getting the number of flashes listed in the
chart above.
ALWAYS DTSCOiTwECI the charger lrom your Auto/strobonar when you have compteted charging. This is required
to keep the batteries lrom discharging needlessly through the circuitry in the charger.
View original page 8Page 9 · Read text
;^?i:                                                                                                                                    t*,b*                                                                                                                                                                                                          +.4'                                                                        rffi,,    w:as:-                                                                                fffii
Attaching to camera
 lf your camera has a built-in accessory shoe, mount your Strobonar to the accessory shoe and
tighten the knurled nut on the mounting shoe. Cameras equipped for cordless flash have a
center contact in the accessory shoe. ln this case, there is no need to connect the shutter cord
included with your 360.
 lf there is no contact in the accessory shoe, just connect the shutter cord by sliding the lock (7)
open and inserting the locking tip connector. Connect the end with the removable tip con-
nector to the X-sync terminal of your camera. Tip connectors are available for a variety of
cameras (see your dealer). A standard PC (DlN) tip is supplied.
lf your camera does not have an accessory shoe, use one of the many Honeywell brackets
available from your dealer.


Setting shutter speed
Use X-synchronization (zero delay). lf your camera has a between-the-lens  shutter, it will syn-
chronize at all speeds. lf it has a focal plane shutter, it will synchronize only at slower speeds,
 generally up to 1/60 second. Check your camera instruction manual.
View original page 9
Page 10 · Read text
'!_*F                                                                                 :ffi,
                                          www.butkus.us
  Taking pictures automatically


     '1. Turn the calculator dial (10) until the ASA number of the film you are using is opposite the
    ASA index (17).

   2. Choose the f/stop, opposite one of the three range indexes (11, 13 or 14) that gives you the
      depth of field and/or range you want. You have a choice of three stops for each different
       film speed. However, the three shooting ranges are the same for all film speeds.
   EXAMPLE 1: lf you are using a film speed of ASA 25, you can shoot at either t/2.0 (4to 22
    feet or 1.2 to 6.7 metersl, t/2.8 (3 to 15.5 feet or .9 to 4.7 meters), or t/4.0 (2 to 11 feet or .6
    to 3.3 meters).
  EXAMPLE 2: lf you are using ASA 100, you can shoot at either ll4 (4to 22 feet or '1.2to 6.7
    meters), f/5.6 (3 to 15.5 feet or .9lo 4.7 meters), or t/8 (2to 11 feet or.6 to 3.3 meters).
   3. Set Automatic/Manual  selector lever (12) to the range index opposite your selected stop.

   4. Set your camera lens to your selected f/stop.

   5. Set battery switch (1) to ON, white dot visible

   6. Shoot your picture after the ready light (16) comes on. Within the range (see page 5) of your
      selected f/stop, your subject will receive correct exposure automatically - with no bother-
     some adjustment or calculations.
View original page 10Page 11 · Read text
Taking pictures in manual mode using calculator


 1. Set Autornatic/Manual selector lever (12) to M (15).

 2. Turn calculator dial (10) until the ASA film speed of the film you're using is opposite ASA
   index (17).

3. Gheck the distance to your subject, using camera range finder or some other convenient
   method. Remember  it is flash-to-subject distance that counts, not camera-to-subject
   distance.

4. Adjust your camera lens to the f/stop that appears opposite the flash{o-subject  distance on
   the calculator.

5. Switch the Battery switch (1)to ON (white dot visible) and take your picture after the ready
   light comes on.

EXAMPLE:  lf you are using a film speed of ASA 25 with a flashto-subject distance of 10.5
feet (3 meters), the proper f/stop to set on your camera ist/4.

ilOfE; The calculatot scale and the gulde number are based on averages calculated lor average size rooms with
light walls.  ll you are taking pictures in a very large room or out ol doors at night, you may need to increase the
exposurc by one tlstop or more.
View original page 11Page 12 · Read text
www.butkus.us
Taking pictures in manual mode using
guide numbers


1. Set the Automatic/Manual Selector (12) to M (15).
2. Find the guide numberforthe  film speed you are using in the table below.
3. Determine the flash-to-subject distance.
4. Divide the guide number by the flash-to-subject distance to find your f/stop setting for
   average exposure, and set this f/stop on your camera.
5. Switch the Battery switch (1) to ON (white dot visible) and take your picture after the ready
    light comes on.
EXAMPLE: lf you are using a film speed of ASA 25 al a flash-to-subject distance of 10 feet
(3 meters), the proper f/stop to set on your camera  is f/4.0 (42 divided by 10 or 12.8 divided by
3), which ist/4.2. The nearest click stop on your camera is close enough for practical work.

 ASA           25   32   40   50   64   BO  100 125  160 200  250  320  400  800   1 600
 GUIDE NO.                 42   47   52   59   67   75   84  96  106 118  134  150  168  236   336 FEET
 GUIDE NO.                12.8  14.3  16.2  18.0  20.4  22.9  25.6  29 32.3  36  40.9  45.7  51.2  72.3  102.4 METERS
View original page 12Page 13 · Read text
Tips for using your Auto/Strobonar

Move in close for tight shots or back away for long shots. You can do this without changing
setting when operating automatically.
Try to line up a group so that everyone is about the same distance from your Auto/Strobonar.
Try to keep your subject a few feet (about 1.5 meters) from the wall. This will keep the harsh
shadows out of your pictures.
For more pleasing results, try to have a light, bright color a few feet from your subject.
Avoid shooting through doorways or against windows where objects close to your field of
view may reflect light into the sensor, causing incorrect exposure.
Bounce flash - Use manual mode for bounce flash. Remove flash from your camera and allowtwo full stops more exposure to compensate  for the light absorbed by the ceiling or wall under
average conditions.
Stop-Action -The fantastic speed of your Auto/Strobonar  (1 /70,000 to 1/4,000 second) is ex-
cellent for such stop-action pictures as breaking a light bulb, hitting a golf ball, and bursting
a balloon. Creative pictures of this type require special techniques. Usually the camera shutter
is set to "B" and a simple switch (made of aluminum foil, paper clip or pieces of wire) is used
to fire the flash at the moment you desire to make the exposure. Be sure to photograph your
subject in a dark area and fire the flash when the shutter is open. For further information, write
Customer Services.
View original page 13
Page 14 · Read text
www.butkus.us


       Your Auto/Strobonar 360 may be used quite simply in manual mode as fill-in light when sun-
          light causes heavy side or front shadows. Just enough fill light should be used to soften the
        shadows, so more detail can be seen in the shadow areas. Of course, too much fill light will
       overpower the reflected sunlight and completely cancel the shadows. The amount of fill light
         to use depends upon your personal preference. As a starting point, use one-half of a full flash
        exposure for color film and one-fourth for black-and-white film.
       The techniques of fill flash, although not complicated, are beyond the scope of this owner's
       manual. lf you would like to explore this lechnique, write to Customer Services.
             Fr


                                                                                                                                                                                                      t;           Ig.I                       Z
                    Sublect in brlght sunlight with-                        Strobonat  lill-in soltens shad-                    out lill-in llash.                            ows and gives crlsp detail.
                                                                          Meter readlng was taken on sun-
                                                                                         light side ot subiect.
        For further information. write to: HONEYWELL INC.
                                    Photographic Products Division
                                Customer Services
                                       P.O. Box 22083
                                     Denver, Colorado 80222 U.S.A.
i
View original page 14From the M. Butkus archive. Original publisher and archive notices are retained.
Check the model and edition against your equipment.
PDF verified 2026-10-10.