Film cameras
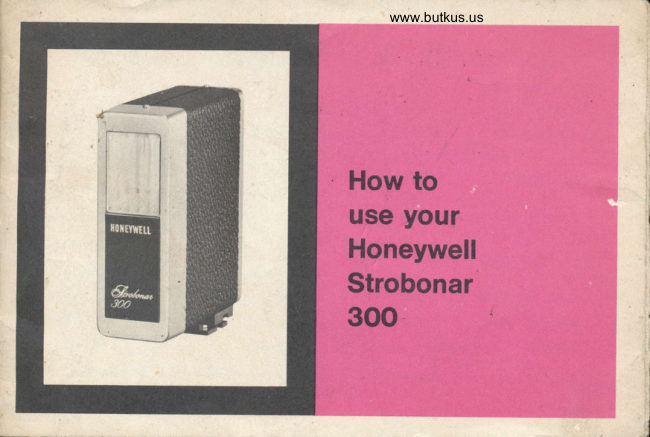
Honeywell Strobonar 300 User manual
User manual for Honeywell Strobonar 300. 24 pages in English. Read the original PDF, download or print a copy without registration.
24 pagesEnglish3.4 MB PDF
Loading your manual…Open PDF directly
Document details
- Brand
- Honeywell
- Model / document
- Honeywell Strobonar 300
- Document type
- User manual
- Language
- English
- Pages
- 24
- File size
- 3.4 MB
- Category
- Film cameras
- Document date
- Not specified in catalog
Search available document text
Find a term, then jump to its page in the original PDF. Image-only pages may not be searchable; check the PDF for exact wording and diagrams.
Page 4 · Read text
Venmo @mike-butkus-camera  Ph. 2083
PayPal Name  Lynn@butkus.org      www.PayPal.me/lynnbutkus
View original page 4
Page 6 · Read text
www.butkus.us
Strobonar 3OO specifications


Guide Number.    ..40 for ASA 25 film       Flash Capacity
                                     Battery         About 40 per charge
Flash Duration         1/1200 second                            with fully charged battery
                        AC                            Untimited
Angle of lllumination. About 65 x 55 degrees     Battery   Rechargeable nickel-cadmium
                                         AC.  . .                  . 105 to 129 Vac, 50 to 60 CpSColor Temperature. .Approx. noon daylight
                                         Charge Time.          About 15 hours
Recycle Time (Nominal)                                                 Shutter Contact.....Either  hot shoe or PC,
  Battery            ..About I seconds                 with special shutter cord supplied
  Combined Battery and AC.  . .About S sec.    Weight                 ....About 8 oz.
 AC..            ...About15seconds     Dimensions....  .3.23x 2.84x 1.15 in.
View original page 6Page 7 · Read text
ffiWlt$ffi1:"rl4Tti!ry8i.'9tr,                   fli?f  .y:f €F "       ,ns*ry!@ryta*-:     aerr*n!y@E;    i e
    Introduction
        Your. Horreywell Strobonar 300 is the smallest member of the Honeywell family of         q.uality Strobonars, and the smallest miniaturized, shoe-mount electronic flash on
        the,marketlog?y..lt delivers more energy pqr ftash ior its size iha; ;t   unit avaitabte       and has a Guide Number of 40 for nSAZS titm.
        T'he Strobonar 300 has many features not found on much larger and heavier units.
           It's equipped with a. hot shbe, but a unique Circuit attows rise witn slinoard pC
       equipped cameras without adapters. The uhit is supptied wiiniipeciar s[ltter cord        for PC equipped cameras.
        U.tlng advanced t_o!'-d_slatg^o^rrguitry and self-contained nickel cadmium recharge-
        able cells, your- Strobonar 300 features both battery anO ac operation.-ii'afro has a       manual button for open flash photography.
        You'll find that the extremely short flash duration (1 /1200 second) will ,,freeze"
        action and eliminate blurred [ictures due to camera movement. rne iignt trom your
       Strobonar 300 is color balanied for daylight film. The cofor tempeiitiii" bi tne iight         re-sults in warm, natu.ral-.looking pictuies-, especially flattering'to Jfiin tones. The
        300, used as fill-in light, improves'the q.udtity.'ot youi'outdoor-pictures by softening
      shadow areas and enhancing detail tnat would oinerwiie oe t6si.--
      Each unit is thoroughly tested before it leaves the factory, and the Honeywell war-
        ranty which appears on the inside back cover of this mdriuat is your-as-iurance of       prompt, courteous service and complete satisfaction.
View original page 7Page 8 · Read text
www.butkus.us
    lmportant:
      o Recharge the nickel-cadmium battery for about 15 hours for any of the following condi-
            tions (see page 14):
                       lf your unit is new.
                       lf your unit has been out of service for a long time.
                       lf the ready light takes longer than 30 seconds to glow.
      o Rejuvenate the Storage Capacitor  if the unit has not been used for two days (see page 15).
       NOTE: The capacitor is automatically rejuvenated when the unit is continuously charged for
           about 2 hours or more.
       o Avoid switching your 300 to "on" and leaving it on for extended periods of time. Leaving
                                                  damage the unit. When storing the                                                     could                                                 battery                                          and                                   drains                         "on"                                     the                     switch               batterytln&t.t         the                                                                           "off".                                                                 is set                                                         to                                       battery                               the                                         switch          Strobonar,                make                          sure
       o Avoid flashing your Strobonar on battery power  if the ready light is off. Even if the unit
          does flash, it will not have achieved  full output, and the result will be a poor exposure.
       o The ready lamp will take longer to glow when the battery needs recharging or the storage
           capacitor needs rejuvenating.
      o During long breaks between shots, switch the unit to "off".
       o The 300 thrives on frequent use - use it often.
li*
     6
iL
View original page 8Page 9 · Read text
Operating steps
       FAMILIARIZE YOURSETF WITH YOUR HONEYWEII STROBONAR 3OO_THEN FOLLOW
      THESE SIMPLE STEPS;
      Checklist
      o Recharge the batteries and rejuvenate the capacitor (see pages 14 and 15) before using
          your unit if it is new or has been out of service for sometime.
               ' Attach the 300 to your camera and connect the shutter cord if required (see page 8).
       o Set camera shutter speed (9).
       o Set exposure calculator to the ASA number of the film you're using (see page 10).
      o Determine the flash to subject distance.
      o Use the f/stop which appears opposite the subject distance on the exposure calculator.
       To Operate on Battery Power: Set the battery switch to "on" (down, red mark visible); take
        the picture after the ready light glows (see page 11).
       To Operate on Battery and AC Simultaneously: Connect the wall box (see page 12); set the
         battery switch to "on"; take the picture after the ready light glows (see page 1t!).
       To Operate on AC Only: Connect the wall box; set the battery switch to "off" (up, red mark
        not visible); wait about 15 seconds and take the picture (see page 12).

1l
                                                                                                       7
View original page 9Page 10 · Read text
www.butkus.us
   Connecting the unit
    to your camera
       Your Strobonar 300 should be mounted to your
       camera with one of the many brackets available
       as optional accessories (see page 18). lt comes
       equipped with a center (hot shoe) contact. By
       means of a unique circuit, the Strobonar 300 can
     be used with standard PC equipped cameras
        without adapters. Your 300 is supplied with a
        specially designed shutter cord for use with PG
       equipped cameras. The cord is supplied with a
        standard PG connector on one end and a Rollei
         locking connector on the other end for connecting
         to the Strobonar.
      Cameras with Accessory Genter (Hot Shoe)
        Conlact: Mount your Strobonar 300 on the hot
         shoe.
       Cameras with PC Gonneclor: Connect your Stro-
       bonar to the camera using a shutter cord and
        accessory bracket (page 18). When connecting           Strobonar 300 mounted
       and disconnecting shuttei cord plug: pull shutter          on Rolleiflex SL 26
i       cord plug lock down (page 3). When the shutter
     IL
View original page 10Page 11 · Read text
cord is connected, the hot shoe contact is disconnected. Connect the shutter cord to the
        X-contact (zero delay) of your camera, making sure that the flash synchronization lever is         set to "X" if adjustable.
      cAUTloN: Always use a shutter cord with a Rollei locking connector on one end for con-
                   necting to the Strobonar. Otherwise the hot shoe contact will be connected and
                  could damage the flash unit.

   Shutter speed
      The proper shutter speed to use with your 300 depends on your camera. lt is primarily a
       m€tter of synchronization and not exposure determination, since the flash duraiion of ine      300 is shorter than any normal camera shutter speed.
      Your Strobonar 300 is designed to operate with built-in "X" flash contacts.  lf your camera
      has a between-the-lens shutter with X-contacts (zero delay), it will synctrronize at 1/S00
      second and all slower speeds. lf your camera has a focal plane shutter with X-synchroniza-
        tion, it will synchronize only at slower speeds-up to tizs or 1/60 seconds, depending      on the camera.
 ;     To determine at what shutter speeds your camera is properly synchronized for use with
I        electronic flash, check your camera instruction manual, or if in doubt, check with your dealer.
        Generally speaking,  if it is possible for you to use the higher shuttei speeds, it ii best to do        so, particularly when the existing indoor light or daytight is at a high level.
                                                                                                                      I
View original page 11Page 12 · Read text
www.butkus.us
  Taking flash piptures
   Whenever daylight or constant sources of artificial light
    are available, correct exposure is regulated by shutter
    speed and diaphragm stop. lf the ultra short Strobonar flash
    (1/1200 second) is used, exposure can only be regulated
    by the f/ stop setting. The exposure calculator on the back
    of your Strobonar 300 offers a quick and easy way to
    compute the correct f/stop. The calculator scale is based
   on averages calculated for normal size rooms with light
    walls. However, if you're taking pictures in a very large
   room or out of doors at night, increase the exposure by
    one'or two f/stops.
   To use your Strobonar 300, calculate the exposure for each
     different flash-to-subject distance as follows:
     o Set the arrow on the exposure calculator dial opposite
         the ASA number of the film you're using.
        . Use the f/stop opposite the flash-to-subject distance.
     EXAMPLE: lf you're using a film speed of ASA 25 with
           a flash-to-subject distance of 10 feet, the
                 proper f/stop to set your camera is fl4.

10
View original page 12Page 13 · Read text
Battery operation
                                    Your Strobonar 300 uses a maintenance free nickel-cad-
                                 mium battery, offering a recycte time of about g seconds
                                    to ready light and 40 flashes per charge from a fully
                                       charged battery.
                               The nickel-cadmium battery is a popular portable power  E             source and has no equal in convenience and economy.
                               To get the best out of your battery, observe the recom-
                                       mendations given in this manual. ln particular, avoid leav-
                                             ing the unit switched on battery power for long periods of
                                      time when not in use. The cells must bring-the unit to
                                     "Ready" and maintain the condition untit you take the.pic-
                                               ture. To conserve your battery, switch your unit to ,,otf"
                              when there are long pauses between exposures. After
                                             using, don't forget to switch the unit to ,,off',.
                                                                                                                                     ,,on',       rylrl        To Operate on Baltery: Set the battery switch to
  1                                          (down);after the ready light glows, you may take the picture.
                www.butkus.us            WARNING: Do not operate your Strobonar 300 on battery
                                     power if the ready light takes 60 seconds or more to glow.   ,l                                     ]o do so will permanenily damage the battery. Charg6 the                                              battery and then operate your Strobonar.
I
I
                                                                                                                11L,
View original page 13Page 14 · Read text
www.butkus.us
 AC operation


   A wall box is suiplieO with your Strobonar 300. You must connect the wall box to operate on
   ac line, battery and ac line simultaneously, or to charge the nickel-cadmium battery.
   AC operation offers you the advantage of an unlimited number of flashes, independent of the
    state of charge of the battery. Although your Strobonar 300 will operate on a wide range of
   ac line voltages (105 to 129 volts,60 CPS), the ready light may not light when the line voltage
     is low. However, your unit will operate properly and give well exposed pictures  if you allow
   15 seconds between flashes.
   To Operate on AC:
     o Connect the wall box to the three-prong connector on the back of the unit.
     oPtugthewa||boxintoastandardacwa||out|et.
     o Set the battery switch to "off" (up).
     o After 15 seconds you may take the picture.
     o Wait 15 seconds between flashes.

12
View original page 14Page 15 · Read text
Simultaneous battery and AC operation
 I
 I


I
I        time,lf youyouplancanto takeoperatea largeyour numberStrobonarof pictures300 on batteryindoorsandandacconserveline voltageyour simultaneously.battery at the sameThis
      mode of operation gives you more flashes per charge and quicker recycle time   about        5 seconds.                                                                        -
       To Operate on Battery and AG Line Simultaneously:
        o Connect the wall box as shown on the preceding page.
             . Set the battery switch to "on" (down).
        o After the ready light glows, you may take the picture.
        o Switch the battery to "off" when there are long pauses between flashes.t
          r After using, don't forget to switch the unit to "off" and disconnect the wall box.

                                                                                                      13
View original page 15Page 16 · Read text
www.butkus.us
  Recharging the battery

   Recharging replaces the battery power that has been used. Recharge the battery when the
    ready light takes longer than 30 seconds to glow. This is likely to occur when you first receive
   your unit or when it has been out of use for a long time.
   The nickel-cadmium battery supplied with your Strobonar 300 can be recharged at any time.
   Charging the battery after each use helps to assure that it will have a good charge the next
    time you wish to use your unit. Since all batteries discharge slowly during storage, it is ad-
    visable to recharge the batteries after periods of disuse.
   The battery will be fully charged after a charge period of 15 hours. Charging your battery
    for a longer period of time causes no damage but neither does it offer any advantage.
   To Recharge the Battery:
       . Connect the wall box (page 12).
     o Set the battery switch to "off". The signal lamp on the wall box indicates that the battery
          is being charged.
       . After charging, disconnect the wall box and set the battery switch to "otf" (up).
   NOTE:  lf you recharge the battery for two continuous hours or more, it is not necessary to
    rejuvenate the capacitor. The solid state electronic circuitry inside the Strobonar will reju-
    venate the capacitor automatically.  lf you recharge the batteries for less than two hours, flash
    the unit four or five times. The capacitor will then be rejuvenated.

14
View original page 16Page 17 · Read text
Reiuvenating the capacitor
        Every electronic flash unit has an energy storage capacitor.  lt is the most effective means of
         delivering electrical energy from the battery or standard household current outlet to the flash-
t       tube which converts electrical energy to light. When the unit is not flashed for several days,
        the storage capacitor "deforms" through disuse, which means it loses some of its capacity
        to store electrical energy. The longer the time between uses, the more "deformed" the
        capacitor becomes. In a sense,  it goes dead, and needs reforming to put it in efficient operat-

      I
   I        ing condition.
      A "deformed" capacitor causes excessive current drain from the battery and longer recycling
        time (time to ready light glow) for the first few flashes. Reforming the capacitor easily corrects
          this situation, thereby allowing your unit to perform at peak efficiency.
  I      The storage capacitor is reformed through use. The Strobonar 300 thrives on frequent use -  I      use it often. Reform the storage capacitor as described below.
 I                  lf your unit has been out of service for two or three days:
          o Connect the wall box.
          o Set the battery switch to "off" (up).
I          .  o Wait five minutes and then flash the unit four or five times, waiting about 15 seconds
             between flashes.
                   lf your unit has been out of service for four days or more:
         o Connect the wall box.
a               . Set the battery switch to "off".
          o Wait about an hour and then flash the unit four or five times, waiting about 15 seconds
 II             between flashes.
 I
                                                                                                     15
L*
View original page 17Page 18 · Read text
www.butkus.us
  Outdoor use as fill-in light

   Your Strobonar 300 may be used quite simply as "fill" light when sun light causes heavy side
   or front shadows. Just enough light should be used to soften the shadows, so that more
    detail can be seen in the shadow areas. Of course, too much "fill" will overpower the re-
    flected sun light and completely cancel the shadows. For good results it's best to let the
    sun do the biggest part of the job, and use the Strobonar to put just the right amount of light
   on the shadow.
    Between-The-Lens-Shutters:  Use the calcufator to determine the correct f/stop for the lamp-
    to-subject distance, but set your camera for one f/stop less exposure for color film and two
    f/stops less exposure for black-and-white film. Adjust your camera shutter speed for the out-
    side light conditions as indicated on the exposure meter for the f/stop already set on your
    camera. This gives half the correct flash exposure for color film or one-fourth the correct flash
   exposure for black-and-white film to relieve the shadows, while the rest of the subject is
    correctly exposed.
    Focat Plane Shutters: First, determine the fastest shutter speed usable with electronic flash
   and the appropriate f/stop for sun light exposure. Make these settings on your camera. Now
    set the exposure calculator on the Strobonar 300 to the ASA speed of the film you're using,
   and read the flash-to-subject distance of the calculator opposite the f/stop setting that you
   made on the camera. To reduce the amount of flash reaching the subject, and thus not over-
   power the reflected sun light: the flash should be backed away from the subject; for color,
   50 percent further than that shown on the calculator, or twice as far for black-and-white.

16
View original page 18Page 19 · Read text
Bounce lighting
       To obtain the softer, more subdued lighting, bounce the light from your Strobonar 300 off the
         wall or ceiling. The wall or ceiling should be a light, neutral color. Light bounced from a
        colored surface will impart an overall color tint to your pictures. To determine the exposure
         for bounce lighting, estimate the distance from the flash to the ceiling to the suoleci. find
        the f/stop for this distance using the exposure calculator. Then, allow one full f/stop more
        exposure to compensate for the light absorbed by the ceiling. The light is usually aimed at
         the ceiling in a way that the bounce light usually falls directly on the subject.  tt ihe light is
       aimed at an angle so that the subject does not receive the main portion of the light, then
         increase the exposure one more f/stop.
        For bounce lighting use a shutter cord and hand hold the strobonar.

   Open flash
       Your Strobonar 300 has a manual button for open ftash photography. With this method re-
        peated                 flashing                        during                                                                  possible                        a long                                     time exposure                                          becomes                                                                                        special                                                                                                            effects                                                                     - for example,       and tricks.                   For open                                 flash,                                 disconnect                                              the Strobonar                                                       from                                                                 the camera,                                                                    open the                                                                            camera                                                                                                        shut-
           ter, and flash the Strobonar by pressing the open flash button.


                                                                                                     171
View original page 19Page 20 · Read text
www.butkus.us
  Accessories
   Honeywell manufactures the finest line of mounting brackets, clamps, shutter cords, and
    other flash accessories available.
       lf you have a camera with a hot shoe connector, connect the 300 directly.
    For snap-on mounting, which permits instant release of the unit for off-camera flash, use the
   Honeywell Quick-Release Shoe Mount Handle, Catalog No. 366, and one of these brackets:
    Bracket                                    Gat. No.            Camera
                                                                  For most miniature and most
    Standard Camera Bracket                                                                  roll film cameras
  R-7                                               .. ..301                                     . Most twin-lens reflex cameras
  135-VX                           .....304                                 Exakta VX
    Retina 111C .                        .....305
   Pentax-Leica..                    ...306                                   ;;;;;;;;; #:1",:[:   44 ..                               .....307                . .Rolleiflex & Yashica 4 x 4 cameras
     Rollei 35 bracket with
    hot shoe adapter.                    ..342                                                                                        . Rollei 35
   Polaroid                                                          . .356                                       .  Polaroid
    Pistol Grip with
    Rollei TLR Pistol Grip Bracket..... .369 & 1502                                      .. Rolleiflex

18
View original page 20Page 22 · Read text
www.butkus.us
  Accessories                                     Mounting Strobonar 300
                                                                               to Rollei 35
    To connect the Rollei 35 to the Rollei 35
     bracket with hot sfioe adapler:
    o Push the round hot shoe adapter into
       the shoe connector on the camera.
    o Attach the bracket to the camera.
    o Attach the 300 to the bracket.
    o Connect the shutter cord.


   SELECTING THE PROPER HONEYWELL SHUTTER CORD
    Select the proper Honeywell shutter cord for connecting the 300 to your camera. A 12-inch
     straight cord and a 15- to S4-inch coiled cord are available. These are provided with a Rollei
     locking connector at one end (to connect to the Strobonar 300) and with a choice of Rollei,
     Leica, or normal PC connectors at the other end (to connect to the camera). Your Honeywell
    dealer will be happy to assist you in selecting the proper mounting combination and connect-
    ing cord for your camera.

20
View original page 22Page 23 · Read text
Warranty
 All Honeywell Strobonar elecironic flash units sold in the United States and its possessions are uncon-
ditionally guaranteed against defects in material or workmanship for a period of ninety days afier
date of delivery to the original retail purchaser. Service will be rendered and defective parts will be
replaced without cost to you within the ninety day time period, provided the electronic flash unit has
not been abused, altered, or operated contrary to instructions. Honeywell shall noi be liable for any
repairs except lhose made at aulhorized Honeywell repair centers or alterations excepf ihose made
with its written consent and shall not be liable for damages from delay or loss of use or for ofher
 indirect or consequential damages of any kind, whether caused by defective material or workmanship
or otherwise; and it is expressly agreed thaf Honeywell's liability under all guarantees or warranfies,
whether expressed or implied, is strictly limited fo the correction of defecfs in material or workmanship
as hereinbefore provided. To enable us to properly serve you, the purchase registration card should be
filled in COMPLETELY and mailed to Honeywell within five days of purchase. Any electronic flash unit
which proves defective during lhe ninety day warranty period should be returned to your Honeywell
Photographic Dealer with particulars regarding malfunction and date and place of purchase (including
evidence of date and place of purchase  if requested by Honeywell). The dealer will forward the
electronic flash unit with particulars fo Honeywell. PLEASE DO NOT SEND YOUR UNIT DIRECTLY TO
HONEYWELL, as your Honeywell Photographic Dealer will select the aufhorized Honeywell repair
center which will give you the fastest service.
UNITS SOLD lN CANADA through Honeywell                       For information regarding units sold in
Controls, Ltd., Toronto Canada, are protected by                       ofher countries write:
the same warranty policy outlined above.                       INTERNATIONAL DIVISION
Electronic flash units requiring service in Canada                  HONEYWELL,  INC.
should be returned to your Canadian Honeywell                     4800 E. Dry Creek Road
Photographic Dealer.                                                 Denver, Colorado 80217
                     All models, prlces and speclllcatlons are subiect to change without notice.
View original page 23From the M. Butkus archive. Original publisher and archive notices are retained.
Check the model and edition against your equipment.
PDF verified 2026-10-10.