Film cameras
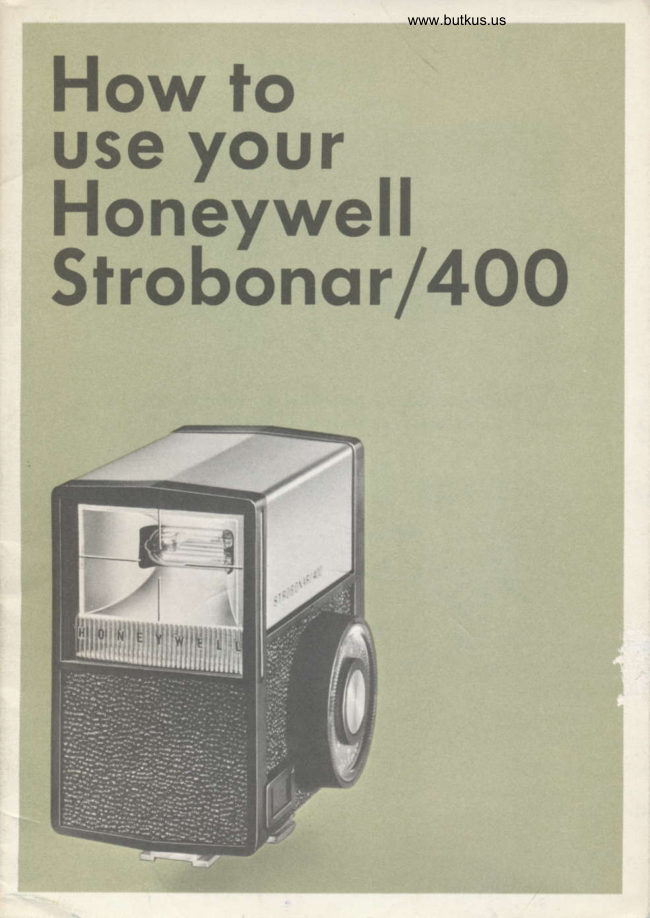
Honeywell Strobonar 400 User manual
User manual for Honeywell Strobonar 400. 21 pages. Read the original PDF, download or print a copy without registration.
21 pagesOriginal document3.2 MB PDF
Loading your manual…Open PDF directly
Document details
- Brand
- Honeywell
- Model / document
- Honeywell Strobonar 400
- Document type
- User manual
- Language
- Check the original document
- Pages
- 21
- File size
- 3.2 MB
- Category
- Film cameras
- Document date
- Not specified in catalog
Search available document text
Find a term, then jump to its page in the original PDF. Image-only pages may not be searchable; check the PDF for exact wording and diagrams.
Page 9 · Read text
Qpefgting steps
checkf ists

BATTERY OPERATION
Make certain capacitor is rejuvenated (Page 9).
Mount unit on camera (Page 7).
connect shutter cord to unit and camera. set ASA film speed on
exposure calculator to line up with exposure index mark (Page 1 3).
Read flash-to-subject distance on dial (Page 13).
Determine exposure (Page 13).
Set aperture and shutter speed on camera. Push power switch up
to BATT position. watch left-hand neon indicator. with fuily
charged battery,  it should glow within 4 to 9 seconds (page 8).
When neon glows, shoot picture. Wait for neon to glow before
shooting next picture.when delaying more than 2 minutes between
pictures, when through shooting, turn power switch to OFF/CHRG.
AC OPERATION
Make certain capacitor is rejuVenated (Page 10).
Plug AC cord into 105-129 volt outlet.
Mount unit on camera (Page 7).
connect shutter cord to.unit and camera. Attach AC cord to unit.
set ASA film speed on exposure calculator to line up with exposure
index mark (Page 13).
Read flash-to-subject distance on dial (Page 13).
Determine exposure (Page 13).
Set aperture and shutter speed on camera. Push power switch
down to AC position. Right-hand neon will light, indicating that
unit is plugged in, and that the switch is in either the AC or OFF/
CHRG position.
     Left-hand neon operation is dependent upon vottage; if it does
     not light, you can be certain of full output  if you allow  I S secs.
    from the time you switch to AC until you shoot your picture.
Allow 15 seconds between each picture.
When finished shooting, unplug the AC cord. Or, if you wish to
recharge the unit's battery, leave the cord plugged in and move the
power switch to OFF/CHRG.
View original page 9Page 10 · Read text
www.butkus.us
Mountinq the
Stroboncirl+OO
on      cqmercl   Your


Because  it incorporates a standard mounting shoe, the Strobonar/
400 is easily attached to any camera with a built-in shoe mount.
Many cameras, especially single-lens reflexes, do not have shoe
mounts, but most have a provision for attaching an accessory shoe
mount. Your Honeywell dealer will be glad to assist you in mounting
the Strobonar/4OO on your camera by recommending the proper
bracket, clamp, or whatever is needed. The Honeywell accessory
Pistol Grip, described on Page 1 6, provides the most flexible method
of mounting the 400 on any type of camera-be sure to read the
description of it.
View original page 10
Page 11 · Read text
Bqttery operqtion


Buift into your Strobonar/4OO is a permanent, rechargeable nickel-
cadmium power source. lt will deliver a minimum of 40 flashes
when fully charged-more than enough for most shooting sessions.
Power is easily replenished-see RECHARGING YOUR UNIT on
Page 11. With a fresh charge, recycling time (the length of time it
takes the neon 'full light' indicator to glow between flashes) will
be between 4 and 9 seconds. When the ready-light goes on, you
are ready to shoot with full light output. One of the outstanding
features of the Strobonar/4OO is its consistent recycling time. Dur-
ing the life of each charge, the interval between flashes should not
exceed 12 seconds. You'll appreciate this feature when the action
gets fast near the end of an extended sequence!
View original page 11
Page 12 · Read text
www.butkus.us
 AC operqtion


    When taking pictures indoors, there will be many times when you'll
    want to use your Strobonar/4QO on AC. The unit will function over
     quite a wide voltage range-from 105 to 129 volts. The higher the
     voltage, the closer the unit will come to full light output, and the
     quicker the recycling time. To use your Strobonar on AC, plug the
     female end of the AC line cord into the receptacle on the right-
     hand side of the unit. Plug the male end into a suitable outlet. Place
     the poWer switch on "AC." As you did for battery operation, make
      ceftain the capacitor is rejuvenated. With the unit plugged in and
     theswitch in theAC position, the right-hand pilot neon should glow
      brightly;  if it doesn't, make certain you are plugged into an operat-
     ing outlet, that both plugs of the AC cord are firmly in place, and
      that the switch is all the way down in the AC position. With voltages
      at the high end of the recommended range, the left-hand 'full light'
    neon may glow when full output is reached. ln any case, your
     Strobonar/4OO  is ready to flash at 15-second intervals when using
          it on AC. And, since AC operation helps to rejuvenate the capacitor,
    the more you use your 400, the more you'll keep it ready for
     instant use  !
10
View original page 12Page 13 · Read text
Rechqrging your unit


Repfenishing your strobonar/4oo's built-in power source is neces-
sary whenever the'full light' neon takes 20 seconds or more to glow
or fails to come on with the unit set for battery operation. To re-
charge the power source,.connect the unit as described under AC
OPERATION and place the power switch in the OFF/CHRG posi-
tion. The right-hand pilot indicator will light, but with less intensity
in the oFF/cHRG position than in the AC position, assuring you
that the unit is charging. The recommended charging time is 20
hours for a full charge. Exceeding this for an hour or two will not
damage your unit, but extended charging times are definitely not
recommended. As a suggestion, placing the unit in the charging
position at bedtime will guarantee a full, fresh charge by about
dinnertime the following evening. you wiil, of course, work out
a charging routine best fitted to your own habits.
View original page 13
Page 14 · Read text
www.butkus.us
lmportqnt!


Although your new Strobonar/400  is as foolproof as possible,  it
can be damaged through misuse. To avoid damage to your unit,
please bear the following points in mind:
Avoid switching the 400 to BATT and leaving it on for extended
periods of time. Doing so will drain the battery and could damage
the unit. When storing your Strobonar, make certain the power
switch is set on OFF/CHRG.
Avoid extended charging times.
Avoid  f lashing your Strobona r/4OO on battery operation when the
'full light' indicator is not on. Even if the unit does flash,  it will not
have achieved full output, and the result will be a poor exposure.
View original page 14
Page 15 · Read text
How to determine
exposure


 Taking correctly exposed flash pictures is easy with the Strobonar/
 400 ! Here's how to do it:
   Line up the ASA number of your film with the exposure index
 mark on the exposure calculator. lf you are uncertain of the correct
ASA number, don't guess-see the data sheet which was packed
with the film. Let's assume you're using Kodachrome  ll (ASA 2s).
set the dial so that the index mark is between the marks for'20'
and '30'on the scale. Then, determine the distance from strobonar
to subject.  lf your camera has a rangefinder or distance scale on the
lens or focusing knob, you can take the distance from that, assum-
ing the flash unit is mounted on your camera. lf you intend to hold
the unit off the camera, use the distance from the Strobonar to the
subject-n ot the camera-to-subject distance.
  As an example, you find the flash-to-subject distance to be 1o
feet. The upper portion of the exposure calculator contains a scale
for distance and one for aperture. with the catcutator set at ASA 25
for Kodachrome ll, you'll find that the 1O-foot flash-to-subject dis-
tance corresponds with an aperture between   f /4.5 and f/b.6. set
your camera accordingly, and the result will be a properly exposed
picture. Remember-set the ASA number of the film to coincide
with the index mark-then simply read the correct f/stop by referring
to the distance scale. The aperture which lines up with the distance
setting is the one to use  !
View original page 15
Page 16 · Read text
www.butkus.us
Tips on toking
b;tter pictures with
your Strobonq rlaOO


There are many good books available on picture-taking techniques,
including all aspects of lighting your pictures. We'd like to mention
a few points that will help you to get the best results with your
new Strobonar.
    It's easy to calculate exposure with the 400; however, many
photographers do not realize that flash exposure is governed to
a great extent by room size, the color of walls and ceilings, and by
the subjects themselves.
   For example, picture a situation where a young child in a white
dress is photographed in a small room with a cream-colored wall
as background. Then, imagine a group of high-school graduates
in dark-colored robes photographed outdoors at night next to a
black automobile. Neither of these situations is farfetched; in fact,
you've probably taken pictures like these yourself. But assuming
the same film is used and the flash-to-subject distances are identical
 in both cases, the results will be vastly different  if the same exposure
 is used for both shots.
  The reason, of course, is the difference in subjects and locations.
The picture of the child would probably be slightly overexposed
View original page 16Page 17 · Read text
due to the high reflectance of the child's dress and the light-colored
 walls, plus the fact that the small room would act as a reflector.
 For proper exposure, your camera should be stopped down.

  The shot of the graduates would no doubt be underexposed be-
cause the dark clothing, background, and the low light level of the
surroundings would absorb a certain amount of the light from the
flash unit. Proper exposure would call for a larger camera aperture.
so-remember that the exposure you read from the Strobonar/400's
calculator is for an average subject in average surroundings. For
situations like those described above, an adjustment in aperture is
indicated. with experience, you'll soon be abre to compensate for
extreme situations with ease.
   After you've become completely familiar with your strobonar/
400, you'll probably want to experiment with such techniques as
bounce lighting, off -camera flash, and flash  fill for outdoor pictures.
These subjects, while not difficult, are best learned by consulting
a specific reference book on lighting techniques from your locat
photo shop or public library.
  one final suggestion that seems obvious, but is quite often over-
fooked: be certain that you are familiar with your camera before
making flash pictures with your new Strobonar. Reread the instruc-
tion manual that came with your camera, if necessary, to be sure
of such things as the proper shutter speed to use with electronic
flash and the correct shutter cord outlet to aehieve synchronization.
when you are completely familiar with both camera and flash unit,
good flash pictures follow naturally.
View original page 17
Page 18 · Read text
www.butkus.us
Accessories for the
Strobonq rlaOO


Pistol Grip
The accessory Pistol Grip provides the best means of mounting
your Strobonar/4QO on your camera. A wide, deep channel in the
top of the Grip accepts the 400's mounting shoe extension, and the
mounting shoe locks  it securely in place. The camera bracket locks
in place in one of the four slots provided for maximum adiustment,
and can be removed instantly by depressing a lever and withdraw-
ing it; a feature that's especially valuable for off-camera flash pic-
tures. Two brackets are available; one for standard 35mm cameras,
and one for twin-lens reflexes. The Pistol Grip is molded to fit the
hand perfectly, and provides the utmost stability for the camera/
Strobonar combination.
 Catalog No. 329 (For standard 35mm cameras)        $ 9.95
View original page 18
Page 19 · Read text
Accessory Lens Kit
Exclusive with Honeywell, this kit of interchangeable accessory
fenses for the Strobonar/4OO will further increase the unit's versa-
tility. Lenses can be fitted and removed in seconds-simply place
a fingernail in the depression near the left-hand edge of the lens
and slip the lens out through the lens access slot. Another lens
clicks into place just as quickly. Here is a description of each lens
and how to use it:

Clear Wide-Angle Lens (Marked-WA)-lncreases the angle of
coverage of the Strobonar/4OO to correspond with the field of view
of a 35mm wide-angle lens for use on 35mm cameras. When using
this accessory lens, the camera aperture should be opened 1 addi-
tional f/stop.
                                                                         17
View original page 19Page 20 · Read text
www.butkus.us


Light Yellow UV Filter (Marked-UV)-Some  reversal color films
have a tendency to yield transparencies that are excessively blue.
This lens will effectively correct for these films, producing slides
with proper color balance. No exposure compensation necessary.
Also furnished in wide-angle (WA-UV); open camera's aperture
1 f/stop.
Light Grey Neutral Density Lens (Marked-ND-2)-With  fast
films, or when shooting at close distances,  it's often necessary to
cut down the amount of light output from your flash unit. This lens
reduces light output by 1%to 2 f/stops. Your camera's aperture set-
ting should be opened 1% to 2 f/stops. Also furnished in wide-
angle (WA-ND-2); open camera's aperture 1 additional f/stop.
Dark Grey Neutral Density Lens (Marked-ND-4)-Functions
in the same manner as the Light Grey Lens, except that it further re-
duces light output. When in place, your camera's aperture should be
opened 3 to 4 f/stops over the setting indicated by the exposure
calculator. Also furnished in wide-angle (WA-ND-4); open cam-
era's aperture 1 additional f/stop
Opaque Black Lens-Don't try to flash your Strobonar through
this one ! lt's supplied to be fitted when carrying your flash unit in
a gadget bag. Besides protecting the flash tube, it prevents the
unit's normal lens from getting scratched.
The Accessory Lenses are supplied in a compact plastic wallet
small enough to fit in a shirt pocket. Once you've used them, you'll
wonder how you got along without them   !
Catalog No.374.                                                    . $5.95
View original page 20
From the M. Butkus archive. Original publisher and archive notices are retained.
Check the model and edition against your equipment.
PDF verified 2026-10-10.