Film cameras
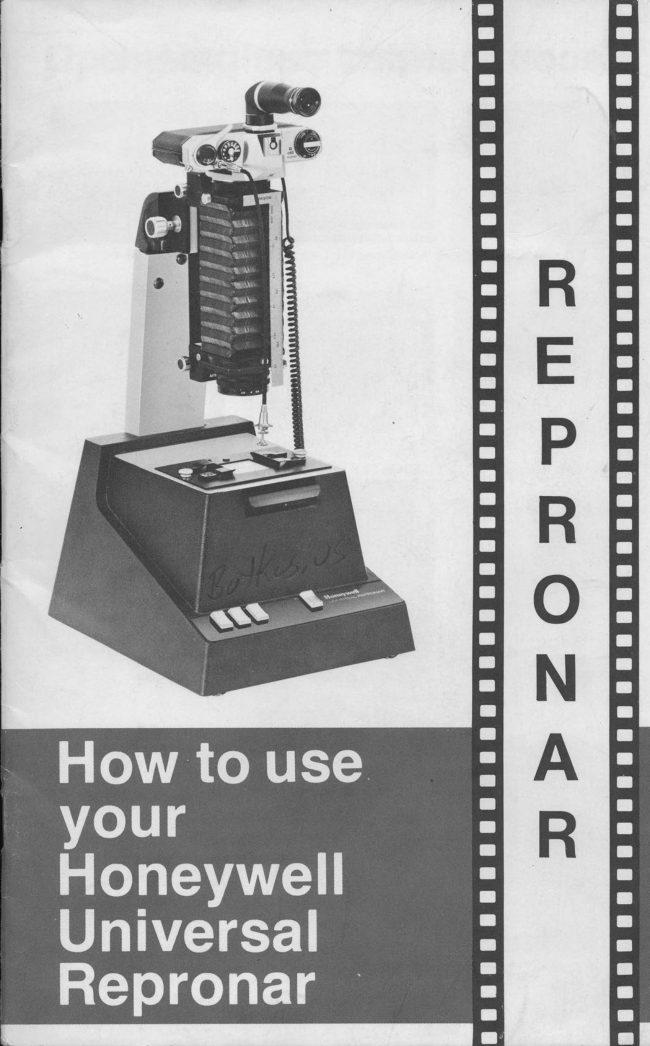
Honeywell Universal Repronar User manual
User manual for Honeywell Universal Repronar. 23 pages in English. Read the original PDF, download or print a copy without registration.
23 pagesEnglish3.6 MB PDF
Loading your manual…Open PDF directly
Document details
- Brand
- Universal
- Model / document
- Honeywell Universal Repronar
- Document type
- User manual
- Language
- English
- Pages
- 23
- File size
- 3.6 MB
- Category
- Film cameras
- Document date
- Not specified in catalog
Search available document text
Find a term, then jump to its page in the original PDF. Image-only pages may not be searchable; check the PDF for exact wording and diagrams.
Page 3 · Read text
Operating sequence


 1. Turn on Repronar. See      2. Set for 1:1 magnification. See page 10.
 page 7.


3. Calibrate light meter.        Load film.                 5. Turn on FOCUS  light.
See page 13.                                      Compose and focus slide.
                                                    See page 16.


                                            DO NOT leave focus light on
                                                                        unnecessarily.   lt can damage
                                                               your filters. Focus light must
                                                    be off when you snap your
                                                                                picture.

6. Insert filter pack. See     7. Turn on light meter and
page 18.                         adjust for propei exposure
                         using only lens f/stop.
                       NOTE: Be sure to meter
                           your slide at the shutter
                        speed listed in Table 1,
                           Page 14.


8.8. TurnTurn offoff focusfocus light.light.        9. Set your camera shutter     10. With READY light on,
                                    control to the highest speed      take your picture.
                                          it will x-sync at, usually
                                1/60 sec. (See your camera
                              Owner's Manual).
11. Repeat steps 5 through 10 for additional slides.
12. Perform steps 1 through 11 each different shooting session.
View original page 3Page 4 · Read text
Re     ended equipment


                      35 mm Single Lens Reflex Camera with stopped-down
                                  through-the-lens metering capability.


Pentax Auto Bellows         50mm f/2.8 Enlarging Lens       Locking Cable Release


Right Angle Finder            Leica "A" Adapter            "T"-Adapter
Supplied equipment


Shutter Cord                Bellows Ring with            Slide Holder
                               Thread
                                      4
View original page 4Page 5 · Read text
Read this first


Your Honeywell Universal Repronar Slide Duplicator is designed to accept most
35mm SLR cameras with through-the-lens  light metering capability. For mounting
and alignment purposes, the Repronar is designed to be used only with the
Honeywell Pentax Auto Bellows available from your Honeywell dealer as an accessory.
Most 35mm SLR cameras can be adapted to the Pentax bellows by selecting
the specific "T" adapter for that camera.
Your Repronar will accept a variety of different brand cameras. So reread your
owner's manual for your camera, particularly'the areas covering light measurement.
You'll use stopped-down (manual) aperture metering with most cameras.
 lf your camera has both spot and average metering systems, you'll usually get
better results with the average setting.
 lf you want to use your Repronar with SLR cameras that do not have a through-the-
lens metering system, you'll have to determine exposure by making test exposures.
See pag e 4 lor recommended equipment. Major parts of your Repronar are
illustrated on the outside flap (page 22) of this manual.
For best results, read this Owner's Manual through before aftempting to use
your Repronar.  lt'll take only a few minutes. Then use the simple steps on page 3
as a key for day-by-day operation of your Repronar.
                                          5
View original page 5Page 6 · Read text
t't
Choosing a lens
 Normal camera lenses are not recommended for use with the Repronar. They're
 just not designed for flat copy work. Most normal lenses (especially fast ones) exhibit
 too much curvature of field to provide sharpness over the entire picture.  lf you focus
 on the center, the edges will be out of focus. lf you focus on the edges, the center
 will be out of focus.
  lf you want sharpness, use a lens designed for close-up or copy work. An enlarging
 lens or a reproduction lens will give good results and prove more satisfactory. An
 enlarging lens such as the Honeywell Lumetar 50mm t12.8 (Catalog Number 5074) or
 a 50mm macro lens is recommended.

Choosing films for copying
 In any copy process, there is some loss of quality. The copy may lose some sharp-
 ness and detail when compared to the original. The contrast of the copy may be too
 high and have less saturated colors than the original. The colors of the copy may
 differ in hue from those of the original. So, the first consideration is to choose a film
 that will minimize these losses.
 In general, with color reversal films sharpness decreases as film speed goes up.
Therefore, the better films to use from the standpoint of sharpness will be those that
have lower film speeds.
The Kodak Ektachrome slide duplicating film 5038 is an excellent choice. lt's
made specifically for slide duplicating. You can process  it yourself, or you can have
Kodak or the processor of your choice process  it. This film only comes in 100 foot
 rolls, so you'll have to load it yourself in 20 or 36 exposure rolls.
Duplicates made using most films with electronic flash generally have less contrast
build up than experienced with tungsten lighting. The flash duration is extremely
brief (1/500 second or less). Color films produce lower contrast when the exposure
time is very short. Electronic flash resembles daylight in color. lf you use film
balanced for tungsten light, be sure and use appropriate color correcting filter.
 lf you do your own processing you can control both film speed and contrast by
modifying your process. Some custom labs also offer special processing.
Film manufacturers are constantly making improvements in their films. The instrurc-
tions packed with the film should be considered a prime source of information.
Additional information concerning the film of your choice can be obtained by writing
the film manufacturer.
The following basic publications are recommended reading. These can usually be
purchased from photo dealers.
Producing Slides and Film Strips.                     Kodak Publication No. S-8
Color as Seen and Photographed.                    Kodak Publication No. E-74
Filters.                                         Kodak Publication No. AB-1
View original page 6
Page 7 · Read text
What the buttons do


ON  . .                                                      . . .. Depress to turn on yout' Repronar. Then
(Push-Push Switch                depress to turn off.
FOCUS                                                . . Depress to turn on focus light. Then depress
(Push-Push Switch)                    to turn off.
HIGH
(Push-Push Switch)                      is switched for high flash output.
                         When not depressed (OUT), the Repronar is
                                      switched for low flash output.
FLASH                     ...When  lit, Repronar is ready to be flashed.
(Momentary Switch               Momentarily depress for open flash photography.
+ Ready Lamp)
CAMERA                .....Camera shutter sync receptacle. Accepts shut-
                                                  ter cord with Honeywell 100 Jack connector,
                                      provided with Repronar.
1.5 AMP SLO BLO              ..Fuse Holder.
POWER CORD                              . . . . .Connects to standard household outlet, 120V,
                               50 or 60 Hz.
                                      7
View original page 7Page 8 · Read text
Attaching the parts


1. Remove the camera mount ring from       2. lnstall "T" adapter for your camera.
your bellows. This ring is supplied with     NOTE: You may disregard this step  if
your Pentax Auto Bellows.                       you're using a camera with Pentax lens
                                          mount thread.


3. Install the bellows camera mount ring.  lf      4. Install "A" adapter  if you're using an
you're using "T" adapter, use bellows        enlarging lens with Leica thread.
camera mount ring with "T" thread supplied
with your Repronar.


5. Install lens on bellows.                      6. Mount bellows to Repronar.
View original page 8Page 9 · Read text
7. Attach camera to bellows.                   8. Install cable release.


  Connect shutter cord.                       10. Install right angle finder if you intend
                                                       to use  it.


                                            11. You're now ready for initial set-up for
                                                     1:1 magnification. See page 10.
View original page 9Page 10 · Read text
Initial set-up for 1:1
magnification


1.     Install slide holder. DO NOT tighten
     thumb screws. You should be able to
    move slide holder easily.

2.  Cut a 2" x 2" piece of matte
    acetate (generally available at
      Artists Materials and Drafting supply
     stores) to fit slide holder.
    Draw two parallel lines one inch     apart on the matte acetate. See    f-1'-f
      picture.


      Insert the matte acetate in the slide
      holder.


5.  Open lens to full aperture.


    Set camera shutter for B (BULB
      operation) and lock shutter open with
     cable release.


7.    Position lens mount so it is against
     bottom stop of bellows and lock by
     tightening lens carriage locking
     screw. The lens mount should remain
      in this position for slide copying with
     Repronar.

                                      10
View original page 10Page 11 · Read text
Position camera so bellows is all the
   way closed, but DO NOT lock
    camera mount.


9.  Open camera back. Place a small
    piece of ground glass or matte
     acetate (about 11/q x 172 inches)
     over the tracks at the film plane of
     your camera.


10. Place a small transparent ruler over
    the ground glass or matte acetate
      in the film plane,


11. Plug in and turn on Repronar.


12. Turn on FOCUS light.


13. Focus your camera by turning
   FOCUS knob on bellows. NOTE:
    Always focus by positioning entire
     bellows assembly. Be sure to lock
     bellows assembly after focusing.
 (Continued on page 12)

                                               11
View original page 11Page 12 · Read text
(Continued)
14. Turn camera positioning knob until
     the 1-inch marks appear exactly 1
     inch apart. See picture.
     Your're at 1:1 magnification when
     the 1-inch marks are 1 inch apart as
    viewed and measured'in the film
    plane of your camera, and your
    camera is focused sharply.
       It's easy. Here's a hint. lf the 1:1
     marks appear less than 1-inch apart,
    move camera back up slightly and
     lock mount. Then refocus. Continue
     in this manner until the marks are
      1-inch apart.
15. Now that you've established 1:1
     magnification with your particular
     lens, use your bellows scale to
    measure the distance between the
    camera mount and lens mount as
    shown in the picture. Use the milli-
     meter portion on the normal side of
     the scale. Do not use the magnifica-
     tion scale (X times) portion of your
     scale. lt's not correct for this applica-
      tion. Record the measurement.
    Once you have the measurement,  all
    you have to do to reestablish 1:1
     magnification in the future is to
     adjust camera mount to this mea-
     surement. Then focus your camera
   on a slide with focus knob and
     you're there.
        lf you change to a different lens,
    then perform steps 1 through 14
    to establish 1:1 magnification  for
    the new lens and record the new
     measurement.
16.  Turn off FOCUS light. Remove
    2 x 2 inch matte acetate from slide
      holder.
17. Remove ground glass or matte
     acetate and ruler from film plane.
    Close camera shutter and back.
                                      12
View original page 12Page 13 · Read text
Calibrating your camera light
  meter for slide copying


     1.  Set for 1:1 magnification. Seeil         page 10.
1


          Set shutter speed for 1/500 second.
          Note: lf you're using Pentax ES set
          shutter control for AUTOMATIC.
           (See your camera Owner's Manual.)


           Using Table 1, (see page 14) decide
                     if you want to use your Repronar on
             either HIGH or LOW flash. Then set
           Repronar for HIGH or LOW flash de-
          pending upon your selection.


          Set lens to f/stop circled on calibra-
          tion label on bellows support for
           selected HIGH or LOW light.

     5.  Turn on FOCUS light.

     6.  With no slide in place, turn on your
          camera light meter and adjust ASA
            control until meter indicates correct
I         exposure point, usually centered or
          at index mark for stopped-down
            metering.
        NOTE:  lf your camera light meter                                              ffi       has both averaging and spot
          metering capability, use the aver-
         aging system. lf you're using a
      (Continued on page 14.)
View original page 13Page 14 · Read text
6.    (Continued)
     Pentax ES, adjust ASA control for
      indication of 1/500 in viewfinder.
     (See your camera Owner's Manual.)

 7.   Record ASA setting of your camera
        dial.
8.  Find the ASA number you recorded
     in step 7 in top row of Table 1.
     Find the ASA number of the film
     you're using in vertical column of
     table 1 for either HIGH or LOW
     flash per'your selection in step 3.
    Now find the number that intersects the two ASA numbers in the chart and set
      this ASA number on the ASA dial of your camera.
    NOTE: Don't change this ASA setting without recalib.rating.
    FOR EXAMPLE: You're using a film with an ASA number of 25, the calibration
      setting for HIGH flash is f14.0, your camera meter indicated correct exposure
     at ASA 80, then the proper ASA number to set on your camera is ASA 320,
    where 80 down and 25 across intersect in Table 1.
    You have now calibrated your camera light meter for either HIGH or LOW flash
     depending on your selection in step 3. You'll have to recalibrate  if you switch
    from either HIGH or LOW flash. You just can't arbitrarily switch between
    HIGH and LOW flash without recalibrating.
    Because of variations in line voltage and age of focusing lamp, you'll obtain best
     results if you perform this calibrating procedure for each different shooting
      session..
 Table 1. Calibration


Because of variations in film, processing and camgra meters, Table 1 must be considered as only a starting point.  lf you find
variations, make a series of test exposures and select the one that suits your conditions. You may have to do this with each
ditferent film and processing technique you plan to use.
                                      14
View original page 14Page 15 · Read text
Metering slides


You must use the shutter speed listed inside the proper black bar in Table 1 for
exposure determination of your slides, even if your camera will x-sync at higher
speeds. Notice that shutter speed (1/15 or 1/60) varies with film speed and
calibrated flash setting. In the preceding example, you'd set your shutter speed at
1/15 second for exposure determination of your slides.
With proper shutter speed set, turn on your meter and adjust lens f/stop until proper
exposure is indicated in the viewfinder. This is the f/stop to take your flash picture
at. Note:  lf you're using a Pentax ES, the shutter speed dial will be set on AUTO.
Adjust the lens f/stop until the proper shutter speed from Table 1 is indicated in the
viewfinder.
                                         15
View original page 15Page 16 · Read text
Composing and focusing


Always focus your camera by positioning
entire bellows assembly. Focus by
loosening bellows mount locking screw
and turning focus knob.
lf you're using a lens with focusing ad-
justment, set to infinity.
Set lens f/stop to wide open position
while focusing and composing.
Place your transparency in slide holder
with emuls.ion or dull side down. That's
so you'll view your slide just like you
took your picture. On most slides, the
emulsion side is the one with the
manufacturers name printed on the
mount.
Compose your slide by moving the slide
holder on the easel and checking in your
viewfinder.
To make a 1:1 duplicate from a color slide, frame the image of the slide in the
viewer of your camera. To get rid of the border of the slide you're copying, you
may have to crop the slide slightly. To crop, loosen the camera mount locking
screw and extend your bellows slightly by moving your camera away from the lens.
Don't move the lens mount. When your picture is properly composed, tighten camera
mount and slide holder thumb screws. Then focus slide.
In most SLR cameras, the viewf inder doesn't show 100 per cent
of the picture that will be recorded on the film. The amount of cutoff can exceed
10 per cent of the total image area of the slide you're copying. You'll usually get
better results if you frame your copy well inside the borders of the slide you're
copying.
A good check is to comparc a slide in the viewfinder with what appears on a piece of
matte acetate or ground glass at the film plane. Here's how: With no film in your
camera, open camera back and place a piece of matte acetate or ground glass on
the film tracks at the film plane. What you see there is what the film is going
to record.
Shooting a test roll of film will also help you deterniine your camera's viewfinder
cutoff limits, if any.
Once you have the image you want, just measure and record the distance between
camera mount and bellows mount and make this setting next time you want to
copy slides.
                                       16
View original page 16Page 17 · Read text
Cropping and enlarging


With your Repronar, you can enlarge a
portion of your transparency up to about
372 times the original size. Cropping and
enlarging may strengthen and greatly
improve the composition of your picture.
This technique lets you eliminate dis-
tracting or undesirable areas from your
picture.
Try some portraits or enlargements  like
the one on this page which was made
from the original (top picture).
The quality of the enlargement in general
depends upon the sharpness, film grain,
color balance, and other qualities of the
original. For best results make en-
largements from originals that are of
good quality. An enlargement of 3X
magnification requires an original trans-
parency of excellent quality.
Here's how to crop and enlarge: Leave
the lens mount locked at base of bellows.
Loosen the camera locking screw and
position camera while observing your
transparency. Compose by moving slide
holder on easel. Focus by positioning
entire bellows. lt's easy if you'll move
camera a little and lock it. Then focus
and compose.
Keep repeating the sequence until you
get what you want. When you get there,
be sure to lock both camera mount and
bellows focusing mount.
                                         17
View original page 17Page 18 · Read text
Inserting filters
The proper use of filters is important
when using your Repronar. Suggested
starting points for color filtration are listed
in Table 2. Color printing (CP) or gelatin
filters, generally available in 3-inch
squares (75mm), can be inserted into the
filter holder. Use the filters of your
choice together with the clear glass
in the filter holder.
For best results, keep the number of filters in your filter pack to a minimum. For
example, there's more light loss with two CC20Y filters than in one CC40Y filter.
Film will vary in color balance and speed from one emulsion batch to another.
Slight color shifts are also experienced because of processing differences between
processing labs. Day-to-day variations also can be experienced within the same lab.
Since there are so many variables, the films and filter pack listed in Table 2 should
be regarded as suggested starting points only.
TABLE 2. Suggested  filter starting points
      Film you're using to                Film of slide                 Suggested Filter Pack
     copy with                        you're copying                          starting point
     Ektachrome slide               Kodachrome                     Wratten Filter No. 2E
       duplicating  film 5038*                                 + cc60Y + cc40R
                                       Ektachrome                         Wratten Filter No. 2E
                                                  + cc50Y + cc55R
                                    Agfachrome                      Wratten Filter No. 2E
                                                  + cc50Y + cc55R
     Kodachrome 25                                                   20Y
     Kodachrome 64                                  5R+5Y
     Ektachrome X                                 2A+10M+5Y
     Agfachrome 64                                                15R
    Kodacolor                                               None
*Process         E-4 short first developer times. See Kodak datia sheet packed with film.
Determining your filter pack
Everyone sees color differently. Each of us have preferences to tonal values. Your
choice of filters for each film and scene is at best subjective. That's why the sug-
gested filter packs in Table 2 are only starting points.
The filter combination that you prefer is best determined by a series of tests. Here's
how to do  it:
1.  Select a test slide that, in your opinion, is pleasing and includes known colors
    and the gray scale. Always view this slide and all others you compare  it with
    under identical lighting conditions. Standard transparency illuminators are
    com mercially available.
2.  Copy your master slide on an entire roll of film of your choice, use a different
       filter combination for each exposure. Record all filter data.
3.  After processing, eValuate and use the filter combination that most closely
    matches your master slide. lf you change films or processing techniques, make
    a new test for best results.
                                         18
View original page 18Page 19 · Read text
Correcting Color
 lf the slide you want to copy does not have the color quality you desire, a slight
variation in your filter pack is necessary.
Here's how:
                                                       or viewing box.1.  Place a slide on your transparency illuminator
                                               below'2.  Select filter colors according to the table
3.  View the slide through the different densities of this color and choose the filter
     that makes the correction you want. Add this filter to your standard filter pack.
    When judging, look at the middle tones instead of highlights or shadows. Your
     adjustment of the filter pack involves either removing a filter of the color of the
     overall hue or adding its complement. Whenever possible, subtract color from
     your standard filter pack, because you want as few filters in the filter pack as
      possible.
         lf Overall Slide           Add these             Or Subtract
       is too:                             Filters:               these Filters:
        Yellow                  Magenta + Cyan          Yellow
       Magenta                 Yellow + Cyan          Magenta
       Cyan                    Yellow + Magenta       Cyan
        Blue                      Yellow                  Magenta + Cyan
       Green                  Magenta                 Yellow + Cyan
       Red                   Cyan                    Yellow + Magenta
Correcting exposure
Since you're metering your slide with the through-the-lens metering system of your
camera, under and overexposed transparencies will be automatically corrected by the
metering system. lf you're enlarging a portion of your slide, the bellows extension
factor is also corrected for by the metering system.
 lf your original is more than one f/stop overexposed, the resulting copy may'appear
muddy. There's too little color in the original to make a satisfactory copy. You also
may have to add color filters to compensate for the color shift caused by the exposure
correction.
 Every system has limits. You can't get a picture out of something that's just not there.
Some experimenting may be necessary to arrive at a solution for slides that are more
than one f/stop over or under exposed.
 lf your original has dominantly light or dark tones (like a snow scene) and you want
to retain the original tones, select a test slide that has average density. Meter the test
slide and adjust your camera f/stop for proper exposure. Then replace the test slide
with your original and take the picture. That's all there is to it.
Some experimenting may be necessary to get to just the right degree of tonal value
you want. You may want to stop down or open up the lens to get what you're
looking for.


                                         19
View original page 19Page 20 · Read text
Using your Repronarwith large
format cameras


You can use your Repronar with most format cameras. But, with cameras larger than
35mm SLR's, you'll need a copy stand or some other firm way to hold your camera.
The bellows mount can be removed by unscrewing the two Phillips screws in the
back as shown in the picture. These screws have a special taper that self-aligns
the bellows column when tightened.
                                    20
View original page 20Page 21 · Read text
Specifications


Power Source                    .104 to 129 VAC, 50 or 60 Hz
Recycle Time
        High Light               .About 8 seconds
      Low Light ....                .. .About 2 seconds
Flash Duration             .....About 1/500 second
Color Temperature .                .. ...About noon, daylight on bright day (5600'K)
                                                                                      t/a tlstopFlash Output                    ..Regulated to within
Magnification             .From 1:1 lo 31/z:1 with Honeywell 50 mm
                                 Lumetar enlarging lens
Ready Light                                      . ..lndicates full light output
Shutter Sync Circuit             .. ...Low voltage to protect camera shutter contacts
Shutter Synchronization      .X-Sync
        Between-the-lens shutters .All speeds
        Focal Plane Shutters   .Usually 1/60 second
                                                                      jack-to-Shutter Cord                                      . .3-foot Honeywell 100
                                   removable-pc (supplied)
Size
      Height                 17 Inches (43cm)
     Width                    .9.25 Inches (23.4cm)
     Depth                    .11.25 Inches (28.6cm)
Weight          ...,:.          ...About 11 pounds (5 kilograms)
                                    23
View original page 21Page 22 · Read text
!

                                                                                                   1Maintaining your Repronar


Form the Capacitor
Like all electronic flash units, your Repronar has an energy storage capacitor that
stores the electrical energy required by the flashtube. When your Repronar is new
or if you haven't used it for 30 days or more, it's normal for the capacitor to lose
some of its ability to store electrical energy, or deform. A deformed capacitor causes
longer recycle time for the first few flashes.
Reforming the capacitor is easy. Just turn on your Repronar and set to HIGH flash
for about 30 minutes before you use it. lf you can afford a few seconds more between
flashes, let your capacitor reform while you're using your Repronar.
Shutter Cord
Your Repronar uses a Honeywell shutter cord Cat. No. 477. This cord has a 100
jack on one end and a removable tip on the other. lt's supplied with a removable PC
tip. Tips that fit most cameras are available from your Honeywell dealer.
For best results, make sure the removable tip is screwed on tightly, otherwise your
Repronar may fail to flash due to poor contact.
Replacing the Focus LamP
The focus lamp supplied with your Repronar is a special, clear glass, 115 to 125
 volt incandescent lamp. You can purbhase replacement lamps from Honeywell (Part
 No. 73004039-001) or General Electric (Lamp ordering code 2556)
CAUTION: Before attempting to replace your focus lamp, turn it off by depressing
ON switch, unplug power cord, and wait about 10 minutes for lamp to cool.
 1.  Remove opal glass.
2.   Pull out filter drawer.
3.  Unscrew lamP and rePlace.
 Replacing the Fuse
 1.  Unplug Repronar Power cord.                                                                                       il
                                                                              arrow. The 2.  To remove fuse, press fuse cap inward and turn as indicated by the
      fuse is held in the cap by a spring clip and will be withdrawn with the cap.                                                                 f
 g.  Remove the old fuse. Insert a 1.5 amp, 125-volt slow-blow fuse in cap. Observing
     cap key, insert cap and turn clockwise to lock.
                                                                                                                 ,il
 WARNING: Do not remove bottom cover.  lt'll expose you to dangerous HIGH
 VOLTAGE. The bottom cover must be removed only by a qualified technician.
                                            21
View original page 22From the M. Butkus archive. Original publisher and archive notices are retained.
Check the model and edition against your equipment.
PDF verified 2026-10-10.