Film cameras
Ilford Sporti User manual
User manual for Ilford Sporti. 8 pages in English. Read the original PDF, download or print a copy without registration.
8 pagesEnglish2.2 MB PDF
Loading your manual…Open PDF directly
Document details
- Brand
- Ilford
- Model / document
- Ilford Sporti
- Document type
- User manual
- Language
- English
- Pages
- 8
- File size
- 2.2 MB
- Category
- Film cameras
- Document date
- Not specified in catalog
Search available document text
Find a term, then jump to its page in the original PDF. Image-only pages may not be searchable; check the PDF for exact wording and diagrams.
Page 3 · Read text
www.butkus.us
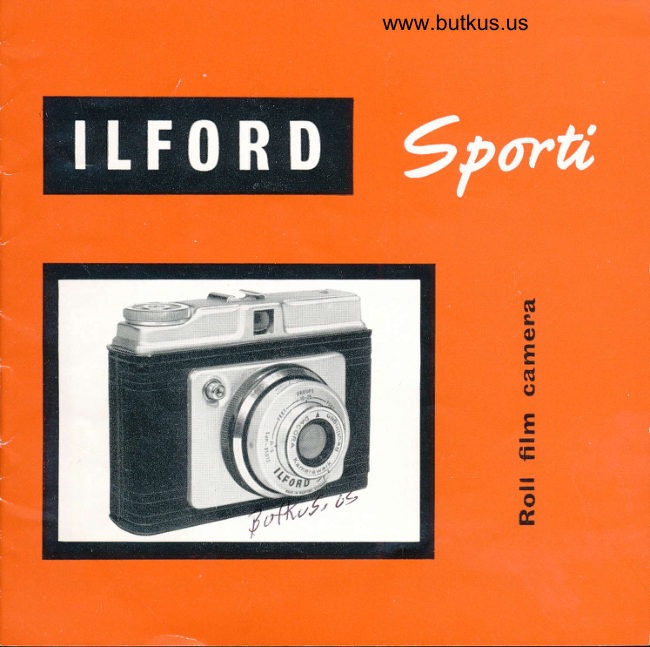
               GameraIIFORD 9porh
The Sporti camera takes 12 pictures, 2* in. square, on 120 size roll
film, and the camera is fitted with a lens which can be focused from
5 feet to infinity. Easy-to-read focusing zones are marked on the
front of the camera for taking close-ups, groups and views.
  Adjusting the camera for the right exposure is easy. All you have
to do is load up with Ilford Selochrome Pan 120 roll film for summer
snapshots, and Ilford HP3 for the winter. The exposure control
above the lens is then set, either for a sunny day, or for a cloudy
day.
  The large shutter release button is conveniently placed on the
front of the camera so that when it is squeezed there is no risk of
camera shake. The shutter is synchronised for taking flash pictures.
  The viewfinder  is of the optical eye-level type, and gives a brilliant
image of the scene to be photographed.
  Before you take any photographs, buy an Ilford No. 120 roll
film from your photographic dealer, and read through these in-
structions carefully with your Sporti camera and film beside you.
LOADITIG THE SPORTI
The camera should always be loaded and unloaded in the shade,
out of direct sunshine.
   First, open the camera back by pushing up the locking button on
the left-hand side of the camera as it is held in the taking position.
  The empty take-up spool, which is already in the camera, must
be in the right-hand chamber. If it is in the left-hand chamber, first
pull up the curved flap of the left-hand chamber and remove the
empty spool. Then pull up the wind-on knob on the top right-hand
View original page 3Page 5 · Read text
www.butkus.us

side of the camera, pull up the small knurled stud at the bottom of
the chamber, and engage the hole at the end of the spool with the
small stud at the bottom. Place the spool in the chamber by
pushing back the small knurled stud, then push down the wind-on
knob and, holding the spool upright, turn the knob until the slot
of the spool engages the wind-on knob.
  Next, place the new spool of film into the left-hand chamber,
making sure that the hole in the end of the spool engages with the
small stud at the bottom of the curved flap- The film must be so
placed that when the backing paper is drawn out, the coloured
side is outermost.
  Break and remove the film sealing band and pull out about 6
inches of the backing paper. Now push the curved flap so that the
spool is inside the chamber. Pass the pointed end of the,film through
the slot in the take-up spool, making sure that it enters the wide
slot first.
 Now give the wind-on knob one or two turns in the direction of
the arrow, to make sure the film is correctly attached to the spool
and is passing centrally over the rollers. Close the camera back.
  Wind on the fllm until No. I appears in the red window at the
back of the camera, and you are ready to take the first picture.
SETTIIIG TIIE GATUIERA
The settings of the Sporti are extremely easy; all that has to be
done, is to move the small lever above the lens either to SUNNy
or to CLOUDY according to the weather.
  To obtain correctly exposed pictures during the summer months,
use Ilford selochrome Pan roll film. In winter, still use the exposure
settings in the same way, but because the days are not so bright,
you must change over to Ilford HP3 which is a faster film than
View original page 5
Page 6 · Read text
Selochrome Pan. Do not use HP3 in the summet, otherwise your
pictures will be over-exposed.
  Next, the lens must be focused according to the distance you are
away from the subject. Rotate the lens mount until the red index
mark lies opposite CLOSE-UPS,  for portraits and other subjects 5
to 10 feet away, GROUPS, for subjects l0 to 25 feet away and
VIEWS for scenes 25 feet or more away.
TAKITIG THE PIGTURE
After the lens has been focused and the exposure lever set, hold the
camera firmly in both hands, view the picture you are going to take
through the finder, and then gently squeeze the shutter release button
with the forefinger of the right hand.
  After you have taken the picture, turn the wind-on knob in the
direction of the engraved arrow which is on top of the knob, at the
same time looking through the red window at the back of the
camera, until the next number is seen.
  Make a special point of winding on the film to the next number
immediately after a picture has been taken, otherwise you may
forget, and take two pictures overlapping each other.
U1{[OAIIII{G THE GAMERA
When the last exposure, number 12, has been made, wind on the
film until the coloured paper disappears from the red window. Give
a few more turns to make quite sure that the film is completely
wound-off, and then open the camera as described previously.
Remove the film (making sure it does not unwind) then fold over
the end of the backing paper and seal it with the adhesive paper
strip which is attached to it. The empty spool should be transferred
to the take-up position ready for the next film to be loaded.
View original page 6Page 7 · Read text
www.butkus.us

FLASH PIGTURES WITH THE SPORTI GAMERA
The shutter of the Sporti is synchronised for flash, which means
that when a flashgun is fitted to the camera, the bulb fires only
when the shutter is open. In this way you get the maximum amount
of light on your subject for the duration of the camera exposure.
  The flashgun has a foot which fits into the shoe on top of the
camera. The plug on the end of the flashgun lead is then pushed
into the socket at the bottom of the lens mount and the bulb
inserted.
  The Ilford Sportslite flashgun is ideally suited to the Sporti
camcra. Your dealer will give you full particulars.

TAKIT{G THE FLASH PIGTURE
Taking pictures by flash is easy. First load an Ilford Selochrome
Pan roll film into the camera. Next, set the exposure control to
FLASH. If you wish to take pictures between 5 and 10 feet away,
then fit a PFI flashbulb to the gun, but if the subject is 10 to 25
feet away, then fit a PF5 flashbulb into the flashgun.
  Make sure that the flash plug is pushed home firmly before you
take the flash picture.

TAKIT{G GARE OF YOUR SPORTI GAMERA
Always keep the camera clean and free from dust, inside and out.
When at the seaside, keep it dry and off the sand-sand in the
shutter will prevent  it from working properly.
  The camera should always be treated with great care and respect;
sudden jolts can spoil its performance, so never drop your camera.
View original page 7Page 8 · Read text
Any dirt, scratches or finger-prints on the lens surface will scatter
the light and give hazy pictures, so always keep the lens spotless.
It is best cleaned with a clean and very soft handkerchief. The best
way of protecting your camera is to purchase the ever-ready carrying
case which is made specially for the SPORTI, price f,l . 2. 5d.
including tax.
  Finally, never try to take the camera to pieces yourself; it has
been carefully adjusted to give sharp pictures. In case of trouble,
take it to your camera dealer for repair.


                        SUPP!,IED BY
        TOHN H. PRESTON, F.B.OAi
                           (A. R. BAINES)
        39 JAMES STR,EET, HARROGATE
                            l'l YOUR PHOTO SHOP i


                                           . ESSEX                        ItF0RIt


lSporti/859/S                                                           Printed in England
View original page 8From the M. Butkus archive. Original publisher and archive notices are retained.
Check the model and edition against your equipment.
PDF verified 2026-10-10.