Film cameras
Ilford Sportsman 125 User manual
User manual for Ilford Sportsman 125. 23 pages in English. Read the original PDF, download or print a copy without registration.
23 pagesEnglish6.4 MB PDF
Loading your manual…Open PDF directly
Document details
- Brand
- Ilford
- Model / document
- Ilford Sportsman 125
- Document type
- User manual
- Language
- English
- Pages
- 23
- File size
- 6.4 MB
- Category
- Film cameras
- Document date
- Not specified in catalog
Search available document text
Find a term, then jump to its page in the original PDF. Image-only pages may not be searchable; check the PDF for exact wording and diagrams.
Page 4 · Read text
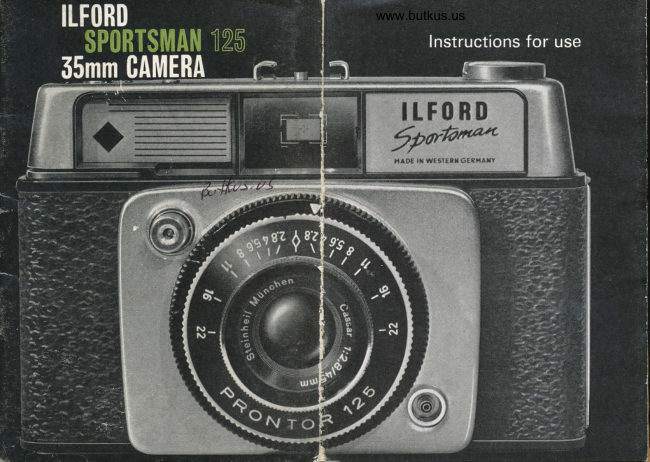
ITFORD
$P0HT$MAil X26
 35mm CAMERA
   The Ilford Sportsman r25 camera is designed to make
  picture taking easy. It also allows you to make varied
         adjustments for more advanced photography when
                            you have more experience.
            Read these instructions  carefully, and examine
 .   the illustrations, then you will get good pictures from
the start whether you use colour or black and white film.
View original page 4Page 5 · Read text
www.butkus.us

                 you If lS mm is new to
Your camera uses black and white or colour films,
35 mm. (millimetres)  wide, which are available in
light-proof metal containers called cassettes.
The cassette of film is loaded into the camera
and after each picture has been taken the film has
to be wound on around a take-up spool.
You do not have to look into a red window as
the film winding lever winds on iust the right
amount of film each time. You can tell how many
pictures you have taken by looking at a
counter in the base of the camera. lfhen all the
film has been used it has to be rewound into
the light-proof cassette before you open
the back of the camera.
    Your Sportsman r2S camera takes
pictures z4x 36 mm. in size. lfhen you
hand an exposed black and white film, in its
cassette, to your photo dealer for developing and
printing you should ask for enprints (small
enlargements) size 3} x 5 inches or other'
enlargements. Colour prints are made
from 35 mm. colour negative films such as
Ilfocolor and colour slides from colour
reversal films such as llfochrome.
View original page 5Page 6 · Read text
rr
Ft
r",
i:1"        Your Sportsman r25 camera

                         If your photo dealer has loaded the camera for
                 you, you will want ro start taking pictures
                   right arvay. Turn to page 14 where y'ou rvill find
              I                 set out the es-"ential steps for taking snapshots.
                   But rve start the book by describing the
                  rvav a film should be loaded. Obtain a cassette
                  of film and follow the step by step loading
                  of your camera set out beiorv. The figures in
                  brackets throughout the booklet refer to the
                  parts shown on pages 4 and 5.


                ILT$ $fl$


                      www.butkus.us

     i
    l:J
   I
     j
rl
i,l
View original page 6Page 8 · Read text
I            Step r. Open the camera by pushing up the catch
              release (ro) using your thumb nail or a coin.


Itl:           Step 2. Push up the rewinding spindle (8).


       t"


, l,          Step 3. Drop film in and lead its end across to the   I '         take-up spool. Push down the rewinding spindleI
' I            gently, rotating it slightly if necessary, to
  ;           secure the cassette. Now press the shuttef release
            button (5) as far as it will go.

  !


             Step 4. Feed end of film in wide slot of take-up
             spool and hook the second perforation over the
              projecting tooth. If wide slot is not
               visible rotate the spool with the thumb.
View original page 8Page 10 · Read text
Step 5. Ensure that the sprockets are engaged with
                   the film perforations. Turn the take-up spool with
                   the thumb to take up the tension of the film on
                   the spool. Your loaded camera should look like
                      this. Now close the back, making sure the film
                  does not spring away from the sprockets and push
                              it so that it snaps shur.


                 Step 6. Operate the film winding lever (3) as far as
                            it will go. Now press the shutter release button
                and operate the film winding lever two or three
                    times each until the picture counter (6) indicares   .. r ",
                   Check that the rewinding knob and crank (8)
                    turn, as you wind on the film. Keep left band clear of
                  rewind knob as you wind on, to avoid damage to film.


                 Step 7. Now set the film type reminder disc (z).


i ARg READY To TAKE YoUR FIRST PICTURE
View original page 10Page 11 · Read text
www.butkus.us


Setting the camera
for snaps in sunshine
 If you have not used a camera
like this before follow steps r to 3
below, which tell you horv to set
your camera for snapshot pictures
in sunshine when you have
Ilfochrome 3z colour film,
Ilfocolor film or FP3 black and
white film in your camera. The
settings enable you to take pictures
in sunshine of any subject thar is
more than about 7 to 8 feet away
from you. You can leave the
camera set like this for your snaps
and then all you need do to take
the picture  is follow steps 4 to 7.
Other films will require slightly
different settings as shown on
p^ge 24.
View original page 11
Page 12 · Read text
FOR ILFOCHROME 32   I5 AND ILFOCOLOR

 llotate the diaphragm ring (4)
 so that the white arrow  is
 opposite "rr".  Let  it click
 into place.


 FOR FP3 FILM

 Ilotate the diaphragm ring (4)
so that the white arrow  is
opposite "r6".  Let  it click
 into place.


FOR ILFOCHROME 32
ILFOCOLOR AND FP3

Rotate the shutter speed ring
so that the red line is
opposite "60". Let it click
into place.


FOR ILFOCHROME 32
II.-FOCOLOR AND FP3

Rotate distance ring (r3) until
"14" is opposite the diamond
shaped index mark,
View original page 12
Page 13 · Read text
Steps 4-T applywww.butkus.usto all films

 Hold the camera to your eye and steady
  it against your face. See page 6.


 Look through
 the viewfinder
 (9) at the picture
 you are about
 to take. flave your picture framed in
 the main line. (Note: For close-ups
 see page zz).


 Press the shutter release button with
 a firm pressure as far as it will go
 It will click two or three times before
 reaching the firing position.


Operate the film winding lever as far
as it will go and then allow  it to
return gently to its rest position. You
are now ready to take the next picture.
    The shutter release and the film
winding lever mechanisms are
interlocked. This prevents your
making two pictures on the same
piece of film.
View original page 13Page 15 · Read text
www.butkus.us

              STEP


             STEP 2
Unloading
the camera
Vhen you have made all 36
or 20 exposures (depending on
the film you are using) the
film must be rewound into its
cassette.             STEP 3


             STEP 4
View original page 15Page 16 · Read text
Lift out rewinding crank,
       swing it up, over and down.


       Press rewinding release button
        (7) and rotate rewinding crank
        in the direction of the arrow.
      Continue rewinding in this
       direction until it comes ro a
      sudden stop or unril it suddenly
      becomes easier to turn.


     Open the camera-see page ro.
     The picture counter will
!       automatically return to "A".
  I


       Pull up the rewinding spindle
     and the cassette of exposed
       film can be tipped out of the
      camera.
      The camera is now ready to
       accept a nelv cassette of film
       but before loading  it check
       that there is no small piece
       of film loose in the camera.
View original page 16Page 17 · Read text
www.butkus.us

Il|lORE ABOUT
Tt|E CAIII|ERA
To be able to take more interesting pictures
you need to know more about the controls on the
camera. Here are brief details,

The lens

This has a focal length (distance from lens to
film) of 45 mm. It has to be rotated  (i.e. focused)
and set to agree with the subject to camera
distance. It is set in a rotating mount (r3) marked
with figures which are the subject to camera
distances in feet. When taking close-ups (see
page zz) you must measure the distance but the
distance of subiects farther away can be estimated.

The Shutter

This is a Prontor rz5 with three speeds, and
a "B" setting which is for time exposures,
The 3o, 6o, tz5, represent fractions of a second
e.g. 6o is r/6o second. The shutter  is
synchronised for flash photography. Flashbulbs
and electronic flash can be used, see page 22.
View original page 17
Page 18 · Read text
The diaphragm
or lens aperture

The main purpose of the diaphragm ring is to
control the intensity of the light reaching the film
by altering,the  size of the lens aperture.
    Another function of the aperture is to
control the range of distances within u'hich a
subiect can move and still be sharply defined on
the film. If the distance ring is set to 14 feet and
the diaphragm ring to "16", then by referring
to the "depth of field" scale (rz) you can see that
obiects in the picture will be sharp from about
7 feet to the far distance. (oo is the sign for
infinity or far distance). You can check the depth
of field for any other combinadon of distance
and lens aperture by referring to the scale.

        ILLUSTRATION OF "DEPf'H OF FIELD''
View original page 18Page 19 · Read text
www.butkus.us


Taking close-up pictures

The viewfinder shows a pair of short lines
inside the main frame at the top and a pair of
short lines outside the main frame at the
bottom. See page 16. IJse these short lines to
frame your picture when you are between
6 feet and 3tft feet from your subject. Measure
the distance from camera to subiect and rotate the
distance ring (i.e. focus the lens) until the
correct distance figure is opposite the
diamond shaped index mark.

Taking flash pictures

FLASHBULBS

Fit an llford flashgun to the accessory shoe (r)
and connect the lead to the flash socket (r4)
on the front of the camera. Set the shutter speed
ring to "3o". Insert a flashbulb in the gun and
when you press the shutter release button
the flash will fire at the same time as the shutter
opens. Refer to the flashbulb carton for the
method of working out which lens
aperture setting is needed.
View original page 19
Page 20 · Read text
ELECTRONIC FLASH

Connect the flash lead to the flash socket (14)
on the front of the camera and set the shutter
speed ring to "r25". Refer to the flashgun
manufacturer's literature for the method of
working out which lens aperture setting is needed.

Taking time exposures

Rest the camera on a firm support (better  still,
screw  it to a tripod by means of the screw
socket (rS)), set the shutter speed ring to "8"
and screw a cable-release  into the shutter release
button. You can then operate the shutter
without jerkiness and it will stay open as long
as you keep pressure on the release.
It is advisable to make use of an exposure meter
to determine the camera settings to be used
in order to obtain correctly exposed pictures.


     www.butkus.us
View original page 20Page 22 · Read text
Accessories for the
Sportsmur r25 camera

A range of accessories is available for your
 Sportsman r25 camera. These include flashguns,
 a yellow  filter to "bring out" the clouds in black
and white photography, a U.V. filter to
 prevent colour pictures being too blue when taken
by the sea or at high altitudes, a lens hood to
 prevent unwanted side-light entering the
 lens, supplementary lenses which fit in front
ofthe camera lens so that you can take pictures
between 3/s feet and rr inches, and
of course a leather ever-ready carrying case to
protect your camera during use. Your
photographic dealer will be pleased to help
you make a suitable choice ofthese accessories.

Care of the camera

Use only a soft special lens-cleaning brush to
remove dust, and lens-cleaning tissue to lightly
clean the lens. Do not keep colour film for
too long in your camera or the pictures may be
affected by heat or high humidity. Should your
camera ever need repairing send  it to Ilford
Limited at the address shown on the guarantee card.
View original page 22
Page 23 · Read text
www.butkus.us


The aim of this booklet has been to help you
to start taking pictures without worrying too
much about the technicalities.  It has set out
the essential information to enable you to take
good pictures from the start but cannot
however cover all points you may need to know
as you become more experienced. Your Ilford
dealer will be pleased to help you with
further points on which you need guidance.
You may also write to Ilford Limited,
Amateur Sales Services, flford, Essex.
Further information on taking colour pictures  is
given in the booklets "All about taking colour
pictures with Ilfochrome 32" and "All about
taking colour pictures with Ilfocolor" published
by Focal Press Limited and available
from your usual photo dealer.

Constant improvements in llford products
mean that minor changes in the design
or specification rnay occur from tirne to time.
It will not be possible always to arnend
the instruction book at the same time, and
the right to alter the design and specification
without notice is accordingly reserved.


 l25lJ64llOmlE                         Printed  In England
View original page 23
From the M. Butkus archive. Original publisher and archive notices are retained.
Check the model and edition against your equipment.
PDF verified 2026-10-10.