Film cameras
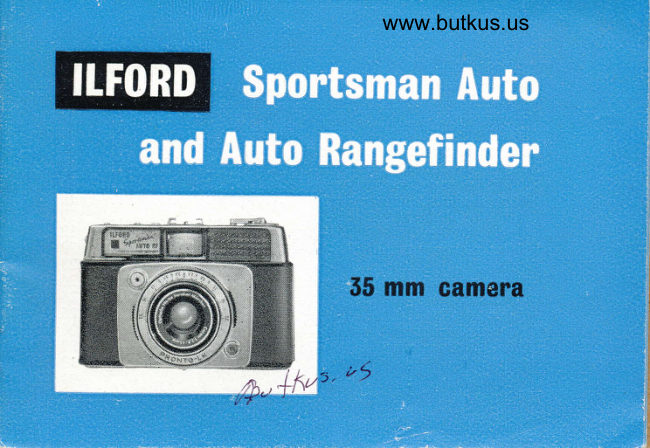
ILFORD Sportsman Auto User manual
User manual for ILFORD Sportsman Auto. 35 pages in English. Read the original PDF, download or print a copy without registration.
35 pagesEnglish6.6 MB PDF
Loading your manual…Open PDF directly
Document details
- Brand
- Ilford
- Model / document
- ILFORD Sportsman Auto
- Document type
- User manual
- Language
- English
- Pages
- 35
- File size
- 6.6 MB
- Category
- Film cameras
- Document date
- Not specified in catalog
Search available document text
Find a term, then jump to its page in the original PDF. Image-only pages may not be searchable; check the PDF for exact wording and diagrams.
Page 5 · Read text
GAMERA IIETAILS
                  l. Focusing lens mount with distance scale in feet. and distance
                symbols.
             2. Film speed setting ring.
             3. Film speed and shutter speed scale.
            4. Release catch for film speed setting ring.
             5. Exposure control window.
             6. Back catch release.
             7. Rewind flange.
             8. Rewind lever.
            10. Depth of field scale.
                       I l. Film speed indicator dot.
            12. Grips for aperture scale.
            13. Indicator dot for apertures and shutter speeds.
            14. Shutter release button.
            15. Exposure counter setting button.
            16. Film reminder disc.
            17. Exposure counter.
            18. Film transport lever.


x._.
View original page 5Page 7 · Read text
GATIIERA DETAITS


 4. Release catch for film speed setting ring.
 6. Back catch release.
 7. Rewind flange.
 8. Rewind lever.
 9. Viewfinder.
10. Depth of field scale.
12. Grips for aperture scale.
14. Shutter release button.
15. Exposure counter setting buttorr.
19. Accessory shoe.
20. Photo electric cell.
21. Flash socket.
22. Delayed action setting lever.
View original page 7
Page 9 · Read text
GAMERA DETAILS


 9. Viewfinder and eye-level exposure control window.
23. Film track.
24. Tripod screw socket (English thread).
25. Take-up spool.
26. Sprockets.
27. Take-up spool flange.
28. Rewind release button.
View original page 9
Page 11 · Read text
Before attempting to operate any of the controls on your new
Sportsman camera read these instructions through carefully, and
make sure that you are familiar with the location of the various
controls. Practise handling the camera before you load it with
your Ilford 35 mm. film, and this will help you get good pictures
from the start.
  Sportsman Auto and Auto RF cameras are thoroughly tested
before they leave the factory and guaranteed for one year from the
date of purchase so do not forget to complete the guarantee card
and post it to Ilford Limited without delay.

lf tr5 mm. is new to you
Your camera uses black and white or colour 35 mm. film which
is available in light-proof metal containers called cassettes. The
cassette of film is loaded into the camera, and after each picture
has been taken the film has to be wound on around the take-up
spool. When all the film has been used it has to be rewound into
the light-proof cassette before you open the back of the camera.
Your Sportsman camera produces negatives 24x36 mm. in size.
When you hand the exposed black and white film, in its cassette,
                                    10
                                                                                                                      I
View original page 11Page 12 · Read text
www.butkus.us
 Io your photo dealer fo' developing ancl printing. you can a,sk lbr enprints size :"j : 5 inches or nther enlargerients^  cotrour prinfs can be made fionr 35 mm, corout negaTiue filn;s such as
 llfclcolor" and colottr slicles and colr.'rr-rn prints iinnr 35 nrnr. eslnur rcversal films such as llfochronre.

                           GEI{ERAI DETAITS
The slrurtsman Auto RF is ideniical tc) the sportsnlan Auto
except for frhe viewfinder and the addition of the cnuplecl ,nng.-
finder. The difference-s are exprained under the secti;ns d;;ifrgwith the viewfinder and focusing rhe lens.

THESE ANE THE COI{TROIS
The lens. Your cermerfi is fittecr with a steinheil c_'assar rhree-element.        coated                 lens                  45 mm.                                        fcrcal                   of                                      length                                 a maximum                                                 -differenrwirh               The                        lensilperture af                                 is lbcused                                   on              /,/:.9.                                                  distanc;r;t
rotating its front .section. thar is the lens mounl ( ll.  The lens
surfaces are coated tcl give increased image hrilliance lbr excellenr
results, whether you use colour or black and white films. Fili;;:
close'up lenses a.nd a lens hootl can he fitted to the 32 nrrn. diamerter
lens mount.
                                   www.butkus.us
                                          11
View original page 12Page 13 · Read text
Film winding. A single _movement of the film transport lever (lg)
 ryTds on the film, sets the shutter, and adjusts the e>iposure counter (17)     _to show the number of exposures remaining on the film.
 The film winding and the shutter release mechanisms are interlocked
 which means that the shutter cannot be fired until the film has been
wound on, or that the film cannot be wound on untii an exposure
 has been made. This prevents double exposures and blank fiames.
whgn ope_rat_ing the film transport lever, move it firmly and srnoothly
to the end of its travel then allow it to return smooihly and gently
to its resting position, controlling it with the thumb. Do not-allow
it to snap back under pressure of its spring.
  Important. Make sure that the film transport lever is taken to
the end of its stroke, otherwise the exposure counter may not
operate correctly, and the interlock mechanism may not be-freed
to allow an exposure to be made. Although in some cases an
exp^og_ure ryigbt be possible, the film transport lever may not travel
its full stroke the next time  it is operated. If this happens, the shutter
release button must be pressed again. This will not give a further
exposure.,  i-t simply_ frees the mechanism to allow thl completionof the winding stroke.

                                    12
View original page 13Page 14 · Read text
www.butkus.us
 The viewfinder when you look through the bright-line optical
 viewfinder (9) you will see an illuminated pattern outlining the
 picture you are taking and some short lines within and beloir the
main frame which show the picture area for subjects between
 5 and 3{ feet away. When taking horizontal pictures of subjects
 between these distances tilt the camera slightly upwards and use
 the short lines to show the edges of the picture instead of the main
brighrline frame. When taking upright pictures swing the camera
slightly sideways to use these "close-up" markings to show the
sides of the picture area. On the Sportsman Auto Camera an open
cross marks the centre of the picture area and on the Sportsman
Auto RF camera there is a square of lighter tone in the centre of
the picture atea. On both cameras, outside the main frame line,
you will also be able to see part of the subject which is not included
in your picture and this will be found useful when observing the
area surrounding a moving subject.
  The large rear lens of the viewfinder makes it easier for spectacle
wearers to see the picture area outlined by the bright-line frame.
  Just above the rear lens of the viewfinder you will see the eye-level
exposure control window. When you look through the window
                                    15
View original page 14Page 15 · Read text
you will see two pointers on a gr@n background. Their function
 is explained under "The Exposure Control."
The Pnonto.U( shutten The Pronto-LK shutter can be set to
aly one of six speeds or "B." The six speeds are l/500, ll150,
 lll25, 1160, 1130, lll5 second and are shown by the figures 500,
25O, 125,60, 30, 15. The "8" setting is for brief time exposures.
The shutter is "X" synchronised for flash photography as eiplained
in "Taking Flash Pictures." Also included in the shutter is a delayed
action mechanism so that you can be in the picture yourself. When
the delayed action feature is used the shutter will not fire until
6 to 8 seconds after the shutter release button is pressed.
The exposune contnol As well as the eyeJevel exposure control
window you will see another window (5) on the camera top plate-
you can use either window to view the two pointers inside. One
pointer moves according to the amount of light falling on the
photo electric cell (20). You can see this when you move the
camera from light to dark parts of the scene. The other pointer
moves when the lens aperture, the shutter speed or the film speed
setting is changed. When the two pointers coincide the cameia is
automatically set for the right exposure.
                                 14
View original page 15Page 16 · Read text
www.butkus.us
TOADII{G THE GAMERA AI{D TAI(II{G PIGTURES
The camera should always be loaded, and unloaded. in the shade
away from direct sunshine. Your own shadow witi be sufficient
 .if no other shade is available.
  open the back of the camera by pulling up the back catch release
(6) 3n{ swing the back outwards on its hinge. Now lift out the
rewind lever handle (8) from its recessed position in the camera
top plate, and pull up the rewind spindle. Insert a cassette of firm
so that the projecting end of the core is at the bottom, see figure
 l.  In pulling up the rewind spindle you will have to overcomJthe
resistance of the catch which holds it in position.
  The free end of the film projecting from the cassette shourd
now be pulled out sufficiently to extend along the film track (23)
and reach the take-up spool (25)" Push down the rewind rever
flange (7) gently, so that the two prongs of the spindle engage with
the bar in the core of the cassette and the flange clicks into position.
If the prongs are not in line with the cassette core bar, thb rewind
flange should be turned until it can click into posiiion. Now
fold down the rewind lever so that its milled handle returns to the
hole in the camera top plate.
  Befcrre attaching the film make sure the shutter is c<lcked bv
                                   15
View original page 16Page 17 · Read text
operating the film transport lever once. If the lever cannot be
 operated the shutte.r will be already cocked. The slot n trre iafe-up
 sqool should be visible, rotate the spool flange by means of its millei edge .(27) until_the slot is facing you. Now insert the end of the film lnto the slot so that the second or third perforation hooks
 over the small tooth at the bottom of the spool. Then turn the take-
 up spooljust sufficiently to make sure that-the end of thenmwiiinot
 spring off the tooth, and that the sprockets (26) ui" .ngug.d in the film perforations.
  The loaded camera. shorlld appear as illustrated in figure 2 with
the film in the_position shown.- close the camera uict                                                          -;k-;sure that the film. does not spring away from the sprockets,                                                     and
that the back is held firmly in positlon Uy tfre
                                               "ut.ti(Ol      www.butkus.us
Setting the exposure counten and film neminder disc
lhe gxpo,sure countel Q7) should now be set. rf a 36 exposurefilm has been loaded, keep pushing the exposure- counter ietting                                                     .;n"button-(15) backwards and-forwardJuntil th; letter                                                                                     i, bpporiiEthe index mark o1                       ouler edge of the scale. lt  i zo                   lhefilm has been loaded, set the cointer to the division fo; ;$;;;;;"*p^or"i.
                                    16
View original page 17Page 19 · Read text
number 23. Theexposure counter indicates the number of exposures
 remaining on the film.
  The film reminder disc (16) should now be set to show the type
and speed of film in the camera. Each .uiio" oifilm has a film
speed, or a meter setting number printed otr it ur      in eSag-_?IN rating. you can use wlich you prefei "itt.,lor setting the
remmder drsc. Revolve the disc by means of the pin sitiatedbetween         the           "Rev."                 and "Neg."                                    sectors,                                     so                                             that ttrJinoex                                                                     i"                                                  -uitthe sector         comes                  gpposite                         the                   ASA or                          DIN                                                          film- speed                                                                ;;il"g
4guT9. The figures-"1                                etc.,mean 100, 200 ASA, eic. UsE                                                      . . " r"2. .",the "Rev." sector for coiour reversal films, it L;Nig.', sector forcolour-nega^tive films, and the sector marked .iB &-fu" for blackand white films.
  Now. alternately release the shutter and then wind on the film .,three trmes each. The exposure counter will then read ..36" or"20" depending on the tengtn of film in the        and the film
wrll be in position for the first exposure. Note "usr"tii,that thsrewind fla;;;
should turn anti-clockwise when the film transpoii i;;"; is opeia-t-e"d,
which indicates that the film is being wound through the'camera
corr-ectly. Take care that the left hand does not"interfere with
the free rotation of this flange while the film ir b.ind wound.
                                    18
View original page 19Page 20 · Read text
www.butkus.us
            $etting the film rpeed seate
        The film                 lpeed scate (3) should be set ro show the speed of the fitm          in use. set either ai asR or prN neu;;;i;;dffis the rerease               (41 and                        turning                              the                                       setting rinf(Z)         1alch                                                            ,iti'i'it,6'inAi.utor                                                                      dot                    ( I  I ) c.opes                    opposite                                 thl firm                                  speed*num5.i                                                                                             ,i,rrl"r.,                                                     vou i'uu. previousry         noted from the firm carton. Now release tt.             ii is important          that this settins be change* *.rry. ir*" u nl-""i.r,oJ airi*r.rrr speed is
         loaded as otheiwise you iritt outiin an incori""r ,.uding from the         exposure control.
                                 loading. the firm to_setting the firm speed scale          , All the steps from         have to be carried out every Time a niw fitm ii i8uo"ol-ih;iJt;i"s
          steps of focusing the rens and setting the;fi;;uiJi"ntror have to         be carried out every time an exposule ;s maOL.
f'it          Focusing the lens
        Sportsman Auto.                                                        .I        focus the lens to obtainWfrena.iharpyou havepicture.serectedArounda subject,ii,iiln,youmounthave (.r)to
       vou will see a scale of distaniei marked i" i;;i  il;    ilfi;iiv"tli         to 3{ feet. when you have estimated o, n,.uirr"a tro* rar away
        your subject is, rotate the lens mount to set tt. upprop;;l*';#;;;          figure in line with the index *utk on the depth of field scale (10).
                                              19
View original page 20Page 21 · Read text
As well as actual distances marked on the lens mount thereo'por-arepictures representing distances for 'oscenes", "groups" and
traits" each of which can be used when accurate measurement is not
possible. See "Snapshot Settings".
  Sportsman Auto RF. Instead of having to estimate how far
away your subject is, the coupled rangefinder on the .Sportsman
Auto itF model automatically tells you when the lens is correctly
focused. Hold the camera to your eye, look through the viewfinder
and,at the same time rotate the lens mount. In the centre of the
viewfinder you will See a square of lighter tone and the camera
should be positioned so that the subject to be focused is brought
into this area. Until the image is focused two overlapping images
are seen. By rotating the lens mount in one direction or the other,
the two images are seen to merge and when they are both in coinci-
dence your camera is focused.

Usin$ the Exposure Gontnol
After focusing the lens you have to adjust the camera so that
the correct combination of shutter speed and lens aperture give
you the right exposure. This is made easy for you with the exposure
control.
                                    20
View original page 21Page 22 · Read text
www.butkus.us
   select the shutterspeed.you want to use, e.g., l/60 or lll25 second,
 by rotating the setting ring (2) which is now iocked'to the scale
 (3), lr_qqit the speed number clicks into place opposite the indicator dot (13).
  Now aim the camera at the subject, look through either exposure
control window and at the sarne time rotate tlhe apertur6 scale
by means 9f the grips (12) until both pointers coincide. The lens
aperture will then be set to work with ttie shutter speed you selected,
and will give you the right exposure when you^ fire-the shutter.
You can also make the adjustments in the r-everse order, that is
nlslgeJ-fle aperture scale at a lens aperture you prefer (see"'Depth
    riel$'l and "Special. Notes'),, q''d rotate ihe ihutter: speed ring9{(2) until the pointers coincide. Make sure you hold the lenS aperturE
           as you rotate the shutter speed ring. The shuttei;d;dqg lrmlywill then be set to work with the lens apertuie you have selected
to give the right exposure.
   If you are                    to make the two pointers coincide it may be .             -unabledue to one of the following reasons.
  1. Available light too dull (for speed of film in camera) in which
     case change to a slower shutter speed. If still unable to make
     pointers coincide although shutter is set to its slowest speed,
                                      21
View original page 22Page 23 · Read text
make a time exposure or use flash. See "Time Exposures'o
    and "Taking Flash Pictures".
  2. Available light too bright (for speed of film in camera) in
     which case change to a faster shutter speed.
 When aiming the camera at your subject in order to take a
reading through the exposure control window, take care that you
do not obstruct the photo electric cell (20) with the fingers.
  When making an exposure, press the shutter release button (14)
with a continuous positive movement right to the end of its travel
     not jab it. Hold the camera firmly but comfortably in both-dohands with the camera against your cheek.
  Shutter speeds from 1/500 to 1/30 second can be used with
the camera held in the hand but 1/15 second should only be used
with the camera on a firm support.
  Remember that once you start to press the shutter release button
you begin to operate the double exposure prevention device.
Therefore do not press the release button until you are ready to
take your picture, because if you partially press the button beyond
a certain point near the end of its travel, and then allow it to spring
back, you may have already freed the prevention device. Then
when you next try to take a picture, you may find that you cannot
                                    22
View original page 23Page 24 · Read text
www.butkus.us
 press the rclease button, and it will be necessary t0 wind orr the film
 befqre you can make another exposure.
   The pointer that.is.actuated"bythe  photo elecrric cell is constantly
 varying with the light conditions, so if you change your position
 only.slightly check to see that the two pointers stilTcrjincide before making your exposure.

 0epth of field scate
 Although, you focus the lens fbr sharp pictures at a particular
 distance there is a zone irr front of and beyond that Jistance which
 will in addition be acceptably sharp. This zone is known as the
depth of field and ro find out how'f-ar on each side of the mairisulject it extends, you consult the depth of field scale (10). you
will see that there is an index mark in the midale-oi thL oepth oi
field scale and the aperture markings on either side of this'index
shnw the limits of the zone which extends on either side of the
fbcused distance. The lens aperture helps contr:oi the zone of
sharpness and so the extent of the zone changes with the lens        used.              Small                       lens aperture,                                           y6ld                                           moretperture                                                       depth of                                                   e.g.,-roi"iin"e.l'122,field. than                    a-pertures,                                                           irn                                                             distances                                   i.e., ./lg.           larggr                                            *yields less depth of field than grearer distances.       "itr*
View original page 24
Page 25 · Read text
Using delayed action
theiamera should first be prepared for the exposure in the normal
way by adjusting the shutter, the lens ap-erture and. the focusing.
Then r-est tire cariiera on a firm support or fix it to a tripod by means
of the socket (24). Now move the delayed action lev,et (22) in an
anti-clockwise'diiection as far as it will go, press the shutter release
button and you will have 6 to 8 seconds in which to geJ into the
picture before the shutter fires. While the delay mechanism  is
ivorking, the lever wilt be moving back to its rest position so take
care nol-to have anything in the way that might stop this movement'
There is no "B" setting on delayed action.
Snapshot settin$s
The camera {an be used as a simple snapshot camera without
th.- n""".tity of referring to the exposure cont_rol. Load the
                                                                             setcamera with a medium speed film such as F.P.3 Series II and
the shutter to l/60 second. Set the lens aperture to fll6 and focus
the lens for "groups". The camera will then be set for close-to-
medium distanie shots in bright weather. In dull conditions change
the lens aperture to flll.  niter ybu have taken a picture always remember to wind on the
film so that the camera is at once ready for your next exposure.
                                    24
View original page 25Page 26 · Read text
www.butkus.us
Time Exposunes
Time exposures can be made when "8" on the shutter speed
scale is set opposite the indicator dot (13). The shutter will remain
open for as long as pressure is maintained on the shutter release
button. A cable release can be screwed into the release button.
Rest the camera on a flrm support or fix it to a tripod by the screw
socket in the base of the camera.
A method of calculating time exposures. If you have a frne grain,
slowspeed  film, e.g.,25 ASA in the camera there maybe a timewhen
you cannot make the pointers coincide even with the shutter set
to l/15 second. The following method may enable you to calculate
the time exposure required.
  Re-set the film speed scale to 800 ASA; keep the shutter speed
set to 1/15 second; point the camera at the subject and note the
aperture number which comes opposite the indicator dot (13)
when the pointers coincide. If this is 8, the exposure for 800 ASA
film would be 1/15 second at fl8.  (If moving the grips to line upthe two pointers brings a space opposite the indicator dot, set
the aperture scale to the next smaller number. If between 5.6 and
8 for instance, set to 5.6).
 Now if 800 ASA film needs l/15 second at lens aperture .f18,
                                   25
View original page 26Page 27 · Read text
then because the speed rating of the film is doubled or halved
when the ASA speed number is doubled or halved,
    400 ASA would need say 1/8 second at lens aperture//8
and 200 ,,      ),    ),   +    ))    ,,  ,,      ,,         ,,or 100  ),or 50  ,,              T,,
or  25 ),     ))    ,,     2 seconds ,)  ),      ,,         ))
so 2 seconds at //8 is the exposure you would require.
    If you then decided to use another aperture for the same subject,
e.g.,f15.6 instead of fl8, the exposure time would be I second. If
you used/l I instead of fl8 the exposure time would be 4 seionds,
and so on.
  After calculating your time exposure in this way be sure to return
the film speed scale to its correct setting to agree with the film in
your camera.

TakinS flash pictums
The camera shutter is "X" synchronised, which means that either
electronic flash or flashbulbs will fire when the shutter is fully
open. Electronic flash can be used with the shutter set to any speed,
but because electronic flash is of such short duration. a shutter
                                    26
View original page 27Page 28 · Read text
www.butkus.us
speed of l/500 second is advised. This is because at slower shutter
speeds the natural light nnay give a secondary image on the {ilrn
 if the subject is moving. Flashbulbs can be used with the shutter
set to ll30 or lll5 second but ll30 second is advised.
  For simple flashbulb exposures, fit a flashgun such as the Ilford
Sportslite or Sportilux to the accessory shoe (19) on top of the
camera. The flashgun lead should be inserted into the socket (21)
at the base of the lens panel. Make sure that the connector is
pushed in firmly. An electronic flash lead is connected in the same
way, although because of the weight of some units they will have
to be attached to the camera with a connecting bar fixed to fhe
tripod screw socket.
  The method of calculating the right flash exposure is the same
tbr electronic flash and flashbulbs. First find out the Guide Number
of the flash you are using with the type of film in the camera.
Manufacturers of electronic flash units publish Guide Numbers
for their products, and Guide Numbers for flashbulbs are printed
on the bulb cartons. Estimate the distance in feet of the flash to
the subject, and divide this distance into the Guide Number. The
answer tells you the lens aperture number or nearest number you
should set opposite the indicator dot (13). Pressing the shutter
                                    27
View original page 28From the M. Butkus archive. Original publisher and archive notices are retained.
Check the model and edition against your equipment.
PDF verified 2026-10-10.