Film cameras
ILFORD Sportsmaster User manual
User manual for ILFORD Sportsmaster. 23 pages in English. Read the original PDF, download or print a copy without registration.
23 pagesEnglish2.8 MB PDF
Loading your manual…Open PDF directly
Document details
- Brand
- Ilford
- Model / document
- ILFORD Sportsmaster
- Document type
- User manual
- Language
- English
- Pages
- 23
- File size
- 2.8 MB
- Category
- Film cameras
- Document date
- Not specified in catalog
Search available document text
Find a term, then jump to its page in the original PDF. Image-only pages may not be searchable; check the PDF for exact wording and diagrams.
Page 3 · Read text
www.butkus.us


         35mm camer'a

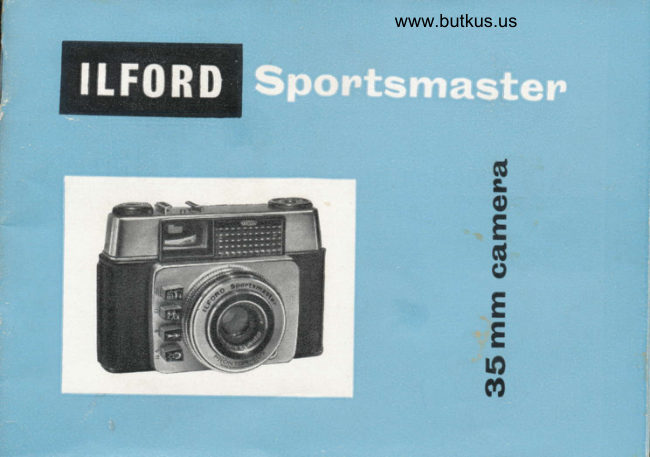
The Sportsmaster js.ful]v automatic-just look through the view-
finder, select one of the four release butions roitne aiJance you are
from.your subject and take your picture. pressintthe siutter release
sets the exposure accordingiq thi reading of ih";"d;;ad;;Fil;-rtriscontrol, focuses the lens, and releases thE st          means thateverything           is,donefor.you,                       and makes sure you"Gi.ii*ui, g.t d.fe"iryexposed,        and              needle-sharp pictures.
View original page 3Page 4 · Read text
35 mm camer'a   | . l'ilnr \pcc(l \cttilrg lirrg.
 l.  F ilnr spccd ring.
 -.1. l:lash'Arrto indicutor dot.
 -1. F ilnr spcccl locking cutch.
 5. Ilrrsh..\rrlo scttirrg rirrg.
 (r. [-ens ul]crtLrrc scttings lirr lllr.h pictLrrcs.
 7. Acccssot')' shoc.
 li. [-.rltosurc c()unlcr.
 9. Filrn lcrcr rrinrl.
10. Shuttcr rclcusc ltttd lircLtsittg [rtttltlns.
I l. ( onrbinccl  r icutindcr atrd optical signltl.
ll.  Rcuincl knob uncl lilrtr rcmirtclcr dise.
I J. Autonlrlic c\lr()\ul'c crlrttnrl.
1.1. Lockirrg catch.
I 5. ljlash c()l'rtitcl.
l(r. Rcu irtrl rclcltsc [-rutton.
View original page 4
Page 6 · Read text
Spor"tsrnastel"
     35mm camepa
Before you begin to take any pictures with yorrr new Sportsmaster,
read through these instructions very carefully witlt ygyr camera
beside you, and make sure that you are thoroughly familiar-with its
use. This will ensure that you get perfect pictures right from the start.
   Fill in your guarantee card right away, and post it to Ilford
Limited. Your Sportsmaster is thoroughly tested before it leaves the
factory, and gUaranteed for one year from the date of purchase. Re-
ceipt bf tne guarantee card means that your camera is registered
in your name under this guarantee.
  Do not forget that the Ilford Sportsmaster is a delicate instrument
and the lens,-shutter and automatic exposure control are carefully
adjusted for optimum perforrnance. So make sure that_ you treat
your camera very carefully, and give it the protection it deserves_ by
                                                                          atkeeping it in iti special ever-ready case which can be obtained
your photo dealer.
View original page 6Page 7 · Read text
lF'                                        www.butkus.us

                           AtL ABOUT THE SPORTSMASTER
           The-Sportsmaster takes 35 mm. firms in standard cassettes, that is,
              the.light-tight metal containers in which the film i. r"ro, ;"4 i;i;           which you must rewind the film after it has been eipor.o dna ueroie
          you open the camera back. The negative size is 24x36 mm. and il          you hand.your films-to your chemisi-or photo dealer ror aevitopinE
                 grinting' your.photographs can be ieturned to you us                -11t$          whrch are standard small size enlargements.                "npiinti
           The camera has a three-element lens with a focal length of 45 mm.         and a maximum                            aperture                                         o!                                    The lens is coiied                                                       u"J                                      fl?.9:                                                                                 ti;;;            excellent                       results when                                 using                                    both                                             black-and-white                                                    and colou,                                                                                     d'l-.,
           The film leven-wind
     A single movement. of the rapid rever-wind (9) performs three
          operations-the film is advalced, the shutter is sdt, u"o ttr.                    (8) is adjusted to show the number of exposures "*dil;that are            :oJlteT.
               left In the camera. The film lever-wind and the shutter release are
            interlocked to make double exposures impoJsibte;ai; ensure that
           the film cannot be wound on until an exiosure has been maoe.
           ..^Yt:l,operating the film lever-wind,_--by"  it firmly u"O i-ootnfv          ngnt to the end of its travel, and then allow it to returh smoothlv and
                                                7
View original page 7Page 8 · Read text
gently to its position, controlling it'with the thumb. Do not allow it
to sn-ap bacli under the pressure of its spring.
The viewfinden
when you look throush the direct-vision, bright-line, optical view-
fi;a;;,'i;  *ill ."e an-illuminated pattern outlining 4e picture-you                                               centre. The short lines;;i;i.ilg,  *ittr u small cross maiking the
*ittritr anl below tliJ main frame show the picture area when the
;"-bj;;i ir i.r. thutt 5 feet away.- When taking-pictures at distances                                             and these              j  feet, ih"             be tilteil_upwards6;1h";                                    instead of the main bright-line;;;ki"g,      as the "u*"ra'shouldpicture areaframe.    "r.a
The optical si$nal
Lookthrougl the viewfinder, and right at th9 tg,p you will see a small                               sienal (t1) and tells yo} when thelightAi;irfi;: firiJi. the opticaiir-i,;;f,-t;"o"gttioia picture. lvrren the gre.en portiort of the signal
ir *.ii *ithin-the rictingle, your picture will !e perfectly exgosed.                g19gn hai swung over to the left, and the small nickif ftt*"uJ, the
     Uttio- ofTnt rectangle hJs against the red, then this indicates
"dtfr"that there is not              figfr't for a g-ood picture.. The lumbers inside
;il;';i;gle  l"Oi"uti""o"gtt ap"proximatlty tlie opening of the lens (the
                                   I
View original page 8Page 9 · Read text
www.butkus.us

 lens aperture), which will be set when the shutter release button is depressed.
 The automatic shutter
 The Prontor-Lux  shutter  is qoupled to the automatic exposure control,
 and they ygrk together. This means that all the gueiswork is taken
 out of judging.the right exposgre.. All complicatid shutter settings
 and lens. focusing ar-e dispensed with too, and all you have to do to
 take a picture is look through the viewfinder, malie sure the optical
 signal-shows green, and then press one of tlie four i.i"ur. uuitons according to your subject distance.
  The automatic exposure- control reads how much light there is
agd. pre-set9 lhe opening of the lens aperture to control The fi;uniof light which will reach the film.
  As soon as a film has been loaded in the camera, the speed control
lpg m}-st_ be set according to the speed of the nm- Babtr .utton oi               v_o!l puv has the_ film speed printed o,r-it, *a eiaheit[;{tg wnic-nASA.or tle DIN gpeed can be used witf the sportsmaster. The film
speed setti_lg numbers on the camera are in red, it the front of the lens
mount. DlN_s-peeds, from l2.to ?!, urg at thi: top and ASA speeOs,from 10 to 200 are on the undersid6 of the ring. i{;;1;  set uie filni---speed is explained in "Loading the Sportsmasler" on page 12.
                                            I
View original page 9Page 14 · Read text
film placed in the camera with the projecting end of the core at the
bottom. The free end of the film that projects from the cassette
should now be extended along the film track in the direction of the
take-up spool. Push down the rewind knob gently and turn it until
it engages with the core of the cassette, then operate the lever-wind
once, but do not press any of the shutter release buttons.
  The leading edge of the film can now be taken along the film track
and slipped into the slit of the take-up spool. If the take-up spool
is not in the correct position and the slit cannot be seen, the spool
can be rotated with the thumb, on its lower milled-edge flange.
Make sure that the small tooth at the lower end of the slit in the
spool is engaging with the second or third film perforation.
 Now turn the take-up spool with the thumb so that the tongue of
the film winds round the spool; turn  it just sufficiently to take up the
slack in the film, and until the full width part of the film is just
protruding from the mouth of the cassette. Now close the camera
back.

$etting the Film Gounter and the Film Reminden ltisc
Release the shutter, and operate the lever-wind twice, releasing the
shutter each time. Then operate the lever-wind again. This will
                                 14
View original page 14Page 16 · Read text
bring the first frame on the film into position and clear film which
may have been fogged during loading. The rewind knob should turn
anti-clockwise when the film wind is operated, and this indicates that
the film is passing through correctly. Always check that the rewind
knob turns as the film is wound on.
  The exposure counter (8) should next be set to 20 or 36, depend-
ing on whether a 20 or 36 exposure cassette was loaded. Turn the
milled ring anti-clockwise,  until the right number lies opposite the
mark at the top. The exposure counter indicates the number of
exposures remaining in the cassette.
  Lastly, the film speed reminder disc on top of the rewind knob
(12) should be set to indicate the type of film in the camera.

The Film $peed $etting
The film speed setting on the Prontor-Lux shutter must now be
adjusted so that it corresponds to the film speed of the film which
has been loaded.
  Hold the camera with one hand, and with the thumb nail press
down the small locking catch (4) at the top left of the lens mount.
With the other hand, turn the milled outer ring (1) on the lens
mount until the small red dot of either the ASA or the DIN ratings
                                 16
View original page 16Page 17 · Read text
www.butkus.us


         L_-_-:;ifl                      !!__+         r{
Setting the exposure counter


Setting thefilm speed reminder disc      Setting the.film speed

                                   17
View original page 17Page 18 · Read text
on the ring lies opposite the film speed number. Now release the
locking catch.
  Do not forget to check this setting every time you load a new film,
and make sure that the speed setting on the camera corresponds to
the speed rating on your film, otherwise your pictures may be
incorrectly exposed.

                        TAI(I]{G OUTIIOOR PIGTURES
Note. Before taking any pictures, always make sure the film speed
setting is correctly adjusted, and if a new film has been loaded, make
sure that the exposure counter is set correctly.
  Adjust the shutter to the Auto setting, as explained on page 10.
The exposure control is now coupled to the lens aperture and to the
shutter release.
  Look through the viewfinder at your subject, and then glance at
the optical signal. If this shows that the green portion is well into
the rectangle, and has moved to the right of the small nick at the
bottom, then you can take the picture and it will be perfectly
exposed.
 Now estimate the distance you are away from your subject, and
select one of the four release buttons as explained on page 10. If
                                 18
View original page 18Page 19 · Read text
www.butkus.us
 your subject corresponds to one of the pictures on the buttons, then select the right button in this way.
   Before           y_ou take                         picture,                    the                         mlke                                           that                                             the                                                       optical                                                            signal is quite      steady.                    the            Hold                     camera                                 firmly-surewith                                       both                                           hinds                                                     u"l-it." sq r.eeze-don't jab-the selected shutier release with the forefingii
 of tfe right hand. Make sure that you have pr.s"d ihe button iifii to the end of its travel, otherwise you will nbt have taken u pi"tu?.
  The optical signal will tell you immediately  if your picture will be
:9:l."1ly exposed, so always make sure you gtance atit, even if youhave changed your position only. very slightly. rf the ilividing iinebetween the red and                          .the greg-n- iies exacu-y in ttre smalfdaylight shots are still possible, but they will tend to "i.t,-tiir"be L"o"i
exposed and not so successful. with colour film in the camera, it is
best to make sure that there is plenty of green ttto*i"El" tn" oiti.ursignal.
. .If v.o.r qartially gepress the release button, and then decide not totake the picture,.allow the button to spring back before you actualiytake the         -next               picture, otherwise the exposure control wil giue ifalse reading.
  Finally, remember to use the short lines within and below the
main frame of the viewfinder when you are tating pl"t.rr", which
                                   19
View original page 19Page 20 · Read text
are 5 feet or less away from your camera. A good rule is to use these
markings whenever you select the portrait release button. After you                                        operate tle lever-windd;;;"k"n a pictuie, always remember toimmeOiatety, s^o that the iamera is at once ready for a further
exposure.
                       TAKII{G FIASH PIGTURES
Disconnect the Auto setting by turning the milled inner ring on the
                                                lens apertures is at theG"i-o""t anti-clockwise intit ttre group oft;p, ;r described on page 10. The-spoitsmaster_is now ready fora;iirg fish pictures,- aid the shuttei is set at ll39 second, and
synch-ronised?or-'               expendable bulbs ald for electronic flash exposures.                                                flashgun, such as the   i;i  expendable bulb exposures,  fit a small                                       accessory shoe on top oftheIf;id Spbrtslite or the Sportilux, to the
.u-"tu tZ). 1.n" synchronising iead of the flashgun is connected to                                           contact at the base oftfr"ii-iti  by the standard imm. co-axialthe lens panel. Make sure the connector is pushed firmly home
                camera.       using thebefore--F;;                     exposure, first find the guide number for the                  flash        tiiJr-ieht
nainbutU yoi are going io use and the film in your-camera-, estimate
ttre Aistan-ce you i.e away from your subject, and then divide this
                                 20
View original page 20Page 21 · Read text
www.butkus.us

distance into the gujde number. The answer will tell you the lens
aperture you should use. Then move the milled innei ring on the
lens mount until the right lens aperture lies opposite the small black
dot, and use the corresponding release bulton according to the
distance you are away.
The "8" $etting
The "B" setting is for brief time exposures, and the shutter will
remain open for as long as the shutter release button remains
depressed. The lens aperture is fixed at f12.8 when the "8" setting
is in use. when using the "B" setting fix the camera to a firri
support, such as a tripod, and make sure your subject is quite still.
                            TAI(II{G OUT THE FILM
when you have exposed all the 20 or 36 exposures on the film, it
must be completely rewound into its cassette before the camera back
is opened. The film is rewound by depressing the rewind button
(16). in the baseplate of the camera and at the same time turning the
rewind knob in a clockwise direction as shown by the ariow.
Rewinding should be continued with the rewind releas-e button held
depressed until the film pulls away from the take-up spool. If the
                                      21
View original page 21Page 22 · Read text
film was properly attached to the taFe-up- fPool wh:_q the camera*ur fouO"O, som6 resistance will be felt atlhis point. When the film
fr"r Ui." completely rewound the camera 999k npy be opened and
the cassette r"-ou.'d from the camera by lifting the rewind knob.

                        SPEGIAT NOTES
Each different film speed setting corresponds to a certain shutter
rp".d,;d  it is impoitant to keep this ilmin{.especially with films
*hi"h haue low spieds, because the correspo,t-ditg shutter speed will                                                                     asbe low. The cameran'in these cases, should be held as firmly
po5iut", and fast moving subject_s should not be attempted. These
ire the ihutter speeds coiresponding to the film speed settings.
                                                                                        '                                                              240     DIN        12"   15"   18"   21"                                                      200    ASA      10   25   50   100 SHUTTER SPEED ll3o  1160 rlrzs rlzso u500
  Films with intermediate speeds give intermediate settings.
Ghoosin8 the right film
Now that you've got to know the Ilford Sportsmaster you'll want to
                                    22
View original page 22Page 23 · Read text
r                                          www.butkus.us
               try it out with a film. Make sure of s-uccess at your first attempt by
             following a_ll the instructions carefully and by making a tritiit or
             always loading your Sportsmaster wit6 an lfoid fitm.
           These are the Ilford films specially recommended for the             Sportsmaster.
        TLFACHROME the ideal reversal colour film for glowing colour
              transparencies of any daylight pictures and for flash p-ictures-indoois
            with blue coated flash bulbs, o1 electronic flash.
       PAN F the almost grainless, thin emulsion film for negatives of           unmatched definition and enlarging quality.
            T.P.3                   the fine grain, balanced colour response film for all your out--                                                                            -           door and indoor pictures. It has ampleipeed for all subj6cti.
n                                              ITIIPORTAl{T
       Do not use colour filters when taking black and white pictures
              I{ith your sportsmaster, as these will alter the exposure. A u.v.
                 filter can be used with colour film because this filt& has no effect          on exposure.
View original page 23From the M. Butkus archive. Original publisher and archive notices are retained.
Check the model and edition against your equipment.
PDF verified 2026-10-10.