Flashes & lighting
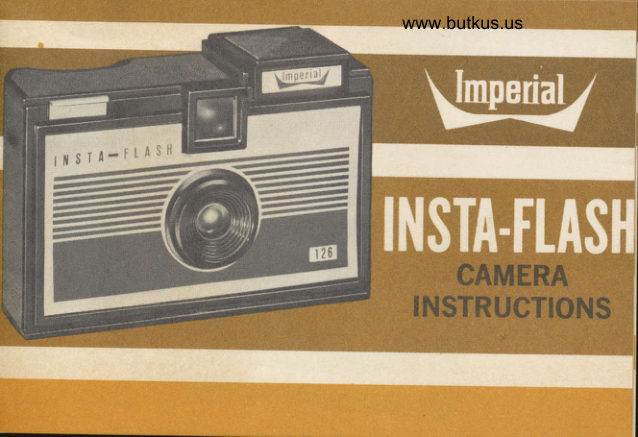
Imperial Insta-Flash User manual
User manual for Imperial Insta-Flash. 19 pages in English. Read the original PDF, download or print a copy without registration.
19 pagesEnglish2.1 MB PDF
Loading your manual…Open PDF directly
Document details
- Brand
- Imperial
- Model / document
- Imperial Insta-Flash
- Document type
- User manual
- Language
- English
- Pages
- 19
- File size
- 2.1 MB
- Category
- Flashes & lighting
- Document date
- Not specified in catalog
Search available document text
Find a term, then jump to its page in the original PDF. Image-only pages may not be searchable; check the PDF for exact wording and diagrams.
Page 5 · Read text
To open the camera back, the body lock
                       (See lllustration) is moved downward to
                     the "Open" position. The back of the
                      camera is then drawn off in a downward
                              direction, and is completely removed from
                          the camera (see lllustration).
           Mike Butkus          Digitally                                                                                                     DN:org,Date:cn=Mikeemail=mike@butkus.org,2023.03.21signedButkus,by19:56:13Mikeo=ButkusButkus-04'00'c=UScamera manuals, ou=butkus.


                        Drop the film cartridge into the chambers
                        provided. Note that one of the spool
                      Chambers of the cartridge is larger than
                         the other. The larger chamber is dropped
                              into the right hand side of the camera, on
                          the same side as the film advancing wheel.
www.butkus.us
View original page 5Page 6 · Read text
www.butkus.us

Replace the back by lining it up on the
light-trap grooves and sliding it back com-
p!ete!_y into the recess in the camera body.
The light-trap grooves must match or the
camera back will not close, and the camera
body lock will not function. Lock the back
by retqrning the camera body lock to the
"Lock" position.


To be ready for the first exposure, you
must advance the film wheel in a clockwise
direction until the wheel stops. ln the open
window the film number will appear. You
are then ready to take the first picture.
View original page 6
Page 7 · Read text
FLASH P|CTURESry              ryh

Your Insta-Flash Camera is equipped with a built-in flip up flash unit
which uses AG I  Flashbulbs and AAA Photoflash Batteries. lt  is
important that fresh batteries be used at all times. Weak batteries
are a major cause of flash picture failure. lf batteries have been in
the camera more than three months, it is recommended that they
be replaced with fresh batteries.
 lf your camera is to be put away, or unused, for any length of time,
remove the Photoflash batteries to prevent deterioration and damage
to the camera caused by aging of the batteries.
The flash unit accepts blue or clear AG 1 bulbs. Consult the film
exposure chart in this booklet, or the film manufacturer's instruction
sheet for the proper bulb to use with the film of your choice.
View original page 7
Page 8 · Read text
E**ry'q  FLASH UNIT                    OPERATION *  www.butkus.us

      To raise the flash hood, depress the lever
         bar directly behind the flash'unit. To return
        the flash hood to closed position,  it should
          be. pressed genfly, but firhly, fonrard until
             rt rs sFcurety closed. Do not force the flash
        untt torward at any time, nor attempt to        close it while a flashbulb is in the'bulb         socket.


       Your Insta-Flash ca.mera is provided with a wrist strap which is mounted
       on the wrist.strap lug on the reft side of the cameii 6e sure the wrist        strap              encircles                     your                              wrist                              whenever                                          you.                                            are using                                                    or                                                         ci.yina t;";       camera,               to prevent                         from                                           it                                    accidentally                                            dropping                                                              a-nd                                                      damaAi;E        camera.                                                                i;;;
View original page 8Page 9 · Read text
.w"  BATTERY |NSERTION ,rryry
 To insert the AAA Photoflash batteries,
  merely slide the lever on the front lip of
  the flash compartment over to the right
  until the opposite end is released. Then,
  just tip the cover and lift it out. This witl
  expose the two openings into which the
  batteries are inserted.
 The batteries must be inserted with ONE
  TIP UP AND ONE TIP DOWN in a vertical
  position.
  Replace the battery cover by sliding the
  right end under the flash unit base-this
  depresses the batteries further against the
  spring loading-slide the cover far enough
  under to have the opposite end clear the
  battery opening. Then slide the battery
  cover back to the left so that the lever is
  centered on the front lip of the compart-
 ment and thb batteries are both cov6red.
 Be sure the battery cover is firmly and
  properly seated or you will have failed to
  complete the electrical circuit.
View original page 9
Page 10 · Read text
FLAsH BULB TNSERTToN        www.butkus.us|.**

   Remove an AG I flashbulb from its plastic
   tubing by sliding it out. DO NOT PULL lT
   STRAIGHT UP. This can cause damage to     f.   the wire contacts, resulting in misfiring of
   the flashbulb.
   The flashbulb is then inserted straight down
    into the flashbulb socket.
 .l  After your indoor flash picture has been
   taken, the lever bar behind the flash unit I   is used to eject the hot, used flashbulb.
   Depressing the lever bar in the same man-
   ner that was used to open the flash unit
    will eject the used flashbulb.
   This lever bar has a dual function-opening   the flash unit-ejecting the flashbu16.  @r
View original page 10Page 11 · Read text
FLASH EXPOSURE INFORMATION


Whether you use black and white or color film, your Insta-Flash does
not require any exposure adjustment. Consult the distance chart on
the back plate of the camera or in this instruction booklet. By staying
within the limits of the distances recommended on these charts, you
are assured of accurate exposure.

           INDOOR EXPOSURE GUIDE


        FILM               BULB              DISTANCE
     Kodacolor-X
       Veri-Pan            AG-lB Blue             4-10 Feet
   Kodachrome-X                        AG-lB Blue               4-8 Feet    Ektachrome-X
View original page 11Page 13 · Read text
RULES FOR BETTER PHOTOGRAPHS frJ I
Be sure to operate the shutter lever and other controls on your camera                  I
a few times before you load it with film if it has been stored away for                Imore than a few months. These preliminary operations will insure                 Ismooth working, and will tell you if your camera is in the proper operat-
ing condition before you attempt to expose any film.
Hold your camera steady and level. The slightest movement will cause
blurring and a loss of sharpness in your picture.
Be sure subject is centered and fully visible in your view finder before
taking a picture.
When taking flash pictures, use a steady firm pressure on the shutter
lever. Do not press the shutter lever very slowly. This could cause a
premature firing of the flashbulb.                                                                                                  l
Load and unload your camera in a shaded place. Do not expose film
cartridge to direct sunlight.
Develop your film as soon as possible.
Keep your view finder and taking lenses clean. Do not touch them with
your fingers. Wipe them only with a soft dry ctoth or lens brush.
View original page 13
Page 14 · Read text
, .$,   ;X*l                          *;   *fl}|"  www.butkus.us
    Be sure to use a new flash bulb with every indoor picture.
    Check the distances indicated on your exposure chart when taking
     indoor pictures.
q"rLET'S TALK ABOUT FILMS AND BULBS

     Your  f nsta-Flash uses Kodapak type cartridges, film size #726. Be sure
     to specify this film size to your dealer when purchasing film.
     Your camera can take L2 black and white snapshots, 12 colored snap-
      shots, or 20 color slides, depending on what type of film you purchase.
     Your dealer can advise you regarding the type of film necessary for the
      picture taking you have in mind.
     Clear or blue colored flashbulbs can be used for taking indoor pictures
    on black and white film.
    When purchasing color film, check with your dealer to determine
                  purchasing.l*liilT'   whetherfilm you clearare  or blue bulbs are recommended for the type of color
View original page 14Page 15 · Read text
_L   TAKTNG PTCTURES

After advancing film to the first exposure, the sequence of operation
for each picture is as follows:
l.  Frame your picture and press the shutter.
2. Advance fitm winding knob until it stops-do not attempt to force
      it past this point.
3. This has automatically reset your shutter for the next exposure.
   This sequence of operation  is repeated until all pictures on the
     roll have been taken.
4. The number 1 appears in the window on the back of the camera,
    indicating the number of pictures on the roll. lt is possible that
   more than one number will be visible in the window at one time.
After the last exposure, the wheel is advanced until you can no longer
see any yellow paper in the window on the back of the camera. At this
pgint the camera can be opened for removal of the exposed cartridge
of film.
View original page 15Page 16 · Read text
www.butkus.us
       9*o*o*/*
Your camera is guaranteed against defective workmanship
and materials for a period of one year. lf service is requireci,
return the camera to the factory where  it will be repaired or
replaced at our option. lnclude $2.00 to cover costi of han-
d.ling and postage together with the negatives and a descrip-
tion of the fault or difficulty with the camera.
We are not responsible for any loss sustained for film, flash-
bulbs, or processing expense due to defective workmanship
or materials. We are not responsible for any consequentidl
damage or inconveniences occasioned by equipment'failure.
Our Guarantee does not cover cameras which are exposed to
excessive heat.
No other Warranty or Guarantee, express or implied, shall
be honored.
View original page 16Page 17 · Read text
MADITTITir\l LJsA                              tt
               IMPERIAL CAMERA CORP.
printed in u.S.A. 421 N. Western Ave., Chicago,  lll. 60612
View original page 17Page 18 · Read text
www.butkus.us

            Il.|STA.FLAS]|
                To insert the AAA Photoflash batteries,
                       merely slide the lever on the front lip of
                      the flash compartment over to the right
                            until the opposite end is released. Then,
                          just tip the cover and lift it out. This will
                      expose the two openings into which the
                            batteries are inserted.

                    The batteries must be inserted with ONE
                      TIP UP AND ONE TIP DOWN in a vertical
                              position.


:     I                                                                                                                                     fi,. @sr1:lYittr.J.S6r$rYs'  tiFrF-rElqN?;PttI.+.El'E"x  Ef1,,r:'illl$rl]f*ir-  'F tEor-ri{Y
i_-;      Made in U.S.A.
View original page 18Page 19 · Read text
Replace        the              battery                     by                                 sliding                                        the           :tk right     end           rrnder               the flash-cover                            ,nit                           U.i"_tni,.!epresses          the                batteries                                         aga-i-nst                                                              f urthJi                                                      tfrespnnp ioadirrg-5licle the cover fir enoughrrnder to have the opposite end clear the         ope.nrng.                          stide-'lnJ'i"ttu.y!gttery                lh-encover      back           to the                        left so                          that the lever is
centered on the front lip of the compart-
ment and ilre batteries are both covered.
Be sure the battery cover is firmiy and            l,pproperty seated or you will have failed tocornplete the electrical circuit
                                                  _-lt
                                         \$\
   IMPERIAL CAMERA CORP.421 N, Western      Chicago, llt. 60612   =ffiPrinted in U.S.A.
View original page 19From the M. Butkus archive. Original publisher and archive notices are retained.
Check the model and edition against your equipment.
PDF verified 2026-10-10.