Film cameras
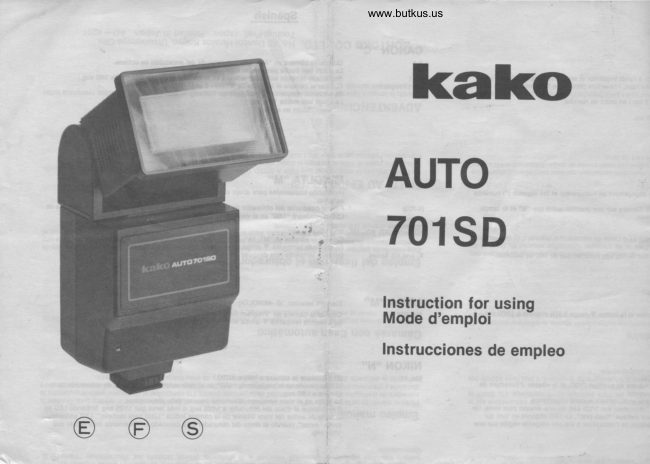
Kako Auto 701SD User manual
User manual for Kako Auto 701SD. 26 pages in French, Spanish. Read the original PDF, download or print a copy without registration.
26 pagesFrench, Spanish2.4 MB PDF
Loading your manual…Open PDF directly
Document details
- Brand
- Kako
- Model / document
- Kako Auto 701SD
- Document type
- User manual
- Language
- French, Spanish
- Pages
- 26
- File size
- 2.4 MB
- Category
- Film cameras
- Document date
- Not specified in catalog
Search available document text
Find a term, then jump to its page in the original PDF. Image-only pages may not be searchable; check the PDF for exact wording and diagrams.
Page 4 · Read text
Venmo @mike-butkus-camera  Ph. 2083
PayPal Name  Lynn@butkus.org      www.PayPal.me/lynnbutkus
View original page 4
Page 5 · Read text
KAKO
     TR-PACK S-4
        (option   opcional)                /


Dimension: 17Ox85 x 31 mm (with leather Case and Strap)
Weight: 2409 (w/o batteries)
View original page 5Page 7 · Read text
Cold F,lter


                    fl6)


 (1) Couverclepiles
 (2) Pied a contact central
 (3) Senseur
 (4) Reccord cable-syncro
 (5) Commutateur  "Marche/Arr0t"
 (6) Tete-ref lecteur orientable
 (7) Glisseur-diaphragmes,  illumination diaphragme
     par LED
 (8) READY-signal "prdt a fonctionner"
 €) Selecteur diaphragme computer
(1 0) Multi-"dedicated"-Commutateur
(11) Marquage sensibilite pellicule DIN-ASA
(12) AuTO-Declencheur  manuel-dclair  individuel
(13) CSblesyncro
(14) Contact central-contact  direct
(15) Marquage diaphragme  travail a compuler
(16) 3 filters de couleur
(17) Zooming                a(18) Zooming Positlon          ;S
(19) PUSH-ON (POWER-RESET)
(20) TR-PACK S-4 (option)
View original page 7Page 8 · Read text
Fffi*lF_                             www.butkus.us

        f-----
                                                                                                  I
                               fl3)


                                                                                                                                                                   .   .4.r.  !  j.

              (1) Tapa del alojamiento de las pilas
              (2) Soporte de la camara
              (3) Sensor
              (4) Conexi6n del cable de sincronizaci6n
             (5) Bot6n de CONEXION/DESCONEXION                                                             +rf6?r?;              (6) Cabezal orientable
              (7) Corredera de diafragma con iluminaci6n LED
             (8) READY, indicador de pronto uso
              (9) Selector de diafragmas computarizado
            (10) Multi-"dedicated"-Selector
            (11) Indices de sensibilidad DIN/ASA
            (12) AUTGDisparador manual-Relampago  individual
            (13) Cable de sincronizacidn
            (14) Contacto central-Contacto directo
              ('15) Indicador de diafragmas de trabajo cmpularizado
            (16) 3 filters de color
            (17) Zooming
            (18) Zooming Position                               '**t'           (1s) PUSH-ON (POWER-H6ED
            (20) TR-PACK S-4 (option)
View original page 8Page 9 · Read text
English     lnstruction for usingg6eiliGarion
                                                        i#Guide-Number:        32, films 21 DIN/100 ASAPower Source:     -    4 batteries alkaline-manganese,  AA-size
Flash sequence:          abt. 0.4-30 sec, computer-work.
Flash reserve:            abt. 10-30 sec. manual work
                                 abt. 2500-100 llashes on computer-work
                         .  : .   abt. 100 flashes on manual work
Flash duration:           1/4OOOO-1/1000 sec. computer-work
                                 1/'1000 sec. on manual work
                                                           2lDW/lOOASA
Angfe of coverage:      W28(adt.) 670 horizontally, 45o vertically,27\ml  44(ltl
   &                      N35(adt.) 58" horizontally, 40o vertically, 32(m) 52(ft)Guide Number            S5O(adt.) 45o horizontally, 30o vertically, 37(m) 60(ft)
                               T85(adt.) 35o horizontally, 20o vertically, 42(m) 69(ft)
Compluter-work-range:                  ZOOM POSITON  (17)
films 21 DIN/100 ASA            F-stop     T85      S50      N35       W28
                   Yellow   2.8    .,.r,  1.6-'l5m   1.4-13m       1.2-1 1m        1.2-10m                  Bfue    4        1.0-10m     0.7- 9m        0.7- 8m         0.7- 7m
               Red    8              1.0- 5m         1.0- 5m        0.7- 4m        0.7-3.4m
'TR-PACK S-4 (20) (option)
Flash sequence:         abt. 0.4-30 sec.-computer-work
                                 abt. 6-30 sec.-manual work.
Flash reserve:             abt. 400 flashes on manual work
                         Power Source: 6 batteries (AM-2)
Colour lemperature:    5,600 Kelvin-as medium daylight
Multi-dedicated  Contact-System: NIKON EM, FE
                             MINOLTA.XTOO, XD, XD7, XD11, XGM, XDs, XGl, XGg
                           LEICA R4-MOT
                      CANON A-1, AE-A, AE-1 program, AV-1, AT-1
                            .      ASAHI PENTAX MV-1, ME-super                                                               ift                       OLYMPUS OM.lO, OM.2N

I&{tst.'.rbq'o        -i\''    ij  -. ,:t1..            ,,:-i€i;r -:-:r;qg" B1*.i  . ,          ;."r rri':                r tl
 !'    t A        .. i-,                                           ...,dler'         ^  h-q.
View original page 9Page 10 · Read text
www.butkus.us
 Further equipment
 Tilt reflector, 1800 horizontally, 90o vertlcally, scrlal thyrlstor clrcult, multldlaphragma TELE€omputer,  ready-for
 operation-indication, "M" manual work, Open-flash, Mullidedicated  contact system, hot-shoe with central contact,
 synchrocable.
 Dimension:                136x 90 x 75mm
 Weight:                   370 gram (w/o batteries)


Cameras with automatic flash control
 First set the correct guidenumber on the camera-see technical speclflcatlons-and  set principally the Computer-Selector
 (9)in pos. "M".
 Bring the reflector in basic position and the small flash switch automatically.


Multi-dedicated contact system
 The multi-dedicated  contact system enables you to adapt the KAKO AUTO 701SD lo the automatic flash systems of the
35mm SLR cameras made by NIKON, MINOLTA, CANON, LEICA, OLYMPUS and ASAHI PENTAX.
The MD switch (10) must be set to the camera before the flash is mounted on the camera.

 Warning: The camera set switch (10) must be set to the correct position; if it isn't, the camera may be damaged.
 When the flash has been mounted on the hot shoe of the camera, the special contacts in the base ('14) of theTlash
 automatically set the camera shutter to "X".
 The actual switching over does not take place until the "ready" indication of the  f lashlight lights up. The camera shutter
 operatees normally when lhe flashlight  is not switched on.
 Set the aperture ring of the camera to "manual" and select the same aperalure to which the  f lashlight has been set.
 When you press down the shutter-release  bulton to its first stop the following signals appear in the viewfinder of the
 various cameras:
                                                         ,            ih*               'tf-           ,,                                                               'ud{'


WARNING: FOR USE OF MULTIPLE FLASH LIGHTING
Protecting the circuit of the dedicated system camera and the same of the dedicated flash from hazardous case, "SAFE-
TY SYSTEM" of Kako's dedicated flash enables you to use other tlash for "Multiple flash lighting purpose".  In this case,
Kako's dedicated flash should be mounted on the hot-shoe of the camera.
Reason; Output voltage of other make's hot-shoe of nondedicaled  strobe is about 250-3OO voltage, but Kako's
dedicated is about 15-20 volt and also "Safety System" lo prevent overvoltage from hot-shoe is built in the Kako's
dedicated  flash.

                                                      Alsr         i{lA
View original page 10Page 12 · Read text
www.butkus.us
Ca ract6ristiques suppl6menta    i res
 Ref lecteur orientable, horizontalement  de 1g0"-verticalemenl de 90", series circuit thyristoris6, multidiaphragme TELE'
            ,,M"-service manual, open-flash (D6clencheur manuel), syst6me de contact Multi'Dedicated, signal "prOt a Computer
 fonctionner", pied avec contact central, cAble-syncro.
Dimensions:         136x90x75mm  env.
 Poids:                    370 g env. (sans piles)


Appareils-photo avec automatique contr6le 6clairs
Mettez sur l'appareil-photo le nombre-guide appropid-voir specifications techniqueset ajuster le s6lecteur-computer   (9)
toujours en pos. "M". Le reflecteur est 6 mettre en position de base, en suite petit-flash se ddbranche automatiquement.


 Systeme de contact Multi-Dedicated
 GrAce au systdme de contact Multi-Dedicated,  le KAKO AUTO 701SD peut 6tre adapt€ aux systemes automatiques de
 flash des appareils ref lex de petit format (35mm) des marques NIKON, MINOLTA, CANON, LEICA' OLYMPUS et ASAHI
 PENTAX. Pour ce faire,  il faut ajuster le commutateur MD (1O) au type de chambre respectif avant de le placer sur la
 chambre.
 Attention!  ll faut veiler A ce que le commutateur  (10) soit a la camera position correcte. Des 169lages in'corrects corrects
 Ctre la cause d'une ddtdrioration de la ch6mbre.
 Apres que le  f lash a 6t€ glissd dans le coussinet de contact de la chambre, les contacts spdciaux situds 6 la base (1tl) du
 flish rdglent I'obturateu? de la chambre au temps de synchroni$tion X de manidsynchronisation  X de manidre enti6re
 ment auiomatique. La commutation ellemOme n'a lieu que lorsque I'indicateur d'ordre de marche s'allume. L'obturateur
 fonctionne de facon normale lorsque  le flash n'est pas enclenchd.
 Mettre la bague de rdglage du diaphragme de la chambre 6 "manuel" et regler I'ouverture A la m6me valeur que le flash.
 Lorsque voui tuuchez au ddclencheur, Pour les diffdrents types de chambre, les signaux d'ordre de marche suivants sont
 indiquds dans le visseur:


                                 ::.                   q,.,-t                   .!:               '    f.:   ?i1a.!ffrlrc..=

ATTENTION: UTILISATION EN COMBINASION D" AUTRES ECLAIRS
Le "SYSTEME DE SECURITE" des flashs universels Kako pr6vu pour prot6ger le circuit dlectrique des appareils photos A
systeme universel comme celui du flash universel, permet la libre utilisation d'autres   f lashes pour procdder e des prises
de vues avec plusieurs 6cairs de falsh. Si le cas se prdsente, le  f lash universel Kako doit etre obligatoirement  monte sur le
sabot de prise directe de I'appareil, les  f lashs universels fabriquds par d'autres constructeurs risquant d'endommager
I'appareit (la tension dlectrique de la plupart des sabots de prise directe 6tant de 250 A 300 volts, alors qu'avec les tlashs
Kako elle n'est que de 15 A 20 volts, et les flashs Kako sont munis d'un systdme de sdcurite).
View original page 12Page 14 · Read text
www.butkus.us
 Equipo diverso
  Rellector orientable horizontal  't80o, vertical 90o conexl6n en serle por tlrlslores, telecomputadora  de varios diafragmas
 "M" manual, TEST-Disparador manual, Sistema de contacto multi-dedicated, piloto de funcionamiento instantdneo
  soporte con contacto central, cable de sincronizaci6n. TEST de pilas.
  Dimensiones aprox:       136 x 90 x 75mm
  Peso aprox.:               370 g (sin Pilas)

                    t -r    ;.

Cdmaras con flash autom6tico
 Graduar la cdmara seg0n el n0mero guia (vdase los respectivos datos t6cnicos) y poner el mando  (9) siempre en la
 posicidn "M". Poner el reflector en su posici6n normal, y se desconecta luego automdticamente.


 Sistema de contacto multi.dedicated
 La KAKO AUTO 701SD, por rhedio del sistema de contacto multi-dedicated,  puede adaptarse a los sistemas de flash
 autometico para los aparatos totogrdrficos de reflexi6n de tamano pequeno (35 mm) de las marcas NIKON, MINOLTA,
 CANON, LEICA, OLYMPUS e ASAHI PENTAX. Para hacer esto el interrupto MD (10), antes de ser instalado en la cAmara,
  tiene que ser registrado para el correspondiente  tipo de aparato fotografico.
 Atenci6n: Sin falta, hay que prestar atenci6n para que el interruptor  ('t0) est6 colocado en la c6mara posici6n exacta. En
 casc de instalacion equivocada se podria danar la camara.
 Despuds de haber introducidoel   f lash en el pie de contacto de la cAmara, los contactos especiales en el pie del  f lash (14)
 registran de manera completamenle  autometica el cierre de la cAmara para el correspondient  tiempo de sincronizaci6n
 x.
 El pasale se efect6a reci6o cuando se enclende el indicadnr de dlsponlbilidad.del flash. El clLrre de la-c6mA?a funclona
 de manera normal cuando no estd conectado  el flash.
 Colocar el anillo del diafragma de la c6mara en "Manual" y regular el diafragma para el dia fragma registrado en el  f lash.
 Tocando el disparador de la cdmara, en el visor del correspondiente  tipo de cdmara se indicanlas siguientes  seilales de
 pronto uso del flash:


ADVERTENCIA: UTILIZATION CON OTROS FLASH
El "SYSTEM DE SEGURIDAD" del flash multi-apropiados de Kako sirve para proteger el circuito el6ctrico de las cAmaras
como tambien al flash apropiados, de accidentes, permitendo el uso de otros   f lash con el prop6site de "Encendido  M0lti-
ple de Flash". En ese caso el flash apropiados de Kako de Kako deberA montar sobre la zapata caliente de la cAmara.
La razdn es que la lens6n de salida de zapata caliente de otros fabricantes de estrobos noapropiados es de cerca de 250
a 300 voltios, mientras que los de flash Kako es de 15 a 20 voltios y ademds el "SISTEMA DE SEGURIDAD" de Kako pro
tege la sobretens6n de la zapata caliente.


                                                                                                                                     .frit    flrr,
View original page 14Page 15 · Read text
English

                                                                                                                  .iGANON ,.C'
A-1                   Press down ihe shuter-release button softly, and the followlng signals (*) appear.
A-1                   Set the selector switch of the of camera to "Av"                           . The readings "l/60" will light up.
AE-'l                           ' The needly of the exposure meier is in its upper mosl position and the shutter time of the
                      camera will be set at 1/60 sec. automatically.
AE-1 Program       Discharge "Program" setting of the camera.
                          Select the shutter time ot the camera between 1/1000 s€c. and 2 sec.
                                       '  fl mark lights up and automatically set at 1/60 sec.AV-l                            ' The needle of the exposure meter indicates "1/60''.
AT-1                           ' No indication in the viewfinder, but shutter time of this camera is set at 1/60 sec.
                        automomatically.


MINOLTA "M''
                                      '  Press down the shutter-relase  button softly, and the following signals (*) appear.
(X 700)                        ' Set the shutter dial of the camera to the position other than "8" Then LED lamp will bllnk at
                               ''1/60" in view finder.
                          XDrJXD-Series (XD, SC1 XD5, XD?,                                                                                                                               r'      .           *i                      Set MODE                                Switch of the carnera to "M", "A" or "S".                                                                                                                                                t
                       The Tri-Angle mark (red LED) blinks in its upper right position and the shutter time of the
                     camera will be set at 1/100 sec. automatically.
Xr and XG Serles (XG', XGe, XG-u, XG=, XG-e)
                     The red LED blinks at 1/60 sec. setting automatically

LEIGA "M"    {,?1T:i::lTi?tJ,:Jt}Bh'j}  or rhe camera at any poinr.
                      :iilffitr":  TlinliXiiluroo"n'iont position and the shutter time of the camera will be set


                                                                                                     :
           ..N''NIKON
EM, FE                (EM) Set the camera at M90 or AUTO.
                   LED lights up at the position of "1/90" in the viewfinder  setting camera's shutter time at 1/90
                          sec.
                     The needle in the vlewfinder moves freely, but no wbrry.
                           (FE) Set shutter dial at 1/125 sec. or slower than 1/125 sec. or slower than /125 sec. Lit LED
                           at the top of camera finder indicates "Ready for Flash". LED blinks as warning, when shut-
                             ter dial is set laster than 'll125 sec. erroneously.
View original page 15Page 16 · Read text
---o[YMPUS                .S;,-."*:-e:-:-.,      -  ;*.  -  ..www.butkus.us.1.^    -                      {|Fi4+fgl6L=i            "O'                                                                                                                                                                -,*'
    oM-10                  Set the MODE Switch lever of the camera to "AUTO".
                                  I  Uarf lights up setting the camera at 1/60 sec. automatically.                            Set the Switch Lever to "MANUAL" position.
                            Set shutter dial at 1/30 sec. or slower shutter time.
                            Charging over indication lamp lights up automatically.


                                                                                                                                                                                                                                                   '  ASAHI PENTAX ..P"
    ME€uper                . Set"M" themarkcamerablinksatand"AUTO"LED lightsoT "MANUAL"up at the position ot "'l1125" and camera is set at 1/125 sec.
                                aulomaticallY.
     MV-1                               ' LED lights up setting camera's shutter tlme at 1/100 sec. automatlcally.


  STANDARD "S''
                           Normal setting when using the flashlight with a camera without automatic flash system,
                                  irrespective  of the make.

   Syncro connection                             "\-
   a) Cable slack
         Using TB-pACK S*4 with MULTI-DEDICATED  system, set MD switch o#bnd simply push in the flash with the slip-on'
          foot (2) in the hot-shoe of camera. Hereby, the syncreconnection is made.
   b) With syncro-cable
         Using cameras without central contact, the connection from camera to flash is realised by the attached syncrG
          cable (13). lnsert the syncro-cable (13) In the plug (4) and connect the other end with "X" contact of camera. Observe
       '      strictly the hints of camera's manufacturer!

   Setlng/Adjustment of camera                                                                   ,
     Should your camera have an adjustable  syncronisation  ("X", "M" or various   f lash-cable contacts) use always "X"-contact.
    Recent cameras are always syncronized by "X", without specified marking. Select shutter-time according to instruction
    manual of camera. Using cameras with diaphragm-shutter  optionally up to 1/250 sec. (moslly 1/125 sec.) When focal plane
     shutters cameras are used, select 1/60 sec., distance as usually.

  The VARIO-TELE-COMPUTER
   a) Aperture selection
        The marking  (11) of diaphragma-Slider  (7) to set to sensibility-number  of film used. The 2 marks (15) have opposite
          aperture values on the apertureslide  (7), indicating the work-apertures  available  for selection, depending  it a larger
          flash distance is preferred or larger depth of focus. The aperture hereby found should be set on the camera.
View original page 16Page 17 · Read text
b) Adjustment of Gomputer-automation
     Select the desired setting by the computer-switch   (9); the computer-aperlure  should be transferred  to camera. The
     distance marking, to the right to apertureslider (meters or teet) indicates simultaneously  the maximamal  possible
     distance for the setting chosen. The following 4 settings are possible.
c) Gomputer with serial circuit                s:     "1*'
   Light regulation, thyristorized
    The serial circuit with thyristors  is economizing excess energy, which is being destoyed in normal computer flash
      units. In other words, only as many of energy is being absorbed as the correct exposure of picture require, the
     residuary energy is stored. Here is the result: super-short flash sequences up to 0.4 sec. and up to 2.500 flashes per
     set of batteries, depending from distance to object. Here is the rule: The shorter the distance  to object, the shorter
     the flash sequence and the higher the amount of flashes per set of batteris.


AUTO.OFF
Full automatic switching-off of entire flash unit after abt. 60 sec.
There is a  f ull automatic switch-off incorporated  in this electronic    f lash unit, disconnecting  same, should there not be any
consecutive phot shot within 60 seconds. Gonsequently, there is an economy in energy, and-in spite-the unit is again im-
mediately ready for  f urther   f lashing operation. The energy tor an instant   f lash remains stored for abt. t hour, shown by the
ready-foroperation lamp X READY  (8).
After automatic disconnection, pilot lamp (10) will extinguish.


PUSH.ON (POWER- RESED (19)
Quick starting key
Should a flash been stored for a longer perlod, Instantly for snapshots,  after abt. t hours time the quick starting key can
be pushed, so that the unit is recharging again for one minute, than switching olf automatically. In the case that you
forget to switchoff the flash unit, this will be done fully automatically.
View original page 17Page 18 · Read text
www.butkus.us
 Remark
  Please consider that the distance is important run by the light  (f lash unit-wall-oblect), to determinate the correct aperture.
  .Qince the reflecti ngJig[-anount depeads lugelyon the n.ture of refl,ecting surface (wall or ceiling  etc-), hcre the indica'                                                                                                                         - tion of a distance llmit is no more posslble. (see also para "The VarioComputer)


 Manual operation
 Set Computer-Selector  (9) in pos. "M". The aperture scale (7) replaces any ciphering of guide-number. Just set the
 apertur+slider (7) to the sensibility of your film (marking  11), reading then the aperture corresponding  to any distance,
 transferring same on to the camera. When flashing manually and indirectly, and to determinate the correct aperture,
 please add the distance from the llash unit to the reflecting surface plus from there to the subject to be pictured.


Cameras with flash automation
 First set the correct guidenumber on the camera-see technical specifications-and  set principally the Computer-Setector
 (9) in pos. "M".
 Bring the reflector in basic position.
                                                                  ':.
 Open llash method
 Flashing here is being made with open shutter. The open-flash-method ensure several tlashings within a longer period of
 exposures (instantly night pictures), then to obtain effects and tricks.
 Use flash unit and camera seperately. Open camera's shutter (pos. "8") and fire the flash by the manual key (12) lrom
 various places.


EFFECT FTLTERS (16)
Your A-701SD   f lash unit comes complete with three   f ilters. There enable you to produce special colour effects. Using the
red auxiliary filter, the colours are softened and there is a clear red tint. Using the blue auxillary  filter makes the colours
harder and there is a clear blue tint.


 NOTE
 When ready lamp takes more ihem 30 set to be llt after power swltch on, replase all batleries for new.
View original page 18Page 19 · Read text
French
t    CANON..C" *
         Model A-1            Mettre la chambre 6 "Av"
           AE-l                 ' Les modications 1/60 s'allument.           AE-l                 '  L'aiguille de l'actinomgtre oscille.lusqu A l'an6t supdrieur et en mome temps 1/60 sec. sont
                                    r6gl6es sur la chambre de facon automatique,  l'ouverlure (lorsque le flash est en ordre de
                AE-l prosram [Hi"1"ftJil'j",:ff;"  (1/1ooo sec. - 2 sec.) en ordre de marche.                                          ' fls'allume.          AV-1                '  L-aiguille de I'actinom€tre indique 1/60 sec.
          AT-1                ' Pas d'indication dans le vis€ur.

                                          .tir

     MINOLTA "M''
                                                        ' (Appuyer doucement sur le bouton de d6gagement de I'obturateur  et les signaux (') suivants
            (X 700)     it               '  apparaissent.)Mettre le cadran de I'obturanteur de la Kamera sur une position autre que "8" et la lampe
                          LED clignotera en "1/60" dans le viseur.
    .,      XD-series (XD, SCr, XD5, XD?, XD;)                                         #                                 Mettre la chambre e "M", "A" "S".
                               La lampe V rouge (LED) clignote a 1/100 sec.
           (Series Xz et XG)       (XG!, XGe, XGs, XG-e)
                                                        '  Le t6moin LED rouge clignote A la valeur de f6glage automatlque de ll@ de seconde.


     LEICA               ttMtt     (camera setector io -MINoLTA)    R4-MOT          Mettre la "Program Selector" de chambre et la lampe V rouge (LED) clignote 6 1/100 sec.


     NIKON "N''
        EM, FE                (EM) Rdgler I'appareil sur M90 ou AUTO.
                              Le t6moin lumineux dans le viseur s'aullume en posllion "1F0, et la vitesse d'ouverturn de
                                          I'appareil est donc r6gl6e A 1/90 de seconde.
                                        L'aiguille dans le viseur se d6place sans arret, celii'a aucune importance.
                                      (FE) Rdgler la bague des vitessesde l'obturateur sur 1/125 sec. ou une vitesse plus lente. Un
                          LED illumind en haut du viseur inl6rieur indique "flash pret", Le LED clignote en tant qu'
                              ;i::$;i'T;;ffiJi'::  ?i?uu"'x::vitesses de I'obturatuer a 6te par m6sarde r6sr6e sur une
E                        '"*'                                   **    OLyMpUS..O"
     OM-10              Mettre la chambre 6 "AUTO".
                              hiliT?:   oM.2n     La lampe "FJ'i';T,Xi,J'f1,,'ffi*s'allume automatique.
View original page 19Page 20 · Read text
www.butkus.us
                               ..P''    ASAHI PENTAX
    ME-SUPER        Mettre la chambre a "AUTO" "MANUAL"
                                  ''M" lampe clignote d 1/60 sec. automatique.
    MV-1               L lampe s'allume 6 1/100 sec. automatique.
                         _
   STANDARD "S''
                                Position normale en cas d'emploi d'un flash pour les chambres normales sans flash
                              automatique, quel que soit le mod6le.

-   Connexion syncronis6e
     a) sans cable
              Utilisant TR-PACK S.4 6 systeme de MD, metlre simplement le MD dans utilisant, avec son pied (2). Ainsi
             laconnexion-syncro  est ddjA donnde.
     b) par c6ble-sucro
             Acloperant des appareils-photo sans contact central,  la connexion entre camdra et  f lash est accomplie par la cdble
             syncro (13) ci-joint. Enfichez le cAble-syncro (13) dans le raccord (4) reliant I'autre prise du cAble au reccord "X" de la
           cam6ra observez les indications du fabricant de I'appareil-photo!

    Aiustage appareil-photo
       Adopdrant des camdras A syncronisations r6glables ('X", "M" ou plusieurs raccords pour cAble-syncros), utilisez que le
       raccord "X". Les cam6ras r6centes sont toutes syncronisdes avec "X", sans aucune indication spdcifique. S6lectionnez
         le temps d'obturation suivant le mode d'emploi de votre appareil-photo. Pour les appareils A obturateur A diaphragme
        librement iusqu'A 1/125 sec.) Pour camdras e obturateur A rideau surtout 1/60 sec. Ajustez la distance, comme d'habitude.

    Le computer Vario-TELE
    a) S6lection diaphragme
           Ajustez le marquage   ('1 1) du glisseur-diaphragme   (7) sur la sensibilit6 de pellicule utilisde. Les valeurs-diaphragme
             sur le glisseur-diaphragmes   (7) se trouvant en face des 2 marquages (15) indiquent les diaphragmes de travail s6lec-
             tionnables, selon qu'on prefere une grande port6e d'6clair ou une nettet6 en profondeur plus prdcise. Le diaphragme
            d6termin6e de cette fagon est a mettre sur votre cam6ra.
View original page 20Page 21 · Read text
b) Aiustage automatisme-computer
     56leclionnez la position ddsir6e avec le commutateur{omputer  (9), alors que le diaphragmecomputer pose s'allume
     directement  et est e transmettre  sur la cam6ra. La valeur-distance coordonn6 e droite du glisseur-diaphragme  (mdtre
    ou ft=pieds) indique simultandment la distance maximale admissible pour une telle pose. VoilA les 3 positions
      possibles:
c) Computer avec series circuit
   R6glage lumidre thyristoris6
     Economie est achevee de l'6nergie excddentaire, par les series circuit A thyristors, une telle dnergie suppldmentaire
     6tant ddtruite dang un flash A computer normal. Par consdquence, on prdldve seulement autant d'6nergie pour une
     exposition correcte de la photo, tandis que I'energie rdsiduaire reste accumul6e. Voila le rdsultat: sdquences des
      6clairs ultracourtes iusqu'a 0,4 secondes et quantitd des 6clairs maximum jusqu'A 2,500 tires par jeu de piles, sui-
     vant la distance du motif. Rdsum6e: La plus courte la distance du motif, la plus reduite la sdquence des 6clairs
     consdcutifs et la plus 6l6v6e la quantitd des 6clairs par un jeu de piles.


AUTO.OFF
D6branchement enti6rement automatique du flash
complet apres 60 sec env.
Nous avons incorpo6 dans ce  f lash un ddbranchement entierement automatique deconectant  I'apparell, si  il n'y a pas lieu
une prise consdcutife pendant les 60 secondes suivantes.
Economie en dnergie est obtenue, mais le flash reste ndamoins pret A fonctionner instantandment. Reste accumul6e
l'6nergie pour t heure env., pour un 6clair instantan6, indiqud par le signal "prdt-6-fonctionner" READY  (8).
D6s le flash est ddbranchd automatiquement, la lampefonction (10) s'6teind.


                                                                                                                                                                               lPUSH.ON (POWER-RESET) (19)
Touche d6marrage rapide
Si un eclair doit rester "emmagasind" pour une pdriode 6loign6e, lnstandment pour des lnstantan6s pGslbtes, on peut
pousser la touche de ddmarragerapide, aprds une heure env., alors que la flash recharge immddiatement pour une
minute, en suite il se debranche automatiquement. Dans le cas qu'on oublierait de d6clencher la flash par le com-
mutateur principal, c'est le flash mdme qui le fait pour vous et enti6rement automatique.
View original page 21Page 22 · Read text
www.butkus.us
     Remarquez
         Observez strictement que c'est la distance parcouru€ par la lumlOre (flash-mtrobjet) d6termlnani le dlaphragme ap
                         peut                                                                ces                On-ne                                     une                                                        dans                           pas indiquer                                                                         conditions,carla-quanlitrfuElumiArc                                                   distance-limite,*==      .progrid!                                                                                                                            reflAtante rl6Fenrl  .,, r,,r,                                              (m0r,                                                                               (voir          largement                                     reflotante                  de la                                                plafond etc.).                                                                chAp.                                                                    "Le computer VarioTELE)                         surface


      Op6ration manuelle
          Placez le sdlecteurcomputer  (9) en pos. "M". L'6chelle de diaphragmes  (7) rend inutile de faire des calculations sur le
          nombre-guide. Mettez le glisseurdiaphragmes  (7) sur la sensibilitd de votre pellicule (avec mgrquage 11), lisant le
         diaphragme approprie d chaque distance, en suite le transmettre sur votre appareil-photo.
          Pour des eclairs manuels et indirectes,  et dans le bot de ddterminer  le diaphragme de la camdra,  il faut faire additin des
         distances du flash A la surface refldtante plus celle au sujet a photographier.

      Appareils-photo avec automatisme.6clairs
         Mettez sur I'appareil-photo  le nombre-guide approprid-voir sp6cifications terehniques€t ajuster le s€lecteurcomputer (9)
          toujours en pos. "M". Le reflecteur est a mettre en position de base, en suite petit-flash se d6branche automatiquement.


     Methode "open-flash"
         Les 6clairs sont provoques i oblurateur ouvert. Cette methode permet le ddclenchement de ptusieur 6claires pendant des
         longues expositions (comme poses de nuit) et I'obtention d'effets et de trucages. Utilisation s6parde du llash et de
           I'appareil-photo. Ouvrez I'obturateur (pos. "B") et declenchez le flash, A I'aide du d6clencheur manuel (12), des positons
          diverses.


     FTLTRES A EFFETS SPECTAUX (16)
        Vous trouvez trois  f iltres suppl6mentaires  pour le  f lash 4-701SD, dans votre emballage, qui vous permettent d'obtenir des
          effets de couleur particuliers. Le  f iltre rouge adoucit les couleurs avec une nette pointe de rouge. Adop6rant  le  f ittre bleu,
         vous avez les couleurs qui se dur cissent, ici d'une nelte pointe vers de bleu.


    ATTEN
        Quand la lampe d'appr6t demande plus de 30 secondes d s'allumer aprds avoir branch€ I'interrupteur  principal, remplacer j$,
         toules les piles par des nouvelles
View original page 22Page 23 · Read text
Spanish

           ,,C"CANON
 A-1                      Colocar la cdmara en "Av", 1/60 seg d€spu6s del encendido se obtiene.
 4.2                   La aguja beli oscila pasando al tope superior.
 AE.1                     Registrado tambi6n automaticamente en la cAmara el tiempo desu6g de 1/60 seg.
 AE-1 Program           Golocar la cAmara el el tilnpo de 1/1000-2 seg.
                    Se enciende lamparita  fl  Oespu6s de 1/60 seg.                      La agula beli mdica 1/60 seg.
                   No hay mdi6i6n en el visor.


                                  ..M''           MINOLTA
                        (Apretando suavemente para abajo el bot6n des disparador, aparecerAn las siguientes (')
(X-700)                     '  senales).Fijar el cuadrante del obturador de la cemara a la posici6n diferente de "B", y la lAmpara de
                    LED parpadeard "1/60" en el visor.

XD-Series (XD, XDs, XDr, XDr, XD'J
                        Colocar la cAmara en "M",
                    Se enciende lamparita V arriba en el visor y despu6s de 1/100 seg. automaticamente.
X, and XG Series         Destella lamparita roja despu6s de 1/60 seg. automaticamente.


          ..M''      (Camera selector 10 -MINOLTA)LEICA
R4.MOT                 Colocar la cdmera en "Program Selector"
                    Se enciende lamparita V arriba en el visor y despuds de 1/100 seg. automaticamente.


           ..N''NIKON
EM, FE                 (EM) Coloque la cemara a M90 o AUTO.
                    LED se prende en la posici6n de "1/90" en el visor colocando  el tiempo de obturaci6n de la
                      cdmara a 1€0 seg.
                      La aguja en el visor se mueve libremente pero no debe preocuparse.
                           (FE) Coloque el disco del obturador a 11125 seg. o mds lento que 1/125 seg. Brillando LED en
                            la parte de arriba del visor interior de la cAmara indica "Listo para destello". LED parpadea
                    como "Aviso", cuando el disco del obturador esta colocado err6neamente m6s r6pido que
                          1/125 seg.

olYn/lPus "o"
oM-10                    Se encienite\- lamparita E despu6s de 1/60 seg.OM-2n                   Colocar  la c6mara en "MANUAL" y la c6mera el tiempo en 1/30.
                    Se enciende lamparita automaticamenle.
                                    \
                                                            n.: {r
                                                                     \
View original page 23Page 24 · Read text
www.butkus.us
                         ..P''ASAHI PENTAX
ME-Super          Colocar la c6mara en "AUTO" "MANUAL".
                           Destella lamparita roja (LED) "M" despu6s de "11125" seg. automaticamente.
 MV-'l               Se enciende lamparita despu6s de 1/100 seg.


STANDARD "S''
Estdndar:            Posici6n est6ndar normal utilizando el flash con cAmaras normales sin automatismo de
                          flash para cualquier tipo de producto.


                                                                                                                                                                                                                                                                                                                                                  .Flash y c6mara                             1:.g.r : ,;r:si*  '. :-
Sincronizacion
a) Sin cable
    En TR-PACK S-4 con MD, colocar MD en "funzionamento" y montar el flash en el soporte previsto para ello en la
    c6mara, con lo que queda establecido el contacto sincronizado.
b) Con cagble de sincronizacion
   En las cdmaras que no tienen contact o c€nlral, la conexi6n entre el flash y la c6mara se establece mediante el ad-
    junto cable de sincronizaci6n  (13). Este cable (13) se la clavija  (4) y su otro extremo se empalma en el contacto "X" de
     la cdmara. Obsdrvense las instrucciones del fabricante de la cdmara.

Requlacion de la c6mara
En las c6maras con sincronizaci6n regulable (contacts X,M, o cable) se eligir6 siempre el contacto "X". Las c6maras
modernas tienen generalmente sincronizaci6n "X". Graduar la velocidad del obturador siguiendo  las instrucciones de la
cdmara. En las cAmaras cen obturador  central, hasta 1/250 s (generalmente  'll125 s). En las cAmaras con obturador de
cortinilla, generalmente  1/60 s. Graduar la distancia comO de costumbre.

Va rio-TE L E-Computadora
a) Graduacion del diafragma
    Graduar la marca (11) de la corredera de diafragma fl) frente al m0mero que corresponda a la sensibilldad de la
     pelicula. Los valores de la tabla (7) frente a las 2 marcas (15) indican los diafragmas de trabajo a elegir, segOn si se
     prefiere un gran alcance del flash o, al contrario, una mayor profundidad de campo, respectivamente.  Graduar
    seguidamente  el diafragma en la cAmara.
View original page 24Page 25 · Read text
b) Graduacion del automatismo por computadora
    Gon el mando (19) se grad0a el valor requerido, observando que se ilumina el n0mero de diafragma que se graduarA
   en la cdmara. La distancia (m 6 ft) respectiva que se indica a la derecha de la corredera de diafragma, indica al
    mismo tiempo la distancia mAxima posible con esta graduaci6n. Son posibles las siguientes 3 graduaciones:
c) Computadora con conexi6n en serie
   Regulacion de luz con tiristores
    La conexi6n en serie con tiristores ahorra energia sobrante, que en aparatos normales se desperdicia. Es decir,
    solamente se gasta la contidad de energia necesaria para una correcta exposici6n. la energia restante queda en
     reserya. Esto permite conseguir una sucesi6n supercorta de los relAmpagos hast 0,4 segundos y hasta 2.500
    rel6mpagos por grupo de pilas, seg0n la distancia del objeto a fotografiar. Hay que tener presente, por consiguiente,
    que cuanto m6s corta sea la distancia mAs breve serd la sucesi6n de los reldmpagos y mAs larga la duraci6n de las
      pilas.


Auto-Off
Desconexi6n totalmente autom6tica del aparato a los 60 segundos,
aproximadamente.
 Este flash electr6nico  este equipado con una desconexion totalmAtica, que lo desconecta  si no se hace la fotografia den-
 tro de unos 60 segundos. De este modo se economiza energia y el aparato estA dispuesto, no obstante, para funcionar en
 todo momento. La energia para una descarga inmediata estA disponible durante una hora, aproximadamente, que lo in-
 dica la ldmpara de control (8).
 Despu6s de la desconexi6n automAtica se apaga la luz de control (10).


                                              (1 e)PUSH.ON (POWER - RESET)Boton de luncionamiento rdpido
Si se quiere tener en todo momento disponible  el  f lash, por ejemplo para realizar instantaneas,  etc., puede apretarse este
bot6n cada hora, aproximadamente;  el aparato se recarga duranle un minuto y se desconecta luego automaticamehte. Y
si alguna vez se olvida usted de desconectar el aparato con el interruptor principal, lo hace el mismo aparato
automaticamente.
View original page 25Page 26 · Read text
www.butkus.us
Nota
                                  que recorre                                                       laDebe tenerse en cuenta que la distancia                                                             luz (flah-pared-obieto) es muy importante para graduar el      -e'                                         en gftrn                                  depende                                        rn'aneraOatragnr&-fuqque_ta-hrertflecda
pueOe-n indicarse aqui datos generales relativos a la distancia. (Vdase tambidn las instrucciones "VarioTELE-
Computadora")

Empleo manual
 poner el mando (9) en la posici6n "M". La escala de diafragmas  (7) le ahorra tener que calcular  el numero guia. Graduar la
 corredera de diafragma  iZ) segUn la sensibilidad de la pelicula (marca 11); comprobar  el diafragma que corresponde a la
 distancia y graduarlo en ti cAirara. Para fotograf iar con  f lash indirecto  la graduaci6n del diaf ragma se realiza midiendo y
 sumando  la distancia del flash hasta la superlicie de reflexi6n y de 6sta hasta el obieto a fotografiar.


Gdmaras con flash automdtico
Graduar la cdmara segon el nomero guia (vdase los respectivos datos t6enicos) y poner el mando (9) siempre en la
posici6n "M". Poner el reflector en su posici6n normal, y se desconecta  luego automaticamente.


Empleo del flash con el obturador abierto
 Este mdtodo de emplear el flash dejando el obturador de la cAmara abierto permlte disparavarias vocos el  f lash dentro de
 un mismo tiempo de exposici6n  (p. ej., para fotografiar de noche), para obtener efectos y fotografias trucadas. Para ello
 se empleardn  la cdmara y el tlash por separado. Abrir el obturador de la cdmara (posici6n B) y disparar el flash con el
 disparador manual (12) desde diversos puntos.


 FTLTRT AD EFFETTO (16)
 Tre filtri si trovano in dotazione al Suo flash A-70'lSD. Questi permettono di ottenere particolari effettl di colore. Usando
 I'adattatore rosso di filtro si ottengono  colori pi0 morbidi e un'evidenle sfumatura rossa.
 fmpiegando I'adattatore di filtro dlu  i colori diventano  pi0 duri, con un'evidente sfumatura azzwta.


ADVERTENCIA
 Cuando la lampara lista para el uso tarda m6s de 30 segundos para ser ehcendldo despuds de conectar, reemplace todas
 las baterias por nuevas.


  KOHTOKU CO., LTD. No.46 Danchi-Hiraide Kogyo, Utsunomiya-City
                                 Tochigi-Pref, Japan Printed in Japan AD-4201
View original page 26From the M. Butkus archive. Original publisher and archive notices are retained.
Check the model and edition against your equipment.
PDF verified 2026-10-10.