Film cameras
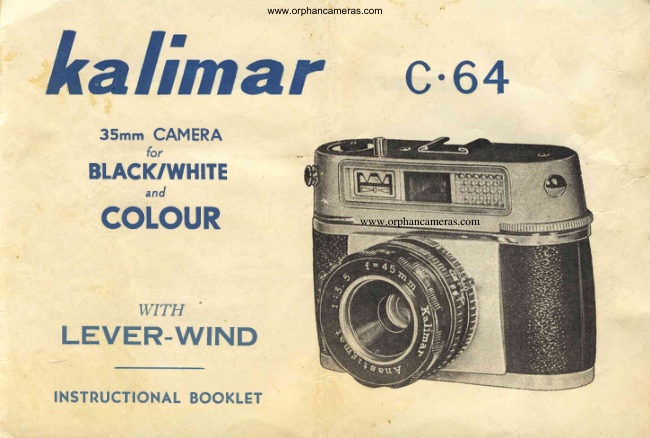
Kalimar C-64 User manual
User manual for Kalimar C-64. 9 pages in English. Read the original PDF, download or print a copy without registration.
9 pagesEnglish0.6 MB PDF
Loading your manual…Open PDF directly
Document details
- Brand
- Kalimar
- Model / document
- Kalimar C-64
- Document type
- User manual
- Language
- English
- Pages
- 9
- File size
- 0.6 MB
- Category
- Film cameras
- Document date
- Not specified in catalog
Search available document text
Find a term, then jump to its page in the original PDF. Image-only pages may not be searchable; check the PDF for exact wording and diagrams.
Page 2 · Read text
www.orphancameras.com


     35mrn CAMERA
                  for
  BLACK/WHITE
              and

                                                     www.orphancameras.com  coLouR


        WITH
LEVER-WIND

INSTRUCTIONALBOOKLET
View original page 2Page 3 · Read text
www.orphancameras.com

       kalimar      c.64


This camera is robust and attractively'dcsigncd.Produced    BEFORE  USING  YOUR  KALIMAR   C'64  BE
                                           SURE  'To  READ   THls   INSTRUCTIoN   BooK'
to meet the demand for  a  moderately  pricecl 35mm
                                                                                   1'  Lever wind and rransport'
camcra i*corporating all the features found on  thc more                            '                                                                           2,  Shutter Releaseand Cablc Sockct
expensive t),pes of  camcras. Fittcd  with  thc famous             3.  Exposure Counter.
Halina13.5/45mm.AnastigmatLens -  thc rcsults on eithe|                4'  Aperturc Sctting Ring'
                                                                             5.  Spced Sctting Ring.
black/whiteor colour films are outstanding.                            6.  Distance Setting Ring.
                                                                             7.  Accessory Shoe.
Also fittcd is thc new Level tUind.Onesrrokc winds the               8'  Vicw Finder window'
                                                              9  Rewind.Wheel.
film,  cocks the  shutter and  advanccs the exposure          10.  Flash SynchronisationNipple.
counler                                                                                                             t 1. Back Cover Loc.k (not shou'n on diagram)
View original page 3Page 5 · Read text
HOWwww.orphancameras.comTO LOAD TFIE CAMERA
           (Never  load or unload in  bright  light)


      A) Hold the Camera
      with  the base facing
     upwards and turn the
     Back Cover Lock so
       that the red dots meet.
     The gripping ends of
      the Lock Wheel  are             o D r t r ! t r n t r n
      thus  in  a  horizontal
      position (OPEN)  run-
      ning parallel with the
     Camera base.                 U N O N E N D N O D B


                                Q) NeverLoadIn A BrightLight Ensure that the Clip (15) on the Film
                                   Take- up Spool (16)  is  in  position. (Facing towards  you)   lf  the
      B) Slide the Camera            film  loading clip (15)  is not  visible  it can be brought into position
     Back cover down  to-         by actuating the Lever Wind  (1). A  single 180o traverse is sufficienl
     wards the base of the            Pull out approx. 3 inches of the film leader from the loaded cassette,
                                and insert the end of the film leader securely over and under the
     Camera and remove
                                             clip (tS) of the Film take-up spool (16) sufficiently to hook either
      completelv.The Cam-
I                                      the 3rd or 4th sprocket perforation over the lower nipple of the clip                                                                                                                                                                                                                                                                                         4{II     era Back and the base            (tS). Still holding the Film take-up Spool (t6)   fit the loaded cassette
       are one  plece.                     into the Film Loading Chamber (13), makiag sure the pin on the
                                      cassetteis correctly engaged in the slot of the Rewind Wheel Shaft
View original page 5Page 6 · Read text
ALL CONTROLSwww.orphancameras.comARE VISIBLE FROM ABOVE


       (12). Transport the Film by actuating the Lever Wind  (1)  in an
                                                                                                                    E) Set the aperture by rota-3qanti-clockwisedirection. Rotate 180' and then release (it  will autom-
                                                                                                                                            ting   the  Apenure   Setting  !    atically return to the original  position). Depress Shutter Release (2)      and repeat whole operation until the whole length of the film leader
      has been transported. IMP0RTANTNever try to force the Lever Wind                                                                                                                   Ring  (  )  until  the white  Tri-       (1) beyond the 180' traverse.Replacethe Camera Cover by reversing
      the procedure given under the  letter B. ENSURE THE BACK                                                 angle  is opposite the chosen
    COVER LOCK  IS TURNED SO THAT  THE TWO GRIPPING
    ENDS OF THE LOCK WHEEL ARE IN A LOCKED POSITTON                                                      setting 3.5 - 4 - 5.6 - 8 - ll  - 16.


      D) The  film now has to be wound on sufficiently to take the  first
      exposure, this is done in the following manner: Advance the Lever
     Wind  (1)  180" and then depress the Shltter Release (2)  repeat
       this operation once more and the film  is now in position. (NEVER
    FORCE THE LEVER WIND   (1)  IF IT WILL NOT ADVANCEF  WHEN  COMMENCING  THE  ABOVE  OPERATION,  FIRST                                                      F) Set the  shutter speed
    DEPRESS THE  SHUTTER  RELEASE  (2). Set  the Exposure                                                                                                                 by rotating the Speed Set      Counter  (3)  by  exerting  slight  finger  pressure on  the  raised
      Knurled  Wheel  in  the  centre and  turning   in  an  anticlockwise                                                               ting  Ring  (5)   until  the I
       direction until  the Red Mark  is opposite the Triangle  Qeft of Ex'                                              chosen speed is opposite
      posure Counter) (3) The Exposure  Counter   will  always show  the                                                       the red diamond. l
I  lF9T{TF'rupEE'qnumber  of exoosures taken
View original page 6Page 7 · Read text
www.orphancameras.com
                                                                        ..       ,'isi;.


                                  G) Set the distance from           K)  After the last exposure is taken a certain resistance will be felt
                                        the subject to be taken to                                                                  and this indicates the film  is used and has to be rewound into the
                                        the camera, by  rotating
                                        the Distance Setting Ring           cassette before removal. This  is done by depressing the Rewind
                                            (6) until the distance is                                                                  Releasebutton (f8) (fig Aa). situated under the Lever Wind  (1). Still
                                       oppositethe red Diamond.
                                 The  lnfinity  Mark   oo          depressingthe Rewind button (18) rotate the Rewind Wheel (9) in
                                       indicatesdistanceof over                                                                    a clockwise direction (as indicated by the arrow on  the Camera
                                  30 feet.
                                                                               back). When the Rewind Wheel appears to rotate without any resis'
                                                                            in                                                       focus                                                          in sharp                                        area                                       the                            (19)                           shows                    scale             of Field     DepthThe                                                                       tance the film has been rewound completely into the cassette.The                                                                        off the                                                 read                                           Scale                                          the                           To use                           use.                              in              Aperture         to therelation
Aperture in use on both sides of the 0  in relation to the figures         camera back can be taken  ofi  (see instructions under headings
on th. Distance Scale. For instance. the above illustration shows       A  fd B) remove cassette. reload and replace camera back.
everything in focus from approx. 25  ft. to  infinity on  f8'

 H)  AII adjustments have now been made.  Your KALIMAR  C.64
 is ready for use.


I) Hold the camera firmly  in both hands. sight the subject to be
taken through the View finder (8) and depressthe Shutter Release
(21 smoothly with the forefinger- FOR GOOD RESULTS AVOID
CAMERA SHAKE  -  it  is helpful to hold one's breath when actu'
ally depressingthe Body Release.The Camera can be held either
vertically,or horizontally.                                                                       Rewind Releaee Button
View original page 7Page 8 · Read text
www.orphancameras.com


 Your KALIMAR  C.64 is fitted with a Double Exposure Prevention        A  further  fitting  of great use is the Accessory Shoe (7). This cna-
                                                                               bles a Range-finder, Flashgun, etc. to be f.itted to the Camera. Device (no danger of 2 shots on one negative). The Lever Wind

 (1) has a threefold use. 1. Transports the film.  2. Counts  the  ex-
posures.3. Clears the Double Exposure Prevention. To mike  sure        The use of a Flashgun is of particular importance and interest -  it
                                                                        enables the camera to be used the whole year round, 24 hours a
the film  is being transponed correctly a  usiful  tip  is  to  watch  if                                                                    day -  light conditions are of NO consequenceif you have a F'lashgun.
the Rewind Weel  (9) rotates in an  anti-clockwise direction when
                                                       Wo especiallyrecommendrhe {ollowing flashguns-
yoii advance the Lever Wind (1). If  this does nor  rotate the  film             DUO LUX and NATIONAL

has probably been incorrectly inserted.
                                                              The shutter of the KALIMAR  C.64 is synchronised so that bulbs
                                                                  can be used at a shutter speed of  1/30th of a second. Fit your
The "KALIMAR   C.64" is  fitted with a Trip"d  Bush enabling  it  to         Flashgun into the Accessory Shoe (7)  on top of the camera, the
                                                                        synchronising lead of the Flashgun should. be connected to  thebe set on a Tripod (the ideal method. to obviate all camera shake).
                                                                         synchronisationnipple of the camera (10)  follow  instructions for
The Tripod Bush is also used to hold the camera securely in the                                                                       normal use, but remember to set the Speed Setting Ring  (5)  on
Ev'er Readv Case.                                                          1i30th of a second.


                    Lens Eood, Filter  Eolder,  Filter,  Ever Ready Case atways  ayailsblo
                                                                                                                     P'ililIfp    tl)tlrrK016
       W    w"w                      w
View original page 8From the M. Butkus archive. Original publisher and archive notices are retained.
Check the model and edition against your equipment.
PDF verified 2026-10-10.