Lenses & filters
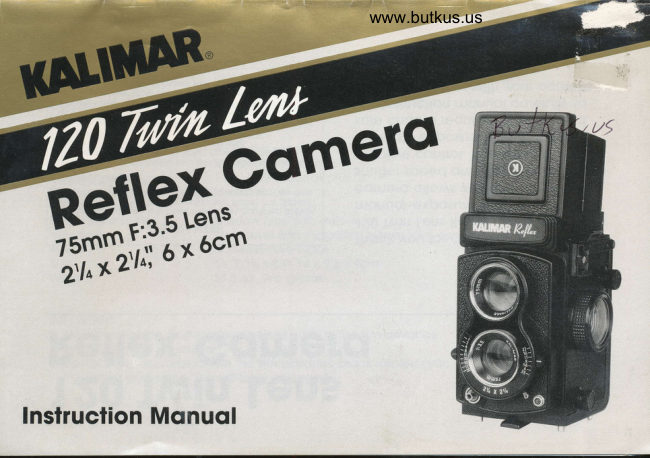
Kalimar reflex 120 twin lens User manual
User manual for Kalimar reflex 120 twin lens. 19 pages in English. Read the original PDF, download or print a copy without registration.
19 pagesEnglish6.7 MB PDF
Loading your manual…Open PDF directly
Document details
- Brand
- Kalimar
- Model / document
- Kalimar reflex 120 twin lens
- Document type
- User manual
- Language
- English
- Pages
- 19
- File size
- 6.7 MB
- Category
- Lenses & filters
- Document date
- Not specified in catalog
Search available document text
Find a term, then jump to its page in the original PDF. Image-only pages may not be searchable; check the PDF for exact wording and diagrams.
Page 3 · Read text
www.butkus.us

SPECIFICATIONS
Type                           2'/ox2'/0" (6 x 6cm) Reflex Comero
Lens                     Twin Lens 75 mm F:3.5, with 75mm F:2.8 viewing lens
Film type                120 formot
Opficol conslruclion  3 elements in 3 groups
Self-limer                l0 seconds
Hot Shoe             X contoct
Flosh synchronizolion  All shutter speeds
Shutfer                Metol blode leof type
Shutter speed                  I fo I/300 seconds plus "B"
Shutter releose        Mechqnicol
Film odvqnce            Circulor orm type
Exposure counler      Window type with outo reset
Viewfinder             Woist level with mognified viewer, plus eye level
Finish                     Non-reflective block
Size                        51A x 33/o x 3t/2" , 14 x 9.5 x 9cm
Weight                  34.5 o2.,966 groms


                                                                .:IMPORTANT:
l. Alwoys odjust the shutter speed before roloting the film odvonce
  cronk (cocking fhe shutter).
2. Do nol slore lhe comero with the film odvonce cronk rototed (with
  the shutter cocked) or the self-timer engoged.
View original page 3Page 6 · Read text
FIIM TOADING
Use 120 formof film. Alwoys lood ond unlood film in subdued
light (never in direct sunlight).
 l. Unlock fhe bqck cover by pushing the bock cover sofety
   releose (20) in while lurning the bock cover locking
   wheel (21 ) counterclockwise.
2. Open fhe bock cover. Pull out the lower film spool releose
   (16) ond move fhe empty spool to fhe upper chomber.
    Insert ihe poper tope seoled film into the lower film chom-
    ber, with the right side of the spool entering in firsf.
1 Once the film spool is oll the woy correctly info the chom-
   ber lhe lower film spool releose (16) will spring bock
   towords the comero body, lhereby securing the roll.
4. Next pull oul the upper film spool releose (17), which will
   ollow you fo inserl the empty foke-up spool info the upper
   film chomber. Insert the right side of the spool firsf. Agoin
  once the film spool is oll the woy correctly inlo the chom-
   ber, the upper film spool releose (17) will spring bock
   towords the comero body.
5. Now remove the poper lope seol from the end of the film,
  ond extend fhe end of the film (or film leoder) into the
   long horizonlol open slof on the upper film toke-up spool.
   The film should be evenly posifioned between the lwo red
   index morks.
View original page 6Page 7 · Read text
www.butkus.us
   'sdols +l lllun ost/y\)colc,lolunoc puo sdols  {l lllun asl/v\)lcolc
  (g1) luorc ocup po otll put/v\ ol sl Llclrl/v\'Z# puo 1g qdot6
  -orod eroqo eql u! u/v\oqs so etnpecotd eq1 pedel 'olJlo,l,
     qcoa uoe/qaq le$nqs oql )co3 puo  tl'llll otll oJuoApD
         oI'uo)o{ uooq soLl etnlc;d g,lll otll Ou4oclpu1 '1c11c
      io{+nqs oql roeq puo (/) uo[nq esoolo,l loilnqs aqt Llsnd   L
                                            'etryc1d Ptg tnoA e1o1
   o1 Apoer /v\ou oto noA puo polcoc uoeq /vrou sotl lo14nLls
 eql'sdo1s  ll l11un 'u,tnl Ipr,.l-euo (estrvrlco;ctelunoc) uo[3al!p
    elpoddo otll ul (0t) )uojc ocuo^po ullg otll ololol /v\oN  'z
  /ropu!/v\ .relunoc etnsodxe eq1 u; toeddo  ll!/v\  ,, t,, ,laqulnu eql                                                                                                   't  'sdop       1 l1un es/v\Icolc (0t) )uDJo ocuo^po tulg ol'.ll aplod
                                           6u;cuoltpy  tu1;1
           'pelcol  sl loop lcoq oql pql soloclpu! punos lcll3
    slql'IJlp o rooq no{ 14un {poe utq plnoqs qclq^ ';eeq/',r
    eql acJof lou oC '{poq oteulo3 uloul otll uo enoorb ;;ot'tts
  or.ll olul {lurtg s;ceuuo3 (61) tlclol lo^oc lcoq eql eJns oIoW
     'esr/r)colo (tZ) teeqat buqcol eql utn{ [poq oteuloc eq1
                                   allLyvr puo'(77) rcttoc lcoq aq1 osolC '8sprp/rol {urg I 6u1p1oq
                                 'eprs euo o{ re^o oplls lou soop   puo'loods dn-41o1 aql o{uo Aluene spull* ullg olns a)ol4 '/
              'u/v\oqs so Apoq olouJoc otll uo slloLtl xopul pel
 o4 eLll qlrr* peu6;1o eto tedod e^ll3olo.td aLll lo s/vrollo oql
                                                    LUIU aLll plolun '9 lllun esl/vrlcolo ulnl puo (et) Iuotc ocuo^po
View original page 7Page 8 · Read text
FRAMING
Lift open the viewfinder housing (l) os indicoted by
the orrow. View by looking down into lhe viewfinder
housing (l). Note thot the imoge seen on the
viewfinder focusing screen  is o mirror imoge.
Direcl Frqme Viewing
Direct frome viewing is helpful when toking pictures
of moving objects by viewing directly through the
viewfinder housing  (l ).
After focusing, push the viewfinder front ponel (2)
inwords, os indicofed by the orrow, so thot  it swings
into the viewfinder housing (l) ond locks inlo ploce.
Now view lhrough lhe smoll squqre opening locoted
on lhe bock of the viewfinder housing.
To relurn bock fo normol downword viewing, push
genlly ogoinst fhe two hinged oreos on the side of
fhe viewfinder housing (l). The viewfinder fronl ponel
(2) will pop bock to ils originol position.
View original page 8
Page 10 · Read text
SETTINO THE SHUTTER SPEED
The shutter speed confrols lhe durotion of time in
which lighf reoches the film. lf the shutter speed con-
trol (10) is set to o higher numbet (i'e., moved from
60 to 125), the qmounf of exposure (or lighf reoching
fhe film) will be reduced by holf.  lf il is sel fo o lower
number (i.e., moved from I25 to 60), the omount of
exposure will be doubled. The numbers "1," "2'"
...'300' on fhe shutter speed lever represenl  1, 1/2, or
 I /300 second, ond the letter "8" is for bulb exposure.
To set fhe shutter speed, slide the shutter speed con-
trol (10) fo lhe setting you wonl, opposile the index
morkings on lhe pholo lens housing (8).
"8" Selling Exposure
The "B" setting is used for long lime exposures of  I
second or longer. To use, slide the shutter speed con-
frol (10) to the "B" (bulb) position. When you press
down on the shutter releose button (7), the shutler
will remoin open os long os the shutter releose bul-
ton (7), is depressed. To prevenl comero shqke,
olwoys mount the comero on o lripod ond trip lhe
shutter wilh o coble releose.


                                    --r:J                                                              .$:c--
View original page 10Page 11 · Read text
'pojlsop                                                                                                                                                        l!
                     pesn eq oslo uoc sbuil+as uea/vr1eq-ul '(g) Oupnoq
                       suel oloqd oql uo 6u;1tou.t xopul oL{l egsoddo'luorvr
                       noA 6uges oql ol (y) lo,tluoc atnpedo eql aplls
                     's6uges ern;redo e6uoqc oI'Lulg eql seqcoet 1q6;1
                                                                                           s1 (7)                        Llcnu so lpq-euo'9t:l ol  t t:l utoll penou
                       lorluoo ernpedo oLll Jl 'ullg oql q3oel 11;m 1q6;1 qcnu
                          so ecuq'0'8:l ol  t t:l uro4 po^otu s; (y) lo4uoc
                      einpedp eql I 'eldu.toxa.toJ'Xeu oql so uilg aql
                            ol lr.16ll qcnu so 1otl-ouo lo'qcnu so oc!/vq.taLlile
                           sllursuorl 6u;ges dols-1 qcoe'peeds Je$nqs oql e);l
                                              'zziJsl lsollouls oLll puD'g't:l  s! eJnl
                     -redo lsebrol eLil'(y) lo.rluoc etnlredo oLll uO'do1s-1
                        oql ro'requrnu-l eLll pelloc laquJnu o Aq pepc;pu;
                               s; 6u;uedo etnltedo eLll lo a4s otll'utlg oLll sot{oool
                                 loLll lq6ll lo lunou.to eql slo.tluoc oqo elnllodo oLll
                                 rdnldldv tHlgNlllls
www.butkus.us                                                                     '  :.
View original page 11Page 12 · Read text
DEPTH OF FIETD
The depth of field is the zone of occeptoble
focus, or whot portions of the bockground
ond foreground will be in focus in your
picture.
The depth of field is controlled by the size of
the lens operture or F-stop setting. The
smoller the operture, the greoter the depth
of field. When you focus on o moin subject,
different ports of the bockground ond fore-
ground will olso be in focus, depending on
how much depth of field you hove. You con
control the depth of field by chonging the
operture size, Alwoys odjust the shutfer
speed to ensure correct exposure.
Using lhe Depfh of Field Scole
The ronge of the depth of field con be colculoted by look-
ing of the depth of field scole (18). For exomple,  if the object
you ore focusing on is 5 meters owqy (16.5 feet), qnd the
operture on the comero is set to F:l l, then the ronge of your
depth of field will be opproximotely 3 meters to l5 meters
(9.9 feet to 49.5 feet). Or for exomple,  if the object you ore
focusing on is 4 meters owoy (13.2 feet), ond the operture  is
set of F:22,then the ronge of the depth of field would be
opproximotely 2.25 meters to infinity (7.5 feet to infinity).
View original page 12
Page 13 · Read text
'pesodxoro^o oq ol soloqd InoA osnoo  lll/v\ os op
                   ol e.rnllol 'Jle'sdols o,\q Aq esodxe.repun 'sernsodxo eelLll
                  Jol'soJnsodxo o/vu 6ulop uoq/( dols ouo Aq orrucld oql
             asodxo.ropun ol e.rns o€ :luouodurl 'clo'orlpJf auo uo selns
             -odxo oorr.ll roJ ulo6o papodor oq ADu| oJnpocoid slLll'uoll
                   -rsod o|'rlps eLll u! sulpure.r urlu eql nq 'polcoc uooq A,\ou
                       spr.l .re$nqs eql'sdoF  il l[un urnl florl-ouo osrir^lcolcrolunoc
                  (et) luorc ecuD^po urlg oql ololo.r /roN'eco;d o{u! slollc
                               lr orns alorrt puo'(Zt) uoilnq ernsodxe eldgntu eql ssard
                   'erqcgd rnoA 6uqo1 ,rogo'os op 01 'euIDrJ elOurs euo uo
             sernsodxe a.ror,u .ro o/vq e)pl o1 noA s/v\ollo ernsodxe e;dgny1
                                 rdnsodxl lrd|llnw
www.butkus.us
View original page 13Page 14 · Read text
l2
SE[F.TIMER
lf you wont fo include yourself in fhe picture, mounl the
comero on o fripod ond lrip lhe shutter with the oid of the
self-timer.
l. First focus the lens, ond set fhe correct exposure.
2. Push the selFfimer (5) down until  il is in the locking
   position.
3. Depress lhe shutter releose butlon (7). The self-fimer will
    storf, ond  it will kip the shutter in opproximotely l0 sec-
   onds giving you time to get info the picture.
The self-limer con olso be used in speciol coses where o
slow shutter speed is required, but o coble releose is nof
ovoiloble  (i.e., shutter speeds under l/30th of o second).
Use o lripod or other firm support fo ovoid comerq shoke,
ond use the self-fimer os described obove. This will ovoid
comero shoke coused by your finger fripping the shutter
releose button (7).
View original page 14Page 15 · Read text
'(pepueurruocor  s! puo
                                                -ces 9Ztlt ro 09/t q6noqlo)
                   pozluorrlcuAs A;;n1 s!loilnLls or-l+ osnocoq'prouJoC xoged
                    ror!!lo) rnoA qlrrvr pesn oq uoc Ourges peeds tegnqs Auy
                              '(rlsoU eLll osn o; uo;d noA oteuloo otll llo tpl /v\ot.l
            uo Ourpuedep'sq16uol snouon 1o lq6noq oq uoc sptoc a6)
              orotroo eq+ urory Aor*p qso[ aLl+ lunou lo plotl o1 noA /v\ollo
                                 lll/v\ r,lc!r,liv\'(g) lcoluoc qso[ 3d s,oreulos eql o1u] pe66n1d
           eq uo3 proo Jd oLll'+eloos qsou Cd o q1m peddtnbe st qsog
            rnoA 11 'lrun Llsog rnoA qlrrvr popnlcur suorlonr+su! eLll /v\ollol puo
                  '(91) eoqs loLl r.lsolt s,protuoo tnoA o1u1 t-lsog oLll ep;;s Aldtu;g
                 'sern;crd rJso[ lnl[noeq noA en;6 ;11ivt 11 'tuelsAg qsoll lorutlo)
            lcoduroc o esn 'setnlctd eurgq6;u roloopur 6u;1o1 eto noA;;
                             HSVH rHr eNrsn
www.butkus.us
View original page 15Page 16 · Read text
EXPOSURE COMPENSATION
 lf there is o significont difference in brightness between the
moin subject ond its bockground you will not be oble to get
even exposures when metering correctly. In these situotions
exposure compensqtion (or overexposure) moy be necessory.
Toking Bocklighted Subjects
lf you ore toking o bocklit subject or if o bright bockground
occupies o lorge oreo of the picture frome (i.e. portroits with
o bright sky, seo in the bockground, or subjects stonding in
front of sunshine coming through o window, etc.) your moin
subject will turn out underexposed or too dork. In such coses
increose your exposure (or overexpose) so thqt the mqin sub-     correclly exposed
ject is exposed correctly.
Exomple:
lf your seperote exposure meter or exposure chort indicotes
F:16 of  I l25O second, to get correct exposure moke overex-
posure compensotion with either one or both of the following:
l. Compensote with the operture control (4). For lX exposure
   compensotion, move the operture from F:16 to F:l L For 2X,
  move the operture control (4) from F:16 to F:8.
2. Compensote with the shutter speed control (10). For 1X expo-
   sure compensotion, move the shutter speed control (10) from
   11250 second to l/125 second.For 2X, move the shutter
  speed control (10) from 11250 second to l/60 second.                                                             underexposed
View original page 16
Page 17 · Read text
pasodxero^o
                                                                 'puocos
                              OgZll. ol puoces 09/t tuorl (Ot) lor+uoc poods ro$nqs
                                      or.ll o^or.u'xz loJ 'puocos 97,l,lL o+ puocos oglt urorl (ot)
                        lolluoc peeds ro$nLls eL{l elour'uoplosueduoc elnsodxe
                      Xt rol'(Ot) tor+uoc peeds ra$nqs oql qiliv\ e;osueduo) 'Z
                                                                                                   'g:l ol
                          ?:l uroll (7) lorluoc atnpedo otl+ o^ou 'XZ )oJ '9'g:l ol t:l
                             urorl (y) lorluoc etnpedo eq+ olour'uoglosueduJoc o.tns
                      -odxe Xt rol '(7) lorluoc ernlredo eW Lllliv\ e;osuedutoC  't
                                                                              :6urmo11o1 eq1
                           lo rlloq ro euo JaLl+lo r.lll/r uollosuadutoc etnsodxetopun
                            o)or.! ernsodxe +coroc ge6 o1 'puooes 09/ t lo O'7:l seloc
pesodxo Aglcerroc              -lpul +ror.lo ernsodxe ro Jolour ernsodxe e;oted.as tnoA  11
                                                                           :e;dtuox3
                                                             'A;lcerroc pesodxe  s; lcefqns
                              ulor.u eLll +orll os (esodxoropun  ro) atnsodxe tnoA ocnpol
                           'sesoc r.lcns ul 'lq6ll ool to pesodxoJono lno utnl ||tm lce[
                         -qns ulour rnoA'(a6ols uo qce{qns pelqOluods'e'l) euJpll
                         ernlc;d or.ll ro oe.rp e6rol o segdncco punotb)cpq lrop o  ll
                                      r{sop 1nor.6yr slcefqng pelqbtUods 6uptot
                                       's6u;ges ernsodxe lpuJrou 1o ernlc;d rnoA esod
                       -xoJolo o+ pue+ Aor-r.r qsog elll eculs's6u!$os etnsodxe luolol
                                                           r.l+l/\\ lueurlredxo 'os op oI'tlsou ul-llll so u/v\ou) s! Llcltl/v\                          llp
                               '1ce[qns ulour rnoA dn ue1q6;rq oslo uoc r.lsolt o 6u;s1'1
      www.butkus.us
View original page 17Page 18 · Read text
t6
FILM UNTOADING
After your finol picture hos been loken, continue to lurn lhe
film odvonce cronk (13) unlil lhere is no more tension on
the odvonce cronk (13). This indicotes thof fhe film is now
fully wound onto the loke-up spool. Open the bock cover
(22), using lhe some procedure os shown on poge 4, in the
section on film looding. With the bock cover now open,
remove the roll of film by pulling out fhe upper film spool
releose (17), by litting up on fhe lett side of the film spool
first. With the film out of the comero, now seol the roll by
opplying moisture to the odhesive tope, ond wropping  it
oround the roll, lhereby seoling  il closed. Be sure lo keep
the film wound tightly during this seoling process to ovoid
light enfering lhe film. Toke the film to your locol processor
immediotely to ovoid color shifts.
View original page 18
From the M. Butkus archive. Original publisher and archive notices are retained.
Check the model and edition against your equipment.
PDF verified 2026-10-10.