Film cameras
Kewpie Kameras User manual
User manual for Kewpie Kameras. 15 pages in English. Read the original PDF, download or print a copy without registration.
15 pagesEnglish1.6 MB PDF
Loading your manual…Open PDF directly
Document details
- Brand
- Kewpie
- Model / document
- Kewpie Kameras
- Document type
- User manual
- Language
- English
- Pages
- 15
- File size
- 1.6 MB
- Category
- Film cameras
- Document date
- Not specified in catalog
Search available document text
Find a term, then jump to its page in the original PDF. Image-only pages may not be searchable; check the PDF for exact wording and diagrams.
Page 2 · Read text
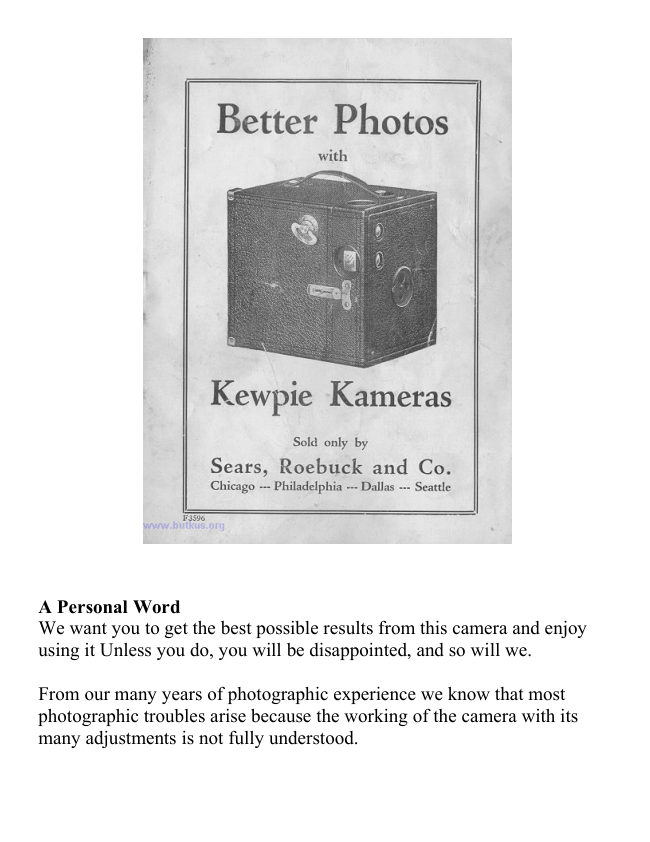
A Personal Word
We want you to get the best possible results from this camera and enjoy
using it Unless you do, you will be disappointed, and so will we.

From our many years of photographic experience we know that most
photographic troubles arise because the working of the camera with its
many adjustments is not fully understood.
View original page 2
Page 3 · Read text
We ask you to read these instructions carefully before attempting to make
any pictures. We want you to practice with it until you know exactly how
every adjustment is made and operated. Be especially sure that you
understand how to adjust and operate the shutter for instantaneous and
time exposures.

Upon fully understanding the camera and how to handle it, and to
correctly expose the sensitive film, depends the making of successful and
pleasing pictures.


                         Sears, Roebuck and Co.
      CHICAGO - PHILADELPHIA - DALLAS SEATTLE

                   CONTENTS


                                    PART II. Page
        PART I. Page
                                    LOADING THE CAMERA WITH FILM
       THE CAMERA .............................3             ......10

        To Open the Camera ....................3       REMOVING THE EXPOSED FILM
                                                                                 ............13
        To Close the Camera ..................4

       THE SHUTTER .............................4      PART III

           Instantaneous Exposures ..............4      MAKING THE EXPOSURES .............15

         Time Exposures ..........................5              Instantaneous Exposures .... .............. 15

       THE LENS....................................... 6          Indoor Portraits .................................18

          Stops ...........................................7                Interiors ............................................. 20

          Depth of Focus............................ 8       SUGGESTIONS ............................... 21

       VIEW FINDERS.............................. 9 br>
        TRIPOD SOCKETS ................ 9
View original page 3Page 4 · Read text
Part 1
     The Camera


            A Kewpie Kamera
                      consists of two parts
                     (see Figure l), an outer
                 box (B), which contains
                     the lens, shutter and
                       finders, and an inner
                 box (A), containing the
                  winding mechanism for
                     the film. In these
                      instructions we will
                       refer to the inner box
                   (A) as the roll holder.


 To Open the Camera


To remove the roll holder, except in the case
of the No. 2 Kewpie, push the three nickeled
catches, C1, C2 and C3, Figure 2, as far as
they will go as shown by the illustration.
Hold the camera and grasp the winding key
as shown in Figure 2 and pull the roll holder
completely out as it appears in Figure 1.
View original page 4Page 5 · Read text
The No. 2 Kewpie is made with only two
                                      catches, a broad one, C, clear across the
                               end of the camera and another, C2, on
                                     the side of the camera (see Figure 3).

                             The winding key on the No. 2A is
                                    located at the bottom edge of the camera,
                                  while on the other sizes it located at the
                                   top edge. (Compare Figures 2 and 3.)


                           To Close the Camera

Put the roll holder, A, Figure 1, back in the outer box, B. Figure 1, and fasten all of the catches
securely. For more complete directions for closing the camera after a film is inserted in the roll
holder see Figure 16, page 13.

                               The Shutter

The shutter on a Kewpie Kamera is always set. It can be adjusted for instantaneous and time
exposures.

                     Operating the Shutter


                                 Instantaneous or Snapshot Exposures.

                           To take an instantaneous or snapshot
                                 exposure see that the slide P is pushed
                           down as far as it will go, flush with the
                                   top of the camera, as shown in Figure 4.
                             Then push the lever Q, Figure 4, once in
                               one direction in the slot. This makes an
                                   exposure. Pushing it once in the opposite
                                      direction makes another exposure. The
                                    length of this exposure is about 1/25 of a
                                   second.
View original page 5Page 6 · Read text
Caution. Push the lever but once, in one direction, for one exposure.
Pushing it twice once in each direction, for a snapshot, will cause a double
exposure and absolutely ruin the picture.


                               Time Exposures.
                               To make a time exposure, pull the slide P up
                                         as far as it will go, as shown in Figure 5. Push
                                          the lever Q once in one direction in the slot.
                                      This opens the shutter. Time the exposure with
                                      a watch. Push the lever Q once in the opposite
                                           direction from the one required to open it.
                                      This closes the shutter.
                                Time exposures must be made with the
                                   camera on some steady solid support, like a
                                           chair or table. A tripod may be used with all
                                           sizes except the Nos. 2 and 2A. These two
                                           sizes are not provided with tripod sockets.
                                         In making a time exposure as just directed,
                                          there is always some danger of jarring the
                                   camera when opening and closing the shutter.
                        We therefore recommend the following
                                  method because it permits the exposure to be
                               made without touching the camera.


After the camera has been placed in the proper position for the exposure,
with the slide P up as far as it will go, as shown in Figure 5, hold some
dark object, such as a book, cardboard or a man's hat directly in front of
the lens and as close to the camera as possible without touching the
camera. With the lens thus covered, open the shutter by pushing the lever
Q once. Then, without touching the camera at all, uncover the lens,
covering it again as soon as the proper length of exposure has been given.
Then, with the lens still covered, close the shutter by pushing the lever Q
once.
View original page 6Page 7 · Read text
The Lens
This camera is equipped with a single achromatic lens. It is located back
of the shutter and can only be seen from the front when the shutter is open,
as for a time exposure.

Keeping the Lens Clean.
If the lens is dirty or dusty it will not produce good pictures. They will be
dim, indistinct and under timed. To clean the lens, remove the roll holder
from the outer box and clean the rear of the lens in the outer box with a
soft linen cloth. To clean the front of the lens, open the shutter as for a
time exposure and clean it with a soft linen cloth on the end of a small
blunt stick or pencil.

                       Stops or Diaphragms

The stops control the volume of light passing through the lens to act on the
sensitive film, and this volume of light is controlled by the size of the
diameter of the stop opening.

There are four stops on a Kewpie, and they are brought into position in
front of the lens by revolving the metal diaphragm dial containing the
openings, which we will designate as No. 1, No. 2 No. 3, and No. 4,
illustrated as S1, S2, S3 and S4 in Figure 5. The stop must be brought
exactly to the center of the opening to the lens, which position is easily
recognized, because at just the right point the dial catches with a little
click.

The "F" Value of the Kewpie Stops

Stop No. 1, the largest opening, is equivalent to Stop F:14 of the F system
of numbering stops used with the Exposure Guide supplied with these
instructions. No. 2 is equivalent to F:16, No. 3 to F:22 and No. 4, the
smallest, to F:32
The stops have a decided effect on the sharpness of the pictures produced
View original page 7Page 8 · Read text
by a lens, as a small stop increases its covering power and depth of focus.
Because of these facts, the smaller the stop opening used the sharper the
picture will be, but a small stop opening admits less light than a larger
one; consequently, it requires a correspondingly longer exposure. For this
reason it becomes practically impossible, except under unusual conditions,
to make a snapshot or instantaneous exposure with a small stop or
diaphragm. (See the Exposure Guide for the correct exposure.)

Depth of Focus
This has to do with the ability of a lens to give sharp images of objects
located at different distances from the camera on the same negative at the
same time. For example, in interiors there may be an object within 4 feet
of the camera and other objects 20 feet from the camera which are to be
sharply defined on the negative. The ability to secure sharp images of both
at the same time depends on the depth of focus.

The following table shows the distance, in feet, after which everything
will photograph sharply for each of the different Kewpie Kameras.
Everything beyond these distances will photograph sharply.


                                 STOP
  KAMERA
                 No. 1 - F:14     No. 2 - F:16     No. 3 - F:22     No. 4 - F:32

    No. 2            8              7            5 1/2            4

    No. 2A           10             9              7              5

    No. 2C         11 1/2           10             8              6

    No. 3           10             9              7              5

    No. 3A           13             12             9              7

                 Pages 9 through 12 are missing!

shown in Figures 11 and 18, while watching the red window, O. When fifteen to eighteen turns have
been given, a hand pointing toward , the first number will appear; then turn slowly until the figure 1 is
exactly in the center of the red window. After No. 1 is exposed, a few turns of the winding key will
bring No. 2 into place, and so on until the entire roll is used.
View original page 8Page 9 · Read text
Removing the Exposed Film


  After all the film on the roll has been
  used, before attempting to remove the
  exposed film from the camera, give the
  winding key twenty turns.


          To remove the exposed film,
           remove the roll holder,
           A, from the outer box,
            B, Figure 1, as explained on
            page 3, and wind up all of the
             black or red and black, paper
                  if there is still any remaining
           unwound. Then press the roll
              spring, J spring, J. Figure 9,
               until it can be removed from
              the roll holder, and fasten the
             loose end of the black paper
            with the gummed sticker
           which will be found on the
View original page 9Page 10 · Read text
empty spool remaining in the
                                            camera.


Remove the empty spool and place it in the side from which the exposed roll has just been taken,
placing it so the slotted end of the spool fits over the tongue of the winding key. The camera is now
ready to load again.


                              PART III
                               Making Exposures

Before making exposures of any kind be sure of the following:

First-That the shutter is adjusted for the desired exposure-that is, for instantaneous or time, as the
case may be.
Second-That the proper stop opening is in position in front of the opening to the lens.
Third That an unexposed section of film is in position to receive the exposure.

                         Instantaneous and Snapshot Exposures

Before making an instantaneous exposure ---

See that the slide, P. is down, as in Figure 4, page 5. See that a large stop, No. l or No. 2, is in place,
as in Figure 4, page 5. If in doubt as to which stop use, use No. l.
In taking snapshot pictures the sun should be behind the back or over the shoulder of the operator
and should shine on the object to be photographed. Successful snapshot pictures cannot be made in
the house, under a porch, under the shade of a tree or on dark days, or too early in the morning or
too late in the afternoon. (Consult the Exposure Guided Under no circumstances should the sun shine
directly on the lens, as absolute failure will be the result.
View original page 10Page 11 · Read text
With the shutter set for an instantaneous exposure and the proper stop in position, point the camera
directly at the subject to be photographed and locate the image in the view finder by looking into it
from directly above, and not from an angle. When the arrangement of the subject appears satisfactory
in the finder, hold the camera steady and level, as shown in Figure 4 for a perpendicular picture, that
is, one higher than it is wide, and as shown in Figure 19 for a horizontal picture, one wider than it is
high, then make the exposures by pushing the exposure lever, Q, Figure 4, once only in one direction
in the slot.


                              Avoid jerking or jarring the camera
                            when making the exposure; otherwise it
                                       will be blurred, as shown in Figure 20.
                                             If care is used to move only the thumb
                            when pushing the lever, there is little
                                  danger of jarring the camera.
                              Hold the camera as nearly level and
                              plumb as possible. Otherwise pictures of
                                     buildings will look distorted and twisted,
                                    as shown by Figure 21, where the
                                camera was pointed upward, and in
                                   Figure 22, where the camera was tipped
                                     sidewise.


                              Remember, pictures are made or spoiled
                            when the exposure is made, and that if
                                     the light is poor, or too the exposure is
                            made too early in the morning or too late
                                       in the afternoon, the only result will be a
                                          failure. Practically nothing can be done
                                       in developing and finishing the exposed
                                            roll of film to overcome mistakes made
                                       in exposing it. (Consult the Exposure
                               Guide for the correct exposure.)
View original page 11Page 12 · Read text
After making an exposure turn the winding key until the Figure 2 appears at the window, repeating the
operation after each exposure until the entire roll has been exposed.
View original page 12
Page 13 · Read text
Indoor Portraits


                                 Lighting in Portraiture.

                        Good results in the making of portraits are
                                   entirely dependent upon the lighting; that is,
                                 the way in which the light falls upon the
                                 subject or sitter. There should be but one
                               source of light, and, if possible, this should
                            be a north window not shaded by trees or
                                  buildings. If there are other windows in the
                             room, they should be darkened by opaque
                                   curtains, and the lower half of the window
                              should be darkened by covering it over with
                              a dark cloth. With this arrangement the light
                          comes from one source only, and that from
                            above the head, thus striking the sitter at an
                               angle of about 45 degrees. We can best
                                explain the proper lighting and the proper use
                                of the background and reflecting screen by
                                 the aid of a diagram. (See Figure 23.) In this
                              diagram: we have illustrated, in a general
                            way, the relative position of the camera, the
                                          sitter, the background, the reflecting screen
                            and the window from which the light is
                               admitted to the sitter.


While it is, of course, not necessary that the relative position of the camera, the sitter, reflector, etc.,
be maintained exactly as shown in the diagram, still this arrangement gives the best results as a
general rule. In this diagram the sitter is 21/2 feet from the window and the front of the chair is just
even with the farther side of the windows The background is 3 feet behind the sitter and the reflector
is 31/2 feet from the sitter.

A better method is to place a dark screen 18 inches square between the window and the subject, thus
throwing the entire face into shadow. This, of course, increases the exposure, but gives, better
results.

Practice different methods of lighting by moving the subject and screens, without attempting to make
any exposures. Much information may be gained in this manner.

Splendid portraits may be made on the shadow side of a building with an open sky overhead. This is
a fine method to photograph children, as the exposures may be made quite rapidly, although a tripod
or something equally solid on which to place the camera is always necessary. (See the Exposure
Guide.)
View original page 13Page 14 · Read text
When posing the subject, do not neglect the background. Figured wall paper should be avoided. It
hardly ever looks the same in a picture as on the wall, and is nearly always displeasing in what
otherwise might have been an artistic picture.

The straight lines and knot holes in a frame house, or the lines of mortar in a brick building are also
unsatisfactory as a background for portraits, although not always so displeasing for large group
pictures.

A sheet, 2 or 3 feet behind the subject, forms a good background if stretched enough to remove the
wrinkles. If this is not practical, if the sheet is held 2 or 3 feet back of the subject and kept moving, the
wrinkles will not photograph.

A clump of bushes makes an ideal background for outdoor pictures, but the subject should not be too
close to the bushes. Do not use the sky as a background, as it gives a light stronger back of the
subject than on the subject, and the results are not pleasing.

To test this, place a subject against a window and then from a distance of 6 feet look at the subject
and see how indistinct are the features with the strong light behind the subject. Then change
positions and see how distinct the features are with the strong light on the features.

In making portraits keep in mind that if the position and lighting of the subject do not please before
making the exposure, they will probably please less after the picture is finished.

Always use time exposures when making indoor portraits or portraits in the shade, otherwise they will
be underexposed, and do not try to hold the camera in the hand for time exposures. The camera
must rest on something solid otherwise the pictures will be blurred, as shown by Figure, 20 on page
16.

                                              Interiors

Always use a time exposure and a small stop when making interiors. See that the desired view shows
in the finder. Do not point the camera directly at a window when making interiors, as the bright light or
glare will often spoil the picture. If this cannot be avoided, pull down the shades of such as are
included in the view. (Consult the Exposure Guide for the correct exposure.)

                                    Suggestions

Always see that the shutter is closed before loaning the camera.

Always wind another section of film into position immediately after making an exposure, whether you
are ready to take another picture or not. This habit once formed will often prevent making two
exposures on one section of film.

Before making an exposure of any kind see that an unexposed section of the film is in position and
that the shutter is properly adjusted for the desired exposure. ~

A separate Exposure Guide in convenient form to carry in the pocket is included with these
instructions. We advise referring to this Exposure Guide whenever any question arises regarding the
correct exposure for any subject.  '
View original page 14Page 15 · Read text
For those desiring to finish their own pictures separate instructions are furnished. Those who do not
care to do their own finishing will find our work first class and the prices given in our big General
Catalog reasonable.

SEARS, ROEBUCK AND CO.
View original page 15
From the M. Butkus archive. Original publisher and archive notices are retained.
Check the model and edition against your equipment.
PDF verified 2026-10-10.