Flashes & lighting
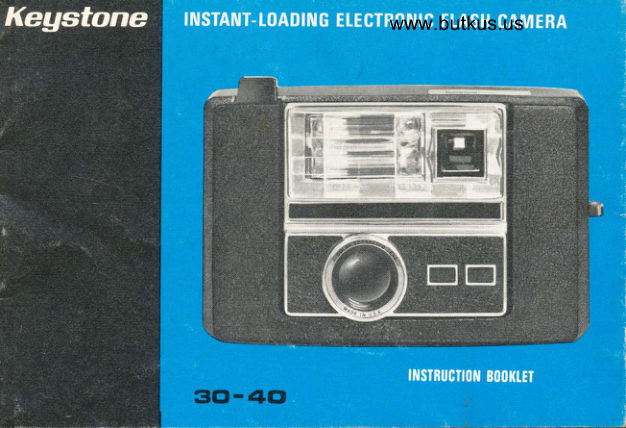
Keystone 30-40 instamatic flash User manual
User manual for Keystone 30-40 instamatic flash. 14 pages in English. Read the original PDF, download or print a copy without registration.
14 pagesEnglish2.2 MB PDF
Loading your manual…Open PDF directly
Document details
- Brand
- Keystone
- Model / document
- Keystone 30-40 instamatic flash
- Document type
- User manual
- Language
- English
- Pages
- 14
- File size
- 2.2 MB
- Category
- Flashes & lighting
- Document date
- Not specified in catalog
Search available document text
Find a term, then jump to its page in the original PDF. Image-only pages may not be searchable; check the PDF for exact wording and diagrams.
Page 5 · Read text
SHORT FORM INSTRUCTIONS - Read entire booklet for details.
LOAD                                   SHOOT


 1. Attend to the battery 2. Frame the subject in  3. Holding the camera
                                                        steady, slowly press the - non rechargeable the viewfinder compos- models, see page 6; re-  ing the desired scene.  shutter button.
chargeable models, see
 page 7 -  load the film cartridge and wind un-
 til it stops.  lf needed
 turn on lhe flash-
NOTE: When using flash, be sure the ready light is lit before taking the picture.
After taking the picture, the shutter button stays down until the film is wound to the
next picture. This feature prevents double exposure.
View original page 5Page 7 · Read text
BATTERY - Non-rechargeable models onlyThe battery compartment  is to the left of the film cartridge area. Use a good
grade of alkaline cell such as Mallory MN 1500 or Eveready E-91.

                                1. Open the film compartment door.
                             2. Insert two size AA alkaline cells as shown by
                              the battery diagram in the camera. Be sure
                            the plus and minus terminals are correctly
                                    positioned.
                              3. Switch on the flash and run through the bat
                                     tery test as described on page 8.
   www.butkus.us                    It the unit lunctions satisfactorily, proceed with
                                   film loading - see page 9.
Remember!
r   lf your camera is to be stored for more than a few weeks, remove the battery
    cells. This will prevent contact corrosion and damage due to leakage.
r  Flash malfunction is usually caused by battery problems. Tarnish, often in-
    visible, collects on the contacts causing a poor electrical connection. Clean
   the battery contacts periodically - see "Camera Care." r  Batteries may be removed or replaced with film loaded in the camera pro-
   vided that care is taken,not to lift the film cartridge from its position.

Page 6
View original page 7Page 8 · Read text
/eAneAV - Rechargeabte modets only         www.butkus.us  Your camera's built-in rechargeable battery stores enough energy for many
   flashes. lf after a flash it takes longer than 20 seconds for the ready light to
  come on, the battery is run down and must be recharged.

                                   1. Set the flash power switch to "OFF."
                                 2. Plug the small accessory charger plug into
                                the charger jack on the side of the camera.
                                 3. Plug the charger unit into an ordinary 120
                                           volt, AC household receptacle.
                                              lf the camera flash unit is fully run down, re-
                              charging will take about 5 hours. In normal use
                                 this rarely occurs; most of the time all that is
                            needed is a 2-3 hrs. charge for full restoration.

  Remember!
   r When taking your camera out of storage or when new, give the battery an
     overnight charge. This will assure full capacity and performance during your
     shooting session.
   r To keep your unit in an instant ready condition, always recharge the battery
      after each shooting session. Be sure the battery is in the full charge condi-
     tion before storage.
                                                                Page 7
View original page 8Page 9 · Read text
BATTERY TEST
 Good pictures require ample battery power: always test the battery power be-
 fore each shooting session and periodically during extended use.
 1. Switch on the flash.
 2. When the ready light comes on press the flash test button.
 3. Time the interval to when the ready light comes on again.

Non-Rechargeable Models
 lf after a flash it takes longer than 60 seconds for the ready light to come on,
the battery cells are too weak and should be replaced.

Rechargeable Models
 lf after a flash it takes longer than 20 seconds for the ready light to come on,
the battery cells are too weak and should be recharged.
Note: Your camera's electric eye is powered from the battery compartment.
For proper exposure the batteries must be in good working order.

Caution: The built-in battery is permanent and not user replaceable. Should your
camera fail to function, consult a qualified repair agency. Because of high voltage,
never open the housing.

Page 8
                                        '  --i      ,-                                                  a.      -                                ,a,
View original page 9Page 10 · Read text
FILM - Size 126, cartridge                www.butkus.us      several styles and types of film are available for your selection. you can use:
       Color Slide Film - 20 exp. per cartridge
       Cofor Print Film - 12 or 2O exp. per cartridge
       Black and White Print Film - 12 exp. per cartridge      Consult your photo dealer for additionat intormation.
     Loading
    Open the film compartment door and place the
      film cartridge in the compartment with the large
    end positioned next to the film advance wheel.
     Close the compartment door pressing it firmly.
    Wind the film until it stops (about 24 strokes).
     The film is now in the number 1 position and is ready for shooting. The number
     of the picture appears in the film compartment window, but disregard the
     numbers when advancing the film - always wind until the film stops.
!     AfterUnloadingyou have taken the last picture, wind the film until all the paper disappears
     from the film compartment window; then open the compartment door and  lift
     out the film cartridge. Have the film processed as soon as possible after taking.
      Note: The shutter button cannot be operated unless film is loaded in the camera
     and wound fully until it stops. A green stripe appears on the shutter button when  it
      is in the raised position, indicating the camera is ready for picture taking.
                                                                  Page 9
View original page 10Page 11 · Read text
INDOOR PICTURES
With ffash, the distance range for proper exposure is from 41o12 feet. Arrange
the scene so that your subject is at least 4 feet away but not farther than 12 feet.
1. Switch on the flash: a faint, rising pitch tone indicates the unit is working.
2. After the ready light comes on, view the scene through the camera view-
   finder framing the subject as you wish the picture to appear.
3. Hold the camera steady, and slowly press the shutter button.
Note: The flash ready light comes on when the flash power has built up to 75% of
fufl. When photografhing at the greater distances, 7'12 teet, or when shooting in
large open areas,-wait an additional 30 seconds before taking the picture. This extra
time gives peak power to the flash.
Flash Test
For test purposes, the flash unit can be trig$ered (flashed) manually without
disturbing the film or picture mechanism. After the ready light comes on' press
the test button. lf the flash occurs, the unit is operating properly.
Flash Computer Models OnlY
With flash, film exposure is controlled automatically by your camera's  built-in
computer. The computer measures the scene brightness and regulates the flash
to give proper exposure.
The control range of the computer is from 4 lo 12 feet. For proper exposure,
 arrange the scene so that your subject is at least 4 feet away but not farther
 than 12 feet. Then follow steps 1 , 2, and 3 above.
Page 10
View original page 11
Page 12 · Read text
OUTDOOR PICTURES                  www.butkus.us     Under daylight conditions film exposure is controlled automatically by your
     camera's electric eye. lt measures the scene brightness and adjusts the camera
      lens accordingly.
     Have the sun behind you and arrange the scene so that your subject is in bright
      sunlight and at least 4 feet away.
      1. View the scene through the camera viewfinder, framing the subject as you
        wish the picture to appear.
      2. check the lower right hand corner of the viewfinder for the red warning
          flag;  if it is not visible scene lighting is adequate.
     3. Hold the camera steady, and slowly press the shutter button taking the         picture.
    Low Light Warning Signal
     should the scene lighting be too dim for picture taking, the red warning flag
I       will appear in the viewfinder. This indicates that flash is needed.
       Ilmportant:Make sure that the electric eye is not obstructed while taking pictures; keep
       your fingers clear of the window.
     r Never take pictures with the camera facing the sun or other bright light. Keep
     r whenthe lightusingsourceflashtooutdoorsyour sideatornight,rear. for proper exposure, use the closer range
       of4toTfeet.
                                                                  Page 11
View original page 12Page 13 · Read text
HELPFUL INFORMATION
 r  Indoors, you can create pleasing results by posing your subject against a
    light-colored background. For best results, the background should be 3 or
   4 teet beyond the subject.
 r  Golor slide film is less sensitive than color print film. When using flash for
   slides, the camera-to-subject  distance should be kept to a maximum of
   8 feet. For greater shooting distances a high speed  f ilm should be used.
   Consult your photo dealer.
 I on sunny bright days, electronic flash can be used as a "fill-in" light to
   brighten shadows, or to obtain natural facial expressions and eliminate
    squinting.
r on cloudy,dark days or in the evening, electronic flash can be used to sup-
   plement daylight. switch on the flash and take the picture as you would
   normally.
 r Keep in mind, when using flash outdoors, the flash intensity will be some-
   what less            than                               photography.                   that                      of indoor                                   The                                                  lack of reflecting                                                                   surfaces                                                                             -   walls,          ceiling,                     etc.,                    reduces                               the                                      effective flash                                                   distance.                                                           Therefore,                                                                     the closer
   range of 4-7 teet should be used; also, wait an additional 30 seconds after
   the ready light comes on for peak power.
r Your camera's electronic circuit is using power whenever the flash switch
   is set on "oN." To conserve battery power switch the flash off when not
   taking pictures.

Page 12
View original page 13Page 14 · Read text
CAMERA CARE                       www.butkus.us
Protect your camera from rain, dampness, and excessive temperatures. Should
the lenses become marked or dirty, they may be cleaned by rubbing lightly
with a clean, lintless cloth. Do not use chemicals or other cleaning agents.
Remove all dust and foreign particles from the film compartment.
Your camera's mechanism is entirely self sufficient and requires no outside
attention.
Non-rechargeable models only
Clean the battery contacts periodically. Between cartridges remove the battery
cells and using a pencil eraser or damp cloth, wipe gently over the contact
surfaces until they are bright and clean. Alwayq remove the battery cells before
putting your camera into storage.
Caution: Do not attempt to open or repair this camera. The internal components
operate at high voltage and are dangerous to handle. Refer all servicing to a quali-
fied repair agency or send it to one of the following service facilities.


Authorized Service Sfafr'ons
KEYSTONE     KEYSTONE                  KEYSTONE
462 Getty Avenue  3770 West Pratt Avenue             1011 Chestnut Street
 Clifton, N. J. 07015 Chicago (Lincolnwood),  111.60645   Burbank. Calif.91502
                                                            page 13
View original page 14From the M. Butkus archive. Original publisher and archive notices are retained.
Check the model and edition against your equipment.
PDF verified 2026-10-10.