Movie cameras & projectors
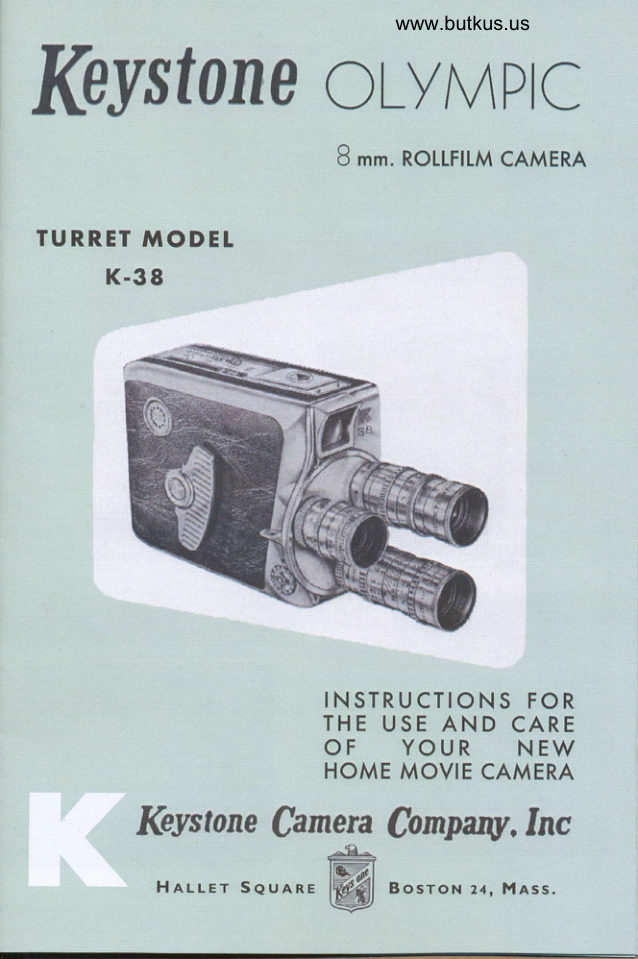
Keystone Olympic K-38 8mm movie camera User manual
User manual for Keystone Olympic K-38 8mm movie camera. 13 pages in English. Read the original PDF, download or print a copy without registration.
13 pagesEnglish8.1 MB PDF
Loading your manual…Open PDF directly
Document details
- Brand
- Keystone
- Model / document
- Keystone Olympic K-38 8mm movie camera
- Document type
- User manual
- Language
- English
- Pages
- 13
- File size
- 8.1 MB
- Category
- Movie cameras & projectors
- Document date
- Not specified in catalog
Search available document text
Find a term, then jump to its page in the original PDF. Image-only pages may not be searchable; check the PDF for exact wording and diagrams.
Page 1 · Read text
www.butkus.us
Iftystone olyMptc
                      B *r. ROLLFILM CAMERA

TURRET MODEL
     K-38


                  INSTRUCTIONS FOR
                 THE USE AND CARE
            OF YOUR NEW
                  HOME MOVIE CAMERA
       Keystone Camera (ompargr, Inc
                            'Fg*
                                         tffi_l          Hrrrer Seurne                  24, MAss.                    [@l ""rtoN
View original page 1Page 2 · Read text
Instrucliong
Ilefore attempting to operate your canera get to know it. Read
urd follow the instructions and you will easily produce the finest
movies.
'[-he short length of practicc film in your calncra is supplied so
that you may become acquainted with the proper thrtading
operations. Biposure cannotbe made on this film.
     Herets llow llts Done

                                    lJefore loading the film wind
                                your camera. Raise the Wind-
                               ing Key and turn it cloclnvise
                                        until the motor is fully wound.
                             Set the Speed Button at 16
                                 (normal speed). Turn Foouge
                              lndicamr clochvise until S
                                                (start) is opposite marker.


                  _JPETA
                    BUTTON

                     Irig. I

   lo Open
To open camera covel, move
 Cover Latch Bunon in thc
 direction of the arrow and lift
 cover up.

                                                               Fig. 2
View original page 2Page 5 · Read text
Hold thc Takc:Up Spool
                         s0 that the side that
                                 reads "F'ilm When On
                                              Spool. [s Only Half                                   This                                 Exposcd" is facing up.
                                             Ins'ert cnd of lilni inio
                                  Spool l-lub Slot. Wind
                                      about tluec inches of f,rlm
                                 around the spool clock-
                                 w$e  .


                                                                                   SUPPLY SPOOT
                                                                            {CUT AWAY TO II.IUSTRATE
                                                                          PROPER PATH OF FILMI


         " TAKE-UP .-/1
        SPOOI SHAFT
                                     Fig. 6
Place the Take-Up Spool on T'ake-Up Spool Shaft (FiS. 6).
Chcck to ensrre that the top surface clf thc Take-Up Spool is
below thc end of dre 'l'ake-tip Spool Shaft. Rotate dre spool
clockwisc to take up the slack in thc film. Press down cln thc
Operating Lcver (Fig. I ) and rclcasc after running about 6 inches
of fihn. If thc camera is threaded comectly, the Take-Up Spool
and Supply Spool will turn clockwisc, and thc lihn will pass uni-
formly drrough dre Aperture Channel. See Fig. 6 for correct
threading diappam.
Close the camera cover (Fig. 2) by prcssing the covcr down
firmly until it snaps into the lockcd position. Check to ellsure
that the Cover Latch lSutton has returned ro its original
position.
O;rcrate the camera until the Footagc Indicator reads 25. The
number below the Footage Indicator Marker indicates the
number of feet of unexposed film remaining in the C,amera
(See Fig. 1).
View original page 5Page 7 · Read text
If your carnera is equipped with
                      a Fixed Focus Lens (no lfistance
                             Scale Ring on the lens barrel) do
                    not photograph subject closer
                                than shown in the table below.
                                                    tWininum I)i,rtonce
                                                   /'" Nunher           in Feet
                                               J|on .rubiecr
                                                                              J
                                                          ?_ tt                      41/t
                                                                                          .{                                   4,
                               56                             33/."
                                              8                        3t/t
                                                                      3         OPENING RING
                                               l6                        2tl,
             Fig. 10                      22                   )
Whcn yorr carnera is equippcd with a Focusing Mnunt Lens
(FiS. l0*Distancc Scalc Ring on lens barrel) it is neccssary to
adjust or "Focus'o the lens for ttre distance in feet from the
carlcra t() the subject.
Emrytle: Determine *re distance in feet from the camera to
thc subject. Assumc B fcet. Turn thc Disunce Scale Ring on
the lcns ban'el until the Figprre B is opposite the Disturce Scale
Markcr. At this position all objects B ftet frnm rhe camcra
are in sharp focns. although thc latitude of focus is a few feet
on either side ofthis distance.
'l'he symbol "moo engraved on dre lens ban'el designates infinity
and represents any distance beyond *re maximum disuncc of
25 feet cngpaved on the lens barrcl.
Mtte: When conditions warrant using the oof' numbers 5.(r, B,
 I l,  I 6 or 22 the l)istance Scale Ring czur be ser ar 25 feet and the
lens will be in universal focus as shown in the table below.
                         "f ",\'unher     J)ittnnce in fect                                               l'r'om ^9ultiect
                                                  (,                 Io"
                        R                   4' 6"    t.) oc
                                                    a'
                                     l{r
                                  tt                10" to m
View original page 7Page 8 · Read text
www.butkus.usLever       Opercting


           t'ig. ll        dplrFig'. 12              Fig.Fig. l313
     RUN         LOCK RUN       SINGLESINGLE F'RANIEF'RANIE
Fig. I I shorvs position of the operating Lever for normal use  .
Fig. 12 shows position whcn camcra is mounted on a mipod zurcl
oPerator wishcs to gct into rhc picturc. Fie. 13 shows ODcratins
Levcr              . in opcration for SINGI,E FRAMil. SINGLE FRAME
operation is similar m rhat of a still camera and is uscful for
making animatcd titles clr other spccial e ffects.
      Adiusfing fhe furret
                    Thc  Turrct  acconlmodarcs 3
                                       lcnse s.  'lhc 'llurrct is adjusted by
                                 rotating the ourer lururled Edge.
                    Whcn adjustcd corrcctly thc Tur-
                                rer n'ill click in place and rhe clot
                           at drc "Taking" lens position will
                                 line-up with the dor on tlre front
                                narncplate. Thc stanclard t/2" lens
                               is shorm in  position for  taking
                                  picrurcs while drc Accessory lcnses
                                   iu'e rnounterl on thc 'lhrrct ready
                                              for usc.
            Fig. 14,
     Opererting the Cclnercr
1. Il.crnovc Le ns Cap.
2. Wind Clamera Motor.
:1. Adjust Lcns.
4. Framc Subje ct in Vicw
     Fi ndc r.
5. Hold Came ra Sready as
   shown ar Righr.
6. I'rcss 0pcr:ating Levcr.
7. Makc your Sccncs B Scc-
   onds or Longer.
B. Wind Camera Moror afrer
   Each Scenc.
                                                Fig. l5
View original page 8Page 9 · Read text
End of Film
Wlrcn thc liootagc lndicator (Fig. l)  rcacls 0, stop taking tttovics.
Operatc thc camera until thc Footagc Indicator rcad E (Enrpty).
Opcn camcra cover (Fig. 2\ in subducd light and opcratc the
canrcrtr until all thc film is ort thc'fakc-Up Spool (ltig. 6).
         Second Hellf
Turn Footagc Indicator clockrvisc until S is oppositc ntarkcr'
Rcmovc upper (crnpty) spool. licntovc lowcr (full) spool in sub-
ducd liglrt. tunt tt orer, and uuroll about 12 inchcs of fihn as
a lcadcr fbr thrcading purposes. l'lace firll spool on Suppl--v
Spool Shaft as shown and dcscribcd in Fig. 4 (make sure light
sidc of filrn is towarcl thc lcns). Hold crilpty spool so that thc
rrrow irnprcssion on thc surfacc of thc spool is lacing up'  ln-
scrt cnd of lilrn into Spool l{ub Slot (Fig. 5) and wind about 3
inchcs of film a.rouncl the spool clockwisc. f'lacc empty spool
on Takc-up Spool Shaft anrl procccd trs shown anrl dcscribcd
in l|ig. 6.
Aftcr thc film has passc:d through rhc carncra thc sccond tintc
rctnovc Take-Up (f'ull) Spool. Placc thc spotil iu thc lnctal catt
in lvhich it carnc. l'lacc thc can in thc cardlloard contailtcr attd
scud it to your photographic dcalcr for proccssirtg.
Notg, Whcn the carucla is not itt usc, avoicl uttncccssary tcnsion
on the motor sprirrg lly prcssittg thc Opcrating Levcr and lctting
thc motor run down.

                LINE         Film Plcrne Mcrker
               Thc location of thc lilm planc is identilicel by
                thc llihn I'lutc Malkcr on thc sidc ot' tltc
                    carncra (lovcr.  'this Markcr Linc is  particu-
                     lu'ly uscful u'hcn closcup arc to bc photo-
                            glaptrect and accuratc distanccs mcasurcd.

         Itig. 16              lrial Film
 It is rccornmcrtdcd rvhcn using the catttcrn {br thc lirst tinrc that
 only onc {ilnr bc exposcd and clcvclopcd. Aftcr projcction you
 wili havc an opportunity to stucly the exposure ancl ot.her details
 of your first fihn aud makc cofrcctiolls fbr usc oll futurc filnrs.
 If thcrc are an,v qucstions. wc suggcst you takc yorr Iilm to
your dcalcr who will bc glad to ntakc rccomncndations for im-
 pf ove mcnts.
View original page 9Page 10 · Read text
www.butkus.us         Ccrmera Speedg
    Your camera can operate at four different speeds. Merely turn
    the Speed buttou (FiS. l) ro the desired speed.
    Use 16 lt[ormal spee d for mosr shors.
     IJse 12 When (l) you wanr to speed up the action.
                     (2) acrion is slow, and light is poor  .
    Use 24 when action is so fast that berter pictures will re sult
            from a shorter exposure time.
    Use 48 When "slow motion" is desirable as in football.
         Speed leible
     AIote: The Exposure Guide (Fig. 9) is for use at the normal speed
    of 16. Alter rhe "f' sening of the lens as shown in the table
    below for speeds 12, 24,and 48.
       Speed       Shuttcr'fime                'f  Len.:' .5etring                                                            'ldiu$tment
          l2                       | /25 Stt:                    7r stoD hishe r nunbe r
           l6                   1 ,/l] 5 Scc               As shrlrvrr on nrride
               ),4                  5(l Scr                    7z stoll lowcr nurrrllcr
             4tl             1/ l0 .Sec                                   Il,/:l stors lnrve r numh
     fhe Wide-Angle Lens (Accessory)
     'fhe Wide-Angle Lens is recomrnended for use in confined spaces. It  is
     particularly u-seful in-home inreriors where space is limited, and a large
I     view an6Jle is clesirable   .
    py         ,{ecre gling thc image size , rhe Trnrn wide-Angle Lens increases the           view by                  93%,                          the                        7.5mm                                   Lens by                                           687" and the 10'rm Lens by     l'i_#                                         (l.3rnrn)                   d ro                          thc t/z-     267o x"fcompare                                          Norrnal                                                     Le ns.
i
       Telepholo Lens  {AAr( essoryl
   A Telcphoto Lens perforns the same  function  forrrtthe camera  that a pair
     of field glasses does for human eyes  -  it magrr iliries the image and brings       it much closer. The Telephoto Lens is particu larrlv useful for taking dis-
     tant shots.
   A movie canera should alrvays be held steady, but this is Jrarticularlv im-
     portant when using a relephoto lens. Use a tripod  if pos.sible antl clon't
    panorama unless absolurely necessary. Whcre possible: shoot, stop the
     camera, move it to thc nerv position, the n run the camera again.
    The 38rnm (tvz"\ Telephoto Leus triples the image size compared to rhe
     l3rnm (7r") Norma[ Lens
View original page 10Page 11 · Read text
Peircllclr Correction
This scenc that is photosraphcd on vour fihn will bc sliehdy
different from the sce"ne' as siehted through the Vielv
Findcr. This is duc to the diffrrencc in location of the                                  *taking"View Finder with respect to the         lens and  is
known as palallax.
At close distances a parallax correction should be made
if an accurate field of view is rcquired. To corr(rt for
parallax merelv sight the top'  of the'scene under tlre point-Lrs in the Vicw" Finder.  Scencs photngraphed approxi-
matcly 5' from the camera should be correctcd fcrr prallax.


                         l)ornrnns ns Vrtirv lftnnnR


To llr,.; lltto'rocttllutut)


As the distance from ttre canera to the sutrject incrcases.
the relative difference of the field of view becoms negli-
grble and parallax may be disregarded.
View original page 11Page 12 · Read text
www.butkus.us   THE KEYST0NE EXP0SURt METTR (Acressory|
              toDEL Kx- t 0
The Keystone Exposure Meter is a precision instrurnent,  rle-
 signed to sirnplify vour photographic problems. The proper
 use of' the Exposure Meter will eliminate  :rll chance of' error
 in determining the correct exposure ltrr the subject and scenes
 you wish to photogpaph.
The Keystone Exposure Meter is designed to fit all Olympic
 and Bel Air cameras that are equipped r,r,ith a Lock Button and
 Cover Plate (See Fig. below).
        TOUIITI}16 THE EXPOSURT TETER


                      COVER PLATE     Belbre mounting your Expo-
                             sure Meter 0n the c[rnerA,
                                the top Cover Plate must tle
                                 removed.
                       To remove the Cover Plate,
                                     slide the Lock Button to the
                               rear of the clmeril and lift
                                   the Cover Plate up.
              Fig. lB
To mount the Exposure Me-
ler 0Il the camera hclld the       POStTtONI              wlNDow
                                             STUDS        I-scAtEMe ter s0 that the Scale'Window is facing up arrd
                                         tocKtowards the lront of  the
ca.mera. Line-up and insert
the 3 Positioning Studs 0n
the trottorn of the Meter into
the 3 Positioning Holes on
the top of' the camera. Press
the Meter firmly down onto                       POSITIONING HOI.ES                                              l9the top ol' the came ra :rncl
slicle the Lock Button to the front o{'the carnera.
The Meter is now reatly for use  .
See your photographic tleale r toclay iliyou do not have the
Keystone Exposure I{e te r.
View original page 12Page 13 · Read text
Color Film Filterc
Daylight Color Fihn Filter is used with Davlight Film and
Tuireitcn Lisht.
I'vnd A Coltir Filrn Filter is uscd with Tvpe A Film and Sunlight.
C'olor Film Hazc Filtcr is used to l)enetritc haze and light mistl
  Blerck clnd Whire Film Filters
Thc filtcrs most commouly used with black and white film toincrcase contrast are yellilw, green, or red filters. The "f'
sctting of the lcns mult be inlreascd when using thesc filters
accorcJing to the filter factt-rt's; that is, use I stop higher number
witlr a 2X filter. Note; See your photographic dealer for tlre
correct filter accessories for your camera.
    lndoor Erposure Guide
                       COLOR FILM         BLACK AND WI]ITE FIL]VT
    No. of 375 Watt
       Nlcrliurn Bclm       Distuce       Lens 0pcnilg       I)istance      Lcns 0pcning                                                                                           for Kodak                                                                        in I.'eet-                               in !'eet-                                               for Kodachroure    Photol'lootl Lamps                                                             X Pan                                                  Lamps                                                                                tn        Super                                                           ttr                           Lnrnps                                       Type A                            Subie r:t                             Subiect       or Ansco Hvlran
                                       4tiz               5.6              4Vz              B
     2               6Vz9                2.84                6Vt139               5.62.84                           l3                 1.9            20                1.9
                                                                                            tt               )                                                           .7                                          4                   6V2I                             llIt.o     4               10               5.6                           t4               2.8             l3                4
                         20                  t.9            20                    2.It
 Above exposures based on G. E. Rcflector Photoflood l.nmp qrd stntt<inrd spccd of'16 framcs
                                                                        rccontme udttious are for Dcr secoird. SHL;1'1'ER SPEED -       l /35 SECONI). 'l'rblc nerv lanrps orrly. .{[tcr llmps burn oue hour uselul  srr-rp larger openirtg; after two hours,
 usic ouc stop lrr;{er openiug.
             Cleclnittg
Clean outsidc surfaces of the Camera Lens and View Finder
Lenses with a cleatt, soft, lindess cloth wrapllcd ab<lut a pcnt'il
or with a small, soft-haired brush. Clean any h'ardened emul-
sion on the Aperturc Platc or Pressure Plate ivith a small piecc
of lintless cloth (rnoistened slighdy with 'alcohol or dry-cleanscr)
wrapped about a matchstick or t'oodr pick.
                          Yctar ca.mera ,seriol number b located at the
          Make,,,ii;::';:{;!;#11;;,":;::;':;;;;i:i:";,dsendto
              KEYSTONE CAMERA CO., INC.
                                   Hollel squore' Boston 24' Moss'
 3 M-32.357                                                                               rN u.s.A.
                                                                             'RTNTED
View original page 13From the M. Butkus archive. Original publisher and archive notices are retained.
Check the model and edition against your equipment.
PDF verified 2026-10-10.