Film cameras
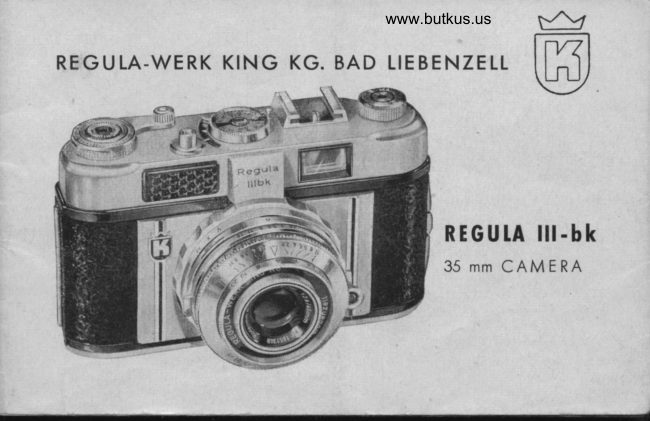
King Regula III - bk User manual
User manual for King Regula III - bk. 19 pages in English. Read the original PDF, download or print a copy without registration.
19 pagesEnglish2.5 MB PDF
Loading your manual…Open PDF directly
Document details
- Brand
- King
- Model / document
- King Regula III - bk
- Document type
- User manual
- Language
- English
- Pages
- 19
- File size
- 2.5 MB
- Category
- Film cameras
- Document date
- Not specified in catalog
Search available document text
Find a term, then jump to its page in the original PDF. Image-only pages may not be searchable; check the PDF for exact wording and diagrams.
Page 5 · Read text
@no, %npuln-friendt

           You ore now the proud owner of o REGULA comero, ond your photo
              deoler ond the monufocturer wish you every success. The comero hos
             been designed ond built to the highest precision stondords, ond this
            meons complete reliobility.
           The following instructions ore designed to help you ovoid moking
               errors. Pleose reod them. lt's for better to be sofe thon sorry.
             with the comero in front of you, reod these instructions corefully.
           Use the illustrotion to locote the vorious ports of the comero, ond
            where possible hondle the ports mentioned. The good worker olwoys
               fomilorises himself with his tools.
View original page 5Page 6 · Read text
www.butkus.us

TOADING THE. FItM
Only use films of good nome     here,
your photo deoler will help. The comero
is designed to occept stondord 35 mm film
cossetles (24x36 mm) 20 or 36 exposures
   Block ond White or Colour. Choose o-shody spot    not bright sunlight.             -
(o) To insert the film first press down the
body lock (19), open the comero bock ond
press or pull the rewind knob (13) up,
os for os it will go. This enobles you to
insert the film cossette, into the empty
spoce thot remoins.
(b) Push the rewind knob down, to  its
originol position. At times, it moy hove io
be turned slightly.
(c) Fold inwords, obout l/r inch of the end
View original page 6
Page 8 · Read text
www.butkus.us

Turn the tronsport lever (l) forword with o steody movement of your Right Thumb
 until it stops. At the some time oscerfoin thot the rewind knob is turning ogoinst the
orrow. This ensures thot te film is being tronsported correctly. Allow the tronsporl
 lever to glide to  it's normol position (lf the lronsport lever is blocked in ony
woy, press the releose button).

Now press the releose button (5) ond repeot the some operotion once ogoin. At the
third movement of the tronsport lever, the film will be in the correct position for
your first exposure. Turn the film counter (2) lo 20 or 36 occording to the length of
film. The counter will then outomoticolly show the remoining number of exposures.

(f) Your REGUTA comero hos o double exposure prevention device, ond fherefore  il
is impossible to moke the error of photogrophing two difierent subiects on the some
negotive. Also it incorporotes o double tronsporf prevention device    this meons thot                                                                             -                                                                           releose theyou connot tronsport the film without releosing the shutter.  lf you connot
shutter you hove to tronsport the film. Not only thot      if you hove not turned the                                                              -
4
View original page 8
Page 9 · Read text
I          tronsport lever enough, it must be turned once ogoin  But you do not loose
                   film  !I       ony
I       pRoNToR srK sHUTTER AND couptED ExposuRE METER
        REGULA lllbk is on entirely new outomotic comero. lt removes oll guess work ond
t       you get o perfect picture everytime. Just follow these simple steps:                                                                               -
 '          (l) Set film speed scole on exposure meter (16).
 r        (21 Press on clutch lever (22) with your lhumb, while forefinger rests on support (ll).
i         (3) Turn scole (8) or speed ring (20) until the lwo pointers (3 & 4) cover eoch other.
                                           (22).,,        (4) Releose lever
I
          Suggestion    Set shutter speed ring (20) ot lloo second, os the best speed for normol                        -          use, ond merely turn diophrogm ring (8) until the poiniers (3 & 4) meet.
iI             lf, under weok light conditions, one of the rings, 8 or 20, comes to o stop without
          bringing the pointers together, 'turn the other ring un,til they meef
View original page 9Page 10 · Read text
www.butkus.us
(ontrol Pointer  ltleler Poinler  Ring for Setting ihe tilm Speeds


                                           www.butkus.us
View original page 10Page 11 · Read text
The Prontor SLK shutter gives you o ronge of speeds from I to r/soo seconds. These
speeds con be set before or ofter the film tronsport hos been turned. lt is not pos-
sible to use "in between" speed settings. N. B. speed setting 30:   l/so second. When
using "B" (Bulb) the shutter will remoin open os long os lhe releqse button is pres-
sed down. For speed seftings longer thon l/go second, we recommed thot you use o
relioble tripod, ond olso o coble releose, which screws into the threod of the body
releose button. Incidentolly, the shutter is cocked outomoticolly when the film  is
tro nsporfed.

The green numbers connot be set    they only indicote exposure in full seconds ot                                   -
o certoin diophrogm setting. e. 9.4 seconds of F/8    such on exposure cqn only be                                                    -
obtoined ot B" setting, ond holding the releose down tor 4 seconds.

The M-X lever (?) normolly stoys on X. To use the "M" setting, refer to the exposure
tobles listed on the corton contoining your flosh bulbs.
View original page 11
Page 12 · Read text
www.butkus.us

For deloyed oction the lever is set to'V"    ond this is only possible ofter the                                                    -shutter is cocked. After the shutter is releosed you hove 6-8 seconds ovoiloble before
the photogroph is token. The lever will then outomoticolly return ro "x".

DIAPHRAGM & EXPOSURE SETTINGS
The REGULA comero hos the odvontoge thot the diophrogm ond shutter mechonism
ore coupled. Here ore some hints obout this new system. You probobly know thot
you will olwoys get on evenly exposed negotive by closing the diophrogm 1/2 stop,
providing of course thot you lengthen the shutter speed to the some extent.
A setting of llns sec. ot f 2.8 would correspond to l/oo sec. of f 4 or l/ro sec. ot f 5.6,
or 1|rc sec. ot f 8 or ]/s sec. of f l1 or 1lt sec. ot f 16. These figures illustrote thot
this relotion of diophrogm to shutter speed gives exoctly the some exposure.
So, once hoving brought the pointers of the meter together, the diophrogm ond
speeds ore coupled ond it is on ly necesso ry lo decide on the best combinotion of
shutter speed ond diophrogm which will suit your subiect ond produce the most

8
View original page 12
Page 13 · Read text
suitoble depht of field. Should you wont to olter the speed, the diophrogm will
         chonge outomoticolly in the correct rotio.
        Moke sure thoi the diophrogm|     _'e'--  ond speed  ..'.v-rings olwoys-rwv/J     vrrwNclick  rrrrvinto yvJrrrvrr.position.
lI"        USING THE EXPOSURE METER
        The built-in exposure meter on REGULA lll-bk is o high precision instrument of
 I        extreme sensitivity. This Meter is designed with specio I core ond ensures  f irst closs
  I          resu lts.
  I
  I     When looding the comero with Film, set ihe film speed by iurning the ring (16)I-         ogoinsf the film speed scole (15).
        As your subiect is viewed, point the Meter towords it. Out-doors it is odvisoble to                /
                tilt the meter downwords slightly to ovoid too much sky light from entering the very
           sensitive photo-electric cell. Where possible, the subiect should be opprooched
           closely qnd the Meter pointed ot the moin oreo to be photogrophed. Core should
                                                                                                                                                                                                                                                                             /        be token to ovoid costing q shodow of the Meter into the oreo being meosured.
View original page 13Page 14 · Read text
www.butkus.us

On subiects thoi hove wide ronges of brightness,  it is better to meosure the brigh-
test ond the dorkest oreos, ond toke on overoge reoding.
For snow, beoch or morine scen'es, toke o reoding on your hond held obout 6"
from window  (6).
Axiom  Wth Block ond Withe Film, "Expose for the shodows ond the highlights       -                                                                                                                                                                                                                                                                                                                                                                                                                                                                                               |look ofter           fhemselves". With Colour Film, "Expose for the highlights ond the sho-
dows look ofter themselves".                                                                                                                                                                                          , r.

DE.PTH OF FIETD
This is purely depedent on the diophrogm setting. The more you close your dio-
phrogm (the higher the number), the greoter the depth of field. lt olso becomes
greoter, os the distonce from the subiect increoses.
To moke it simple for you o depth of field scole (10) is provided obove the disionce
ring (21). This shows, on either side of the centre mork the figures F 2.8 to F 16.
Now follow these two exomples:

10
View original page 14
Page 15 · Read text
l. Set the diophrogm ring to I ond the distonce ring to 20. On the depth of field
          scole (left) ot F.8 the distonce ring reods "lnfinity" ond on the scole (right) the
          distonce shown is opproximotely "l0 feet". This meons, ihot of F g focussed on,,z0
           feet" the photogroph will produce good focus between "l0 feet" ond,,lnfinity,,.
          2. Set the distonce ring to 8, leoving the diophrogm ring ot 8. At F 8, you will see
          thot the focus ronge lies between "12 feeI" ond ',6 feet,,.b
         In these two exomples, you will see the importonce of depth of field. Now, it  is
II         simple to decide on on'y depth of field ot ony distonce or ony diophrogm  setting.
rltt         9. GENERAI. HINTS
           1. Alwoys hold the comero steody ond level.
          2. Put your eye  os  close to the viewfinder os possible ond frome your subiect
              occcu roteiy.
           3. When toking the "shot"    don't ierk the body releose   on eosy steody pressure                                     -                                                                    -               is ideol. Hold your breoth                                  os the releose is pressed.


                                                                                                      11
View original page 15Page 17 · Read text
I2. REWINDING THE FItM
Wlrert the filnr courrter- (2) reoches ,,O,, the.
filnr is fully exposecl , oncl it  is novv rte_
cessory to rewirrcl the  fl lrn bock irrto ihc
co s sette.
With your left ihunrb, press the lock but
torr (,l2) on tlre bollonr of the cornero, oncl
keep it pressecl cl uring the rewincl ing ope-
rotiorr. Wiih the right honci pull out thc
rewirrd knob sonrewhot until the first click
stop orrd turn the rewirrcl krrolt (13) in tlr^
cl irection of the orrow urrtil the Illnr  is
rewourrcl irrto the cossette. Wherr ihe  il lrrr
rs.olntost conrpletely rewouncl , o   slicllriresistorrce will be felt.   lt  is  overconre
eosily ortd srnoothly by en extro revotu-
iiorr of the rewincl knob    orrcl oi  this
stoge the end of the filrl  hos  left tokc-ugr
spoo   |  .
Operr ilre bock of the conrero,  pu ll out thc
rewirrd knob orrci renrove lhe  fi|rl cosseitc.
View original page 17
Page 19 · Read text
IT
                                                                                                                         tl[',li|,lAn oir blower or comel hoir brush  will olso remove dust from the lens or the
inside of the comero. lf the comero  is not to be used for some time    releose the                                   F"li'l                                                                       -sh utter.

IAST BUT NOT TEAST
Reod these instructions once more. Photogrophy is lots of fun    Experience mokes                                                                -perfect. Your REGULA comero will olwoys be relioble.

                              luckr                Qood

REGUI.A.WERK KING KG. BAD I.IEBENZElI. SCHWARZWAI.D

                                                                          l5
View original page 19From the M. Butkus archive. Original publisher and archive notices are retained.
Check the model and edition against your equipment.
PDF verified 2026-10-10.