Sewing catalogs & reference
King Sewing Machines (1908) — Product catalog
Product catalog for King Sewing Machines (1908). 68 pages in English. Read the original PDF, download or print a copy without registration.
68 pagesEnglish41.7 MB PDF
Loading your manual…Open PDF directly
Document details
- Brand
- King
- Model / document
- King Sewing Machines (1908)
- Document type
- Product catalog
- Language
- English
- Pages
- 68
- File size
- 41.7 MB
- Category
- Sewing catalogs & reference
- Document date
- Not specified in catalog
Search available document text
Find a term, then jump to its page in the original PDF. Image-only pages may not be searchable; check the PDF for exact wording and diagrams.
Page 5 · Read text
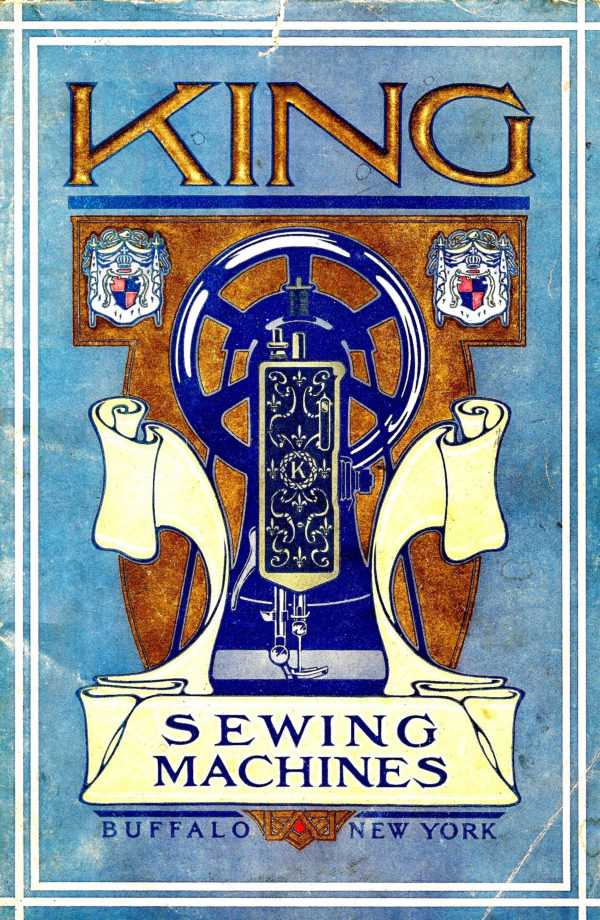
KING
SEWING MACHINES


                          TRADE MAR
            COMPAN


 KING SEWING MACHINE COMPANY

              BUFFALO, N. Y.


          COPYRIGHTED, 1903, BY THE KING SEWING MACHINE COMPANY
View original page 5Page 6 · Read text
INTRODUCTION
     THE King Sewing Machine is de-
      signed for family use.  Its action is
       remarkably simple, and with reason-
able care it will do the family sewing for a
 lifetime, never getting out of order nor causing
any trouble.
  We have used in it only the best of materi-
als. We have manufactured andassembled
 it with absolute mechanical accuracy, and
we have produced the highest grade sewing
machine made. Our guarantee accompanies
 it, completely securing the purchaser.                        In
other words, our interest in it does not cease as
soon as we have sold it; but we insure the
purchaser that it will do all that we say for
 it, and we stand back of what we say.
     KING SEWING MACHINE COMPANY
View original page 6Page 7 · Read text
Tri the dif the hig being Machine     with an ever-present instructor in the
use of it.
   First, we have made the book substantial
and beautiful, so that every person who re-
ceives a copy of it will appreciate that it is
worth keeping; then, we have hlled it with
valuable information stated in such a way
that the most inexperiencedperson can, with
a little study, becomea skillful operator.
We have made it unnecessary to depend on
the instruction ofa teacher, who says so
many things in so short a time that most of
them are forgotten. This book says all these

things, and it is always at hand in case of
  The illustrations are all photographs, and
 they are life size where a large view of detail
 is required.  They are real and show exactly
how the different parts of the machine and
 its many attachments work.
   Every King Sewing Machine is thoroughly
 oiled andplaced in perfect sewing condition
before leaving the factory, so that when it
 reaches the purchaser it is ready for imme-
 diate use.
  By following the instructions contained in
 this book, the machine will always give per-
 fect satisfaction.
View original page 7
Page 9 · Read text
KING SEWING MACHINES


                                                    GLIbE

                                             WHEEL
                         BRACE


                                                                    SEIFTER                     I KINGI


                                                              -8BARB

                                          PITMAN


                OILING

                piece of machinery, needs occasional
                    to insure easy running
        to prevent unnecessary wear of the parts
       which bear upon each other.
             If a machine is used continuously it should
       be oiled each day. With moderate use an
        occasional oiling is sufficient. The pictures
       on the followingpageshow by arrows the
        points where01lshould be applied.One
       drop of oil at each point is abundant.More
        than this serves to retard, rather than help
View original page 9Page 10 · Read text
KING SEWING MACHINE


       the action of the machine. Oil-holes are pro-
      vided in the arm of the machine for parts
     which cannot be directly reached. Oil is
      applied to the shuttle through the oil-hole
      under the front shuttle-slide.
       The movable trade mark plate on the back
View original page 10Page 11 · Read text
KIN G SEWING MACHINES


        of the arm, just below the spool-pin, and the
        plate in front, just above the tension, give
       access to the other parts.
      An occasional drop of oil at each end of
       the treadle, thepitman and the band-wheel
         shaft will keep the stand in proper condition.
       When necessary to clean the machine, the
         face-plate may be removed.


             RUNNING
       UNIFORM motion is                                  necessaryin
               ordinary sewing to secure the best
                 results. Unless one is familiar with A        the sewing machine, it is best to learn hrst
       to run the machine in this way.
            First, then, release the balance-wheel by
       turningtoward the front of the machine, as
       far as it willgo, the stop-motion screw on
        the outside of the balance-wheel.Then place
        the feet upon the treadle and start the band-
       wheel forward toward the front of the ma-
        chine. This will cause the band-wheel and
        balance-wheel to revolve in the same direction.
       The machine must always be run in this way,
       and never backwards. Motion is imparted
        to the machine by pressing on the treadle,
          first with the heels and then with the toes.
     When this motion is masteredso that the
       machine runs evenly, turn the stop-motion
       back as far as it will go. This connects the
        balance-wheel with the arm-shaft, and oper-
         ates all the sewing mechanism.
View original page 11Page 12 · Read text
KING SEWING MACHINE


         WINDING THE BOBBIN
        TITHDRAW the front shuttle-slide.
             Place the hand on the balance-
               wheel and move it slowly forward W
       until the shuttle is at the front end of its
       swing.  Press with the left thumb on the
      point of the        This will raise the
       point of the shu that it may easily be te
      moved from the machine by placing the left
        forefinger on the flat end.
        The bobbin is inside the shuttle and must
      be filled with thread beforesewing. To
      wind the bobbin, pull the bobbin-winder
      forward as far as it will go.  In this position
        the grooved wheel at its right end will engage
      the belt. Place the bobbin in the bobbin-
        winder, as shown in the accompanying photo-
       graph, by holding the bobbin between the
View original page 12Page 13 · Read text
KING SEWING MACHINES


      thumb and forefinger of the left hand in a
        horizontalposition and parallel with the arm
        of the machine.  Place the point at the left
       end of the bobbin in the hole in the left arm
        of the bobbin-winder.  Press it slightly to the
         left andplace the right end of the bobbin in
        the cup on the right end of the bobbin-winder,
         at the same time putting the end of the thread
       between the bobbin andthe cup, as shown in
        the illustration. Lead the thread
        the upper thread-guide, thence through the
       lower thread-guide, thence from left to right
       through the eyelet in the upper forward cor-
        ner of the face-plate, placing the spool on the
       spool-pin Run themachine as previously
         instructed, and the bobbin will automatically
     be wound. When it is filled with thread,
       stop the machine, remove the bobbin from
        the bobbin-winder, push the bobbin-winder
       back into position and turn the stop-motion
       back as far as it will go.

        INSERTING THE NEEDLE

              its prepes pisto fu the needle in
               the needle-bar to its highest point.
      Hold the needle vertically with the left hand
      with the flat side of the shank toward the
        right. Insert the shank in the needle-clamp
      from the bottom, as far as it will go, and
        tighten the thumb-screw with the right hand.
      The needle should enter the needle-hole near
        the right edge of it, instead of in the center.
View original page 13Page 14 · Read text
THREADING THE SHUTTLE
     OLD the shuttle in the left hand, as
     shown in the illustration. Take the
      wound bobbin in the thumb andIHfirst two fingers of the right hand, hold the
free end of the thread with the other hngers
so that it leaves the bobbin from the front
towards the right. Place the bobbin in the
shuttle as shown in the photograph, pressing
it down as far as it will go:
View original page 14Page 15 · Read text
KING SEWING MACHINES


          hold it genet in potplace.the leadLeadthethe
                 thread with the right hand through
        the long slot of the shuttle until it is below and
         slightly to the left of its point, as shown in the
       photograph.


                          13
View original page 15Page 16 · Read text
JARRY the thread up straight above
          the shuttle until it passes beneath the
         spring in the middle of it, as shown
 in the photograph.  Pull the thread to make
  sure that the bobbin revolves freely in the
         Break off the end of the thread soshuttle.  that about four inches hang from the shuttle.
  Restore the shuttle to the machine and re-
  place the front shuttle-slide.
View original page 16Page 17 · Read text
KING SEWING MACHINES


       THREADING THE MACHINE
        LACE the spool upon the spool-pin

         (1).letGuide(2), inthethethreadupper throughforwardcornerone eye-of
         the face-plate, thence between the discs of the
        tension (3), from right to left around the ten-
         sion-regulator and behind the tension-release,
        thence through the thread take-up-spring (4),
       thence through the hole in the thread take-
        up-lever 5), thence through the thread-guide
         (6), in the face-plate, thence through the
        thread-guide (7), on the needle-bar, thence
                                 through the
                           eye of the
                                needle (8),
                              from left to
                                          right.
                               The thread-
                                      guide (6), on
                                           the face-plate
                                             is so arrang-
                       edthat the
                                     thread may
                                        easily be in-
                             serted by
                                          sliding it un-
                                         der the eyelet
                      from the
                                            rear, instead
                                       of slipping it
                                 through the
                               holein the
                                          guide.


                              15
View original page 17Page 18 · Read text
E SKING SEWING MACHIN


              SEWING
       THE presser-tootshould always be
                raised, and both threads should lie
                 fat on the table back of the needle
        before beginning to sew. To bring the shut-
         tle threadup through the needle-hole, take
       the end of the needle thread in the left hand,
      with the needle at its highest point. With
        the right hand move the balance-wheel slowly
       forward until the needle makes one complete
        stroke.  This passes the shuttle thread
      through a loop in the needle thread, and it
     may thus easily be drawn up through the
       needle-hole by pulling on the needle thread
      Place both threads straight back under the
        presser-foot.  Place the cloth under the
       needle, lower the presser-bar and
       to sew, starting the balance-heel proced
       The best results are obtained when both
        the upper and lower threads are the same size
      and quality.

           THE TENSIONS
        Na perfect stitch the threads are locked
       justresulthalf wayis obtainedthroughby theregulatingcloth. histhe
       tensions. The tension of the needle thread is
        controlled by the tension-regulator. Totighten
          it, turn the tension-regulator tothe right;
       to loosen it, to the left. The tension of the
        shuttle thread is regulated by the screw in
       the shuttle-spring,  To tighten it, turn this
      screw to the right with the small screw-
View original page 18Page 19 · Read text
KING SEWING MACHINES


         driver; to loosen it, to the left. This screw
      may be reached by withdrawing the front
         shuttle-slide, it being unnecessary to remove
        the shuttle.  If the upper thread lies flat on
        the cloth and it is not drawn down into the
        hole made by the needle, the upper tension
          is too tight, or the lower tension is too loose.
           If, on the other hand, the lower thread lies
          flat along the cloth, without being drawn up
         into the hole made by the needle, the lower
        tension is too tight, or the upper tension
         is too loose. Thesepoints can readily be
        determined after taking a few stitches.
        For bias seams, or with cloth which is
        loosely woven, the tension should be loose
       enough to allow the stitch to stretch with the
        cloth.
            THE STITCH
           THE stitch is controlled by the stitch-
            regulator. To lengthen it, turn the
                stitch-regulator to the right;  to
        shorten it, to the left. With thin or delicate
         cloth a short stitch produces the best results.
       With thick, coarse or loosely woven cloth,
                              The length of        a long stitch should be used.
         the stitch can be changed at any time to suit
        the taste, without disturbing the work.

          THE PRESSER-FOOT

               furnishes the pressure necessary to
    A in namehold theimplies,cloth firmlythedownpresenon theor
View original page 19Page 20 · Read text
KING SEWING MACHINES


       bed of the machine, and to prevent its follow-
       ing the needle on the upward stroke.  Too
     much pressurecauses the cloth to pucker.
          If there is too little, the feed-teeth, just under
      the presser-foot, do not moveit evenly.
       This pressure is regulated by the screw at
       the top of the presser-bar, and is increased
      by turning it down, lessened by turning it up.
      The adjustment at the factory is for ordinarv
       sewing,  With several thicknesses, or with
        thick cloth, the pressure should be lessened.
            I he presser-foot is raised by lifting up the
       presser-bar lever as far as it will go.                            To
      lower it, push the lever down.

         ENDING THE STITCH

     STo highe Withmachinethe leftwithhandthe drawrepletheac
       cloth back and to the left about three inches,
        at the same time relieving the tension on the
       needle thread by pressing with the right thumb
      on the tension release. Hook both threads over
       the thread cutter, and with a slight down-
      ward pressure, they will be severed close to
       the end of the stitching.  The thread-cutter
         is a most convenient device, and the habit
       of using it should be formed early.

          CHANGING DIRECTION

                  While the needle is on the up-
     SiT dowardthestroke,pie whereand beforetheitomhas theleft thebe
View original page 20Page 21 · Read text
KING SEWING MACHINES


      hah, stop thethe machinebalance-wheel.placing the ghe
        presser-bar, and swing the cloth in the de-
        sired direction around the needle as a pivot.
      Lower the presser-bar and proceed to sew.

            ATTACHMENTS
                 photograph below      the
               arrangement of the attachments in the
              box.  the following pages show the
       attachments themselves, and the different
        kinds of work they accomplish. By the aid
        of these photographs and the accompanying
        explanations, all varieties of work are made
         pertectly plain and simple.  The small photo-
       graphs show how the cloth is held on the
       machine, and the large ones show in detail
         just how the attachment operates upon it.
View original page 21Page 25 · Read text
SE WING MACHINESKING


       FOOT-HEMMER HEMMING
          AISE the needle to its highest point.
               Elevate the presser-bar and remove
                 the presser-foot, substituting the foot- R      hemmer. Beginning at the point where the
     hem is to start, fold up one-eighth of an inch
       of the edge to be hemmed for a distance of
       about two inches, creasing the fold.  Insert
        the crease in the foot-hemmer from beneath,
        to the depth of the fold, holding the beginning
        of the hem between the thumb and forefinger
       of the left hand, and the other end of the
       crease between the thumb and forefinger of
       the right hand, the hands beingplaced as
      shown onpage 26. Draw the cloth forward
       with the right hand until the beginning of the
      hem is under the needle, keeping the crease
        in the foot-hemmer. Lower the presser-bar,
       and proceed to sew, guiding the cloth with the
        right hand, as shown in the photograph.
        too little cloth goes in, move the hand to the
         right, if too much, to the left.


                          23
View original page 25Page 27 · Read text
S                     SKING   WING MACHINE


    HEMMING AND SEWING ON LACE
            THIS is done with the foot-hemmer.
             Start the hem as described on page
           23.When the hem is running prop-
         erly, stop the machine, with the needle at
         its highest point, andraise the presser-bar.
       Insert the edge of the lace into the needle       slotin the foot-hemmer, drawing it back
      under theneedle. Lowerthepresser-bar
      and proceed to sew, guiding the cloth with
       the left hand, and the lace with the right,
      as shownin the photograph,                               keepingthe
        lace far enough in the slot to enable the needle
         to pierce it.
View original page 27Page 29 · Read text
S WING MACHINEKING


           THE HEMMER

       YUBSTITUTE the hemmer-foot for the                     Loosen the screw in the

         will go.  Slip the large hole in the upright
        part of the hemmer over the knob in the
       hemmer-toot,and slide the hemmer to the
         left as far as it will     Tighten the screw.                go.
      Fold up one-eighthof an inch of the edge
        to be hemmed, in the same manner as when
       using the foot-hemmer. Slide the folded
       edge into the hemmer from the left, then up
        and over the spoon, as shown in the photo-
           Draw the cloth back with the left
       graph until the end of the crease is well in the
       hemmer, then draw it forward with the right
        hand, so that the folded edge hooks under the
         left side of the spoon, continuing until the
       beginning of the hem is under the needle.
      Lower the presser-bar and proceed to sew,
       guiding the cloth as in the case of the hem-
        mer-foot.


                             27
View original page 29Page 31 · Read text
KING SEWING MACHINES


       THE ADJUSTABLE HEMMER
       T frequently happens in hemming that
        the distance from the line of stitching
             to the inside edge of the hem is greater
       than it should be to secure the best appear-
       ance.  This is particularly true in the case
       of thin cloth, where delicate effects are the
      most desirable. The King Sewing Machine
        has solved this, among many other difficulties,
      and by the adjustment in its hemmer pro-
      duces a          no matter what kind
      ducts a persect Toentbring the stitching close
        to the edge, loosen the screw in the back of
        the hemmer-foot, slide the hemmer to the
        right the desired        and tighten the
       screw. To bring the stitching farther from
       the edge, slide the hemmer to the right.
       These adjustments must, of course, be made
       while the machine is at rest.


                         K
                                   29
View original page 31From the ISMACS International. Original publisher and archive notices are retained.
Check the model and edition against your equipment.
PDF verified 2026-10-11.