Film cameras
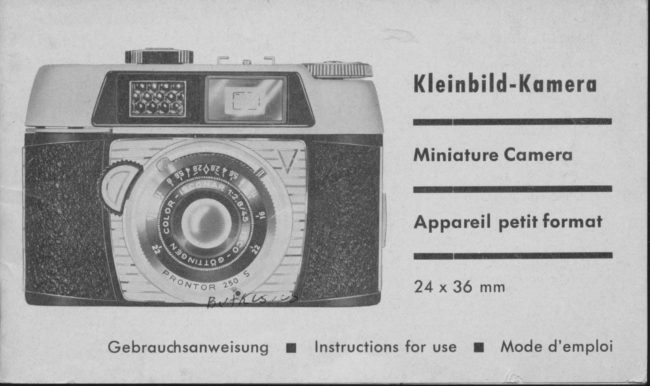
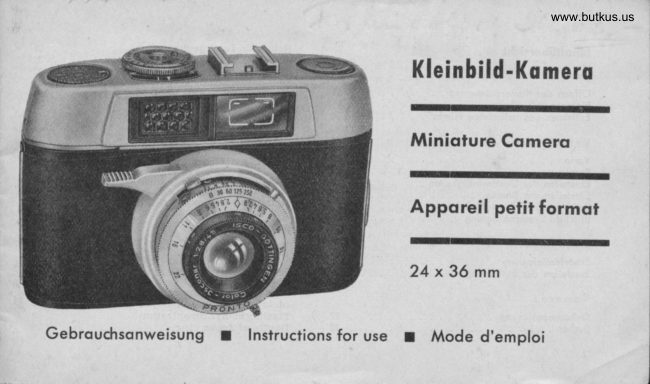
Kleinbilt Kamera User manual
User manual for Kleinbilt Kamera. 33 pages in German, French. Read the original PDF, download or print a copy without registration.
33 pagesGerman, French4.0 MB PDF
Loading your manual…Open PDF directly
Document details
- Brand
- Kleinbilt
- Model / document
- Kleinbilt Kamera
- Document type
- User manual
- Language
- German, French
- Pages
- 33
- File size
- 4.0 MB
- Category
- Film cameras
- Document date
- Not specified in catalog
Search available document text
Find a term, then jump to its page in the original PDF. Image-only pages may not be searchable; check the PDF for exact wording and diagrams.
Page 5 · Read text
Vorderonsicht


 1 Komerogehduse                           40 Zeit-Einsiellring
 3 Suchergehciuse                             4l Selbstousl6ser (Vorloufwer.kl
 4 Schnellscholthebil                       42 Entfernungseinstel      I u ng
 8 Gehciuseous  l6serf oste                     43 Geschwindigkeiten
 9 Drohtousl6sergewinde                    44 Blendenzohlen
ll  Holter f0r Zusotzgercite                        45 -lndexmorke frjr Geschwindigkeiten  und
l2 Sucher                                             Entfernung
l3 R0ckspulknopf                                  46  Schci rf en tief e n-We rle
14 Film-Merkscheibe                              48  Entf ernungszoh len
l6 SchloBriegel                                    49 Blenden-Einstellung
                                                           5r  Bl itzl ichr-Ansch    I uBn  i ppe  I
                                                   60 Eingebouter Belichtungsmesser
View original page 5Page 7 · Read text
. Front view

    I Camera housing                                4040 ShutterShutter speedspeed settingsettrng ringrlng  .
   B View finder housing                           1 Automatic shutter release (detayed action)
  4 Film wind and shutter setting iever             42 Distance setting ring
   8 Trigger release                                   43 Speed figures
  9 Cable release thread                             44 Aperture figures
  11 Accessory shoe                                 45 Index mark for speed and distance
  12 View finder                                      46 Depth of focus values
  13 Film rewind knob                               48 Distance figures
  14 Film speed indicator                            49 Aperture setting lever
  16 Safety lock                                      51 Flash socket
                                           '                                60 Built in exPosure-meter


   6
View original page 7Page 8 · Read text
www.butkus.us
Le devont de I'opporeil


 t Boitier de I'appareil                                     4o Bague de mise au point des temps d'exposition
 j Cage du oiseur                                            4t Diclencheur automatique (retardement)
 4 Leoier ile commande rapirle                              4z Mise au point de Ia distance
 8 Bouton de ddclenchement sur Ie  boitier                       4j Vitesses
 9 Prise pour dtclencheur souple                            44 Chiffres des diaphrngmcs
n Attache pour accessoires                                 45 Marque index pour les oitesses et les distances
tz Viseur                                                46 Profondeurs ile champ
tj Bouton dc rebobinag,e                                    48 Chilfres des distances
t4 Disque aide=m|moire du film                             49 Rdglage du diaphragme
16 Verrou  ile fremeture                                      5t Prise pour synchro=flash
                                                        6o Posembtre incorpord
View original page 8Page 13 · Read text
Bei Verwendung des 36er Filmes, Zcihlscheibe (5) on der R0ckwond des Suchergehduses (3) mittels
des gezohnten Einstellringes (6) durch Linksdrehen ouf den gro0en weiBen Punkt hinter der Zohl 36 stellen; bei
20er Film ouf den Kreis O zwischen den Zohlen 20 und 24 stellen.
Den Schnellscholthebel (4) noch rechts bis zum Anschlog ziehen und in seine Ausgongsstellung  zur0ckfedern
lossen. Noch ieder vollen Betcitigung des Schnellscholthebels  (41 ist dieser oulomotisch gesperrt. Ausl6sung
erfolgt durch Druck ouf den Ausl6sehebel  (8).

Looding the cqmero
Push the locking latch (16) in the direction of the arrow and open the camera back (2). Put out the
rewind shaft (22) by the rewind knob. Insert the film cassette into film chamber (21). Push
down the rewind shaft (22) into the camera by the rewind knob (13), and turn until the cross bar
of the eassette spool engages the slot in the rewind shaft (22). Draw out tongue of film from
cassette and engage it  in  slot (26) of take-up spool (25) by securing the perforation
in film to hook provided. Turn winding lever (4) untll film  ls taut (see illustration  5).
Take care that the teeth of transport roller (24) engage in the film perforations and that the film
runs absolutely straight. Close the back panel of camera (2). Set the film counter disc (5) in the
back of the finder housing (3) by turning the serrated setting wheel to the left. Set the film counter
to the large white dot behind the figure 36 when using 36-exposure cassettes; set it to the circle
between the figures 20 and 24 when using a 20-exposure cassette.
Turn film winding lever (4) to the right as far as it will go and allow to spring back. Each full
turn of the film winding lever (4) automatically cocks shutter and moves films on for next ex-
posure. The film winding lever (4) cannot be moved until body-release (8) has been depressed.

t2
View original page 13
Page 14 · Read text
www.butkus.us

 Chorgement de I'opporeil
 Glissez dans Ia direction de la fltche le oerrou de lermeture (fi)  et
 faites basculer le dos de I'appareil (z). Retirez, au mo7en du bouton de
 rebobinage,  I'axe de rebobinag,e (zz). Placez la cartouche dans Ia caoiti
 prioue pour receooir Ie film (zt). Au moyen du bouton de rebobinage
 ftj) repoussez l'axe de rebobinage (zz) dans I'appareil et tournez jusqu'd
 ce que la petite traaerse de Ia cartoudte glisse dans Ia lente de l,axe de
 rebobinage (zz). Tirez Ie bout pointu du film hors de Ia cartouehe, entrez
 le dans la fente (26) de Ia bobine oide (2fl et accrodtez la perforation du
 films dans Ie c|ne d Ia dite fente. En tournant d la main la bobine oiile
(25), bobinez unbout du film sul cette bobine iusqu'd ce que le filmsoit
 tendu. (Voir figure fl.  Faites attention que les dents de I'axe d.'aoance.
ment (zg prennp.nt bien ilans Ia perforation du film et que Ie film
                                     Ret'ermez le dos de l'appareil (z).apsnce de lagon to;t d fait droite. -En employant un film ile 36 oues, mettez Ie ilisque=compteur  (fl  ilans Ie
dos du boitier de oiseur (il en regard du grand point blanc derricre  le
chilfre j6; oous y arrioerez en tourant le disque=compteur zsers la gaudte au moyen de la bague de rCglage d bord
dentel|. Quand oous employez un film ile 20 oues, oous deoez mettre Ie disque=compteur (il ne regaril du petit cerle Q
entre les chit't'res 20 et 24.
Actionnez I  droite le leoier ile commanile rapide (+) et laissez Ie rcbondir dans sa positiott initiale. Apr|s dtaque
mouoement cornplet du leoier ile commande rapide ($, celui=ci est automatiquement bloqu|. Le diclendtement se fait
en appuyant sur le bouton ile ddclen&eftrent  (8). (Prise de oues).

                                                                                                                         l3
View original page 14Page 15 · Read text
Noch dem Schlie8en der Komero-Riickwond (2) und Einstellen des Zcihlwerkes (5) ouf den wei0en Punkt bzw. O,
        Schnellscholthebel  (4) und Ausl6sehebel (8) ie einmol betcitigen, do der bei offener Rtickwond dem Togeslichl                         I
        ousg,esetzle Film unbrouchbor geworden ist.                                                                                                                                               i.
        Bei der ncichsten Beicitigung des Schnellscholthebels  (4) steht die Zcihlscheibe (5) ouf 36 bzw.20 und die Komero       t
          ist fiir die erste Aufnohme bereit.
      Dos Zcihlwerk orbeitet riickwcirts von 36 bis'l und zeigt olso immer on, wieviele Aufnohmen noch zur Verfiigung
        stehen.
      Es ist zu beochten, do0 bei Beicitigung des Schnellscholthebels  (4) sich der Ri.ickspulknopf (.|3) entgegen seiner
'       Pfeilrichtung miidrehen muB. Dies ist die Kontrolle fijr einwondfreien Filmtronsport. Gleitet mon beim Film-
        lronsport mit dem Finger unbeobsichtigi vom Scholthebel, so doB dieser vorzeitig zuriickschnelll, so ist der Film
      nur teilweise tronsportiert. Bei neuerlicher Betcitigung des Scholthebels (4) greift dieser erst wieder on der
        Unterbrechungsstelle ein, so doB Film und Verschlu0 einwondfrei tronsportiert bzw. gesponnt sind.
       After closing the back panel of camera and setting exposure counter disc (5) to o turn film winding
       Iever (4) once, releasing as necessary by means of body release so that the part of the fllm, exposed
       to daylight during the loading operation, is wound on the take-up spool. Now turn the fllm wind-
      ing lever to set the next frame of the film for your first exposure when the exposure counter
      should show 36 respective 20. The film counter disc works from 36 respective 20 to 1 so it is always
       to see how many exposures are now available. Do not obstruct movement of the rewind knob by       '  gripping the camera awkwardly.
         If, when turning the fiIm winding lever, you unintentionally allow it to slip back before the full
     movement is complete, it will be quite in order to camy out the correct procedure again to ensure                    I
       that the fiIm and shutter is properly set.                                                                                                                                               I
                                                                                                                                                 ?
        14
View original page 15Page 17 · Read text
Der rote Knopf (32) bleibt noch dem EindrUcken so longe im
                                            Komerogehciuse versenkt, bis ein neuer Film eingelegt bzw. der
                                                   Schnellschollhebel  (4) betcitigt wird.
                                       Dos Einlegen des neuen Filmes erfolgt wie eingongs beschrieben.                                                                                                                                                                     I

                                                 Filmpolrone
                                              Achte dorouf, doB nur einwondfreie  Potronen verwendet werden.
                                              Alte oder verbeulte Polronen sind  oft die Ursoche verkrolzter
                                         oder ousgerissener Filme.


                                 Removing the exposed film
                                     Films can be loaded and unloaded in daylight. Press
                                      the red knob (32) at the base of the camera and turn
                                              film rewind knob (13) in the direction of the arrow
                                                until the whole film is rewound into the cassette. This
                                                   is noted by a drop in the resistance durin.g the rewind-
                                            ing. Open the back of the camera and pull out the

16
View original page 17Page 18 · Read text
www.butkus.us
film rewind knob (13) after which the cassette with the exposed film can be taken out of the
camera. The fresh film is inserted as described.
After pressing in, the red button (32) witi stay sunken into the camera casing until a newfilm is put in resp, the rapid winding lever (4) :is operated.
Film cosselle
only use undamaged film cassettes. Second-hand or dam,aged cassettes often are the cause for
scratched or torn f.ilms.


Enlivement du film expos6
On peut enleoer Ie film d lumiire du iour. Presse Ie bouton rouge (y) d la partie infdrieure de l'appareil et on tourne
sinrultandment Ie bouton de rebobinase (a, dans Ie sens de Ia flbche, iusqu'd ce que tout Ie film se trouae d nouaeau
cinns Ia cartouche. On Ie sent quand Ia rdsistance dans Ie rebobinage cesse. Ouorez alors le dos de l'appareil et tirez Ie
bouton de rebobinage (ry) oers I'ext|rieur, aprbs quoi oous poupez enleoer facilement Ia cartouche contenant  Ie
film expos6.
Apris I'impression le bouton rouge (32) sera plongt dans la boite d.e la catnera tant longtemps jusqu'un noaveau lilrnest logt resp, Ie leaier commande rapide ($ est optrd.
Le placement d'un nouveau film se fait comme expliqud au ddbut.
C ar t o u ch e : Attention de n'utiliser que des cartouches impeccables. De oieilles cartouches ou des cartouches
bossel|es sont souoent Ia cause de t'ilm 6gratign|s ou arrach,\s.

                                                                                                                      17
View original page 18Page 19 · Read text
Venschllisse
In der Komero werden folgende
Verschlrisse verwendef  :
Prontor I25
Zeiren: B -  l/30 -                     1t60 -Sekunde Blitzlicht-synchroni-11125
s  r erung.
View original page 19
Page 22 · Read text
www.butkus.us
Obturqteurs
i::::,::',',;':',fr:;'r':, i,'! ,',',2"]':,':"':':,:::;:':,:,"nde  et synchronisation pour rrash
                                                      seconde et synchronisation pour flash.Prontor 2So - Temps: B -  tljo -  tl6o - tln5 -  tlz5o de
Prontor z5o S: Temps: B -  rl3o -  tl6o -  tlrz5 - tlz5o de seconde -  ddclencheur automatique (retardement) incorpord
eI syndtronisation pour flash.
R6gloge des vitesses d'oblurqtion
Le ftglage des temps d'obturation se fait en tournant Ia bague de mise au point (qo) d bord dentel6, iusqu'd ce que
Ia narque index (4fl soit en regard de la oitesse ddsirde.
En position <B>> l'obturateur reste ouoert aussi longtemps qu'on tient  le ddclen&eur appuy6. Le ddclendtement  de
l'obturateur se fait en appuyant doucement et de fagon rdgulibre sur le ddclencheur (8). Pour les temps d' exposition
prolonges tels que Iaprise de oues dans l'obscurit|, d l'interieur ou dans des conditions lumineuses insuffisantes, etc.
iI conoient d'utiliser un ddclencheur souple aoec pis de blocage, que l'on peut oisser dans Ie filet (fl au c6te infdrieur
du dtclencheur.
Mettez l'obturateur sur positiotr <<B>>, appuyez sur Ie d\clendteur souple et serrez la ois de blocage. L'obturateut
restera ouoert tant que rous ne desserrez pas la ais de blocage au d|clencheur souple. lI est |aident que des expositions
nussi longues nu peuoent se faire que quand ootre appsreil est placd sur un pied ou sur une base immobile,
 Einstellen der Btende
DerVerschluBbesitzifolgendeBlenden6ffnungen:22-16-11  -8-5,6-4-2,8.22.istd.iekleinsie,_2,8die gr6f3te Offnung. Bei einer gro8en Blendenoffnung fcillt im Moment der Belichtung mehr Licht ouf .den Film, es
muB olso kUrzer belichtet werden. Bei einer kleinen O-ffnung konn entsprechend weniger Licht einfollen, desholb
muB die Belichtungszeii verlcingert werden. Dos Einstellen der Blende erfolgt durch Verschieben des Blenden-
 zeigers (49) ot,f eine der gewiinschten Blendenzohlen.
View original page 22Page 23 · Read text
Seiling lhe operlure
 The shutter has the following apertures:22- 16   11     I    5,6          2,8. F:2}isthesmatlest.                                                         -     -    -     -4- f :2,8 is the largest aperture.
With a large aperture, more light falls on the film at the moment of the exposure, the exposure
period must therefore be made shorter. With a small aperture correspondingly less light can
enter, therefore a longer exposure time must be used.
The aperture is set by moving the aperture setting lever (49) to one of the desired aperture
figures (44).

R6glcge du diophrogme
L'obturateurposs\delesouoerturesdediaphragmesuiaantes:f:zz-t6-tt-8-5,6-4-2,8,
F: zz est la plus petite et f : 2,8 Ia plus grande ouoerture.
Aaec une grande ouoerture du diaphragme iI y a plus de lumibre que tombe sur le film au ffioment de l'exposition;
il faut donc exposer pendant un temps plus court.
Aaec une petite ouoerture iI y a moins de lumibre qui peut p|ndtrer et il'faut donc prolonger le temps d'exposition.
Le r|glage du diaphragmes se fait plaqant I'aiguille du diaphragme (4il en regard d'un des chiffres de diaphragme
(49 ddsir6.

Selbstousliiser (Vorloufwerk)                                                                                                                                                 .)
Pronlor 250 S: Noch Betdtigung des Schnellscholthebels  (4) dr0cke den rolen Sponnhebel (41) on der Unterseite
des Verschlusses noch links bis zum Anschlog. Die Komero ist donn schufibereii fOr Selbstousl6sung. Der Setbst-ousl6ser ist verwendbor fijr olle Momentgeschwindigkeiten,  iedoch nicht fiir B.                                                                                                                                                                                                                                                      i

 22
View original page 23
Page 24 · Read text
www.butkus.us
Automotic shutler releose (Deloyed qction releose)
prontor 2b0 S: After operating the film winding and shutter setting lever (4)' press the red setting
tever (41) at the lower side of the shutter to the left up to the stop. The camera is then ready for
shooting with the automatic shutter release.                                                                             spee'ds, but not for B.The automatic shutter release can be us€,d for alt instantaneous
D6clencheur qufomolique (Retordement)
prontor z5o s   Aprbs apoir actionn| le leoier de commande rapide (4), appuyez d fond aers la gauche Ie leaier rouse               -            d Ia partie inf|rieure de I'obturateur. Dans cette position aotre appareil est prat d prendre une photod,armemint (+t)
 aaec d6clenchement automatique. Le d€clencheur automatique est utilisable pour toutes les pitesses instantQndes, mais
                                                                                >>,il ne peut pas seroir Ia position <B
 Blirzlicht-Synchroni si erung
                                                                                                                                 Stotiv:                                                                                              (5fSlecke dos Kobel der Blitzleuchle in den AnschluB-Nippel                                                              ) und schroube die Blitzleuchte in dosoewinde (31) der Komero oder schiebe sie in den Hoftir (lj).' Beim Ausl6sen des Verschlusses erfolgl outo-
 irotisch die'synchronisierte Entziindung des  Blitzes.
 Floshlig ht synchronizotion
Insert the cable of the flashlight unit into ,the flash socket (51) and screw the flash lamp onto the
tripod bush (31) of the camera or push it into the accessory shoe (11). Releasing the shutter will
automatically f,ire the flashbulb.
 Synchronisotion pour flosh
Entrez le chble de ootre flash dans la prise de raccordement  (57), aissez Ie llash dans  Ie pas=deois pour pied (3t)                                                                                                             dE cI en che z aut o mat  i quementpr€ou d l'appareil, ou bien glissez le dans l'attadte (n). En ddclenchant'I'obturateur oous
l'|clair de votre flash.

                                                                                                                      23
View original page 24Page 25 · Read text
Obiektive
 Einstellen der Entfernung
 Drehe die Obiektivfossung (42) so, do8 die Morke (45) ouf                                                                   zeigt; domit ist die Komero fUr ,,Unendlich,, schorf                                                                   "o eingestellt, d. h. fiir Entfernungen von mehr ols l5 Meter.
 Fiir Obiekie in geringerer Entfernung erfolgt die Einstellung durch Drehen der Frontlinse ouf die gewiinschte
 Meterzohl.

 Schiirfentiefenring
 Bei Einstellung ouf eine bestimmle Entfernung, z.8.4 Meter, ist nicht nur dieser Punkr schorf, sondern ouch eine gewisse Enifernung vor und hinter 4 Meler. Dies ist die sogenonnte Schcirfentiefe. Auf jer Vorderseite des
 Verschlusses befindet sich der Schcirfentiefenring  (46), mit dessen Hilfe die ieweilige Schcirfentiefe leichr obzulesen
 ist. Links und rechls der Einstellmorke  (45) befinden sich die Blendenzohlen in gleicher Reihenfolge von 2,8 bis 22.
 Dorunter liegt der drehbore Frontring (42) mit den Entfernungszohlen  (a8). Die Schdrfentiefe wr.rd nun'begrenzi
von der Meterzohl unter der verwendlten Blendenzohl rechts und links'der Einstellmorke.
 Beispiel: Enifernung fUr ein Aufnohme-Obiekt 6 Meler.
           Stelle die Frontlinse (42) ouf 6 Meter.
          Gewcihlte Blende 5,6 :  Schcirfentiefe von unler 4 Meler bis 0ber                                                                                               '10 Meter.          Gewcjhlte Blende l1 :  Schcirfentiefe von 2,5 m bis oo.
Durch Einstellen der Frontlinse (42) ouf eine ondere Entfernung, verschieben sich selbstverstcindlich ouch dieSch ci rf e n ti ef en -We rte.

24
View original page 25Page 26 · Read text
www.butkus.us
Lenses
 Setting the dislonce
Turn the lens mount (42) so that the stop (45) points to oo the camera is thereby focussed sharply
for "infinity",  i. e. for distances of more than 40 feet.
For objects within a shorter distance, the setting is made by turning front lens mount to the
desired distance.

Depth of focus ring
When setting to a specific distance, e. g. 10 feet, not only this point will be in sharp focus, but
also a certain distance in front of and behind the 10 feet. This is the so-called depth of focus.
On the front side of the shutter there is the depth of focus ring (46), which shows the appropriate
depth of focus. The aperture figures for depth of focus calculations are from 2,8 to 22 located to
the left and right of the setting mark (45). Underneath there is the distance setting ring (42) with
the distance figures (48). The depth of focus range is now indicated under the aperture figure to
the left and the same aperture figure on the right.
Example: Distance for an object to be photographed: lu feet.
    .      Set the front lens (42) to 10 feet.
         Chosen aperture 5,6 :  depth of focus from about 8 to about 13 feet.
         Chosen aperture 11 :  depth of focus from about 6 feet to about 20 feet.
Setting the front lens (42) to a different distance will automatically adjust the depth of focus values.

                                                                                                                      25
View original page 26Page 27 · Read text
Obiectifs
 Mise ou poinl de lc dislonce
Tournez la monture de I'obiectif (+z) de telle sorte que Ia marque (+il se trouoe en regard de I'indication e. Dans
cette position, ootre appareil est mis au point pour I'infini, c. d. d. pour des distances de plus de t5 m. Pour des
suiets d une plus courte distance la mise au point se fait en tournant la monture de la lentille frontale et en mettant
en regard de Ia marque (49 Ie mdtrage ddsir6.

 Bogue de profondeur de chomp
En mettant au point sur une distance ddterminde, p,ex.4 mbtres, non seulement Ie point ais| sera net mais aussi
une certaine distance aoant et apris 4 mdfies. C'est ce que l'on appelle la profondeur de champ.
A la partie lrontale de I'oburateur se trouoe Ia bague de profondeur de champ (46), au moyen de laquelle on peut
{acilement dd,terminer Ia prot'ondeur de champ correspondante. A gauche et d droite de la marque de mise au point (45)
se trouoent, dans Ie mAme ordte, Ies &iffres d'ouoerture du diaphragme, de z,B h zz. En dessous se trouoe Ia ba,gue
frontale pio,otante (42) de l'obiectif, aoec les chiffres des distances (+S), La profondeur de champ se situe rntri lo
distance indiqude sur Ia bague (42) en dessous d'un &iffre de diaphragme d gauche de Ia marque (+il et Ia distance
 indiqude sur Ia bague (42) sous Ie m|me &it't're de diaphragme d droite de la marque (4fl.
Exemple: Distance d'un suiet 6 mdtres.
         Mettez Ia lentille lrontale (42) sur position 6 mbtres.
         Diaphragme choisi 5,6 :  Profondeur de dtamp entre moins de 4 ffi. et plus de to mbtres.
         Diaphragme choisi tt:   Profondeur de champ de 2,5 m. iusqu'd e
En mettant la lentille frontale (42) sur une autre distance, la profondeur de dtamp oarie |galement,

26
View original page 27Page 28 · Read text
www.butkus.us


Lcudrtrohnencudrer
Der eingespiegelte Leuchtrohmen begrenzt -  leichl
erkennbor dos totsdchliche Bildfeld. Bei Noh-
oufnohmen von co. 1,50 m verschiebt sich die Bild-
feldbegrenzung gemdB den kleinen Strichmorkie-
rungen im Leuchtrohmensucher.

Luminous Frome finder
T'he lurnilnous f,rarne wlth bright reflection
lilmlts   easily recognlsa,ble the actualphotogr. scope. For exposures at a dlstance
of about 5 feet ttr,e llrnitation of the photogr.scope is displaced according to tihe notdtes
in the luminous fr'ame finder.

Viseur i codre lumineux
Le cailre lumineux rcll1td il1termine,  ile manibre facilement reconnaissable, Ie camp rhel ile I'im-age- Lors de,la prise
 ile oues I une courte ilistance d'enoiron t,5o m|tie, la dllimination ilu dtamp ile l'image se il|place suioant les r'"tite
 trails marquhs ilans le cailre lumineut.
View original page 28
Page 30 · Read text
www.butkus.us
Film speed indicotor
The film rewind knob (lB) carries a fiIm indicator (14). This indicator shows you what type of
film you ha,ve in tihe camera. You oan obrtain tJre reqr.r,ired .dSA or DIN values Crom the film                                                                                                                           dil,mpaclcing or instructions. Turn the film ind.icator disc until the ASA or DfN rating of thei'  use appears in the ASA or DIN window oJ the disc (14). When using a colour film' set the                                                                                         .dSAdisc so that tlre orang,e strj.p is visible in the fil,m indicator window in addition to theor DIN figure.

Disque oide-m6moire du film
Le bouton ile rebobinage (ry) porte un disque de aide=m|moire (t$. Cet aide=mdmoire doit oous rappeler quel genre
de film se trouoe ilans ootre appareil. Vous troutsez sur l'emballage des films les oaleurs en DIN ou en ASA.
Tournez le disque aide=m6moi.re du film, jusqu'd ce que Ia oaleur en DIN ou ASA de ootre film appataisse dans Ie
ooyant (DIN > respectioement < ASA, du disque aide=mdmoire  (tfi'
                                                                                           ile telle sorte qu'en plus du &iffre DIN ou ASASi oous employez un film=couleur, r|glez le disque aide=m|moire (tg
il apparaisse dans le ooyant ile I'aide=mdmoire |galement la bande orange,


                                                                                                                      29
View original page 30Page 31 · Read text
Rotschlfige fUr bessere Bilder

 Holte dos Komero-Obiektiv immer souber und  reinige nur mit Obiekrvtuch. Verwende niemols gew6hnliche
 Stoffe, do sie dos Obiektiv verkrotzen k6nnen.
 Versuche nicht, Bilder ous geringerer Entfernung ols 'l Meter o,ufzunehmen, do diese unschorf werden. Sind
Nohaufnqhmen  erwUnschl, so muR mit Vorsotzlinsen georbeitet werden. Bei Geschwindigkeiten lcinger ols l/30
Sek. verwende stets Stotiv oder eine feste Unterloge. Die Komero besitzt Siotivgewinde.

 Unter normolen Lichtverhciltnissen isi die g0nstigste Komero-Einstellung'l:ll und 1/60 Sek. Filr schnell bewegte
 Obiekte verwende l/125 Sekunde. FOr sehr schnelle Bewegungen, wie im Sport usw. 1/250 Sekunde, dobei
 selbstverstcindlich gr6Bere Blende l:4 oder 1:2,8.

An triiben Togen 6ffne die Blende ouf I :8 oder 5,6.

An sehr hellen Togen mii Sonnenschein ouf Wosser oder Schnee schlieBe die Blende ouf 1:22.

Wenn Wert ouf besonders exokle Belichtung gelegt wird, wie bei Forboufnohmen, oder unler schwierigen  Licht-
oder Roumverhciltnissen georbeitet werden muB, empfiehlt sich die Verwendung eines elektrischen Belichtungs-            h{.
messers.
30                                                                                                                                                                                                                                  T.fi
View original page 31Page 32 · Read text
r
                                            www.butkus.us ItlG!a
 lr 1tt'     Hints for better picturee
I                                                                                                 clotJr. Never use or,dinary fabrics,      Always keep the camena lens clean and cl,ean Lt only wift a lens
      as they may scratch the lens.
     Do not attempt pictures eloser than 3,5 feet, as they will not be sharply focussed, unless portrait
      attachments are used. For speeds of longer than 1/30 sec. always use a tripod or a firm base. The
      camera has a socket for a tripod-bush.

      Under normal light conditions, 1:11 and l/60 sec. are the most suitable camera settings. Use 1/125 sec.
       for objects moving rapidly 1/250 sec. for very rapid movements, such as in sports, etc. whereby
      a larger aperture of 1:4 or 1:2,8 wiII naturally be needed.

     On dull days open the aperture to 1:8 or 1:5,6.
     On very bright days with sunshine on water or snow, close the aperture to 1:22. The exposure
      meters which can be obtained at your dealers are a good help.
         It is advisable to use a photo electric exposure meter, if you attaeh particular importance to       accurate lighting or when you are required to work under difficult light or room conditions.
                                                                                                                                                  3l


  l,_
View original page 32Page 33 · Read text
Quelques conseils pour mieux r6ussir

 Suroeillez que I'obiectif de ootre sppareil soit touiours propre  et nettoyez Ie au moyen d'un ilrap spCcial pour
 objectit's. N'employez iamais du tissus ordinaire, car oous risquez il'Cgratigner Ia lentille ile I'obiectif   .
N'essayez pas de prenilre des photos d des distances infdrieures d t mitre, car oos photos ne seront pas nettes.
DLsire des prises ile oues d courte distance, on prend des lentilles dc portrait.
Pour des oitesses il{passant tlio  ile seconde, utilisez touiours un pied ou bien mettez ootre appareil sur une base
immobile. Votre appareil est d'ailleurs muni d'un pas=de=ois pour pieil. Dans iles conilitions lumineuses normales,
la meilleure mise au point de I'appareil est t:tt  et tl6o seconde.

Pout photographier des sujets en mouoetnent rapide, prenez iln5 de seconde; pour des mouoements trds rapides, tels
que scines sportioes etc., prenez ilz5o de seconde et choisissez |oidemment un plus grand diaphragme r:4 ou r2,8. -Par temps sombre ouorez diaphragme d t:8 ou bien d t: 5,6.
Penilant iles iournCes tr\s claires, quand Ie soleil brille sur I'eau ou sur la neige, fermez Ie diaphragme iusqu,d f:zz.
Vous trouoez *oidemment dans Ie commerce il'excellents accessoires, c. d. d. Ies posem\tres optiques.
Quanil oous tenez I une exposition trds exacte, ou quanil oous deoez prendre des photos dans des conilitions  ile
Iumibe ou il'entourage ilAfaoorables,  iI conoient touiours i!'utiliser un posemltre d cellule photo,ilectilque.

32
View original page 33Related documents and language editions
From the M. Butkus archive. Original publisher and archive notices are retained.
Check the model and edition against your equipment.
PDF verified 2026-10-10.