Film cameras
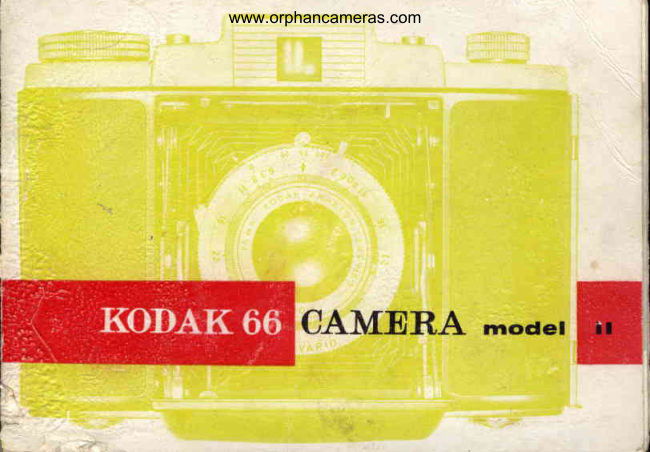
Kodak 66 Model II User manual
User manual for Kodak 66 Model II. 24 pages in English. Read the original PDF, download or print a copy without registration.
24 pagesEnglish2.8 MB PDF
Loading your manual…Open PDF directly
Document details
- Brand
- Kodak
- Model / document
- Kodak 66 Model II
- Document type
- User manual
- Language
- English
- Pages
- 24
- File size
- 2.8 MB
- Category
- Film cameras
- Document date
- Not specified in catalog
Search available document text
Find a term, then jump to its page in the original PDF. Image-only pages may not be searchable; check the PDF for exact wording and diagrams.
Page 4 · Read text
www.orphancameras.com
 filrns ror youF KODAI{66 CAMERA nrodat

      tl(odacolor'
                               Filrn         !  After  exposure,  this  film  is developed  ro
       give colour  negatives  which  are then  printed   to produce   large-size
       prints on paper. The speed of 'Kodacolor'   Film  is comparable  with
       that  of fine-grain  black-and-white    films;   it can be used, without   ligtrt
       'filters, either  in daylight oq with  clear flashbulbs as the only source
       oflight.   It has such a wide 6xposure latitude  that inexperienced users
        will  find no  difficuity  in achieving  a high proportion   of satisfactory
       colour  prints.H
      'Verichrome'  Pan Film. A general-purpose   film  for photography   under.
      almost   all  daylight  conditions   or by  artificial   light  -  either  flash  or
       flood.  High  speed,  great  exposure   latitude  and  balanced  colour
       sensitivity   ensure  the  highest   p'roportion    of  successful   pictures.
       Excellent  enlargements  can be made from  negatives on  this  filnr.

      .'Panatomic-X'   Film.  This  medium-speed   panchromatic     filnr  has an
      unusually   thin-coated   and  fine-grain   emulsion,  and   is capable   of                                                                                                                                    j'
      producing   negatives  of extreme  image  sharpness.  This  wilt  only  be                                                                                                                                                                                                                                                                      l l
      appreciated   to  the  full  u,hen  high  nragnification   enlargenrents  are                                                                                                                                                                                    !ilaia
     made.
       'Tri-X'   Film. A  very  iast  film  of balanced  sensitivity  and  capable  of    This is the size oJ'negative that this
     image  sharpness  quite  remarkable   in a film  of  this high  speed.  For    camera produces -  2f, inches square..
      use under  difficult  daylight  conditions,   or  by  Photoflood    light,  and     Black-and-n,hite prints can be mude
       for  flash photography    in  large  halls  or out-of-doors   at night.            to ary sze. Use only 120 size film.

          --#*:-'h'
View original page 4Page 6 · Read text
www.orphancameras.comriIIti
I   Pnactise     tlre  basic   operations       of  yorrn  rcaffreFa
lit   befcrne  you   lcrad  urith    lilrn
lI1l(
           Press the opnNrNG BUTToN - the camera springs ready for use.
         Move the cocKrNG LEVERawav from the flash socket -
              until  it locks.

          Hold the camera as shown, firmly but comfortably, with your
             finger over the sHurrER BUTToN.
          Look through the vmwFrNDER- keep it close to your eye so
             that you see all four sides of the front  of the finder.  It is the
             front that frames the view that the camera will take.
         To take a picture press the snurrER BUTToN down  - gently,
          so as not to jerk the camera.

            After taking a picture, wind the film on by turning the
         wrNDrNG KNoB (there is more about this on page 9, when
          you have a film in the camera).

         To close the camera, press down on the centre hinges of both
          srRurs and close the snssBoARD until  it latches.


                              "7'It
View original page 6Page 7 · Read text
www.orphancameras.com

Loading

Always load ancl unload with the camera and    Pull on the sPool- RELEAsEknob and give a
-fi1^ well shaded./i'om bright light.                 quarter-turn to hold it out. After exposing each
 Slicleout the LArcH in the bright-plated end of    film, the empty spool is left in this recess;take
the camera. Lift open the camera back.         the spool out.
View original page 7
Page 8 · Read text
www.orphancameras.com
3                              4
Turn  the wtNDrNG KNoB anti-clockwise and    Fit  the new 120 film  into  the empty  recess,
draw it outwards. Put the empty spool in this    with the tapered end of the coloured backing
recess,slipping one end on to the bearing pin   paper on top, and pointing towards the empty
opposite the knob. Pursh the knob  in while    spool. Press the spool down and  turn  the
turning. Make sure the key engages the slot in   spool release knob  until the spindle springs
the spool end.                                       into the end of the spool.
View original page 8
Page 9 · Read text
www.orphancameras.com

 t   :                                                                                  ffi
Break the paper seal, and draw the backing   Give the winding knob threefull turns, mak-
paper across to the empty spool. Thread the   ing sure the paper winds evenly betweenthe
tapered end as far as it  will go through the   flangesof the spool. When the backing paper
longer of the two slots in the spool until  it pro-    is wound to the position shown, seethat the                                                          'open',                                                         then closethe cameraandtrudes through the other side. Centre the paper   latch is still
carefully on the sPool.                          slide the latch in.
View original page 9
Page 10 · Read text
www.orphancameras.com

   7                                                After  taking  the L2th picture
    Keep on  turning  the  winding  knob  while     Turn the winding knob until the end of the
     watching the red window. You  will  first see a      film is well past the red window. In a shaded
    warning arrow pass                         the window, followed by     place, open the camera.Pull out the winding                    'Kodak'     the name of                 the           film. After this comes    knob. Presssidewayson the spool flangeaway                          'l'-     the figure    when  it is centred in the win-     from the winding knob, and keep the film
    dow, you can take the first picture.                  tightly wound as you lift it out. Fold under the


{
                                                       tapered end of the backing paper and seal it
                                                            with  the gummed  strip. Keep the fihn out of
                                                             bright  light  until  you hand   it  to a Kodak
                                                        dealer for developing and printing.
                                                                              9
View original page 10Page 11 · Read text
www.orphancameras.com

Se"tagrshtrt  settEngs    fop  a  sirrrple    tile

                                                                                  If you  want  to see some results from  this
                                         camera quickly, expose your  first film accord-
                                                    ing to the following  simple rules. They apply
                                                   only  if the sun is shining. Even when you have
                                 '15'              discovered all the possibilities of this versatile                  [.ensfocus                                         camera you will find that these settings will do
                                                       justice to an astonishingly high proportion  of
                                                  the subjects you wish to photograph.  Leave
                 Shutter speed'75'           your camera on these settings and you  are
                                              ready for  action when there is  little  time  to
                                                     think  !
                                          (
             vERTcHRoMEPAN aperture'1 1'

                 KoDAcoLoR aperture  '8'


                                                   Don't  forget z a-fter every snop, wind on the film
                                                               until the next number comes into the red window.
10
View original page 11Page 15 · Read text
www.orphancameras.com


The most successfulphotographs are the result
of careful consideration of lighting and ex-
posure. The tables later in this book suggest
settings which will ensure the correct level of
exposure for  nlost normal  subjects. But the
same exposure level can be obtained from
different combinations of aperture and shutter
speed.The most suitable combination depends
on what you are wishing to photograph.
  Setting the shutter one step higher (e.g.'25'
to'7S')requires the aperture lever to be moved
                  'stops' to a lower number (e.g.one-and-a-half
from '76' to between'8'and'11') to keep the
exposure constant.  A  fast-moving  subject  will need a higher                            I
speed than normal. This must be compen-sated for by setting a lower aperture number.                           I
  To bring near and far objects into sharp
focus, a  higher aperture number  may  be
needed. This will entail setting a lower speed.

t4
View original page 15Page 16 · Read text
www.orphancameras.com
 Fon  pleasing    pietuFers
 . Hold the camera still. Press the shuttbr button    " Watch the background  -  if it is not important,
  gently. Do  not  jerk  when you  release the   keep it plain. To bring your subject against the
  shutter. You can support the camera steadily    sky, hold the camera low, c.g. take the photo-
  on a tripod,  or on a firm  flat surface.           graph from a kneeling position.
 . Hold the camera straight and level : judge this    . Preferably,  take  fast-moving   subjects  ap-
  from the horizon or vertical buildings.          proaching  or receding, rather than passing
'Generally,  stand with the sun behind and to    close in front  of you  - unless you follow  the
  one side of the camera for good modelling.  If   movement by swinging the camera.
  the sun is directly behind the camera, the even                                                                                         . Wind  on  to the next  film  number  as soon  lighting tends to flatten contours, and dazzle                                             as you have taken a picture, but do not cock  the subject, while your shadow may be cast on                                                  the shutter  until  you want  to take another  the foreground  of the picture.                                                        picture.
' Make sure that the sun never shines directly on
                                         'against    . Keep the lens clear of dust, finger-prints  or  to the lens. A lens hood is essential for
 the light' photographs.                          spray;  if necessary, gently wipe with a camel-
. With distant scenes,include a nearby figure or    hair brush or a clean, soft cloth. Never use
 some object in order to give scale and depth to    silicone-treated lens cleaning tissues. Dust out
 the picture.                                       the inside of the camera regularly.
" With  close-ups, keep the subject away frorn     . Keep the camera protected, yet ready for use,
 the top of the viewfinder, or you may cut off     in the specially designed carrying case that
 some of the desired picture.                          yollr Kodak  dealer can show you.

                                                                                                       1.5
View original page 16Page 18 · Read text
www.orphancameras.com
PlrotogFaplry       witlr    flaslr
After  the sun goes down,  or   if  the weather
keeps you indoors, and when at parties and
dances - you can keep your  camera  in use
                          'Kodak'with the help of flash. A          Flasholder
Model   II  can be  fitted  to your  camera by
means of a Flasholder Bracket and Flasholder
Cable Type  J. Get these from  your Kodak
dealer, who  will  also supply  batteries  ffid
flashbulbs.A simple adapter is also
for  fitting  the economical  ca,
specified.
  The shutterof this camera
is synchronized  with the fla
1, PF5 and No. 5 bulbs. Set
           '25'only  to     when taking
with flashbulbs.With electro
shutter speed can be empl
ate lens aperturesconsult t
the particular flashgun.


                                                                                                                                    t 7
View original page 18Page 19 · Read text
www.orphancameras.com

 i,?u*,gs$rEndctot's    after    dar.k
Use clear flashbulbs for black-and-white and    In a srnall room with light walls you can use
'Kodacolor'              films indoors. Set the shutter to    the next lens aperture lower down the table.
'25',      to use  all the flash. The lens aperture     Bounced Flash gives softer, more  natural
 should be varied according to the distance of    results, without the hard shadows that direct
 the flash from the subject.                        flash often produces. Detach the Flasholder
   The table opposite gives all the camera set-   from the camera (leave the cable connected),
 ting information you need to get good results.   then  direct the Flasholder  at a nearby light
 Three films and the two most popular sizes of    wall, or a large white card, or at the ceiling.
 flashbulbs are listed. The table assumes nor-   The lens should be wider open by 2-3 steps
 mal subjects in average sized rooms.             higher up in the table.
 Out of doors at night,
 or in large rooms, and
 for darker than usual
 subjects or surround-
 ings,  preferably  use
 the next lens aperture
 higher up in the table.


 1 8
View original page 19
Page 21 · Read text
www.orphancameras.com

Fill:ilr   flaslr   uvith  sunltglrt
Direct sunlight usually gives harsh shadows,   At 6..10ft. in bright sun- shutter set at 25
          people                       screw                            up their                 tend                          to    mostand                                     eyes  PFI                                       197or   'Kodacolor'         lens tr6                                    round                          turn                             the subject                     it. You                 can      facingwhen                                 No.1B
so that the sun is at the side and no longer
                                         PFI or      'Panatomic-X'                                              l                                                                                                                                                                                                                                                                                     7 t/ ]dazzling  Then,  to  brighten  the heavy shad-                                       No.1ows, use the fill-in flash method. Use a PFI  or
                                                        or      'Verichromeo                                         films, but   PFl                   for                   black-and-white      flashbulbNo. 1                                                            Pan         3 1 +                                  'Kodacolor'                                       No.1              PFI         bulbs     blue                 197or lB foronly
film. Set the shutter to'25'.                                 *Preferably   with a'Kodisk'   Cloud  Filter  over the lens
  The  camera  with  Flasholder  should  be
between 6 and 10 feet from your subject de-
pending on how bright you wish the shadows
to be. Use the table below. The nearer you
are, the bri*ehter will be the shadow.
  For distances 3.5-6 feet, drape one thickness
of a white handkerchief over the Flasholder.
   'Tri-X'          Film  is not included as it would be
                                '25'over-exposed  if  used on       in bright  sun.
With  electronic  flash, however,  there  is no                                                'Tri-X'limitation upon the shutter speed, and
Film can then be used with a shutter speed of
'200'                     '16'.     and aperture of
20                                                               tr
View original page 21Page 22 · Read text
www.orphancameras.com

Fttotoflosd        ErBd@c}t-s
                                                                               'Kodaflector'  Assem-For portraiture, table-top work and indoor    instruction  book). The
subjectsnot likely to move rapidly, the use of    bly  allows more  flexible  lighting  set-ups.  It
Photoflood lamps will allow greater control   consists of two lamps on an adjustable stand
over lighting than with  flash. Moreover,  which can be raised to 7 feet or lowered almost
Photofloodlampswill enableyou to judge the    to the ground. Use the Assembly as the main
effectbeforeexposure.                             lighting (above and to one side of the camera)
   It is possibleto use one No.l Photoflood  and the Standette close to the camera to relieve
lamp in a'Kodaflector' Standetteand a white   the shadows. This is the arrangement assumed
card reflector (explainedin the'Kodaflector'    in the table below.

                                                 Lamp-to-subject  distance in feet

                                                                shutter       /r,ll- {1,3   t*         t i i

                                               'Verichrome'\  25             4    3 2
                                       Pan Film       [  75             2.5
                                           'Tri-X'Film   25           6   4.s 3
                                                  75           3.5 2.5
View original page 22Page 24 · Read text
www.orphancameras.com
assunringfront lighting of the subject (sun behind camera)
for use frorn two hours after sunrise to two hours before sunset
winter settings in the table assume no snow is present

                            Sfrutter     Summerand in tropics     In winter months
                                       isetting         Bright     Hazy       ,    Bright    HazY
                                  sun      sun        sun      sun
                                  0rAverage subject in               -;/5
normal surroundings   2,5

Light coloursand                  75             flnsurroundings

Rich colours and                           -frfr                  25dark surroundings

Side or back lighting of close-up subjects -in  bri    sun * set shutter to next smaller number,
or set lens aperture to one or two numbers smalls'
Snow scenesin winter can be exposed as light subjects in summer.
View original page 24From the M. Butkus archive. Original publisher and archive notices are retained.
Check the model and edition against your equipment.
PDF verified 2026-10-10.