Film cameras
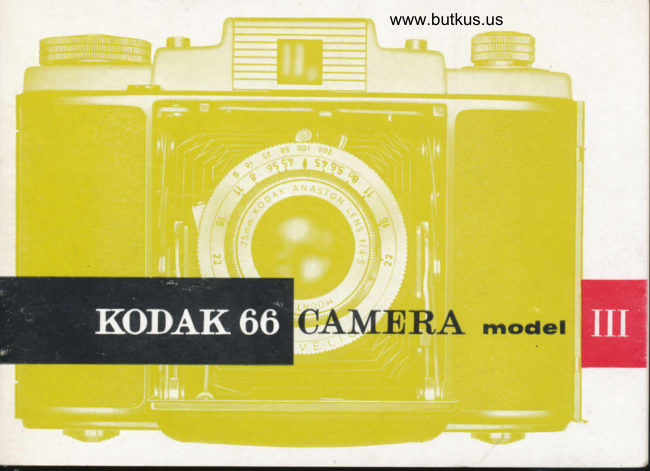
Kodak 66 Model III User manual
User manual for Kodak 66 Model III. 24 pages in English. Read the original PDF, download or print a copy without registration.
24 pagesEnglish5.9 MB PDF
Loading your manual…Open PDF directly
Document details
- Brand
- Kodak
- Model / document
- Kodak 66 Model III
- Document type
- User manual
- Language
- English
- Pages
- 24
- File size
- 5.9 MB
- Category
- Film cameras
- Document date
- Not specified in catalog
Search available document text
Find a term, then jump to its page in the original PDF. Image-only pages may not be searchable; check the PDF for exact wording and diagrams.
Page 3 · Read text
www.butkus.us
filrns ror youF KODAK 66 CAI,{ERA rtrod,                                                                                 general-purpose=! film  'Kodacolor' Film.  After exposure, this    'Verichrome' Pan Film. A  film is developed to give colour negatives    for photography under almost all daylight con-  which are then printed to produce large-size    ditions or by artificial light - ejther flash or
   prints on paper. The speed of 'Kodacolor'   balancedflood. Highcolourspeed,sensitivitygreat exposureensure latitudethe highestand  Film is comparable with that of fine-grain    proportion of successlul pictures. Excellent   black-and-white  films:  it can be used. without    en.largements can be made from negatives on   light filters, either in daylight or with clear    this film.
   flashbulbs as the only source of light. It has
  such a wide exposure latitude that inex-
  perienced users will find no difficulty in   'Panatomic-X' Film. This medium-speed  pan-
  achieving a high proportion of satisfactory   chromatic film has an unusually thin-coated and
  colour prints.                                         fine-grain emulsion, and is capable of producing
  rEktachrorne'                                  negatives of extreme image sharpness. Thia              Daylight Filrn.  This is a    will only be appreciated to the full when high  daylight type film givin-c direct colour trans-    magnification enlargements are made.  parencies. It has the same speed as 'Koda-
  color'Frlnr when used in daylight. The main
  difference in use is that for flash photography    'Tri-X' Film. A very fast film of balanced   blLre flashbulbs must be used indoors as weil    sensitivity and capable of image sharpness
  as outdoors. For consistent results carefully    quite remarkable in a film of this hieh sneed.
  follow the exposure table packed with the film   For use under difficult lighting conditi-ons,' par-                                                                                       Instantaneous                                                                           artificial                                                     ticularly in                                                                       light.  or given on the inside back cover, or else use a   exposures                                                            qre                                                                   possible by                                                                           ordinary                                                                                domestic or  reliable exposure meter.                            industrial lighting at apertures of f|5.6 or J'14.5.
                lhe slze_of negative that this camera procruces is 2f, inches square.
              Black-and-u,hite prints can be mqde to any size. use oniy 120 size film.
View original page 3Page 6 · Read text
www.butkus.us
Get to knour  yorrl. carrr(erra and  its controls
before you load  witlr  filrn.

      Press the oprNrNc BUTToN - the camera springs ready for use.
    Move the cocxrNc LEvER in the direction of the cable
      release socket - until it locks.
     Hold the camera as shown, firmly but comfortably, with your
      finger over the sHUTTER BUTToN.
    Look through the vrEwnNDER - keep it close to your eye so that
     you see all four sides of the front of the finder. It is the front that
     frames the view that the camera will take.
    To take a picture press the suurrER BUrroN right down -      gently, so as not to jerk the camera (the shutter button will not
     go down if the red end of the BUrroN RELEASE is projecting.
     This is a warning that the film needs winding on, as follows).
     (See also page 13.)
     After taking a picture, wind the film on by turning the
    wrNDrNG KNoB (there is more about this on page 9, when
    you have a film in the camera).
     Winding on also frees the shutter release for the next picture.
    To close the camera, press down on the centre hinges of both
     srRUTs and close the baseboard until it latches.
View original page 6Page 7 · Read text
f ilrn into yor'rr GarTreraLoading a lz-o-
I                     ?
Always loacl and rurloacl x,ith the cantera and   Pull on the spoor- RELEASE knob and give a
film well shaded fi'ont bright lisht.                 quarter-turn to hold it out. Afterexposingeach
 Slide out the LArcH in the bright-plated end of    film, the empty spool is left in this recess; take
the camera. Lift open the camera back.          the spool out.
                                                                       \
View original page 7Page 8 · Read text
www.butkus.us

..;                                                             dB,
Turn the wrNorN(i KNot| anti-clockwise and   Check whether the rrllr REMTNDER is set for
draw it outwards. Put the entpty spool in this   the filnr you are going to use. Only when the
recess, slipping one end on to the bearing pin   spool release knob is out can the renrinder
opposite the knob. Push the knob in while    disc be turned to bring the name of the filnt
turning. Make sure the key engages the slot in    against the dianrond pointer on the top of'
the spool end.                               the cantera.
View original page 8
Page 9 · Read text
Fit the new 120 filnr into the errpty recess,   Break the seal and draw the backing paper
with the tapered end of the coloured backing    across to the empty spool. Thread the tapered
paper on top, and pointing towards the empty   end through the longer of the two slots in the
spool. Press the spool down and turn the spool    spool. Centre the paper between the flanges.
release knob until the spindle springs into the   Give the wtNDlNG KNoB three .full turns,
end of the spool.                           making sure the paper winds evenly.


                                                                 www.butkus.us
View original page 9Page 10 · Read text
www.butkus.us

                                           After taking the 12th picture
See that the latch is still 'open'. Close the    Turn the winding knob until the end of the
canlera ancl slide the latch in. Wind the filrn      film is well past the red window. In a shaded
and watch the recl window. Afier a warning     place, open the camera. pull out the winding
arrow has passecl. the nante ol- the filrn will be     knob. Press sideways on the spool flange u*oy
seen. Then contes figurc  '|  ' - and when it is    from the winding knob, and keep the film
centrecl, you can take the first pricturc.               tightly wound as you tift it our. Fold under the
 €9ll
  5'o
 dg
  clo
 99


                                               tapered end of the backing paper and seal itA                                          with the gummed strip. Keep the film out of
                                                      bright light untilyou hand it to a Kodak dealer A                                                       for developing and printing.
                                                                                           9
View original page 10Page 12 · Read text
www.butkus.us
   Focus for. shan;r pictrrres
     With the lens locused at '.15', as recommended   according to the lens aperture setting.
      for snapshots, the sharpest part of a picture    The scales on the cantera show you the
       will be that showing a subject that was  | 5 leet   depth of field for any camera setting. Having
     from the camera. To be sure of the sharpest    set the focus distance, look on both sides of
      picture of any subject, first estimate irs dis-   the diamond pointer for the numbers that
t,    tance in feet lrom the camera, and turn the   correspond  to the aperture setting; these num-
      lens focus scale to the corresponding figure.      bers indicate, on the focus scale, the depth of
        But, in practice, a sharp enough picture will    field. As an example, in the picture below,
     be made of objects some distance nearer and   with the 'snapshot setting' (t5  leet and
      farther than the point for which the lens is   aperture '16'), the depth of field is shown
     focused. The range of distances 'in focus' is   opposite the numbers't6'and extends from
       called depth offielr/. This'field'varies  in depth   about 8 feet to the lar distance 1oo).
     according to the distance focused upon, and
View original page 12Page 13 · Read text
Lens a;rentrrnes and slrr.rtten speeds
                                          The light necessary for taking photographs
                                                      will vary in brightness according to the
                                                     weather, time of day and season. Subjects
                                                          themselves vary a lot in brightness. These vari-
                                                          ations have to be allowed for in setting the
                                                 camera controls ifyou want perfectly exposed
                                                             pictures. Both the lens aperture and shutter
                                                      speed controls have an effect upon the expo-
                                                      sure. Settings suitable for various circum-
www.butkus.us                                              stances are given in tables later in the book.
                                                      In poor light you may have to move the
                                                    LENS APERTUR.E pointer to '4.5', to set the aper-
                                                        ture wide open (just as the iris of your eye
                                                  opens in dim lieht). In bright light, or to get a
                                                             large depth offield, you might use the'16'or
                                                                '22' setting. Settings that give half or double
                                                               the exposure oftheir neighbours are said to be
                                                                                  'l stop'.apart. You car? set the aperture any-
                                                  where between the marked settings. Aperture
                                              numbers are usually written with an 7' in
                                                               front: fl8, fll6, etc., though the /  is not uscd
                                              on the camera or in the tables in this manual.                             Note: Set norch to opeilure mark
View original page 13Page 14 · Read text
www.butkus.us


                                   NOTE. You must press the shutter button
                                                          right down                                                                   the button release to operate                                                                              -for                                                       correctly. lfthe shutter button locks without
                                           the shutter operating hold in the button
                                                       release whilst making another attempt with-
                                                out wrndrng-on.
                                         The expo,sure times given by each speed
                                                         setting are shown in the diagram. Most Com-
                                             monly used is '50'. In bright light you can use
                                                       '100' or '200'-and be more sure of sharp                                                   pictures                                                    moving                                                                       subjects.                                                 of                                                                     In poor light                 tl                                                                                                        ,10'.                                                      need                                         may                                                                   even                                                                                      '25', or        :Oat            m'  +  *   Ssecond   briefI imc    you                                                        Note lhat high scene brightness is allowed for by seiling
                                              a high nmber for aperture and speed. Iaw brightness    Turn the sHUrrER spEED ring to bring the     requiles lov setting numbers.
     desired 'speed' opposite the pointer. Do not    _. Ifyou have no flash equipment in very bad
     set between the marked speeds. Wind the    light you will need to set the shutter to 'B; for aI   shutter by pushing the cocKrNG LEVER across    'time'exposure. At 'B'and '10', the camera and
      until it locks. Press the SHUTTER rurror.r right   thesubjectmust bestationary. The camera can
    down to take the picture. Ifthe red signal on   be held rigidly on a tripod screwed into theI    the BUrroN RELEASB is visible, immediately   bush under thecamera, ahd theshutterreleased                                                 without a tremor by means of a cable release.
    below the shutter button, the button will not   This should have a standard tapered thread,     operate - this warns you to wruo-ox to the   which will screw into the crnr,rnELEASB socKBT
     next numbr in the red window.                provided.
                                                                                                        l3
View original page 14Page 15 · Read text
i.r , ,.'  j   :,- -.. ^).)
              t1,-tr:
The nrost successfut photographs are the result
of careful consideration of lighting and ex-
posure. The tables later in this book suggest
lettings which will ensure the correct level of
exposure for most normal subjects. But the
same exposure level can be obtained from
different combinations of aperture and shutter
speed. The most suitable combination at any
one time depends on what you are wishing to
photograph.- A fast-moving subject will need a higher
speed setting than a normal subject. This must
be compensated for by setting a low'er aperture
number.
  To bring near and far objects into sharp
focus, a higher aperture number may be
needed. This will entail setting c, lov'er shutter
speed.
  Rementber, a full 'stop'change in aperture
balances a halving or doubling of shutter
speed - in a see-saw manner!
t4
View original page 15Page 16 · Read text
www.butkus.us
  For pleasing plctrrnes
 p o Hold the camera still. Do not jerk it when you   some of the desired picture.
 I   release the shutter. You can support the o Watch the background -  if it is not important, I    camera steadily on a tripod, or on a firm flat   keep it plain. To bring your subject against
 I   surface.                                      the sky, hold the camera low, e.g. take the
r oHold the camera straight and level-judge   photograph from a kneeling position.
      this from the horizon or vertical buildings.   o Preferably, take fast-moving subjects ap-
 r o Generally, stand with the sun behind and to   proaching or receding, rather than passing
    one side of the camera for good modelling.    close in front of you - unless you follow the
      If the sun is directly behind the camera, the   movement by swinging the camera.
    even lighting tends to flatten contours, and o Wind on to the next film number as soon as
      dazzle the subject, while your shadow may be   you have taken a picture, but do not cock the
     cast on the foreground of the picture.            shutter until you want to take another picture.
                          does not shine directly o Keep the lens clear of dust, finger-prints or, o Make sure that the sun
 i   on to the lens. A lens hood is essential for    spray;  if necessary, gently wipe with a camel- I    'against the light' photographs.                  hair brush or a clean, soft cloth. Never use
                  scenes, include a nearby figure or    silicone-treated lens cleaners. Dust out the I o With distant    some object in order to give scale and depth to    inside of the camera regularly.{
     the picture.                          o Keep the camera protected, yet ready for use,
 , r With close-ups, keep the subject away from    in the specially designed carrying case that I   the top of the viewfinder, or you may cut off   your Kodak dealer can show you.

  II                                                                                                  l5
  i
View original page 16Page 17 · Read text
Lens accessories
A range of simple accessories in the 'Kodisk'    against it. Your dealer will tell you the uses of
series is available to help to improve your   other'Kodisk' Filters.
photographs. The size 320 accessories may be    Close-up lens: Your camera already focuses as
fitted singly, or in any combination, on to the    close as 3l feet; add a'Kodisk'Close-up Lens
lens focus ring.                          and you will be able to photograph objects
Filters:' Kodacoktr' and'Ektachrome' Films:    between 22 and 4O inches from the camera,
With these films filters are unnecessary for    e.g. for table-top models or flower studies.
daylight or flashbulb photography. Do not use    L,ens hood: It is important to prevent the sun
any filters other than those recommended  in   from shining on the lens, so, when you are tak-
film instructions.                                 ing against-the-light shots (particularly when
Black-and-white  -film: A 'Kodisk'Cloud  Fil-    using a filter or close-up lens) fit a lens hood.
ter slightly darkens the blue of the sky and    ll/hen ordet'ing 'Kodisk' filters, close-up lens,
so makes clouds and other subiects stand out   or lens hood, ask.for size 320.

                                sf
  f,
View original page 17Page 18 · Read text
www.butkus.us
Photogralrhy with flaslr
When there is no adequate natural light, keep
your camera in use with the help of 'flash'. Fit
a'Kodak'Flasholder Model II by means of a
Flasholder Bracket and Flasholder Cable
Type J. Your Kodak dealer will supply these,
and also batteries and flashbulbs. An adapter
is also needed for fitting capless flashbulbs.
  This camera, when set at '10' or'25', is syn-
chronized for PFl, No. l, PF5 and No. 5
bulbs. With electronic flashguns, any shut{pr}i
;[:eii:                                              ] "'   If a bulb         lliil','":ffifails to fire, ilwheqthe           l#pgr*-*shuttdf-ilfi
released. there is no need
posure. The shutter button
a further attempt on the same
holding in the sHUrrER B
pressing the shutter button.


                                                                                             l7
View original page 18Page 19 · Read text
Flash indcDCDFs after dank
Use clear flashbulbs for black-and-white and    In a small room with light walls you can use    ,
'Kodacolor' films indoors but only 6/ae bulbs    the next lens aperture lower down the table.
for'Ektachrome' Film (Daylight Type1. Set     Bounced Flash gives softer, more natural
the shutter to '25', to use all the flash. The    results, without the hard shadows that direct
lens aperture should be varied according to    flash often produces. Detach the Flasholder
the distance of the flash from the subject.      from the camera (leave the cable connected),
  The table opposite gives all the camera   then direct the Flasholder at a nearby light
setting information you need to get good    wall. or a large white card, or at the ceiling.
results. Three films and the two most popular   The lens should be wider open by 2-3 steps
sizes of flashbulbs are listed. The tableassumes   higher up on the table.
nornral subjects in
average sized rooms.
 Out of doors at night,
or in large rooms, and
for darker than usual
subjects or surround-
ings, preferably use
the next lens aperture
higher up in the table.
View original page 19
Page 20 · Read text
www.butkus.us
Dinect llash
Set shutter to'25'.
In the appropriate film and flashbulb column find the most suitable flash distance.
Then read off the lens aperture on the left of the table.
                                                         tVerichromet                                 'Ektachrome'
               'Kodacolort          Daylight          Pan                  'Tri-Xt
Lens      PFI  PFs       PFll97 PF5l97    PFI   PF5     PFI  PFs
aperture     No.l  No.5      No,lB No.58    No.1 No. 5    No.1 No.5
 4.5           l3ft    20ft*                  I 1ft   18ft*         lSft*
 5.6         lOfr   16ft*       9ft    15ft                    I 5ft
             7ft   l2ft        6ft    10ft           1Oft          I 8ft*         16ft*
 ll            5ft     8ft        4.5ft  7ft            7ft     13ft            1 lft    20ft*
 t6           3.5ft  6ft        3ft     5ft            5ft      9ft            8ft     l4ft
                          4ft                     3.5ft      3.5ft  6.5ft          6ft     1oft
*This      table isfor normol subjects in average sized rooms;.for other conditions see opposite page.
 The distances for'Kodacolor' can be used for'Panatomic-X'  Film.
                                                                                             t9
View original page 20Page 21 · Read text
tr  i I E - i  : r    ii i ar :s; ['.r                                            rJL.]i J'i ] I    : - Lt r'? ! i g  I t !
Direct sunlight usually gives harsh                                                25
and most people tend to screw up their eyes
when facing  it. You can turn the subject round   No.lB       'Ektachrome'so that the sun is at the side and no longer
dazzling. Then, to brighten the heavy shad-   PFI or       'Panatomic-X'                                            No.lows. use the fill-in flash method. Use a PFI or
No. I flashbulb for black-and-white films but   PFI or       'Verichrome'Panonly ltlue bulbs PFI 197 and  l B for'Kodacolor'   No.l
and'Ektachronle'  films. Set the shutter to'25'.     *Preferably with a'Kodisk' Cloud Filter ovcr the lens.
  The camera with Flasholder should be be-
tween 6 and l0 feet fronr your subject depend-
ing on how bright you wish the shadows to be.
Use the table alongside. The nearer you are,
the brighter will be the shadow.
For distances 3.5 - 6 feet, drape one thickness
of a white handkerchief over the Flasholder.
  'Tri-X'Film  is not included as it would be
over-exposed if used on'25' sec. in bright sun.
      electronic                     however,With                  flash,                               there                                          is no   t.r                            speed,         upon the                    shutterlimitation                                and'Tri-X'                                                   l.rFilm can then be used with a shutter speed of
'200'and aperture of '16'.
20
View original page 21Page 22 · Read text
www.butkus.us
Photollood  indoons
For portraiture, table-top work and indoor    instruction book let). The'Kodafl ector' Assem-
subjects not likely to move rapidly, the use of    bly allows more flexible lightingset ups. It con-
Photoffood lamps will allow greater control    sists of two lamps on an adjustable stand
over lighting than with flash. Moreover, Photo-   wbich can be raised to 7 feet or lowered almost
flood lamps willenable you to judge the effect    to the ground. Use the Assembly as the main
before exposure.                                    lighting (above and to one side of the camera)
   It is possible to use one No. I Photoflood   and the Standette close to the camera to relieve
lamp in a 'Kodaflector' Standette and a white    the shadows. This is the arrangement assumed
card reflector (as explained in the'Kodaflector'    in the table below.

                                              Film and            Lantp-to-subiect
                                                     shutter speed         di.stance in feet
                                                                          lens 4.5 5.6   rJ   ll    16
                                              'verichronr"'lgt    r08643                                  76432                                       Pan Film                                                          fi     5432
                                                       10t    1513  9  7   5
                                           'Iri-X'Film 25     f08643
                                                    50     76432

                                                          tsupport camera firmly
View original page 22Page 23 · Read text
Shutter and lens settings for black-and-white daylight photography
   Assuming front lighting of the subject (sun behind camera)
   For use from one hour after sunrise to one hour before sunset
    Winter settings in the table assume no snow is present
                             Shutter settings : black figures  l,ctrt strtirr<,  l,lrrr' ligtl,
                               Bright sun    Hazy sun     Cloudy bright Dull or shaded
                       sharpshadows softshadows noshadows
                                                                           flffi+n:[rr-
   'Verichrome' Pan  f00 16   f00   l I    100 tt     100 S.tr
  'Tri-X'         200 16   200  I I   2N  ll     100  ll
't.  'Panatomic-X'  50  t I    50 lt    50 5.6   50 {.5
  'Verichrome'Pan     100   fl     r00 8       100   5.6      100   J.5
   'Tri-X'             200   tl        20/.u.8       200     l.  fi      100    5.rr
   'Panatomic-X'         50     tt     50 s.6      50  {.5      25   t.5
    Side or back lighting of close-up subjects - in bright sun - set the shutter or lens to the next
   one or two numbers smaller.
    Early or late (within one hour of sunrise or sunset) set the shutter or the lens aperture to the
    next smaller number.
   Snow scenes in winter can be exposed as summer subjects.
   22
View original page 23From the M. Butkus archive. Original publisher and archive notices are retained.
Check the model and edition against your equipment.
PDF verified 2026-10-10.