Film cameras
Kodak Bantam User manual
User manual for Kodak Bantam. 8 pages in English. Read the original PDF, download or print a copy without registration.
8 pagesEnglish0.8 MB PDF
Loading your manual…Open PDF directly
Document details
- Brand
- Kodak
- Model / document
- Kodak Bantam
- Document type
- User manual
- Language
- English
- Pages
- 8
- File size
- 0.8 MB
- Category
- Film cameras
- Document date
- Not specified in catalog
Search available document text
Find a term, then jump to its page in the original PDF. Image-only pages may not be searchable; check the PDF for exact wording and diagrams.
Page 1 · Read text
IMPORTANT
  This manual should be read thor-
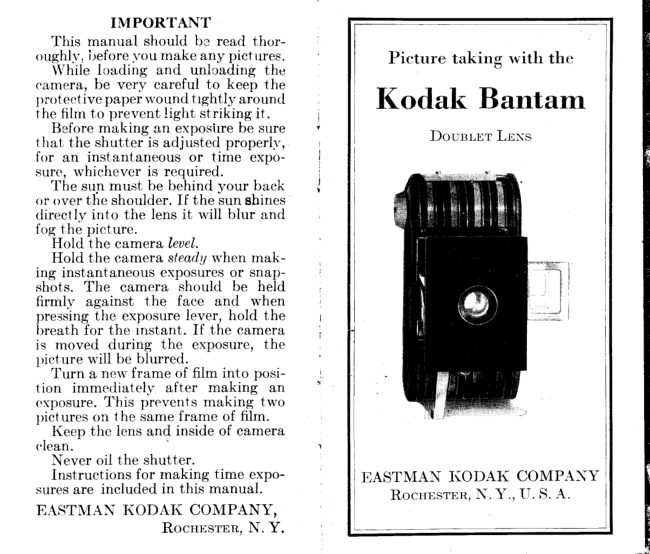
oughlv. i,reforevou make any pictures.              Picture  taking  with the
  While loading and unlcading the
eamera, be very careful to keep the
proteetive paper rvound trghtly arouncl                         I(odak Bantamthe film to prevent light striking it.
  Before making a,n expostrre be sure                                                DoueLEr Lrixsthat the shutter is adjusted properl.r.,
for an instantaneous or time expo-
sure, u'hichever is required.
  The sun must be behind your back                         "sunor over the shoulder. If the    shines
clirectlv into the lens it will blur and
fog the picture.
  Hold the camera leuel.
  Hold the camera steadryrvhen mak-
ing instantaneous exposuresor snap-
shots. The camera should be held
firmly  against  the  face and when
pressing the exposure lever, hold the
breath for the instant. If the camera
is moved during  the exposure, the
uicture-         will be blurred.
  Turn a new frame of film into posi-
tion  immecliatel.v aft.er making  an
oxposure. This prevents making two
uietures^      on the same frame of film.
  Keep the lens and inside of camera
clean.
  Never oil the shutter.
  Instructions for making time expo-       EASTMAN I(ODAK COMPANY
sures are included in this manual.                                               RocnpstnR,  N. Y.,  lI. S. A.
EASTMAN KODAK  COMPANY,
                 Rocnrsrnn, N. Y.
View original page 1Page 3 · Read text
and be sure that the paper is startecl         OpBxrxc THE Fnoxr
 straight. Shoulcl it be irnpossible to
 turn  the  u'inrling knob, press the           Press the button 6, page 2, on tht-.
 Iever 9, page ji, trl release.it.                    front of the Kodak. The front plate 3,
                                       page 2, rvill automatieally spring into
  .   Replacethei back, fitting the flanges          position. As the spring is very strong
 into the grooves provided                                for them.                  it is advisable to check it brr holdins                                                      ' I h e
                        b u t t o n  1 0          the thumb  lightlv against the frnnt.
                 must be next to
                    the rvinding knolr
                      8. Pressthe back         Marlxc  THE ExposuR.ES
                  so that the flanses      INstaxrANEous ExposuRES                               fit into  their  re-
Non'p.sht heknurl,ltfiit iJ?,"-if;3li?i         camera,The I(odaktherefore,Bantamsubjectsis a fixedthatfocusarc
 of tlie Iiodak to LOCI{ (in the diree-         about six feet and farther from the
 tion of the ar.r.ow-),locking the baek.        camera u'ill be sharp. For subjects
                                                 that are closer to the camera ihan
  Ttun  thc n'indins knob B until   it          about  six feet, use the l(odak   tr'or-
locks. The first frarnc of film is nou'            trait Attachment, seepage 13.in position.            _After nraking the expo-
srrre,press the button 10 I'hile turn-            Slide B, page 2, controlsthc shtrtter
ing the u.indrng knolt altclut a  iralf           for time and instantaneousor snap-
turn; thert reka*e thc btdton 10 atul         shot exposures. For  instantaneous
contintteu,iruling urLtil tlLe l;rtob ktcks.        exposures or  snapshots this  slide'fhe
     rvinding kirob  is lockecl ever\.          rnust be pushed all the  .n'a.vin;   it
tirne a new franie of film  is g'ound         must be drau'n out as far as it  ivill
into pclsition for exl)osrlre.Tire suc-        come, for time exposures.
eessiveframes of filrn u-ill be brought
to po.sitionautornaticall-vbv the per-          The shutter of the camera is re-
forations on the edge of tne film.but          leased by pushing the exposure lever
the green rvindorvin the baek of'the          A, page 2, slou'l-v,as far as it u'ill go.
camera can be u'atcheti for checking         This makes the exposure. The leier
the nrrmller of exlx)srlresthat have          automatieally returns to  its original
lreen rn:rrle.                                     position rvhen it is released.
View original page 3Page 4 · Read text
Do  rrrfi .jtrtr', the ltrer QS Qrtll lttot'('-             TnB FrxoBn
rtterrt of  tite c(tttterQ,ut the irtstartt rt.l'
,,.,J7r,rrrtr:re,uill  blur  the Ticture.                   The finder 5, page 2, is brought into
                                                   position by  lifting  the  front  frame.
                                            Hold  the camera .w'ith the  sisht or
                                                  rear frame as close to the e5reas pos-
                                                    sible with the camera held aeainst the
                                                  face, and frame the picture within the
                                                     front frame of the finder. All vertieal
                                                    lines of the subject should be kept
                                                      parallel with the vertical sides of the
                                                       front frame, when holding the camera
                                                     either  in  the  vertieal  or horizontal
                                                     position.  II old the camera steo,dy.
                                          The I(odak must be held level. If                ,\,,                                                                ail the subject cannot be included in
                                                the finder.without tilting the lens up-
                                                    u'ards, move backwards until  it  is ill
  q                                         ineludedIf the subjectwith the iscamera,belowheldthe leuel.normal
   w'                                            f_eiqh!,like asmall child or a dog, the
                                                  Iiodak should be held dou'n levei-ivith
                                               the center of the subject.
                                     Rpnrovrr{crHE Fnrr   \\-hen making instantaneous exPO-
srlresor snayrslirits,'opetrthe sultjeet shoulcl              After the eiehth frame of fiim has
 lle in the liroad,       sunliglit, but           Ireenexposed,lhe button 10, page -1,
 thc camera must ndt. The sun sliouid           rnust be pressed while the  ri'inding
be behind  \'our  track or over  the         knob 8 is being turned.
shoulder. If  it shines rlireetlr. into the            Give the winding knob two com-
 It'rrsit  u'ill blur antl fog the llicture.              plete turns- after the end of the paper
                                         has passed the green window;^t6en
                                       open the back of the Kodak in a sub-
                                       dued light. Unless the film and pro-
View original page 4Page 5 · Read text
I
  The erceptionallg f,ne gruin oJ Koitak  llanutomic  Film  insures satisfactorg enlarge-
ntents oJ almost any size.
  Pri,nts oJ the stanilaril size shawn abouean'ebeing offered,at reasonable prices, and it is
recommend,eilthatonly prints oJ th'is size orlu"gerbe ordered,from Kodak Banta'rn negatiues.
View original page 5
Page 6 · Read text
tective l)aper are comltletel.r'u.ound           Place tlre liotlak   in srrr:h a, position
 onto the.spool ltefore the back of the           that  the  firitier  u'ill  include   tlte  vieu'
 carnera is removecl, the self-sealinq
 flanges of the spcloi rnill not be auto-
 matic.  Remove tlie spool of film by graslr-           n
 ing the flange opposite the windinq
 knob and drarving the spool au'ay'
 from the post of the windirig knob.
   Irnportant:      If   the  above  pro-
 cedure is follou'ed, the spool of film,          clesired. The above diagram  shou's
 n'hen removeC from the camera, will         three positions for  the camera.  It
 be fuliy' wound, and sealed by  the         shouldliot be pointed at a window as
 special'spring flanges of the  spool.         the glare of light u'ill bltrr the picture.
The protective paper should not be                 lf  aii the u'indo\ rs cannot be avoided,
 puilecl tight or sealed l.ith  a sticker          clrarvthe shadesof those within range
or rubber bancl.                                 of the lens.
   Irnportant:    Filrn  should be de-            \\then rnaking a  vertical  picturc,
veloped as soon as possible after ex-          rrsetlre'fhestandard 2, ytage2, for a sup-
I)osure.The quaiit-v of the image on           nort.     carnera must rtot lte more
all sensitized products is retained by         ihan two  or  tlrree inches from the
prompt development after exposure.       edge of the table.
                                        To rnake a horizontal time expo-  Remove the empty spool and place                                              sure, it  rvill be necessary to-secureit in the rvinding end of the carnera,                                          from vour dealer a No. 30 Cable Re-fitting the hoie in the end of the spool                                             lease (price 35c) to be scrern'eclint o theover the post of u.inding knob. The                                           crpeningC, page 2,next to theslide B.Iioclak is norv read-v for reloading.               'furn                                                     fhe canrera on  its  side. The
TnaB ExposuRES-INDooRS              front of the Iiodak must be raised a
                                                               trifle, by placing some srnall -object
  For  time  exposures the camera         under otte lo.tteiof  the front plate.
rnust alu-ays be Jllaced on a firm sup-            Adjust the shutter for a time exPg-
port like a table or chair, rleuerhold          sure by drau'ing out slide B, Page 2,
it in the hancls.                           as far as it  u'ill come.
                          1t)                                                    1 1               n
View original page 6Page 8 · Read text
'flic       subject mttst  ire nborrt 3.1'j               "A'r Houn  wrru  Youn  l(orex"
l'eetfrorn the lens.                                       is a booklet containing many  dia-
                                        grams and illustrations showing vari-  ]Ieasure  the  distance  carefulll-                                          ous lighting  effects. It  gives sugges-from liie lens to the face.                                                                                                             l ions  for  making  pictures,  in  and  The same exposure is reqrtiretl as                                         around the home.rvithout t he Attachment.                                                    t'PrcrurrE                                                         Tarrxc  ar I{rGHr"  is a  Ilse  I{orJul; Portrait   ,lltrrchtnertt                                                   lrooklet that  describes in  detail the^\-ri.,9,u-ith the Iioclak Banttm.                                            rnethods of making pictures by elec-
                                                              tric light, flash-light exposures,camp-
      Crpex LBxsps                          {ire scenes,firervorks, lightning, moori-
                                                        lieht  effeets, silhouettes and  ol lier  Thesc pictures illustrate the tliffer-                                            unusual pictures.encebetrveenrcsults u-ith a dirtl' antl
clean iens.                                 These trvo booklets are free, ancl
                                            copies of them  u'ill be sent upon rc-
                                                         rlrrcstto our Service Department.
                                     I]ASTMAN  I(ODAK  COMPANY,
                                                        Rocupsrnn,, Nulv Yonx.


 JIrtit:  u'itlt Dlrty  Lern.   )Iar]e   u'i.tlt C'lertrt LerLs
  Open the back of the Iioclak, antl
x-ipe the front ancl lraek of thc lens
u-ith a clean handkerehief.

  I(eep Dust Out  of the Carnera
   \\-ipe the inside of the camera and
lrellorvs,occasionalll', u'ith a slightlv
rlamp cloth, especially if the camera
has not been used for some time.                       1-3.1-KP-35
                 T1                                                      1 5
View original page 8From the M. Butkus archive. Original publisher and archive notices are retained.
Check the model and edition against your equipment.
PDF verified 2026-10-10.