Film cameras
Kodak Brownie 2a and 3 User manual
User manual for Kodak Brownie 2a and 3. 29 pages in English. Read the original PDF, download or print a copy without registration.
29 pagesEnglish2.8 MB PDF
Loading your manual…Open PDF directly
Document details
- Brand
- Kodak
- Model / document
- Kodak Brownie 2a and 3
- Document type
- User manual
- Language
- English
- Pages
- 29
- File size
- 2.8 MB
- Category
- Film cameras
- Document date
- Not specified in catalog
Search available document text
Find a term, then jump to its page in the original PDF. Image-only pages may not be searchable; check the PDF for exact wording and diagrams.
Page 2 · Read text
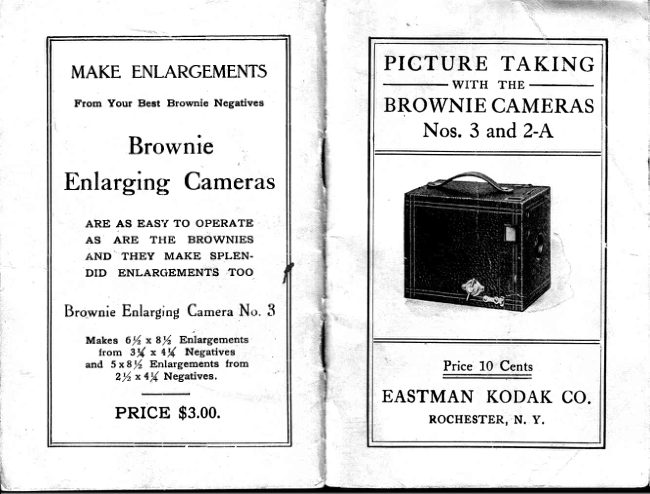
PICTURE TAKING MAKE ENLARGEMENTS
                                                  WITH  THE
  From  Your  Best  Brownie  Negatives                     BROWNIE CAMERAS
                                Nos. 3 and 2-A
     Brownie
LnlarglngT       :       \        l          '       /        i      -        l L/ameras


   ARE AS EASY TO OPERATE
   AS  ARE   TTIE  BROWNIES
    .A,ND' THEY  MAKE   SPLEN-
    DID  ENLARCIEMENTS   TOO

Brownie Enlarging C"*"t"  No. 3

   Makes  6ft  x 8l   Eniargements
       Irom  3r/4 x 4r7{ Negatives
    and  5 x8ft   Enlargements  from                             Price 10 Cents            Zl  x a/  Negatives.                                                .                   --
                        EASTMAN KODAK CO.
     PRICE $3,00.                         ROCHESTER, N. Y.
View original page 2Page 3 · Read text
@ltlFtlrFs,

                                        ;IradeKODAI(Mark,  1E88             PICTURE TAKING
         EasrMAN Kooar  Co.                                          \)I/ITH THE
                 ROCHESTER. N. Y.                      BROWNIE CAMERAS
        Me.xopactuRERs  oF                                      Nos. 3 and 2-A                Kodaks
                 Browaie Cameras
                Kodak  Film Tanks
                Kodak  Dry  }{ountiug  'l'issue
                      '           Velox  Paper
                Eastman Solio Paper
                  Eastntan  Ferro-Prussiate PaPer
                              .   llastman  Velvet Bromide PaPer
                  IJastman Royal Bromide  Paper
                Eastman  Standard Bromide  I'aPer
                Eastman  Enameled Bromide PaPer
                Eastman  Matte-Enameled Bromide Paper
                Eastman  Platino Bromide  Paper
                Eastman  Non-Cuding  Film
                  Tested Chemicals
                        'I'ripods  and
                  Otber Specialtles

                                                                                      Price Ten Cents                     Traile  Mad.s  Reg. U. S. Patent O6ca
            /l4ay,   tgre.                       E A S T M A N K O D A K C O . ,
                                               ROCHESTER,N. y.

                                                                        www.orphancameras.com
View original page 3Page 7 · Read text
opening  in  the back  of the  roll  hold.er (X'ig. VII),  and.
                                                                                thread. the duplex  paper through  the slot in the reel as
                                                               shown  in  n'ig. YIII,  bei,ng ertremely   careful,to  haae the


                          Fre.  VI.                                                                            Flc.   YIf.
  This  will  permit  the  spool  to  drop  fully  into the re-
eess; then push  the  spool  pins  baek into  plaee so film
spool will  revolve  upon  pins.
  The wind.ing  end may  always  be  distinguished   by
the small hole in the side of the  roll  holder.

                       Important.
  Be sure and get the  top of spool  at top  of rolL holder
(each  spool  is marked  on the  end.) when  inserting,
otherwise  your   fllm   N'ill  eome on  the  wrong  sid.e of
duplex  paper  lt'hen  reeled   off  and. total   failure    will
result.
  You can readily   tell  the top  side  of  roll  hold.er, as it
eontains  the  opening   in  the  wind.ing   end. through
which  the key  is inserted  in the  reel.
  5. Now remove  the gummed   slip  that holds d.own
the end. of d.uplex  paper  and  pass d.uplex  pa,per across                               FTO,VItrI.
                                                                                                                                                                    I

                                                                www.orphancameras.com
View original page 7Page 8 · Read text
p$per  clrctusn straight  and  true, and. give the spool two                          7,  Press in on, atrd at the  sarne time"  ru.rxl t-ft* 'qr''::':
or three forward.  turns   (to the  left from  the key end ).                    ing key until   it fits into  position, the lr-eb 6i  l';'m';:  ': 1
The  spool may  be  readily   turned  by  revolving   the                       of l<ey fi"tting into  slot in spool end (Fig. XL
flanges of the spool ntth  the two thumbs.                                    This   is  a reversal   of  operation   shou-ll  :*  F:s      :
                        Caution.                                      page 5.
    If you turn   off too much  of the duplex  paper, before                         8.  Turn  the key slowly  to the  lef t and rn-a:oeb: -  i'4
                                                                                                                         littt*  red. wind.ow  at the baek of the camera.    tr:el     -frthe eamera   is  closed, the  film   will  be uncovered. and.
ruined.                                                                               to 18 turns  have been given, a hand  p,rint:r"i  :."$s,6,ln
  6" The camera  is norl- to be closed. reversing  the op-                   the No. 1 exposure will  appear' then  tur.'r sl-w-y   :-  -:-
eration shown   in  tr*igs"  I  to IV  and pages  5, 6 and 7.                    the fi"gure  l appears before the windos'.
fn  reinserting   the   roll  hold.er  in  the  outside  box,  re-
member   that  the  slotted  end. of winding   reel which
shows through  round  hole  in side of  roll  hold.er, must
be  inserteti  so as  to come  opposite  winding   key   in
otrtside box.


                                                                                                         Frc.  X.
                                                                   The  fiim   is norv  in  position   for   taking   the
                                                                                           pict'ure.

                                                     Load Your  Brownie  with  Kodak Fitrm
                                                      Look  for  this trade mark on the box


                                                    LOOK FOR
                                                                                 . . K O D A K ' '
                                         ON THE SPOOL END.
                      Frc. IX
                     10
View original page 8Page 12 · Read text
s T o P s .   In  making   portraits   tvhere  the  subject   is less thsn
cight  feet from  the camera,  use the  smallest  stop  and,                                      I   Tnr  LrneEsr-For        a,ll, ord,inary  instcr,ntaneous
tlme  accord.ingly.   (See page  16). As  a general  rule                  etposu/eE.
else the middle  stop  fol  portraits.                                                                                                       i   Tnn     ]Iloor.r     -  For   instantaneous    exposures
           Kodak   Portrait   Attachment.                            when  the  sunlight    is unusually   strong  and there  are
  By the use of a Kodak   Portrait   Attachment    this  in'                 no heavy  shado*-s;such   as  i:r views  on  th.e seashore,
gtrument  may be used.'s'ith the  sitter  at a distance  of                       in  extremell    high,  dry   climates   or  on  the  water
only three and one half   f eet, thus  enabling  the amateur                     or  in  tropical   or  semi-tropical   climates;  also for  in-
to obtain  large head and  should.er  pictures  equaling   in                      terior  time exposures, the time  for  which   is given  in
size those of an ordinary   Mantello  photograph.                             the table on pages 16 and 1?.
  The attachment    is simply  an extra  lens to be slipped.                   3  Tsn   Sullr   n3t-For    time  exposures  out  doors
lnlensopeningin     front-board,   and. in  no way"affects                        in cloudy  u'eather.   s:ot for  instq,ntdneous  erposures,
the  operation   of  the  camer&   except   to change  the                The time required  for time exposures on cloudy  days
focus.  Price 50 centb.  Be sure and specify what c&mer&                   with  smallest stop  rvill range from  one-half  second  to
the attachment    is to be used  lvith  when  ordering.                               flve  seconds  according   to the  light.   The smaller  the
                                                                            stop the sharper  the picture.
       Time   Exposures     in  the  OPen   Air.
                                                          When  setting  the stops alr,vays see that  the one to be
  When  the  smallest  stop  is before  the  lens  the  light                 used  is  brottght   to  the  center  of  the  Zens where     it,admitted.   is so much  reduced  that  time  exposures  out                                                                            catches,
.of d.oors may be made the same  as  interiors,   but  tho
erposure  must be much  shorter.                                                                          If  you  use the  smallest  stop  for  instantaneous  ex-
   'Wrtn          Suxsnrxr-The      shutter  can hardly  be opened.                 posures absolute  failure   will  result.
.and closed quickly  enough  to avoid. oYer exposrrre.
   \N'rrs   Lrcrrr   Cr,ouos-n'rom    one-half  to one second
 n'ili  be sufficient.
  Wrrn    Ilnlvv    Cr,ouns-X'rom    two   to  fve  second's
 rr-ill be required.
  The  above  is  calculated   for  hours  from  three  hours
 .after  sunrise   until   three  hours  before  sunset  and. for
 objects inthe  open air.  For other  hours, or for objects
 in the shad.ow, und.er porches  or under  trees, no accu'
 -rate directions  can be given   ; experience  only can teach
 the proper  exposure  to give.
   Time  erposures   cq,nnot be rnctde uthile  the cctmera, is
 held, in  the ha,nd,.  Alwa,ys  pla'ce  it  upon  sonxe fr'rm
 ,|upport,  sueh as a' chqir  or table.                                                               t9
                         18
View original page 12Page 13 · Read text
s E c r r o N  3 .                                                                            should  i:e placed  at one side as well  as behind,  so as to
                Flash   Light   Pictures.                                     thron'a  shadorv and give a little   relief  in  the lighting.
  By  the  introd.uction    of Eastman  X'lash Sheets, pic-                The  fla-qh should  be  at  the  same  height   or  a  little
 ture  taking  at night has been wonderfully    simplif.ed.                   higher  than the camera.  The support upon which  the
A package  of  flash  sheets, a piece  of cardboard.,  a pin                     flash  is to be made  should  not  project   far  enough   in
and  a match  complete  the   list  of  essential  extras,                     front  of  it  t'o cast a shadow in front  of the Camera.  Ao
although   an Eastman   8lash  Sheet  Holder   is a great                     extra  piece  of  cardboard  a foot  square  placed  under
convenience.                                                                   the  flash sheet'wiil   prevent, any  sparks  from   t'he flash
  With   flash  sheets, no lamp   is necessary,  there   is a                 doing damage.  Ilowevern by using the Eastman  Flash
minimum   of smoke and  they  are  far  safer than any                 Sheet Eolder,   all these contingencies  are taken  care
other  self-burning    flash  medium,   besides  giving   a                      of, and we strongly  advise  its use,
softer  light  that  is less trying  to the eyes.                                  Tbe  Eastman   Flash   Sheet  Holder
  Many   interiors   can  be  taken   with   the  flash sheets                    This  holder may be safely held  in  the hand, aluags
that  are impracticable   by daylight,   either  by reason  of                 bettpeen you oncl the flash  sheet. Or   it may be used
a lack of illumination    or because there  are windows                                   on  any  Kodats   tripod,   being   pro-
in  a  direct   line   of  viery  which  cannot  be d.arkened                                       vided   with   a socket   for   this  pur.
suffi.ciently   to prevent  the blurring   of the  picture.                                          pose.  The sheet  is held by a spring
  Evening  parties,  groups  around  adinner  or card. table                                           f.nger,   in  such  position   that    its
or single portraits  lnay be readily made by  the  use of                                     lower   corner   projects   part   rvay
our flashsheets,  thus enabling  the  arnateur   to  obtain                                    across  the  circular  opening  in  the
souvenirs   of many  occasions which,  but   for  the  flash-                                        bolder, as shown  in illustration.
light,  would be quite beyond. the range  of the  art.                                      Then  to set  off  the  flash, merely
  Pnrp;.p"ltroN   FoR rnn  X'r,Asn.-The  camera should                                    touch  a match  to the corner  of the
be prepared  for time exposures, as directed. on page 1b                                   sheet through  this opening.
of  this  manual  (except  that  the  largest  stop must  be                                          Taking   the  Picture
used,) and. placed on some level support  where    it   will                                               Ilaving   the Camera  and  the  flash
take  in the view  d.esired.                                                                            sheets  both   in  position   and.  all  being   in  readiness,
  Pinaflash   sheet by one corner  to a piece  of  eard-               open  the  camera  shutter,  stand  at arm's  length  and.
hoard.  which  has  previously   been  ff.xed. in  a perpen-                   touch  a match  from  behind  to the  loler   corner   of the
d.icular  position.      If the cardboard   is white    it   wiII   act                     flash sheet.
as a reflector  and increase  the strength   of the  flash.                          N O T E - l l     y o u  a r e n o t  u s i n g     t h e  E a s t m a n  F l a s h  S h e e t H o l d e r ,
  The flash sheet should. a,lu'ctys be placed two  feet  be-                       place  tbe match   in  a  split   stick   at least  two  feet  long.
hind. and. two  or  three  feet  to one side of the camera.                   There   will  be a bright   flash  which    rvill  impress  the
If placed in front,  or on a line  with   front   of Camera.                    picture  on the  sensitive  film.  Then push the lever  to
theflash  would. strike  the lens and. blur  the  picture.      It                   close the  shutter  and turn  a fresh  f.lm  into  place with
                  n                                                 the key, ready  for another  picture.
                                                                                                                            2l

                                                                www.orphancameras.com
View original page 13Page 14 · Read text
The  Flash  Sheet                                   as sometlmes seen in  large  pictures,  because the  per-
  The number  of sheets required  to light a room varies                   spective  rrortld be too violent.
with   the  distance   of  the  object  fart'hest  from  the                      B-lcrcnou.Nt-fn    making  single portraits  or groups,                               'the                                walls and. hangings.                         care should be taken  to have  a  suitable  background"camera, and lhe color of
  When  two  or more sheets are to be used they  should.                   against  which  the  figures  will  show  irr relief   ; a light                                                                    background    is  better  than  a dark  one, and often  abe pinned  to the cardboard, one above the  other,  the                                                                                 single  fgure   or  t'lvo  will  show up well against a lacecorners  only  very  slightly   overlapping.                                                                                          curtain.    X'or larger  groups a medium   wall   light    r,vill                    TABLE                                                                                    ,l\                                                                   be suitable.
               distance     ten          feetX'or                        and. light  walls  and. hangings  use                                                                    The  fi,nd,er on  the  camera   will   aid  the operator   in            1               sheet.    one        No.
x.or ten  feet distance  and d-ark walls  and. hangings  use                composingthdgroupssoasto     get the best  effect.  In
    one No. 2 sheet.                                                           ordel  to make the image  visible  in the flnder  the roorn
n'or flfteen  feet distance  and  light  walls and hangings                          will  have  to be well  lighted  with  ord-inary  lamplight,
    use one No, 2 sheet.                                                which may be lefb on while  the picture  is being made,
X'or flfteen  feet d.istance and dark  walls  and hangings                   provided  none  of  the  lights  are  placed so that  they
    use one No. 3 sheeb.                                            show  in the flnd-er.
  NOTE-Never                   use                      more  tban  one  sheet   at a time,   in  the  East-                  Eastman  Flash  Sheets burn  more slowly  than  flash,man      Flash  Sheet                      Holder.
  To Mlxn      I  Ponrn.a.rr.-Place     the  sitter   in a chair                  powders, producing  a much  softer  light  and. are, there'
partly  facing  the Camera (which  should be at the height                       fore,  far  preferallle  in portrait  work;  the subject, horv-
of an ordinary   table) and turn  the face slightly  towards                     ever, should be warned  not to move,  as the  picture   is.
the instrument.   The proper distance from  the camera                    not taken  insta,ntct'neowsly, a"boat one second being  re-
to the  subject  can be ascertained  by looking  at the im-                   quired  to burn one sheet.
age in the flnder.   X'or a three quarter  picture  this will                             Eastman    Flash   Cartridges
be from 6 to 8 feet. and for a full  flgure from  8 to l0 feet.
  The  flash  should  be on the side of the Camera  away                    sheets,Eastmanif  desired.X'lash Cartridges'We recommendmay be substitutedforthe  sheets, ,hot"the
from  the  face, that   is, the  sitter  should  not  face   it.                    ever, as more convenient,  safer, eheaper and capable of
The  flash  should. not  be higher  than  the  head. of  the                  producing  the best results.   Thecartridgesareortly    su-
sitter.                                                                                       lerior  when absolutely  insta,'nt<t'neouswork  is essential.
   X'or using  the  portrait   attachment,   see page 18.                             Keep  Dust  Out   of  the  Camera
  To Marrn  -E.Gnoup.-Arrange    the chairs  in theform                                                                                                                                                                                                          '                                                                                                                                       particles                                                                                                             by                                                                                                   are often                                                                                                 caused                                                                                                                                                         of                                                                                       negatives                                                                              Defectiveof an arc, facing  the Camera  so that  each chair  wiII                                                                                                                                          of                                                                                            on the                                                                                                                             the  c&mera.                                                                                                   collected                                                                                                                       inside                                                                            dust                                                                            which have
be exactly  the same distance  from  the camer&'    Ilalf                  and settle upon  the  film  in particles   that produce  small
the  persons composing  the  group  should  be seated.                  white  spots upon the prints.                                                                                                                                           It   is  therefbre   well  to wine  out the insid.e of camera
and. the  rest  should  stand  behind   the  chairs.     If  the                    occasionallv.  with  a slishtly  damp  cloth.   In summer
group  is large any  number   of chairs may be used, but                   weather   or-dfter   t'he cainera  has riemained  id.le for any
nonc  of  the  subjects  should- be seated on  the  floor,                    length  of time,  this neecls special attention.
                                                               It
View original page 14Page 16 · Read text
TheKodakX'ilm   Tank  consists  of a wooden  box,  a
                                                                                               light  proof   apron,  a  t'trangferring     reel,"  a  metal
                PART   IV.                                                             " solution  cup"   in which   the  flIm   is developed., and a
                                                                       hooked. rod  for  removing   f.lm  from  solution.   There
                     Developing.                                                       is also a d.ummy  fllm cartridge  with  whichoneshould
                                                                        experiment   before  using  an exposed  cartridge.   The
  There  is no necessity of working   in a dark room  or                                                                            varioug  parts  of  the  outflt  como packed  in  the  box
waiting   until  night  to develop  fllm.     It  can be done in                                                                                                              itself.
daylight    at  any  time  and  place.  And  the  daylight
methods   of developing    fllm   give  better   results  than
the  dark room  way.
  Film  may  be developed   in  daylight   by  the  KodakX'ilm Tank  method.   Detailed  directions   for d.eveloping   Tt
will  be found   in  the  manual  which  accompanies   the
goods.
  'W'e
     recommend   the  koAat   FiIm  Tank  method. par-
ticularly    for   its  simpleness,  and. the  uniformly   good
negatives  whieh    it  gives.

     Developing     with'the   Kodak   Film   Tank.
  Provide  a Tft-inch  n'ilm Tank  for  use .with No. 3 or
2-A Brownie   X'iIm.
                                                 tI


                                                                                                       Fra.  II.
                           3'rc.  I.
                      26                                                                 27
View original page 16Page 25 · Read text
PART  VIIL                                                      ,llhts  bath  may  be mad.e up  at  any time  in advance
                                                                          and. be used so long as it retains   its  strength,   or  is not
               Developer    Formulae.                                         sufficiently   dlscolored  by  developer   carried   into    it  as
  Those who wish  to prepare  their  own developer  may                   to  stain  negatives.
do so but care must be exercised  in securing  absolutely                                 If  the  time   of  development    and.  temperature    of
pure chemicals and correct.weights.                                    developer  have been correct  and the  exposures  within
                                                                              the  latitud.e   of  the  f.lm,  good  negatives  must  result,
           For  20  Minute   DeveloPment.                                   butif   error  has been madeindevelopment     the cause
                         3)( rNcrr  I.INK.                                     and. remed.y  wlll  be found  in the following:
       22 grains Pyro.
       44 grains  Sulphite   of Soda, Desiccated.                                       Over'DeveloPment.
       44 grains  Carbonate   of Soda, Desiccated.                        Overd.evelopmeut   may  be  caused. by  a mistake   in
  Dissolve  the chemicals  in order  named. in f.ve  or  six                leaving  films  in  the  developer  too long, by using  solu'
ounces of lukewarmll'ater.     then  add  cold water  to  filI                  tions  too warm  or by those who  mix  their  own  d.evel'
tank  to embossed  ring.                                                 oper  in getting  the developing  agent  too strong.
           For  10  Minute   Development.                                     In  this case the  negative   is very  strong  and  intense
                      3fu txcn  IANK.                                   by transmittett     light  and requires  a very  long  time   to
   '      44 grains Pyro.                                                                 print.   The  remedy   is  to  red.uce  by use  of  Eastman
       83 grains  Sulphite   of Soda, Desiccated.                       Reducer  or by  the  following   method:
       88 grains  Oarbonate  of Soda, Desiccated.                                            Reducer.
  Dissolve  the chemicals   in  order named  in  flve  or  six
ounces  of lukewarm   water,  then add cold water  to  fill                      First   soak  negative   20 minutes   in  water,  then  im-
tank  to embossed  ring.                                          merse ln:
  Correct  temperature    of developer  650 Bahr.                                  TV'ater                            6 ounces
                                                                              Eyposutphite    of Soda                           f  ovnco                 Acid   Fixing   Bath.
                                                                                          I'erri-Cyanid.e   Potassium   (saturated.
  Eastman  N. C. Film  must  always  be fixed  in an Acid                                                                                                                 solutioil)                       20 drops
X'ixing  Bath.
  There   is nothing  superior   to the Kodak  Acid  n'ixing                Rock  traygentlybackand.       forth   until  negatiYe  has
Powders,  but  the following   formule  may be used  :                 been reduced. to thqdesired   density,  then wash 10 min'
       'Water    -      -                    16ozs.                         utesin  running   water  or in four  changes  of water.
       Hypo  Sulphite   of Soda              4ozs.                         Negatives  may be  reduced.  locally  by applying   the
         Sulphite   of Soda, Desiccated       '    %, oz.                     abovo solution   to  the  dense  parts  with  a oamel's  halr
                                                                         brwh,   rinsing   ofr bhe reducer   with   clear  t-ater  occa"  When  fully  dissolved. add the following   hardener:                                                                                     slonally   to prevent    lts  running   onto  the  parts  of  the       Powdered                 Alum                               Yeoz,                                 LAoz,                       negative  that  do not  require  reducing.                                 -          Citric  Acid
                                                                                                                                                                                  /  4  5

                                                              www.orphancameras.com
View original page 25Page 26 · Read text
Under-Development.

  This defect would be caused by a mistake   irr lemov-                   The Kodak
ing Iilmfrom   duveloper  too soon, by using solution  too
cold or by an  error   in  compound.ing  chemicals.     It  is
obvious  that  neither   of  these d.efects  will  occur   inTank Development,     if  instluctions   are  properly    foi-    Correspondence
lowed.
         Intensilication   by Re-Development                        College
  There  are  a number   of  d-ifferent  processes  for  in-
tensifying   under-developed.  negatives,  the most com-
mon being by  mearrs  of  Bichloride   of  Mercury,   and
Sodium  Sulphite  or Ammonia.
  Thismethod,   though  simple  to  use, has  its  disad-
vantages, as it builds up  the  highlights  out  of propor-            A C<iurse Which   Wil[   Increase  Your
t'ion to the weaker  portions   of  the negative,  and. also,           Photographic   Pleasure  by  Helping  Youunless carefu"lly  handled   is apt  to produce   irid.escent
stains,  or  granular   markings   that  are  impossibleto              to make Better  Pictures.
remove.
  While  the method  of  intensifi.cation  by  re-develop-
ment  is only comparatively   new, the now common  use
of Yelox and  Royal  Re-d.eveloper  for  Sepia  tones on
Yelox  and  Bromid"e  prints   will  make  this  the most
effective means of intensification.
                                                                 Tuition  two  dollars  which  includes a  Velox  or Royal Re-developer may be used in exactly
the same manner  as for  producing  Sepia tones on de-         handsome cloth bound copy  of  the School
veloping  paper.                                          Text Book
  Negatives   intensifi.ed  by  re-development   are  built
up  evenly, without  undue  contrast  and" without   the
ehance of staining.                                       ..THE  The ad.vantage  of being  able to use the chemicals   for            MODERN WAY
two  different  purposes  ( Sepia toning  prints  or intensi-
fying   negatives)   is obvious,  the  result   in  either  case           IN PICTURE MAKING''
treing  all  that  could be desired.
View original page 26From the M. Butkus archive. Original publisher and archive notices are retained.
Check the model and edition against your equipment.
PDF verified 2026-10-10.