Film cameras
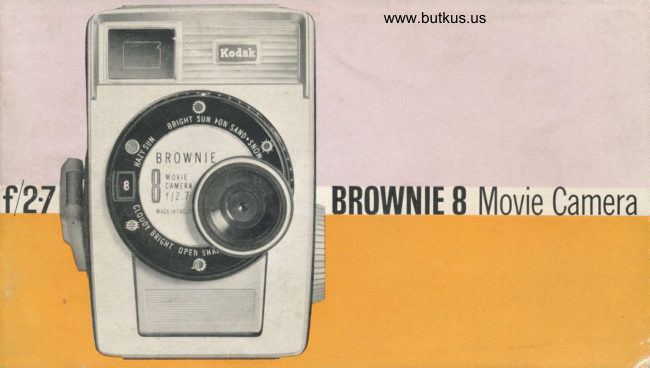
Kodak BROWNIE 8 Movie Camera User manual
User manual for Kodak BROWNIE 8 Movie Camera. 29 pages in English. Read the original PDF, download or print a copy without registration.
29 pagesEnglish4.4 MB PDF
Loading your manual…Open PDF directly
Document details
- Brand
- Kodak
- Model / document
- Kodak BROWNIE 8 Movie Camera
- Document type
- User manual
- Language
- English
- Pages
- 29
- File size
- 4.4 MB
- Category
- Film cameras
- Document date
- Not specified in catalog
Search available document text
Find a term, then jump to its page in the original PDF. Image-only pages may not be searchable; check the PDF for exact wording and diagrams.
Page 3 · Read text
www.butkus.usr
          Using 'Kodachrome' II Film for Daylight
              in the 'Brownie' 8 Movie Camera f/2.7
                  'Kodachrome'  II Film is now available for your 'Brownie' Movie Camera.
                The new film has a speed rating of 25 ASA/BS (15 DIN) and is
                   two-and-a-half times as fast as the 'Kodachrome' Film mentioned in this
                    instruction manual.
                  For 'Kodachrome' II Film, use the yellow pointer (triangle) on the exposure
                  guide built into the front of the camera. The examples of typical exposure
                     settings on the right-hand side of page 17 will now be as lollows:
        O Sun behind the camera: set the dot between 11 and 16 in the window.
        O Sun at side or in front of the camera: set 11 in the window, or, for
                   more shadow detail, the dot between 8 and 11.
                                                                                            panel,        O Subjects on sand or snow: usethe special setting on thefront                                  i.e. one click beyond 16.
                                                                                      reG al& eat€ tu                                                                                                                    ,/a9/r rsMH636r(r652/x)
View original page 3Page 5 · Read text
There is good reason for the name ,Brownie' Movie
Camera. lt's as simple to use - as sure in results - as
the Brownie snapshot cameras everyone grew up with.
Load, set the lens according to the built-in Exposure Guide,
and then just aim and shoot,
Before making any important pictures - of a tour or some
special event - it is always well to shoot a roll of film and
check the results. This will give you practice in camera
operation and provide a check on your equipment.  lf you
have any questions, your Kodak dealer will be glad to help.

  Use _Double 8mm  , Kodachrome' Movie Film, Daylight Type or, for pictures
  by photoflood lisht, use Doubte Smm,Kodaihromd'MovjeFitir, Tii; A.--
View original page 5
Page 6 · Read text
www.butkus.us
                 wind the motor
                        Just unlold the winding handle
                      and turn it clockwise until the
                        motor spring is wound tighily.
                      Fold and lock the winding handle
                        against the camera so that it will
                          not turn when the motor runs'

BEFORE YOU
LOAD IT
GET TO KN()W Y()UR
BR()WNIE M()VIE CAMERA
View original page 6Page 8 · Read text
www.butkus.us
                                                                                                         First, unlatch and lift the winding handle;
                                                                  wind the motor a few turns before you    LOADING              start to load, to make sure that the motor is nol
                                                                 completely run down. Never load the camera
                                                                      with the motor completely run down.


Always keep the film shaded from the sun - and from
bright lights - when loading and unloading the camera. No
need for total darkness - just a shady spot; even the
shadow of your body will do.
When handling a full spool, be careiul to prevent the
springy outer coils from unwinding themselves ("clock-
springing"), otherwise the starting and Jinishing shots will
be light-fogsed.
The design of your 'Brownie' 8 Movie Camera makes load-
ing easy. Just follow the simple steps pictured on this page
and the next few pages.
View original page 8Page 9 · Read text
Next, rotate the cover lock knob               Take the empty take-up spool out of the camera. Remove a spool of
      counter-clockwise (to the left) as               Double 8mm ,Kodachrome' Movie Film from its container. Save the
Jar as it will go to unlock the cover.           metal can and the yellow carton to return the fjlm for processing. Remove
Note that the knob "clicks" finally into           the paper bandn and pull out about ten inches of film. Be especially care_
lhe "open" positjon.  Lift off the cover.             ful not to lettoo much film unwind or the film on the spool will be fogqed.


                                      Mike Butkus                    Digitally                                                                                                                                                                                                                                     DN:email=mike@butkus.org,Date:cn=Mike2023.12.24signedButkus,by21:34:18Mikeo=ButkusButkusc=US-05'00'camera manuals, ou=butkus.org,

  ivolei SaYe the paper band' Place it around the exposed film before the film is returned to the metat can

 7
View original page 9Page 10 · Read text
,    :  Place the spool of film on the supply spindle          www.butkus.usPull about ten inches of fllm from the full
      (marked FULL FILM SPOOL). The flanse of                spool. From the bottom of the spool, guide the
the spool stamped "Kodak Spool" must be upper-          film along the curved threading slot (indicated by the
most. Make sure that the spool is properly seated -        arrow) towards the film gate. Slide the film down
the end ol the supply spindle should project through          into the gate; that is, between the pressure pad and
the hole in the spool flange.                                 the aperture plate (see next picture).
View original page 10Page 11 · Read text
Pull back the spring pressure pad            Hold the empty take-up spool as shown below with the arrow facing
      and push the film all the way down            you. Fold the end of the film to form a quarter-inch hook, then hook
into the gate - first at the top of the       this into the slot in the spool core; wind the slack film, black or shiny
camera, then at the bottom. Thls should       side out, on to the take-up spool by turning the spool in the direction ol
leave approximately {our inches of fllm       the arrow. ll the spool is bent the film will bind; as a temporary measure
below the gate.                                  carefully bend the flanges outwards. Renew the spool as soon as possible.


                      PRESSURE PAO


        www.butkus.us
View original page 11Page 12 · Read text
www.butkus.us      Place the s pool o n the take-u p spi ndle  ( marked                After                                                                           loading the camera, turn the take-up spool
    EMPTY FILM SPOOL) so that the arrow and                  with your flnger in lhe direction of the arrow, until
the wording are uppermost. Turn the spool slightly,            the film appears snug on the reel. Check the film flow
if necessary, so that the spool slips all the way down           by pressing the exposure bar to advance 1 or 2 inches ol
with the end of the spindle projecting through the             film; no slack fllm should build up. lf the film does not
hole in the spool.                                            run correctly, re-check the film threading.


                                                                                                                10
View original page 12Page 15 · Read text
Re-th read ing
  When the film has passed through the camera for the first time, only half the width is exposed.
   Before exposing the other half, first run the motor until the pointer reaches E. Then unlock and
   take off the cover and change over the spools, Grasp the full film spool and ease it off the spindle,
   gently pulling the end of the film out of the gate. Put this full spool on the supply spindle (marked
  FULL FILM SPOOL) with the instruction side down, and re-thread the film as described  in
  "Loading" steps 4-11 (pages B-11). Take care that the outer coils do not loosen or unwind while
  handling the spool. Hold the empty spool with the arrow up, hook the end of the film into the slot,
  and place the spool on the take-up spindle. Turn the take.up spool with the finger until the film is
  quite snug on the reel. Press the exposure bar to make sure that the film is correcfly threaded, and
   will run properly' Then replace and lockthecover. Hold the exposure bar down until the footage in-
  dicator shows 25. Make pictures until it shows 0. To unload, see page 24.


13
View original page 15
Page 16 · Read text
www.butkus.us


Lens settin.'c,Y"
     ,Brownie'             Movie camera has adjustable lens settings. TheseThe
cope with the many variations in lighting and film. The lens settings       Caution
                                                                   ta&(called stops) are numbered from 2.7 to 16 and the setting in use           lens-settingNever leave thering
appears in the window. 2.7 is the largest and each successive         andbetweena numbereda dot      kr
numbered setting, down to 16, lets through only half as much         openrng - use                                                                                the                                                                                                    click-stop            trfr                                                                                                settings.light. white dots between numbered settings indicate half-stops.                                                          Do not alter the
There is a click setting for each number and each dot. ln photo-           lens setting when       EIF.                                                                                      the camera isgraphic literature, stop numbers are usually prefixed "/", for              ru n ning.                                                                    treexample: f12.7, fi8, etc.
View original page 16Page 18 · Read text
AVERAGE  SUBJECTS
SUBJECTS                    SUBJECTS            www.butkus.us
                       Using the exposure guide
                            On the front of the camera is a handy summer
                                            exposure guide. As the lens-setting ring is turned,
                                           the dial with the lens setting numbers revolves. lt
                                                    carries two pointers; these represent film speeds.
                                    One pointer is white, and corresponds to the set-
                                                       ting for 'Kodachrome' Film, Daylight Type. For films
                                                  of exposure index 25 ASA use the other pointer.
                             When setting the camera for average subjects,
                                        using'Kodachrome'Film in daylight, turn the lens_
                                                  setting ring until the white pointer comes opposite
                                           the prevailing light condition on the scale. Make


                                                                                                               16
View original page 18Page 20 · Read text
The viewfinder                     www.butkus.us
 The camera has an enclosed optical viewfinder. Keep the rear lens close to the eye when sighting
 the subject.* When the principal subject is beyond 6 feet from the camera, everything you see *itt,in
 the finder frame will be reproduced on the screen. With close-up subjects, however, this is not so.
 Because the finder lens and the main camera lens are separated, they do not see quite the same view
 at close distances. This effect is called "parallax", You must allow for this when taking pictures
 closer than about 6 feet from the camera, Note the pointer on the upper left-hand side of the lens.
Use this for subject distances of 3 to 5 feet. At these distances,  it will indicate the top limit of what
 will be seen in the projected picture.
Example You may wish to make a close-up on 'Kodachrome' Film. Turn the lens-setting ring to g (if
subject is average and front-lighted by clear sun) and move in to about 4 feet. Tilt the       up tillthe subject's head is just below the level shown by the pointer near the upper left-hand"i.".corner oi tt,"
front frame. You are now ready to take close-ups.
lf you want an extreme close-up, use a No.255 size'Kodisk'Close-up Lens. Carefully slip this on the
outside of the lens barrel. With this lens, you can be as close as 23 inches, with the lens set at g.
In this case' you would move in to about 2 feet from the subject; then tilt the camera up till thereis
as much space between the subject's head and the pointer as between the pointer and the upper
edge of the viewfinder frame.
 * For.9rd.ina1y              shofs,                    use the                                                                    le.ns;                                        of                           outer frame                                           th9.f1ytt                                                                      f_or pictures                                                                  using                                                                          the Telephoto                                                                                              Converter,                                                                                                frame the  subiect          within                the orange                             rectangle.                                 The                                                  Tetephoto                                                                                                     (see                                                                                                         is a                                          'Kodak'                                                             Conierter                                                                         valiableaccessory                                                                                                               ,,lens Atiessorres"  page          26).

                                                                                                     18
View original page 20Page 21 · Read text
With the lens fitted in your camera:   l.l
                                away and you see this in the vrew-                      (    your subject is between 3 and 5 ieel                                      finder,

                                                      . . you will get this on your screen.
                                                    )

                         When photographing as close as
                                      3 to 5 feet keep the top of the subject
                                   below the level of the pointer on the
                                          le{t-hand-side  of the viewfinder.

                                      ],:""[,]:;"y'J" lL?:"J"o"x: "'oj""t )   www.butkus.us

         For shots with the Telephoto Converter, use  the orange reclangle to jrame your picture.
           For telephoto shots between 5 and 8 feet keep the top of the subject below the orange pointer.
19
View original page 21Page 22 · Read text
www.butkus.us
uperartl n g
Unfold the winding handle and turn it clockwise
until the spring is wound fully. Fold the handle
flat against the camera; otherwise  it will turn as
the motor runs.
To start the motor on your'Brownie'Movie
Camera, lightly press the exposure bar. To stop
the motor, release the bar. When you press or
release the exposure bar, avoid moving the
camera. Any such motion will cause the
pictures to wobble, which will be disturbing
when the pictures are projected on a screen'
 Before each scene, make sure that the motor is


                                                20
View original page 22Page 23 · Read text
wound and that the lens opening is set properly to suit the prevailing light conditions.
For hand-held operation, hold your 'Brownie' 8 Movie Camera steady and make no sudden move-
ments while you are taking pictures. Grasp the camera firmly with both hands and brace your
elbows against your body. Use one hand to cradle the camera and operate the exposure bar,
and the other to hold the top of the camera (near the back) as shown in the illustrations. The hand
on top will then rest against the forehead and give extra steadiness. The exposure lever can be
operated with either the right or left-hand index finger, whichever you find more convenient.
Hold the camera so that the rear sight of the finder is close to your eye, as pictured on page 2.
In this way, the entire scene will be framed in the finder. Steadiness is of the greatest importance
when you are making movies, Any unsteadiness while taking the pictures will be greatly accent-
uated when the film is projected. For steadiest pictures, mount your'Brownie'8 Movie Camera on
a tripod or some other firm support. A socket is built into the base of the camera for mounting the
camera on the tripod head. The tripod socket has a standard f,-inch Whitworth thread.
View original page 23
Page 24 · Read text
www.butkus.us
Scene lenothJLrl                    Movie technique
Usually, 1 to 2 feet of film is the proper length for average       Aim to make films which, besides
                                                       being merely topical, are likely toaction scenes. This amounts to between 5 and 10 seconds
                                                            have lasting entertainment value.
of taking time. Naturally, you will want to make some                                                 To do this successfully have some
scenes longer than others. For example, a series of        kind of plan in mind before you
landscape shots might well be made longer than scenes         start, so that the film progresses
which include brief, fast-moving action. The camera         smoothly from scene to scene. En-
                                                        hance interest by varying the sub-motor will drive about 7 feet of film at a winding and then
                                                                              ject distance during each sequence.
it automatically cuts out. Don't try to film scenes that will                                                                Start with a "long shot", say, then
run longer than about 30 seconds without rewinding or       move in closer, Include some really
the motor may cut out in the middle of a scene,                   big close-up shots (see page 15 for
View original page 24Page 25 · Read text
r-I


i
                      Panoramas

    the nearest distances permissible        Normal speed 8mm cameras run too slowly to allow suc-
     at each lens setting).                      cessful panoramic views to be obtained by swinging
    With the aid of a'Kodisk'Close-up         the camera so, whenever possible, try to photograph an
    lens, you can shoot as close as 2        extended scene by a series of views, moving the camera
  $  feet. The 'Kodak' Telephoto Con-        between shots.
     verter will enable you to obtain un-      When it is necessary to follow a moving subject, keep
    distorted close-ups while filming at              it centred in the finder.
    normal distances.                       Never start or finish a scene with the camera moving;
   For other useful hints, ask your         allow 1-2 seconds at each end with the camera stationary.
    dealer for "Better Movies in Colour"       "Pan" on near-by objects only when these are slow-
    - a Kodak publication.                   moving - for example, carnival processions.
                                                                                                                                                                .i


                                                                                                n
   23
View original page 25Page 26 · Read text
www.butkus.us

               NE'ER *{ rRrc}rr L'G}rrUnloading
The film has to be run through the camera twice, since only half the width
is exposed each time (see page 10). When the film has run through the
camera Jor the second time, hold the exposure bar until the footage
indicator reads E. Then, open the camera and take out the full spool ol
film. Place the paper band around the film and place the spool of film in
the metal container, then put the metal container into the carton or
mailing envelope.
Print your name and address in the "FROM" space. This is the only
means o{ identifying your film.
Print the name and address of the nearest processing laboratory in the
"TO" space.
Stick postage stamps, to the correct value, in the space provided, and
secure the package. Tie cartons securely with string (don't use sticky
tape), and put in the nearest post box.

                                                                               24
View original page 26Page 27 · Read text
B]
lF^
  Lamera care
    The tinted appearance of the lens means that it has a 'Lumenized' coating, i.e, has been treated to
    avoid reflections, and reduce flare and scattered light.*    Cleaning the lens: The'Kodak'Movie'Ektanon'Lens  is built into the camera and cannot be taken
    out for cleaning.  lf it should need cleaning, first turn the lens opening to fi2.7; then blow away any
    dust or grit from the surface. Wipe the surface with a clean, soft, lintless cloth wrapped around a
    match stick. Never use a metal object because,  if the lens is scratched,  it cannot be repaired, Avoid
    using silicone-treated lens tissue.
    Use a brush to remove any dust lrom the plastic mouldings, especially in the corners. However, do
    not put a brush or anything similar in the gate in case a hair is left behind. Pull back the pressure
    pad and blow out any dust or particles oJ film or use a vacuum cleaner.
        lf you have any problems, your Kodak dealer will be pleased to advise you.
        lf the camera is to be stored Jor some time, let the motor run down to relieve stress on the spring.
    Never oil the camera.


    25
View original page 27Page 28 · Read text
r
                                               F
                                                                                                                                      I    www.butkus.us
                                                    bIALCNS ACCCSSOTICS                                                         tr:   'Brownie' B Movie Lioht
XODAK TELEPHOTO CONVERTER
This     converter              screws                           into the                                lens                                          barrel. When                                                                   designed for yourfitted,                                                             is           This Movie Light is                                 in                              the picture      the size of                  the subiect
approximately doubled. The orange rectangle  in             'Brownie'8 Movie Camera and can be easily
the viewflnder gives the field of view.                        attached to the top of the camera. First un-
F|f     FOR r,*                        :t:   i,.   i?                  screw the plastic button (which serves to
                    FilmWith'Kodachrome'                          Daylight                            Type usea                                                    keep the hole free from dirt), then place the       Haze Filter or'Kodisk'                              No.lA                    a 'Wratten'                                             (Skylight)          F.Filter to avoid excessive blueness in colour shots                 $..    Movie Light on the camera, Use the centrally-
(a) at high altitudes (b) near largeexpanses  o{               located knurled screw on the Movie Light towater (c) when the sun is hazy or obscured                                              I     attach  it to the camera.(d) of shadows  lit by clear blue sky.
With 'Kodachrome'  Film Type A used in daylight,          Connect a suitable plug to the end of the
fit a 'Wratten' Filter No.85. This filter will then              twin flex and insert two 500-watt rellector
also act as a haze filter.                                  photoflood lamps, type NM, into the lamp-
cLi:tri-:_;;:s                                            holders. A line switch is orovidedsothattheWhen shooting at about2 teet distance use a'Kodisk' Close-up Lens.                              lamps may be switched off when not filming.
When a filter or close-up lens is used  it is advisable             i    The camera and Movie Light are now ready
to fit a'Kodisk' Lens Hood also.                              H                                                        to use.When ordering filters, close-up lens, or lens hood
ask for size 255.                                                                                                                                                EIt    The subject being photographed is always

                                                        %                                                                                                                              F.I
                                                             e
View original page 28From the M. Butkus archive. Original publisher and archive notices are retained.
Check the model and edition against your equipment.
PDF verified 2026-10-10.