Film cameras
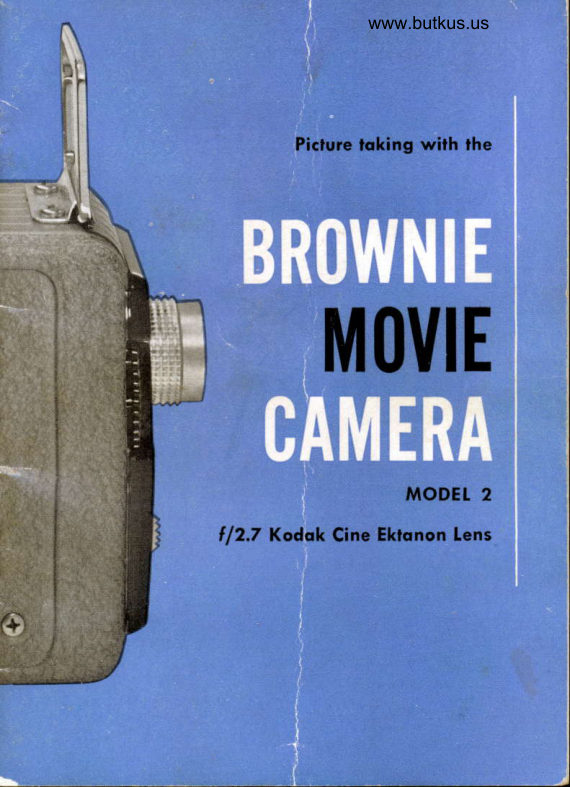
Kodak Brownie Movie Model 2 User manual
User manual for Kodak Brownie Movie Model 2. 25 pages in English. Read the original PDF, download or print a copy without registration.
25 pagesEnglish8.3 MB PDF
Loading your manual…Open PDF directly
Document details
- Brand
- Kodak
- Model / document
- Kodak Brownie Movie Model 2
- Document type
- User manual
- Language
- English
- Pages
- 25
- File size
- 8.3 MB
- Category
- Film cameras
- Document date
- Not specified in catalog
Search available document text
Find a term, then jump to its page in the original PDF. Image-only pages may not be searchable; check the PDF for exact wording and diagrams.
Page 2 · Read text
1-,9#
    Itb everybodyb movle camere


    o There is good reoson for the nome Brownie Movie
    Comero. lt's os simple to use-os sure in results-qs
    the Brownie snopshot comeros everyone grew up
     with. Lood, set the lens qccording to the built-in Sky
    Guide, ond then just oim ond shoot. Brownie Movies
    ore os eosy os thot!
       Before moking ony importont pictures-o trip or
    some speciol event-it is olwoys well to shoot o roll
    of film ond check the results. This will give you proc-
     tice in comero operotion ond provide o check on
    your equipment. lf you hove ony questions, your
    deoler will be glod to help.
View original page 2Page 6 · Read text
www.butkus.us

 Try winding the molor
 Just lift lhe winding key ond lurn
  it clockwise (to the righl) unfil the
 spring is wound tighfly. Fold ihe key
 flol ogoinst fhe comero so it will nof
 lurn when lhe molor runs.


 Try sighting it
 To use the finder, lifl up both the
 fronl frome ond the reor peep sighl.
 Hold the comerq so thol lhe peep
 sight is close to one eye. look
 through lhe sighl, ond lhe scene will
 be fromed in the fronl finder frome
 iust os it will look when the film is
 proiected on the screen.

              Mike Butkus                      Digitally                                                                                                                             DN:email=mike@butkus.org,Date:cn=Mike2024.06.17signedButkus,by19:48:53Mikeo=ButkusButkusc=US-04'00'camera manuals, ou=butkus.org,
Try slorting the motor
To storl the motor, first moke sure
lhoi the lens is nol sel ot I-OCK; then
hold lhe exposure lever toword lhe
bottom of the comero. The moior
will run until you releose lhe lever.
 lf you press the exposure lever in
ond then push up on il, it will lock
in lhe running position. In lhis cose,
to slop the motor, press  f he exposure
lever loword the botlom of lhe com-
erq ond releose il.
T. M. Res. U. S. Pot. Off.
View original page 6Page 7 · Read text
Films
Movies in full color are not only
easy to make, but inexpensive in
the 8mm size (each "frame" is half
the width and harlf the height of a
frame of l6mm film) that fits your
Brownie Movie Camera. Order Smm
roll film for your camera in either of
two types of Kodachrome Film:
Kodochrome Film Doylight Type
This film reproduces colors with
startling realism when exposed rrn-
der dayli,g/r, conditions.
Kodqchrome Film Type A
This fflm is balanced for photo-
graphic flood lamps and requires no
filter when used with these lamps.
It can also be used for taking pic-
tures in daylight with the Kodak
Daylight Filter for Kodak Type A
Color Films.
Note Eoch roll of film hos odditionol foologe for looding ond
processing purposes. This is removed ot lhe loborolory ofler the
fifm hos been processed; lherefore, wfien loading your csmero,
use lhe omount ol film specified in the looding inslructions. Film
exposed in your comero will be relurned os o 5O-foot roll reody
for proiection.
4
View original page 7
Page 8 · Read text
www.butkus.us


   never lood in direct sunlight  !
    Your Rrorvnie Nlovie Camera is as easy to load as it is
    to use-just follorv the simple steps pictured on this
    and the next few pages.                             D


I   First of oll, give the winding key     2  Next, press in on lhe center
o few lurns before you storl lo lood,        spring leof of lhe cover lotch (shown
lo mqke sure thol lhe motor is nol      by lhe orrow in the picture obove)
run down. Never lood lhe comero if      ond qf lhe some time slide the lqfch
lhe molor is run down.                 os for os it will go in the direclion
                                           indicoted to open.
View original page 8Page 9 · Read text
3    Lift ofi the cover. Toke lhe empty toke-up spool oul of
            lhe comero. Remove o spool of Cine-Kodok Film from its
             confoiner. Sove the metol con ond ihe yellow corton lo
             return lhe film for processing. Toke off the poper bond*
            oround the film ond pull oui obout o foot of film. Be espe-
              ciolly coreful not lo let foo much film unwind or the film
          on the spool will be fogged.
            *Note: Sove lhe poper bond. lt musl be ploced oround lhe
           exposed film before the film is relurned lo the melol con.


4   Ploce lhe spool of film on ihe     5   let the film follow the line with
supply spindle. The flonge of the      fhe orrow from lhe bottom of the
spool sfomped "Cine-Kodok 8 Spool"        film spool to lhe gote. Slide the film
must be up. Moke sure thot lhe spool     down into lhe gote; lhot is, belween
is properly seoted-the end of lhe      lhe pressure pod ond operlure plole
supply spindle should proiect through       {pointed out in 3 obove).
the hole in the spool flonge.                   Importonl: Alwoys inspecf the gote
                                        lo moke sure il is free of dirt or
                                          pieces of film. See poge 18.
View original page 9Page 10 · Read text
www.butkus.us


6  Push ihe film oll the woy down,     7  Hold the empty toke-up spool os
ot ihe top of the comero  first; then      shown obove. Threod the end of the
ot lhe bottom. Pull lhe film through        film into lhe slot in  f he spool core;
the goie uniil lhere ore opproxi-      ihen wind the slqck film, block side
 motely 9 inches below lhe gote.           out, onlo lhe toke-up spool by turn-
                                           ing the spool in ihe direction of the
                                         orrow.  lf the film binds between the
                                      sPool flonges, the spool is benl.*


8  Ploce fhe spool on the toke-up           I   Afler you hove looded your com-
spindle so lhot lhe instruclions ore       ero, furn lhe take-vp spool with
up. Turn lhe spool slighfly,  if neces-       the finger until lhe film appears
sqry, so lhol ihe spool fits oll the woy       snug on the reel.
down with the end of fhe spindle
pro[ecting through the hole in the
spool.                              *Note: Stroighten the spool flonges
                                  by bending lhem cqrefully with your
                                                  fingers.
View original page 10Page 11 · Read text
g*vt
A  li4 6nA
                                         Do  nol turn  the    *l                              C<rulion:
                                        toothed wheel upword.
     ffi

         IO   After you hove looded lhe comero, bul before you
             reploce lhe cover, set lhe footoge indicotor diol so thot I
           (meoning "looded") is ot fhe index pointer. To sef lhe
               diol, iust turn (clockwise) the loofhed wheel with your fin-
             ger. You musf set ihe foologe indicotor ot L or there will
          be no woy of knowing when oll the film is exposed.
             Now, check the film flow by pressing lhe exposure lever
               fo odvonce onolher 5 or 6 inches of film. Film should drow
               off the supply spool ond wind up on ihe loke-up spoolr no
             slock film should build up.


                                                        *viil
                         r*
                     ffi
 I t   Reploce the cover ond lock  it     12   Af ter   f he coYer is on ond
 by pushing the lotch to fhe LOCK        locked, hold the expcsure lever down
 end of its slot. lf the cover does nol         unfil 25 on the diol of fhe footoge
 go on, check to see thot both spools        indicotor is ot fhe index, Now you
 ore seoled properly on lhe spindles.       con loke piclures.
                                     As you tolie piclures, lhe footoge
                                              indicotor diol furns fo show you how
                                     much film is yet lo be exposed.
View original page 11Page 12 · Read text
www.butkus.us


no pictures ofler index reocfres 0


run motor until index reoches E


       Ref hreoding
     When the film is run lhrough the
       comero the firsl time, only one side
            is exposed. To expose lhe oiher side,
       remove the empty spool, ploce lhe
           full spool on the supply spindle with
       the instruclions down ond rethreod
        the film os described in the section  {     on  looding. Before relhreoding,
      moke sure lhe gole is free of dirt,
        pieces of film, or foreign porlicles.
        Hold lhe emply spool with the
       orrow up,  f hreod lhe end of the film
         into fhe slof, ond ploce the spool on
        the ioke-up spindle.  f urn lhe tqke-
      up spoof wilh the finger vntll the
        film appears snug on lhe reef.
        Sel the foofoge indicotor qt [. Press
       lhe exposure lever io moke sure
        lhot the film is lhreoded properly.
        Reploce ond lock the cover. Hold ihe
       exposure lever down uniil fhe foof-
      oge indicolor shows 25. Then, moke
        pictures unfil the indicofor shows O.
View original page 12Page 13 · Read text
Lens Openings
The lens opening must be adjusted to suit the light
conditions. Do this by rotating the knurled DIAL
until the desired lens opening number is opposite the
red dot.
  The lens opening marked 2.7 is the larrgest and ad-
mits the most light. Each succeeding marked opening
fror.r'2.7 to 16lets through only one half as much light.
Eilch marked lens opening is called a "stop"; the white
dot between marked openings indicates a half stop.
   lf the lens is set between a u,lilte dot and marleed
Iens opening or at "LOCK," tlte ntotor taill not run.
The Sky Guide, located on the front of the camera,
shows the proper lens openings to use under various
daylight conditions with Kodachrome Film Daylight
Typ". For example, under hazy sun conditions, rotate
the knurled dinl so that 5.6 is opposite the red dot.
View original page 13
Page 14 · Read text
www.butkus.us

     The Exposure Guide, located on the side of the camera,
     shows the proper lens opening to use under daylight
      or flood lamp conditions with Kodachrome Film Day-
      light Type or Kodachrome Film Type A. Slip the little
       silver card packed with each roll of film into the guide;
     one side of the card is for daylight exposures, the other
      side for flood lamp exposures.
     Exposure Meter For those rvho wish to use an expo-
      sure meter, the camera speed is 16 frames per second,
    and the shutter speed is about 1/35 second.

   Neqrness lo Subiect
    The Brownie Movie Camera is of the ffxed-focus type
    and needs no focusing. However, for sharp pictures,
     the subject must be no closer to the camera than a
     certdin distance. This distance depends on the lens
    opening as shown in the table below. For example,
    with the lens opening at B, the basic exposure for
    Kodachrome Film Daylight Typ", all objects 3l!z feet
    and farther from the camera are in focus.

          .     NEARESTAT CAMERA-TO-SUBJECTVARIOUS IENS OPENINGSDISTANCES

IENS OPENING

Neorest Subiecl-
                                      fr.to-Film Distonce         I
View original page 14Page 15 · Read text
Finder
    The finder on your Brownie N4ovie Camera is of the
    open frame, sports typ" - no lenses to clean. When    the camera is not in use, the finder folds flat on the
    top of the camera. To ready the finder for picture
     taking, just raise the front frame and the rear peep
     sight - spring pressure holds them erect.
      Because the finder and the lens are separated, they
    do not "see" quite the same view. This efiect is called
     parallax and is especially noticeable in close-ups.
      Note that there are two arrows on the front frame
    of the finder. As you sight through the finder, the
    arrow near the upper
    right-hand corner of the
    frame indicates the up-

When subjecf is 3t/z to 6 tt


      For close-ups, lhe orrows will
     help you lo give your subiecls
     heodroom - the upper right     for subiecls ol oboul 4 teeli
     lhe lower lefl for subiecls ol
     oboul 2 feel.

When subjecl is obout 2lt.


     T2
View original page 15Page 16 · Read text
www.butkus.us

per edge of the scene when the subject is 4 feet from
the camera. The other arrow, on the left-hand edge
of the frame, indicates the upper edge of the scene
when the subject is 2 feet from the camera.
  For example, you want to make a close-up on
Kodachrome Film. Set the lens opening at 8 (if subject
is front-lighted by clear sun) and move up to about
4 feet. Then tilt the camera up until the subject's head
is just below the pointer near the upper right-hand
corner of the front frame.
    If you want an even closer close-up, use a Series 4
Kodak Portra l*  Lens. With it, you can be as close
as 23 inches with the lens set at 8. In this case, you
would move up to about 2 feetfrom the subject; tiren
tilt the camera up until the subject's head is just
below the pointer on the left side of the front frame.
Winding qnd storting the motor
Be sure that the exposure lever is not locked in the
running position. If the motor is completely run down
with the exposure lever in the continuous-run position,
wind the motor a few turns to release the exposure
lever.
   Lift the rvinding key and turn it clockr,vise until the
spring is wound tightly. Fold the key flat against the
camera; otherwise  it r.vill turn as the motor runs.
View original page 16Page 17 · Read text
For intermittenl run-
                                                                                               I   ning, press lhe lever
                                      toword lhe boltom of
                                           lhe comero.


             i]&S* JJtrLt|i5        ,,


   T'o start the motor of your Brorvnie Movie Camera,
hold the exposure lever dor,vn. To stop the motor, re-
lease the lever. When you press the exposure lever or
release it, avoid moving
the camera. Such mo-
tion will cause the pic-
tures to wobble, which
will be disturbing when
the pictures are pro-
jected on a screen.
   If you want to get in-
to the picture yourself,
mount the camera on a
tripod or other firm support; press in and up on the
exposure lever to allow the motor to run continuously.
To stop the motor, press the exposure lever toward
the bottom of the camera and release it.
I4
View original page 17Page 18 · Read text
www.butkus.us

Operoting
For hand-held operation, hold your Brownie Movie
Camera steady and make no sudden movements while
you are taking pictures. Grasp the camera firmly with
both hands and brace your elbows against your body.
The exposure lever can be operated rvith either the
right- or left-hand index finger, whichever you find
firore convenient.
  Hold the camera so that the rear sight of the ffnder
is close to your eye, as pictured below. In this way,
the entire scene will be framed in the finder.
  Before each scene,
make sure that the mo-
tor is wound and that
the lens opening is set
properly for the prevail-
ing light conditions.
   Steadiness is of great-
est importance when
you are making movies.
Any unsteadiness while
taking the pictures will
be greatly accentuated
when the film is pro-
jected. For steadiest
pictures, mount your
Brownie Movie Camera
                     r5
View original page 18Page 19 · Read text
orl a tripod or some other finn strpport. Atlipocl socket is built into tlrc basc of tlrcr #                           *#'cilmera for mounting tl-re carncril on the
tripocl hcnd. Tlie tripocl sockct is tappc<l
for a standar<l li x 20 thrcacl.
Scene length                                   I--
Usuallv, alrotrt I to 2 feet of filrn is thc   8e)
l)ropcr lgngth for irverrrge uction sc.clrcs.
This um<lunts to al>out 5 to t0 scc,onds of takirrg tirnc.
Naturirlly, some scenes you u'ill u'rrnt to nrake longcr
thun others. For example,  ir serics of lunclscupcr shots
rnight rvell be rnacle Ionger tlran sccr-rcs rvhich inclucle
lrrief, fast-rnoving rrcti<ln. Sinc.e tlre cirrncra rr-rotor u'ill
rlrive altout B feet of fihn at a u'incling, don't try to
fihn scenes that u'ill run longcr than ,30 or 40 scconds
rvithout rcrvinding. A good u'ay to tirnc a sccnt' is t<r
                               corrrrt slos'ly arr<l tlt:lilrer-
                                  rttclv to yrxrrsclf, "orrc :urrl
                               onr: tlrousiurtl, tu'o an<l orrc
                               thorrsirncl, thrcc irnrl onc
                                                                              cirr)                                 thorrsirnrl - ctc." Yorr
                                            tirnt-. sccncs s,ith srrrltrising
                              acclu'ilcv lrv tlris aclclitiori
                       of "arrri ,,rre tl,,r,,rirrrcl"  trr
                              eaclt ntrrnbcrccl  scc'orrrl.
                        l6
View original page 19Page 20 · Read text
www.butkus.us
Filming Tips
Whenever possible, try to photograph an extended
scene by a series of views, moving the camera between
shots. However, in some instances, a panoram shot
may be desirable.
  The secret of a good panoram is to move the camera
slorvly and smoothly. Plant your feet solidly on the
ground; hold the carnera steady on the first scene for
a rnoment; pivot from the waist and panoram slowly.
  Never panoram on near-by objects. When it  is
necessary to panoram to follow a moving subject,
keep the subject centerecl in the finder.
Unlooding
When the fihn has been run through the camera for
the seconcl time, hold the exposure lever down until
the footage indicator reads E. Then, open the camera
ancl take otrt the full spool of film. Place the paper
bancl around the film, plarce the film in the metal con-
tainer, return the container to the yellow carton.
  Although the Eastrnan Kodak Company will con-
tinue to process Kodachrome Film, we are no longer
permitted to sell film in the United States with the
cost of processing incltrded. Do not mail your film to
the Eastman Koclak Conrytany, but return it to a
clealer aoho uill arrange for Ttrocessing. If you desire,
you ma7 specify the processor. Complete instntctions
are packed toitlt tlrc filnt.
                                             I7
View original page 20Page 21 · Read text
This lens has been Lumenized - treated to avoid re-
flections, flare, and scattered light. The tinted appear-
ance of the lens is due to this treatment.
Cleoning the [ens: The Kodak Cine Ektanon Lens is
built into the camera and cannot be taken out for
cleaning. If the lens should need cleaning, first turn
the lens opening to  f 12.7; then blow away any dust or
grit from the surface. Wipe the surface with a clean,
soft, lintless cloth wrapped around a match stick;
never use a metal object or silicon-treated tissue.
Cleoning the gote: The gate must be kept clean to in-
sure proper operation of the cam-
era. Always, before rethreading,
make sure that the gate is free of
dirt, pieces of film, or foreign
particles. To clean the gate, first
remove the film spool from the
camera. Press forward and down
on the end (arrow in illustration)
of the sPRTNG that holds the pnns-
suRE PAD in place. Turn thrj cam-
era over; the pressure pad and
spring fall out.

r8
View original page 21
Page 22 · Read text
www.butkus.us

           Carefully ciean the polished surfaces of the gate and
        pressure pad with a slightly moist cloth; do not scrape
       the track with any metallic obiect. Then polish the
        parts with a clean, soft, lintless cloth. Make sure the
        parts are dry.

    1
        Drop the pressure pad back into place. Guide the
       T-shaped tongue on the pad into the slot at the
        bottorn of the gate bracket. To replace the pressure
      pad spring, hold the spring with the hook toward
        the top of the camera and the little bump torvard the
         gate. Slide the bottom end of the spring between the
        gute and the lower film guide bar; then, press forward
      and up on the hook encl so that it seats itself under
           tlie trpper filni guicle brrr. If you have any trouble, your
      Kodak detiler rvill help you.
              If the carrrerir is to be stored for some time, let the
       motor mn dorvn to relieve stress on the spring.
         Never oil the camerat.


:l
        Seriol Number:
'l        Eoch Brownie Movie Com-
      I       ero hos o seriol number
        sfomped on it for positive
          identificotion in cose of
          loss or thef l. The seriol

      i        number is locoted on lhe
          reor finder brocket on fhe
         top of the comero.
View original page 22Page 23 · Read text
Converler Lenses
Converter lenses specifically designed for the Brownie
Movie Cameras are available from your Kodak dealer
in both the Wide Angle and Telephoto types
  The Wide Angle Converter Lens reduces the focal
length of the lens to increase the angle of view and
obtain. wide-angle effects; the Telephoto Converter
Lens increases the focal length to nearly double the
image size at the same camera-to-subject  distance.
  Extremely simple to operate, these converters are
fttted into the lens mount. Camera operation is the
same as without the converters. Clip-on finder adapt-
ers are available to show the field of view when these
converters are used.

Kodok Combin<rtion Lens Attqchment
With Kodnk Combination Lens Attachments you can
use any desired combination of Portra Lens, Kodak
Wratten Filters, and a Kodak Lens Hood. Use Kodak
Combination Lens Attachments Series 4. The Kodak
Adapter Ring Series 4, No. 43, screws directly into the
lens mount.
   First screw the Adapter.Ring into the lens mount;
then remove the retaining ring. A Kodak Wratten
Filter Series 4 is inserted in the Adapter Ring and is
held by the retaining ring or a Lens Hood.

20
View original page 23
Page 24 · Read text
www.butkus.us

        To use more than one filter at a time, obtain one or
       more additional Series 4 Kodak Retaining Rings.

     Brownie 4-Lqmp Movie Light
        N4akes indoor movies as easy as sunny-day shots. It
         attaches to the tripod socket of your camera and allows
        illumination to always be kept on the subject because
           it moves with the camera. Four reflector-type photo
       lamps are controlled by two switches which provide
       an instant choice of two- or four-lamp illumination.
     A guide on the bar shows the correct exposure.

       Field Cqse
      To protect your camera, order
      the Kodak Field Case for
       Brownie Movie Camera. You
      need not remove the camera
       from the case to make movies
       -merely swing the top down.


fl
View original page 24From the M. Butkus archive. Original publisher and archive notices are retained.
Check the model and edition against your equipment.
PDF verified 2026-10-10.