Film cameras
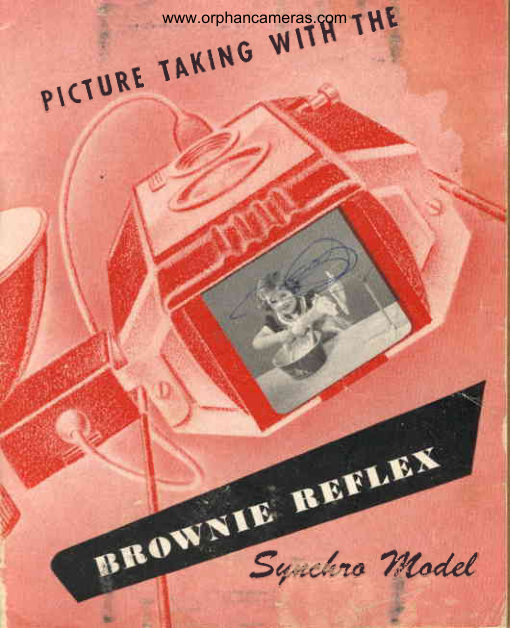
Kodak Brownie Reflex User manual
User manual for Kodak Brownie Reflex. 29 pages in English. Read the original PDF, download or print a copy without registration.
29 pagesEnglish2.4 MB PDF
Loading your manual…Open PDF directly
Document details
- Brand
- Kodak
- Model / document
- Kodak Brownie Reflex
- Document type
- User manual
- Language
- English
- Pages
- 29
- File size
- 2.4 MB
- Category
- Film cameras
- Document date
- Not specified in catalog
Search available document text
Find a term, then jump to its page in the original PDF. Image-only pages may not be searchable; check the PDF for exact wording and diagrams.
Page 2 · Read text
www.orphancameras.com ltlt'               T{tI$
      1IKING
?\cl\tRt


                 Sq-t,:r("o ?#{ode/
View original page 2Page 4 · Read text
www.orphancameras.com                            Whal ftlm
arif6 ile                      to use                           r"iJiiJ     ":,*.J
                                      lhe comerq
 BROvl|NIE5@;;"'     Jj'     nrrl    rV    U L L I    L T                                       'I4'
   NLILLA                                           ";i
  SYNCHROMODET                           '                   n             it'

   You   will   enioy  everv  pic-                               Ph;        tb'   ture-taking   mornent   that
   y o u   s p e n d  w i t h    y o u r
   Brownie    Reflex   Synchro      Time
   N{odel, because  it combines      Exposures      ;;
   simplicity  of operation  with
   excellent performance.           Suggestlons
     This  manual   gives  you         for better
   quickly  and  simply  the  es-       piclures     24
   sentials of camera operation.
  Read  it carefully.             Removing
                                 the ftlm                          1',
View original page 4Page 5 · Read text
www.orphancameras.com
?t'o tao? fo Opaan
To ]oke any piclvre  all you do is:
    Check the distdnce, keeping in mind that any-I'
     thing five feet from the camera and beyond is
     , photographedsharply.
    Sef ihe time fever  in one of two  positions:2-     66I"          for InstantaneousExposures(Snapshots)or
     t'B"          for Time Exposures.
    Press the exposure butlon.3


    A. Time lever                                         www.orphancameras.com
    B. Exposurebutlon
   c. View finder
    D. Film winding
      knob
View original page 5Page 6 · Read text
www.orphancameras.com
 It  hos o  reflex   finder  in  which  you  see your  sub-
ject  in  actual  picture  size, resulting  in  excellent  pic-
 tures right from  the start because you know  just what
each picture  will  include  before you take  it.
 It  fokes   flosh  piclures   with  the  aid  of a  Brownie
Flasholder.  With   this attachment  you can  take  pic-
tures any time-duy    or night-indoors     or out-   win-
ter or summer. The  Flasholder  is put on in a matter
of seconds and the flash is set off by the shutter,  thus
making  flash  pictures  simple  to  take. You  merely
press the exposure  button  the same as when  taking
non-flash  pictures.
It  tokes   color  pictures  as well  as black  and  white.


                           Brownie
                            Flosholder
                                   for
                           Brownie Reflex
                          Synchro Model
View original page 6Page 7 · Read text
www.orphancameras.com


7,/6ai       to o(4e        /"h
SIZE

Use Kodak  Film  No. 127 . The negative size is 7 5/ x
I sl inches.

6
View original page 7
Page 8 · Read text
www.orphancameras.com
TYPE

 To  obtain  best results, follorv  the rccommendations
 belorv and  select the type  of  film  best suited  to the
 pictures you plan  to make.

O  For ouldoor  pictures in sunlrghl or  for  pictures
    with Photoflash Lamps use: Kodak Verichrome
    Film, 12 cxposures,Y127; or, Kodak Plus-X Pan-
   chromatic Fihn, 12 exposures,PX127.

a  For indoor snopsAots with  Photoflood Lomps use
    only: Kodak Super-XX Panchromatic Film, 12
   exposures,XX127.
   Norn:  Kodak Super-XX  Film  is not recom-
   mended for use in bright sunlight r,viththis camera.


O  For  pictvres   in  full  color  use Kodacolor   Film,  9
   exposures, C127. Exposed outdoorsin bright sunlight
    onl2, this  film  yields  color  negatives  from  which
   Kodacolor  prints can be ordered  through  Kodak
    dealers.
View original page 8Page 9 · Read text
www.orphancameras.com


   7o.4oad
           Tvrn the Latch A on the back of the camera
             to "OPEN" and pull the Flru Horonn B out of
            the bottom of the camera.

          The Emply Spool C in the Fnu Hororn, above   2  the WTNDTNGKNon, is to be used as the take-up
           spool on which the exposedfilm will be wound.

  I.OAD CATNERAIN SUBDUEDTIGHT-
       8


I
View original page 9Page 10 · Read text
www.orphancameras.com
                      Do not break the seal on the
                                         roll   of  film  before  the   roll
      7/n e!       hasHolderbeenasplacedthere isin dangerthe Filmof
                              the  film  unwinding  and  be-
                          coming  fogged.


                           E-Slotted pin end
                           F-Plqin pin end


    rv?   Put the roll of frlm in fhe sr'de D of the Fnu       HoroBn  with  the Srorrno  Pw ENp  of the  film
        spool in the bottom  hole.

NEVER IN STRONG, DIRECT I.IGHT
                                                9
View original page 10Page 11 · Read text
www.orphancameras.com
     Breok  lhe  seol on lhe   roll  of  fflm.  Pull  the end4      of the paper across the opening  in the back of the
     Frln  Flornnn  and thread  it through  the longer slit
      in  the  take-up  spool  as Jar  as  it  tnill  go. Make
     certain  that  the black side of the paper  is toward
     theinside of the Fnnr HoronR.  Turn  the WrNorNc
    KNos  and bind  the end of the paper securely to
     the take-up  spool; two  or  three turns  are  suffi-
      cient. Be sure that the paper is started straight on the
     take-up spool.

     Reploce   ihe  Film  Holder  and  turn  the Lnrcn5  on the back of the camera to "LOCK."

    Turn  ihe. W,inding Knob  until  a  small hand6
    appears in the red rvindow on the back of the
    camera. Continue turning the WrNorNc KNos
    slowly until the figure 1 is centered in the win-
    dow. You are now ready for your first picture.
            o o o ol


Load  the  filrn  in subdued  light-never      in  direct
sunlight   or strong   artificial   light.
1 0
View original page 11Page 12 · Read text
www.orphancameras.com


                                                                                                                         www.orphancameras.com
s
     Sef fhe Time Leyer  on  the front  of the camera
      at the letter  "I.t'
     Look in the red window  on the back  of the cam-2  era to make  certain you have advanced  the film.
    Check  the  distonce,  remembering    to  keep  at3  least 5 feet from  the subject because the Brownie
     Reflex  is a fixed-focus camera and only objects 5
     feet and beyond photograph  sharply.
CAUTI()N:
Although   a  close-up  subject  appears  sharp  in  the
finder, do not make pictures  of subjects closer than 5
feet unless you  use a Kodak  Close-Up  Attachment
No. 13. (See Page 19.)
                                    TT
View original page 12Page 13 · Read text
www.orphancameras.com


-E.i:i ;
1 .'.f-ti:t}*' { ' \                -  :

                     l@-**"

   Ouldoor  snopsriots cirn i)c nrirdc anv  tirrlc frorn one
    Irorrl lrlt<'r'srrnliscur)til ol)c horrr llclot'e srlnst:t. Ii.ur
    l)('sLf('\rrlrs.tlr(' srrlrjcctshould bc in lrright sunlight or
   opcn  -slr;rclt'rr ith rrrroi-rstltrctcclclc;rr sk1, ot.*r-n"od,

   With the sun behind your bock or over vour shoulder,
      [ , r c r r t t t' l r c s t r l r j < ' t 'i tn  t h t ' f i n d e r   t h e r v a y 1 ' o u r v a r r t i t
      I t r : 1 1 , F r ' ;irrrr t l r t '  l r i t t u r e .


                                                                                                  I                 ' * n  i


     11 a:
View original page 13Page 14 · Read text
www.orphancameras.com


    comerr  sleady, and  s/
  BurroN  until   it clicks.  If no cl
 r has not been released and no
made. Any  rrrovement  of the ca
  blurs the picture,  therefore,
ess the Exposure Button.
     the film to the next ex
     WrNorNc KNoe and y
        Get into the habi
View original page 14Page 15 · Read text
www.orphancameras.com


          ?ee&az,a
Pictures at night,  either indoors  or out, can be madewith"6nto/ha6the aid of a Brownie  Flasholder and SM  Photo-
flash Lamps.  E,ach lamp  yields a single flash rvhich
lasts 1,l200th  of a second. Because the flash is over so
quickly,   it  is fast enough  to catch a child  at play.
Lood the cqmero  with Kodak  Verichrome   or Kodak
PIus-X Panchromatic  Film.

1,4
View original page 15Page 16 · Read text
www.orphancameras.com
     Attoch  the Brownie   Flosholder  by sliding  the forked
    end A of the bracket under the small metal knob on
     the side of the camera;  then push the bracket down
      until  the hole in the other end of the bracket  fits over
     the screw B on the top of the camera. Plug the end C
      of the rubber  Flasholder cable into  the socket on the
     front  of the camera. The  cable must  be connected
     from  underneath  as illustrated   or   it  will  interfere
     with  the camera  lens.


I
                                                                                                                                                                                                      l )
View original page 16Page 17 · Read text
www.orphancameras.com
Instsll the Bolferies by
lifting   either   one   of
the  metal  clips on  the
back  of the Flasholder
battery case and remov-
ing the back cover. Place
two  pen - sized  pocket
flashlight   batteries   in
the  case so  that  their
heads point  in opposite
directions as illustrated. Replace the back cover on the
battery  case and make sure both metal  clips snap into
position.

Sef ihe Time Lever  at the letter  "I."

Insert sn SM lamp  into  the reflector  socket and give
the lamp  a slight turn clockwise to lock   it in position.

Check  the  lamp-to-subjecf    disfonce   according   to
the table and locate the subject in the finder.

Press fhe Exposure   Butlon   until     it  clicks. This  will
open the shutter and flash the lamp.

Remove   fhe  used  lamp  by  turning   the  E;ncron
KNos D on the back of the reflector  socket.

1,6
View original page 17
Page 18 · Read text
www.orphancameras.com

TXP()SURESWITHSiTFLASH[AfI{PS
 (s*,;:i::-,1":il:,.,::ll.ii, .
   !:FTEIilI     fomp  fo Subfecl Distanca
verilhr;m;  From 3* fedr to 12 feet

            From 6  feel to 15 feet


.rn1*oa;U          Crorerup*loch+nentNo  i,  *d   o".rr.*  ,,
:;:,];':;;.Ti;lJ;'*,;:,,"*riors wi,h,ish,,
colole{  wolls ond  cpilingrs. Fo'rrciufdoor pictures oi ni$ht;     ,
keep  sub.iects ot the lleorCr  disisnces.                                     ,  ,

Coufion, Under auUo,r, conditions, the lomps moy crack
or  shotler  when  ffoshed.   lt; is therefore  recommended
fhot o proteclivC fronspcrent  plostic screen be used over,
lhe frohr of the reflector. Do  nol  ffash the lomps  in onl
exp|osive;otmospherewithoutscfetyequipmen|.

                                                                          t 7
View original page 18Page 19 · Read text
www.orphancameras.com
TheNo.5 PhotofloshLomp
Although  No. 5 Lamps   fit the receptacle they are not
recommended  for use rvith  this camera. The Brorvnie
Reflex Synchro Model, was dcsigned for use with  the
SM Photoflash Lamp.
     If, hon'ever, a No.  5 Lamp   is used, set the Ttue          !
LBvnn  at the  letter  "B",  place the camera on a  tri-
pod or other  firm  support and photograph  only  still
subjects. The  lamp-to-subject  distances for the No. 5    n
lamp  are given  in the follor.t'ing table.

  EXPOSURESWITHN().5 FLASHLAMPS
        o CAIilIERA ON A TRIPOD e
                                   rrB"          ( Set the Time Lever ot letter       )
                                                                   $
                                                                                                                             $r$
    FILM       Lamp fo Subject Dislonce                          si
                                                                              "
                                                                                                               fl   Verichrome  From 6 feet to  l5 feet
   Plus-X      From 7 feel to  l8 feet
  Super-XX   From 9 feet to 25 feet

1 8
View original page 19Page 20 · Read text
www.orphancameras.com
         ehap-?tpz
                 WITH THE KODAK
             CTOSE-UP ATTACHMENT
                           N o .  t 3

The Brownie  Reflex  is a fixed-focus camera  so that
only subjects 5 feet from  the camera and beyond  are
photographed  sharply.  For pictures closer than 5 feet,
such as head and  shoulder  portraits,  or close-ups of
flowers and  similar  subjects, obtain  a Kodak  Close-
Up Attachment  No.  13. The attachment  snaps over
the camera  lens and  the subjects must then be between
3 and 4%feet from the camera.                         19

                                                                                          ,,,r       i
View original page 20Page 21 · Read text
www.orphancameras.com
           ?dAqnreo
Indoor  snapshots can be made  by  using  PhotofloodLamps"6afo{nodrvhich give a stcady light  of great brilliance.
lomps-Obtain    one No. 1 and one No. 2 Photoflood
Lamp  and suitable reflectors from  your photographic
dealer. The No. 2 lamp givcs trvice the light  of the No.
1 lamp.  Photoflood Lamps   fit  all r:cgular sockets.
Film-For   snapshots rvith Photofloods, usconly Kodak
Super-XX   Film.
CaurroN: Do not touch the lamps or allow them  to be
in contact with  anything while they are in use because
they becorne very hot.
SNAPSHOTSwith Photofloods
Sef flre lime  [ever  ot the lefier "1"
Ploce o lomp at each side of the subject as shown in
the diagram.  Both  larnps must be  3rl  feet
from the subject and the No. 2 lamp  should
be from  2 to 4 feet higher  than  the No.  1
lamp. Thc  subjcct should be near a  light-
colored background.
20
View original page 21Page 22 · Read text
www.orphancameras.com


Hold the comerd at least 5 feet from the subject.
Compose fhe piclure in the finder; be sure the lamps
are not included.
Press the Exposure BuIIon just  as you  rvould  to
take a snapshotoutdoors.
                                            2 7
View original page 22From the M. Butkus archive. Original publisher and archive notices are retained.
Check the model and edition against your equipment.
PDF verified 2026-10-10.