Film cameras
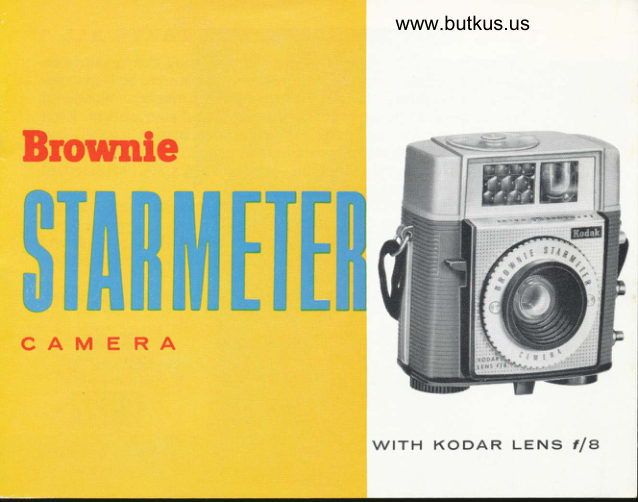
Kodak Brownie Starmeter User manual
User manual for Kodak Brownie Starmeter. 17 pages in English. Read the original PDF, download or print a copy without registration.
17 pagesEnglish3.6 MB PDF
Loading your manual…Open PDF directly
Document details
- Brand
- Kodak
- Model / document
- Kodak Brownie Starmeter
- Document type
- User manual
- Language
- English
- Pages
- 17
- File size
- 3.6 MB
- Category
- Film cameras
- Document date
- Not specified in catalog
Search available document text
Find a term, then jump to its page in the original PDF. Image-only pages may not be searchable; check the PDF for exact wording and diagrams.
Page 2 · Read text
YOUR BROWNIE STARMETER TAI(ES ALL 3
  Youn Brownie Starmeter Camera will take good clear pictures on
   cloudy or bright days. Operation is very simple the built-in expo-
   sLrre meter shows the correct lens-opening number. Wonderful
   pictures will be your reward if you understand  yor.rr camera. Read
   these instructions carefully, and keep your camera handy; then
   practice each step as it appears in the manual.
    t Kodak Verichrome Pan Film-produces 3/2 x3/2-inch standard
   enlarged black-and-white prints.
  2 Kodacolor Film-produces 312 x 312-inch standard enlarged
   color prints.
  3 Kodak Ektachrome Film for Daylight for daylight pictures and
   flash pictures-prodr.rces super slides 2 x 2 inches, picture size
   ll2 x 1/2 inches.
    See your photo dealer for processing, prints, and enlargements.

        l(odek         Kodacolor        Xodak
         Vsrlchromo                          Eklachrome
         Pan Fllm                 'im'   WM
                                          for l2 color         ()   for.l2color  o       m:,'j;;:-ffi  o snopshols                 3ilde3
View original page 2Page 4 · Read text
Venmo @mike-butkus-camera  Ph. 2083
PayPal Name  Lynn@butkus.org      www.PayPal.me/lynnbutkus
View original page 4
Page 5 · Read text
NorE: lf you are practicing with
                                                  ,in       an empty camera and find the                      AIWAUS----- --v-   -'-           shutter release cannot be Dressed
                      SUbdUed--'  l,iOht"r'--      down,bottomofthecamera.turn the wind knob on the

                    I Push the LEVER on the bottom ofthe camera to open; then with-
             draw the FILM HoLDER from the camera as illustrated.
          2 The empty spool should be over the WIND KNoB. If the end of the
                spool does not engage the wind knob, turn the wind knob.


                                                       Digitally signed by Mike Butkus
                                         DN: cn=Mike Butkus, o=Butkus camera manuals,
                                                           email=mike@butkus.org,                                                                      c=USMike Butkus  ou=butkus.org,Date: 2022.12.07                                                                 19:57:20 -05'00'
View original page 5Page 6 · Read text
www.butkus.us
3 Place the cncl of the full filnt spool betrveen the fork of tlre senrxc;
pointed out by tlte word LoAD on the filnr holdcr. pr-rsh up agairrst
the spring: then swing the other end of the spool in and let it snap
into the uolr.
4 Break the filnt sealing band (rentore when indicated), then draw
the paper, colored side or,rt, over the Ia:-.ge opening in the film l-rol<jer
rrarked FILI\.{ THIS SIDE. Thread the end of tl-re paper evenli,
into the slot of tlre enrpty spool. Turn tlre rvind knob trvo frill
turns and at the strrne tinte apply sligltt pressr-rre on the pxper io
be certain it is r.vound on the spool str:iight and tight.                5
View original page 6Page 7 · Read text
5 I{cpllcc thc lllnr Itoltlcr': ttltkc srrrc it  is
lll thc ull   irr. l.tte k it in pltiec lr" ntor  rt-t-g
llrc le\cr  lrll thc tltr  to I()( K.
6 l-ook inl() llrc rcti rrintlorr ()n 1l]o aillllefit
lr;r,k. \\  ir',.1 tlrr' lilrrr unlil tlle r\.rr ninr ilr r,,\\
lrpl)ciirs: then slorrlr uintl Lttrlil thc "l'"  i.
ccnlcrc(l in llrc u inrltt*. l'hc Iilttt :rttttc  f.i c-
ccrics clclr ol' thc ll  Irtttrbcts.

   Bclbre rnlrking irn)' inrportiu)t  l)ir'-
   tures a trip or sonre special event
     it is rvell to sl.root a roll of tilnr out-
   tloors and indoors ivith flash. This
    rvill givc yorr practice and providL'
  a check on your cqLriprnent. Your
   Kodak dealer rvill be glad tohelp yoLr.
     Kcepr tlrc lcns sparkling clern.
  Wipe the surface gently rvith Kodak
   Lens Cleaning Pa;rer or Kodak Lens
   Cleaner arrd a solt, lintless cloth.

6
View original page 7Page 8 · Read text
www.butkus.us
  PICTURETAI{ING
    Youn camera has a built-in exposure meter rvhich measures light
      reflected from the subject to the camera. The amount of light is in-
     dicated in the n'leter window as an exposure-value number rvhich is
     the correct lens-opening setting for the camera.
     To set (he meter you must know the daylight exposure index of
     the film loaded in the camera. Kodak Verichrome pan Film has a
                           daylight exposure index of 125 which is
 EV WINDOW                printed on the paper leader of the film. The
      LENS OPENING RING exposure indexes for Kodak color films are
                      l- ,o,*rr*  given in the instructions packed with the
                                films. Proceed as follows:
                                  I The lower portion of the EXposuRE DrAL
                                                il   on the top of the camera is marked for
                       American Standard Exposure Indexes of 32,
                                       }},1   40,50,64, 80, 100, and 125. Turn the dial by
                                   its two raised cross-ribs until the line from                     #
                            the exposure index number of the film in the
                        camera is at the INDEX MARK. For examole:
                           the exposure index for Kodacolor Film is
INDEX MARK               32-set the line from 32 at the index mark.
View original page 8Page 9 · Read text
2 For outdoor pictures, point the camera
                                 toward the subject and hold it there until the
                                 exDosure reading, clescribed in this paragraph,
                                hus heen made. The porNrnn in the exposure
                                     dial on the top of the camera will move in
                                   the window and point to a line (or between
                                    lines) leading to one of the five exposure
                                value numbers* located over the window.
                             Note the number or between-number mark
                                  indicated by the pointer.
                      3 Turn the r-ENs opENrNc RrNG on the front
                                  of the camera until the number or between-This picture shows the recom-mended rvay to hold the camera.      number dot indicated by the pointer appears
It is important that you hold the       in the EV wrNDow. The camera is now set
caflera steady and that your        for proper exposure.
finger or the neck strap is not in
front of the taking lens or the     4 Compose the picture with your eye close
exposure n'leter.                       to the rear opening of the viewfinder so that
                         you can see all four corners of the front
                                    finder. For sharp pictures, the camera-to-
                                    subject distance should be no less than 5feet.
                         xlf the meter reads less than  | 2, the light is insufRcient for proper exposure.
View original page 9Page 10 · Read text
www.butkus.us
         SHUTTER RELEASE     5 Hold the camera steady while slowly
                                  pressing the snurreR RELEASE all the way
                              down.I
                      6 Wind the film to the next exposure.
                                                shr-rtter release rvill remain lockedI                        The
                                  after each exposure until the winding
                         knob is turned. This feature prevents
                         more than one exposLtre on the same
                             frame of film.

         lmporlont: For proper exposure, the meter must read light
           reflected by the subject; therefore, on sunny days, keep the
         sun behind you.

   UNLOAD always ,in subdued li,ght
         I After the l2th snapshot, wind until the end of the paper passes
       the window and is completely wound on the take-up spool.
View original page 10Page 11 · Read text
2 Push the lever to opEN. Withdraw the roll holder. Grasp the end
of the film spool near the forked spring and swing the film out.
3 Fold the end of the paper under. Seal it with the paper sticker.
4'To reload the camera, move the empty spool to the wind knob
side of the roll holder.
         Importa,rt: Do not leave the exposed film in bright light. Always have the
         film developed as soon as possible.

              FLASH
              PICTURES
                                   FL.q,sH PrcruREs are easy to make.
                               Just attach a Kodak Supermite or
                            Kodalite Midget Flasholder.
                      When taking flash pictures, the
                             exposure meter no longer provides
t0
View original page 11Page 12 · Read text
www.butkus.us

      the proper exposllre-value numbers for setting the lens opcning
       ring on the front of the camera. Proceed as foliows:
         I Attach the I(odak Flasholder to your camera. See page 12 fot
       instructions for the Suoermite Flasholder.
    2 Insert a flash larnp in the socket.
       Use clear flash lamps with Kodak Verichrome Pan or Koda-
       color Films. Use blue flash lamps to make color slides indoors with
     Kodak Ektachrome Film for Daylight.
                        flasholder,               either                                consult                                    the table                                                 the                                                 back                                    on                                                          of thel      flasholder.3 With                                                           proper               Then,                                lens-opening                                                                              ex-                                              ring                      turn the                                                      the                                                          until
      posure value number for the distance from the camera to the sub-
        ject, as shown in the table, is centered in the EV window.
    4 Cornpose the picture; then press the shutter release to flash the
      lamp and take the snapshot.
J             Norc.'The most pleasing appearaltce of the subject's eyes will result when
                 the flash picture is taken in a brightly lighted room, and the subject is not
                looking directly at the camera.
     5 Depress the L.qvp RELEASE to remove the used lamp.
                                            n
View original page 12Page 13 · Read text
KODAK SUPERMITE FLASHOLDER
How to install the batteries:
I Remove the cover plate by loosening the coin-slotted screw.
2 Make sure that battery and flasholder contacts are clean: then in-
sert two fresh l/2-volt penlite BnrrrRrEs* with both bases down. tJse
fresh batteries which test at least 3/2 amperes. Make sure that the
                           cloth puI-I--rns is under the inside bat-
                             tery; the tab end, however, must be out
                          for removing used batteries.
                 3 Fold the end of the tab over the out-
                            side battery, replace the cover plate, and
               BATTERtEs tighten the coin-slotted screw.
                                         *tf u foautite Midget B-C Flashpack is used in
                               place of penlite batteries, insert the required l5-
                                   volt battery after the flashpack has been installed.
                           .-   plJ,   Place the end of the flashpack with the plus sign
                                         i;;'    under the upper contact s-pring of the ffashold-er
                                  rather than as directed in step 5 ofthe instructions             \:JT"T{"           packed with the flashpack.
View original page 13Page 14 · Read text
www.butkus.us


   ;
     Attaching the Flasholder
     Attach the flasholder to the camera by placing the flash posts of the

I      flasholder in the flash receptacles on the side panel of the camera.

I     Then securely tighten the knurled knob on the side of the flasholder.
     Flash Lamps
    The flasholder is designed to accept the AG-l or AG-IB flash
     lamps only. Orient the glass base of the lamp to match the hori-
      zontal slot in the socket and firmly push the lamp straight in until it
      "clicks" into place.
      To release a used lamp, tip the flasholder slightly forward and
      press the LAMP RELEAsE.
    Erposure
      In making flash pictures, exposure depends on the distance from the
      flash lamp to the subject. For good pictures, stay within the range
     of distances shown on the back of the flasholder.
      Caution: Since lamps may shatter when flashed, use of a transparent,
      protective shield, such as the Kodak Supermite Flashguard, over
      the reflector is recommended.
                                                                                 l3
View original page 14Page 15 · Read text
watch                You'll take better snapshots if you avoid these three
    out     common mistakes pictured below. Keep these in
   Ior         mind.
these            I caunna MovEMENT, during the exposure, results in
            a blurred picture. Hold the eamera steady and press
               the shutter release with a slow, steady motion.
         2 If you want to avoid pictures with a foggy
                  effect, don't make pictures with a DrRTy LENS. CIA;I
              your lens with Kodak Lens Cleaning paper.
         3 If voun FINcER oR THE NEcK srRAp rs rN FRoNT oF
            THE LENs, you'll get a picture similar to this.
View original page 15Page 16 · Read text
www.butkus.us
GUARANTEE
wlTHlN o yeor ofter purchose, ony repoirs necessory lo this Brownie
stormeter.comero due to o defect in moleriols or workmonship will be
mode or, qt our oplion, lhe comero will be reploced without chorge' No
olher worronly or guorontee, express or implied, sholl be opplicoble to
this equipment. Nor ore we responsible for loss of film, for olher exPenses
or inconveniences, or for ony consequentiol domoges occosioned by the
equipmenl.
   In cose of unsotisfoclory operotion, lhe comero should be sent direcfly
or through o Kodok deoler lo Eoslmon Kodok Compony or o repoir firm
oulhorized by us to moke such repoirs. lt should be occomponied by o
descriplion of fhe trouble encounfered ond olher ovoiloble informotion
regording lhe comero, including lhe dqte ond ploce of purchose.
                            EASTMAN KODAK COMPANY
                                                  Rochester 4, New York
View original page 16Page 17 · Read text
FEATUN,ES

                                                                                          size      ntm                ft'l\iil*li:\xgs*l*:;;lili'o"rencv
         pi,ctures
                     tli,"x":.1?1,1"ff*?\?1  1?,1":,Ti-Tiilf,:,,  (:1,'#;
                  '              slides)
   etposure meter. . . .Integral part of camera. Reads reflected light
               lens. . . .Kodar fl8-44 mm-three elements-fixed  focus
            shutter.  . . .Instantaneous-synchronized   for flash-with double
                     exposure preventlon
         ui,ewfinder.  . . .Optical-eye level type
       neck strap. . . .Adjustable-supplied with camera
        photo ai.ds....FieldCase. Kodak Close-up Attachment No. 7A.
                 Kodak Cloud Filter No. 7A. Kodak Pocket Viewer,
                Kodak Illuminated Pocket Viewer, Kodak Ready-
                      matic 500 Projector, Model I
         fl,asholders.  . . .Kodak Supermite. Kodalite Midget.
   EASTMAN KODAK COMPANY . ROCHESTER 4, N. Y.

PT. NO. t55950
9-62-SH-DX                                                           PRINTED IN U. S. A.
View original page 17From the M. Butkus archive. Original publisher and archive notices are retained.
Check the model and edition against your equipment.
PDF verified 2026-10-10.