Film cameras
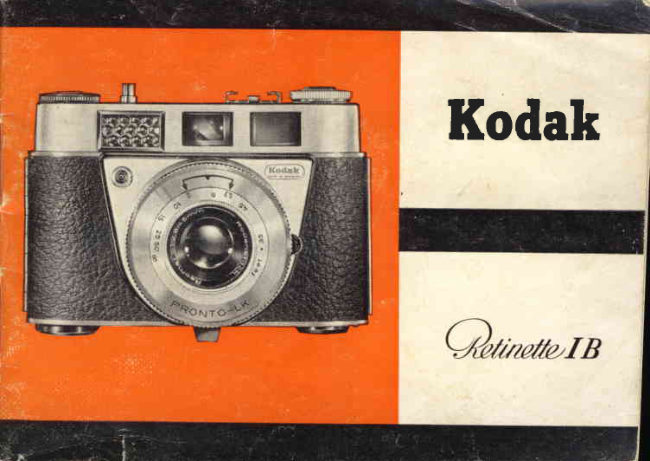
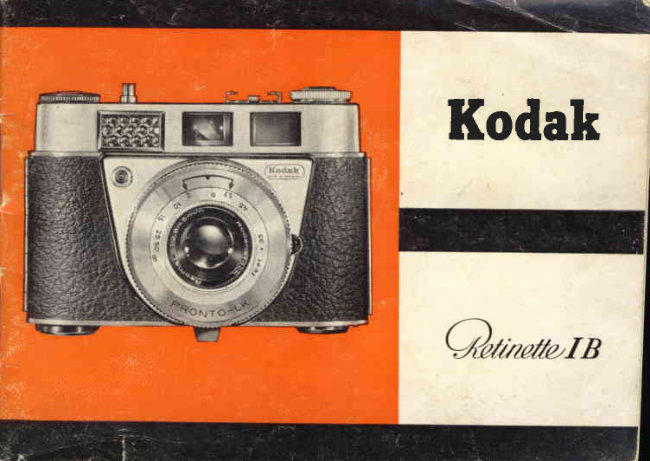
Kodak Retinette Ib User manual
User manual for Kodak Retinette Ib. 24 pages in English. Read the original PDF, download or print a copy without registration.
24 pagesEnglish1.6 MB PDF
Loading your manual…Open PDF directly
Document details
- Brand
- Kodak
- Model / document
- Kodak Retinette Ib
- Document type
- User manual
- Language
- English
- Pages
- 24
- File size
- 1.6 MB
- Category
- Film cameras
- Document date
- Not specified in catalog
Search available document text
Find a term, then jump to its page in the original PDF. Image-only pages may not be searchable; check the PDF for exact wording and diagrams.
Page 4 · Read text
t!::

 You will never miss q shor
 like this wirh rhe RETTNETTEI B


Set shutter  speed
Set  focus  zone
Gentre  pointer   in finder
Sight  and shoot
View original page 4
Page 5 · Read text
Presetting  the  Film Speed


For correct exposure, you must set your comero to the
speed of the film in use. Film speeds in both ASA ond
BS numbers ore morked in red on the shutter ring.
Press the setting key (o) ond turn the shutter ring (b)
until the red dot points exoctly to the relevont ASA or
BS number. The picture shows the comero set itor o
film speed of 28" BS.
On the oppositepoge, someKodokfilms ore listed.


    www.orphancameras.com
View original page 5Page 7 · Read text
Selecting   the  Shutter  Speed


The block figures on fhe shutter ring (b) indicote froc-
tions of one second. The figure 15, for insionce, stonds
for 1lrssec., 30 =  1/sosec., 60 =  1lrnsec., etc. The letter
B identifies ihe shutter setting for time exposures.Turn
io poge l8 for more informotion.
Turn the shulter ring (b) until the shutter speed of your
choice clicks into ploce opposite the block dot. The
illustrotion left shows the shutter speed set ot 1/eosBC.
Apprecioble resisloncehos to be overcome between 1/3sond
l/rs sec. This is to tell you thot for toking picturesol 1fi5sec.
ond B the comero should be ploced on o tripod to prevent
blurred picturesqs o resultof comeromovement.


    www.orphancameras.com
View original page 7Page 8 · Read text
Zone  Focusing


The focusingsystemof your RETINETTEI B is designed
for toking phoiogrophsof o moment'snotice.
You simply turn the knurled lens ring (c) until it in-
dicotesthe disioncezone ih whichthe moin subiectlies.
At the first position,the two block orrows point ot
15 ond oo (infinity).Your comero is lhen set for views
from 15 feet to the for distonce.The middle position
indicofesmid-distonce,between8 ond l5 feet.The third
position is for close-upsbetween5 feet ond 8 feet.
The distonce zone indicoted by the block orrows is correci for
f/4. With  smoller lens openings (e.g. f/8) on even wider zone
will be shorp. But ot lorger lens opening (Il2,B) it  is better to
set to  the triongle with  the block  or  red figures the exocl
comero-to-subiect distonce.
View original page 8
Page 9 · Read text
Gocking the Shutter


   The  ropid    f ilm-wind  thumb-lever  of  your
   RETINETTEI B  is one of the proven feqtures
    thot hove mode the RETINA fomous. A single
    swift movement of  your  thumb  cocks the
    shutter, odvonces the exposure counter ond
   winds the film on for the nexl picture.

   Alwoys operote the lever (d) to the limit of  its
    trovel. lt will oufomoticolly return ofter  it hos
   been releosed. lf the rqpid filnr-wind lever con-
    not be swung out completely,olthough o film is
    inserted, ihis meons thot the film hos run out.
   You should then rewind  it os described on
    p o g e 1 5 .


www.orphancameras.com
View original page 9Page 10 · Read text
How  to Hold  your Camera


The woy you best hold your RETINETTEis de_
fermined by the subiect. The two  illustrotions
q re merely meo nt os o suggestion os to how
the comero should be held for shots in the
horizonfol (obove) or upright pictures (below).
o n e   f h i n g y o u s h o u l d k e e p i n m i n d  i s t h o t t h e
steodier your comero is held the shorper your
pictures will be. The only movement is mode
by the forefinger or the thumb when releosing
the shutter.A few ottempts will certoinly show
you how noturolly your RETINETTEhondles.
View original page 10
Page 11 · Read text
Viewing  and Releasing

   The brillioni frqme in the finder of your cqmero
   shows you  the exoct  field oreo ond mokes
   viewing eosier for you. When viewing, ioke
    core to keep your fingers cleor of the honey-
   comb window  of ihe exPosure meter.
   Turn the diophrogm  ring by meons of  the
    block knob (e) until the pointer in the finder
    points to  the D  mork  in the bottom  of  the
     brilliont frome (illustrotionsobove ond center           '11).   poge    Exposure is then correctly set.
    Hold the cqmero steody ond press the releose
    button (f) fully down. The film odvonce thumb-
    lever should be operoted ofter every shot.
   The bose line of the brilliont frome is interrupted
   once on either side.Thesemorkshove no beoringon
    your picture-toking.The smoll horizoniolmorkson the
    uprightsidesof the brilliontfromeore porolloxmorks
   ond ore describedin more detoil on poge 19.


www.orphancameras.com
View original page 11Page 12 · Read text
lf  the pointer  is on  the extreme right-hond
 side ond connot be set to the a  mork, turn
 the shutter ring  to  the   feft  until the  pointer
con be centred on the a  mork. (Core must be
token, however, not  to  sef the shutter ring
to B becouse the exposure indicotor in the
finder cqnnot be used with tlris setting.)where
the pointer is on the extreme left-hond side
ond connot be set to the A  mork the shutter
ring should be turned to  the  right.  lf  the
pointer con even then, not be set to the a
mork,  or  if the n mork is obscured (bottom
illustrotion),light conditions ore too poor for
toking pictures.

                                           1 l
View original page 12Page 13 · Read text
Film  Loading    (in the shode)

l.  Pressthe opening button (g) in the comero bose ond
   the cqmerq bock snops open.
2. Pull out the rewind knob (h) os for os  it will go.
3. Turn the built-in toke-up spool  (i) with your thumb
    uniil one of the slits foces up. Threod the trimmed
   film end into the slit ond engoge one of the per-
   forotions on the little hook in the slit.
   Pull the film ocross the film trock ond  insert the
   cossette in the cossette chomber.
   Turn the toke-up spool  until the teeth of  the film
   tronsport sprocket (k) properly engoge both rows
   of film perforoiions.
5. Push bqck the rewind knob (h) to its normol position
   ond  turn the knob clockwise, os indicoted by the
   orrow,  unlil o  slight resistonce is felt. The film  is
   lhen properly tensioned.
6. Close the comero bock, ond moke certoin thot you
   heor the lotch engoge.


                       www.orphancameras.com
View original page 13Page 15 · Read text
Setting the Exposure Gounter
and Film Indicator
The exposure counler(obove) tells you how mony shols
you  still hove. Turn the block thumb ring  (l) counier-
clockwise until the diomond mork 0  is exoctly opposite
the triongulor mork V  (m) (for 36-exposurecossetteset
0  mork belween  I ond 36i for 2O-exposurecossette set
0 mork to 23).Cock the shutter ond releose, cock ond
releose ogoin, ond cock o third time. The rewind knob
should be seen turning os you do this. lf  it does not,
tension the film o  little bit more (poge 12). The V mork
will be now opposite No. 36 or 20. To set the film in-
dicotor (below), hold the rewind knob ond turn the
inner serroted ring  until the block dot points to the
type of  filrn used in the comero.
    <>        :  Block-ond-whiteFilm
 Color  g,    :  Doylight Colour Film
Color q'.     :   Artificiol Light Colour Film

1 4

                      www.orphancameras.com
View original page 15Page 16 · Read text
Unloading  the  Film


After the lost picture hos been ioken, the film hos to be
rewound. Depress the reserving button (n) in the comero
bose ond turn fhe rewind knob (o) clockwise, os  in-
dicoted by the orrow,  until the rgserving button stops
turning (wotch blqck doi on button). Open the comero
bock in subdued light. Pull out the rewind knob ond
remove the cossette from the cqssette chomber.
lf you should ot ot ony time hove omitted to set the
exposure counter it moy hoppen thot in o looded comero
the ropid film-wind lever connot be switched to the
limit of  its trovel. Depress the reserving button ond
operote the ropid film-rewind lever to complete its
trovel. The film con now removed from the comero os
obove described.
View original page 16
Page 17 · Read text
Flash Shots Made Easy
Floshshotsore no problemfor ihe RETINETTEI B. Slide
your flosh unif, the KODABLITZfloshgunfor instonce,
inio the occessoryshoe of your comero,plug the flosh
coble into the flosh socket(p),ond turn the shutterring
lo 1/zosec. The exposureindicqtor in the finder of your
RETINETTEI B cqnnokSogever, be used for flqsh shots.
The lens operturerequiredis colculotedon the guide
numberof the flosh bulb or electronicflosh unit used.
Go by the follow'rngrule:
Guide number divided by distonce= operture
           Guide number72
For exomPle:               = operture f/8            D[tonce 9 feet
Turn the diophrogm ring until the figure 8 is opposite
the block dot (left).
lf on electronicflosh unit is used, the entireshutterspeed
ronge from 1/'sts r/soosec. is ovoiloble for fldsh shots.


     www.orphancameras.com
View original page 17Page 18 · Read text
Self-timer   for  Greater  Fun


Wont  to  get  into  the  picture yourself?  Screw the
comero to  o  tripod, cock the shutter ond push the
lever (r) morked in red to the side os for os  it will go.
lf you now depress the releose bufton, the shutter will
not be releosed uniil qfter obout l0 seconds.You hove
enough time, therefore, to get into the picture.
Once ihe  self-timer hos been cocked, the following
picture must be token with the self-timer.The self-iimer
con, of course, olso be used for oll flosh shots.


                                                                                                                                                t /
View original page 18Page 19 · Read text
Time Exposures


The letter B on the shutier ring indicotes the setting ot
which you con expose o picture for ony length of time.
Turn the milled shutt'erring until the letter B is opposite
the block dot. Now, on'ce the shutter hos been cocked,
the shutter will remoin open os long os you keep the
releose button depressed.The releose time is dependend
on the lens opening sei. Becouse extended exposure
times ore too  long for hond-held shots, the comero
should be ploced on  o  tripod ond o  coble releose
should be srewed into the releose bulton.
The exposure  indicqtor  in  the finder  cqnnol be used
in  conlunction with  lhe B  setting.  Self-timed shots
connot be token oi the B setting eilher.


    www.orphancameras.com
View original page 19Page 20 · Read text
Glose-up  Parallax


At subiect distonces closer thon 6 feet o so-
colled porqf fox error oppeors. In other words,
the  field  of  view  outlined by  the  brilliont
frome  in the comero finder no fonger cor-
responds exoctly to the view recorded on the
film. To compensote for  this porollox of o
subiect distonce of 3t/, feet, on imoginory line
beiween the two opposite morks on the frome
( t h e u p p e r b r o k e n    l i n e    i n    t h e    i l l u s f r o t i o n )
i n d i c o t e st h e u p p e r  l i m i t o f  t h e  f i e l d o f v i e w .
A s d i s t o n c e s i n c r e o s e ,t h i s  f i m i t - l i n e i s g r o d -
uolly shifted up until ot 6 feet it coincideswith
the upper border of the finder frome.
View original page 20
Page 21 · Read text
Filters

Filters ore used for  speciol phoiogrophic  effects. Most  filters hove whol
is colled o filter foctor by which the normol exposure hos to be increosed.
This is best ollowed for by reducing the film speed setting by the number
of divisions indicoted in the toble below, before toking the picture.
Kodok 'Filters for Blqck-qnd-white                                     fS.                         Reducefilm speed
ond Colour Films                                                         s e t t i n g b y . . .
Skylightfilter (hoze filter for KodochromeDoylighi Film)
-  Ultro-violetfilter                                                      . .. ;. .             0
Lisht yellow (F l) -  Doylightfilter 85, 85 C ond 85 B (Doylightfilter
for KodochromeFilm,TypeA, Type F ond EkiochromeFilm,Type B)
-  Light BoloncingFilter(for KodochromeFilm,Type F)               2
Mediumyellow (F ll) -  yellow-green(F lll)
Blue filter (F Vl) -  Polo-screen                                  4
Oronge filrer (F lV)
Red filter (F V)

n
                      www.orphancameras.com
View original page 21Page 22 · Read text
for erample


You wont to use o yellow-green filter (F lll) for o shot
on block-ond-white film. You hove set ihe film speed
diol to 28o BS. A look ot the opposite toble will show
you thot for the yellow-green filier (F lll) the film speed
setting must be reduced by  three divisions,  i. e.  to
25o BS (os in the illustrotion).

 lf you remove the filter ogoin, you should not  forget
to re-set ihe film speed to normol.
View original page 22
Page 23 · Read text
lntentional  Double  Exposures

The releose lock  of  the RETINETTEI B prevents occidentol double  ex-
posure. lf for speciol effects, such os o siunt picture, o double exposure is
required, depress the reversing button ofierthe  first exposure, until the shutter
hos been recocked by meons of the ropid film-wind lever.
The film will  not be odvonced but will remoin in posiiion for o second
exposure on  lhe some frome. The exposure counter, however, will  hove
odvonced ond will indicote one exposure more thon hos ociuolly been token.


                                                                     *ued
Gare of the Garnera

Proteci your lens ond the finder windows ogoinst injury ond finger prints.
For dusting ond polishing the gloss surfoces, only o brush with very soft hoir
ond o cleon soft lintless cloth should be used. Also give the film trock ond
cosseife chomber on occosionol brush to cleon oui dust porticles.

22

                       www.orphancameras.com
View original page 23Page 24 · Read text
Close-ups  Closer Than
          3'/z Feet

           For close-ups within the ronge 37,, to  12,, the
            opticol close-up rongefinder (F =  45) is ovoif-
          obfe with  the N  t, N  il  or N frf o  crose-up
                                            you olrItr a         pofenses.rs llox-fThereeclose-upfield of rongenfidervrew.      gives
 1  t
 tlIl t

      The Lens HoodH
         The lens hood should be your first occessory.Htltl.
llIr,l               It screens off stroy light ond olso protects the
          lens ogoinst roin or snow, ond  it is os weil toI
         use it for oll your pictures.

                                                 23
View original page 24Related documents and language editions
From the M. Butkus archive. Original publisher and archive notices are retained.
Check the model and edition against your equipment.
PDF verified 2026-10-10.