Flashes & lighting
Kodak Flasholder Model B User manual
User manual for Kodak Flasholder Model B. 13 pages in English. Read the original PDF, download or print a copy without registration.
13 pagesEnglish2.9 MB PDF
Loading your manual…Open PDF directly
Document details
- Brand
- Kodak
- Model / document
- Kodak Flasholder Model B
- Document type
- User manual
- Language
- English
- Pages
- 13
- File size
- 2.9 MB
- Category
- Flashes & lighting
- Document date
- Not specified in catalog
Search available document text
Find a term, then jump to its page in the original PDF. Image-only pages may not be searchable; check the PDF for exact wording and diagrams.
Page 3 · Read text
•
     Kodak Flasholde

                    MODEL B


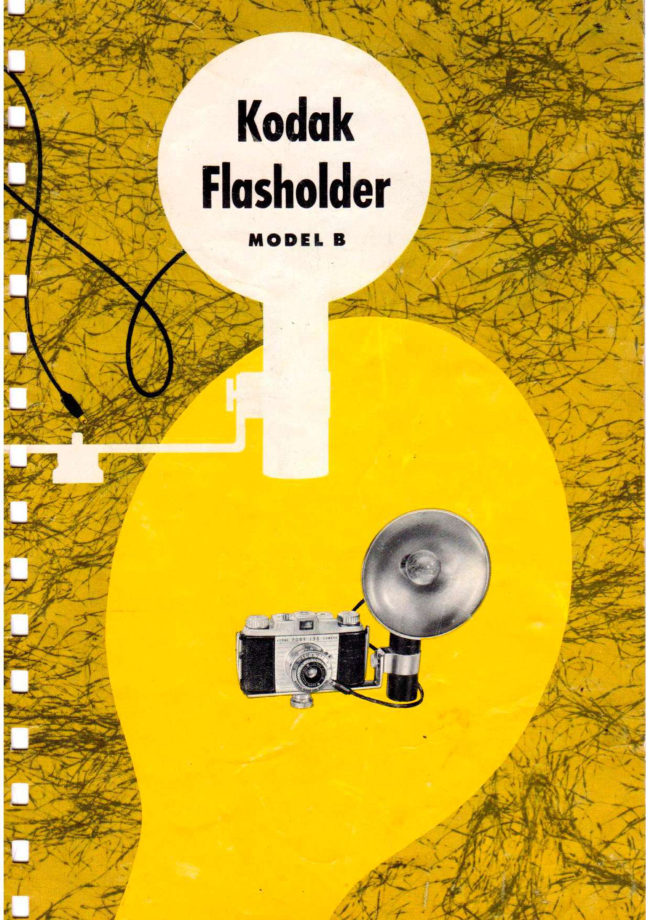
                  T H E KODAK FLASHOLDER M o d e l B can be used w i t h any Kodak camera
                equipped w i t h a Kodak flash shutter.  I t consists of a reflector, a battery
                    case, a 15-inch cord w i t h  a bayonet connector, and either a  standard
                camera bracket or a special camera bracket for mounting the Flasholder
                 onto a Kodak Reflex Camera. The  table on  the  reflector gives  the
                 exposure guide numbers  at  1/50 second  for several Kodak Films w i t h
                   suitable  flash lamps.


             ATTACHING

                   The  standard camera bracket  is provided w i t h several holes to permit
                   the selection of the one most suitable for the particular Kodak camera.
                   T o  attach the bracket to the camera,  select the proper hole, insert the
                   large thumbscrew in the hole, and screw it into the tripod socket in the
                 camera.  Best results w i l l  be obtained when the bracket  is attached  so
                    that the center of the reflector w i l l be higher than the camera lens. I f the
                       flash lamp  is below the camera  lens, the lighting effect on faces w i l l be
                  unnatural.

                    Consult the instruction manual packed w i t h your camera for any spe-u
                      cial directions that may apply to attaching the Flasholder to your camera.

               BATTERIES J

                   Batteries must be installed in each Flasholder. Batteries are not supplied
              w i t h the unit but are readilv obtainable from vour K o d a k dealer.
                     T o  install  batteries, unscrew the black Tenite battery case from  the
                 gray Tenite head.  Install two size " C " photoflash batteries or, if these
                   are not available,   flashlight  batteries.  Insert the  batteries  i n the case
              w i t h their center contacts up; then screw the battery case back into the
                  head.  Slip the Flasholder into the ring clamp of the bracket assembly
                     and  tighten the knurled screw that controls the friction pad to hold  it i n
                    place. O n l y  moderate  pressure  is required. The  Flasholder can  be


                            T. M. Reg. U. S. Pat. Off.
View original page 3Page 5 · Read text
_

                                           _


inserted in the ring clamp either way and can be turned in any direction.
Important:  Successful synchronization, especially at high shutter speeds,  _
requires  batteries that  will  test  at  least 5 amperes. Batteries that  have
been stored for long periods, especially under conditions that allow them
to dry out, w i l l not be satisfactory.

CONNECTIONS
Connect the cord directly to the flash terminal on the shutter or camera.  _
T o make the connection, place the bayonet connector on the cord over
the terminal, push it i n , and  t u r n  it clockwise. T o remove the connector,
push  it in, turn  it counterclockwise, and  pull  it off the terminal.

FLASH LAMPS
Kodak Flasholders are designed for S M , SF, No. 5, No. 5B, No. 25, and  _
No. 25B flash lamps. T o insert a flash lamp, place the two pins  i n the
base of the lamp in the slots  i n the socket; then push the lamp straight
into the socket, without twisting it.
   T o  eject a lamp from the socket, press the black ejector button on the
back of the Flasholder head  all the way in.
Caution:  Do not insert a flash lamp in the socket if the shutter is set on " T " and
the shutter blades are open. The lamp may flash and a serious burn may be the result.
   Never  try  to pull a lamp out of the socket. Always  use the ejector button.
Pulling lamps out by force will damage (he socket.
   Flash lamps remain too hot to handle for several minutes after they are fired.

K O D A K FLASH SHUTTERS

Three types of Kodak Flash Shutters are in use—those w i t h and those
                           without  scale nuts but w i t h  synchronizer
                                levers and those without either scale nuts or   _
                           synchronizer levers. Those w i t h scale nuts
                          must be preset for the class of l a m p being
                               used. Shutters without scale nuts require no   _
                               presetting,  but  a  slightly  different  proce-
                           dure  is followed for each class of lamp.


                      FLASH SHUTTERS WITH A SCALE NUT

                       T h e synchronizer scale on the shutter  has
                              two  positions: F for Class F lamps, such  as  _
                               the S M or SF  flash  l a m p : and M for Class
                      M  lamps, such as the No. 5 or N o . 25  flash
                           lamp. T o insure accurate synchronization,

 4
                     donated to www.butkus.us
View original page 5Page 6 · Read text
the  scale must  be  set  at  the  correct
                  position.
                    T o   set the  scale, loosen  the SCALE
              NUT w i t h a small screwdriver, shift the
                  scale so that the proper letter is oppo-
                     site the arrow, and tighten the nut securely. O n some shutters the scale nut
                              is of the plunger type and no screwdriver is needed. Once the scale has
               been set, do not change  i t as long as lamps of the same class are used.

                 To Take Flash Pictures (Scale Nut Shutter)

                  After  the Flasholder  has been connected  to the camera,  insert a  flash
              lamp  i n the socket. Push  the  l a m p straight in, without twisting it.
                   Before taking the picture, cock the shutter*  i n the usual way. T h e n
                cock the SYNCHRONIZER LEVER by pushing  it toward the synchronizer
                  scale as far as it w i l l go. The synchronizer lever must always be cocked, or the
                     flash w i l l not be synchronized.
                   T o  take  the picture, release the shutter  i n the normal manner.  The
               synchronizing mechanism  built  into the shutter automatically  insures
                  that the shutter  is open when the  flash of the lamp  is brightest.

             SHUTTERS WITHOUT A SCALE NUT
                       (But with a Synchronizer Lever)

                               I n K o d a k Flash Shutters without a scale nut, the synchronizing interval
                        for  Class F lamps, such  as the S M or SF  flash lamp,  is automatically
                controlled by the action of the shutter blades—the synchronizer lever is
                     not  used. W h e n the synchronizer lever  is used, the shutter  is synchro-
                nized w i t h Class M lamps, such as the No. 5 or No. 25  flash lamp.

                   Class F lamps w i l l  not synchronize consistently w i t h Kodamatic  or
               Supermatic  Shutters  without  scale  nuts  at  speeds  faster  than  1/100L
                 second. However, w i t h  flash lamps, the exposure time is limited by the
               duration of the flash which, in the case of S M or SF flash lamps,  is about
                 1/200 second. Thus, shutter speeds of 1/100 second  or longer w i t h S M
                      or SF  flash lamps result in an exposure  of 1/200 second—short  enough
                       to stop all motion normally encountered.

                 *On some Kodak cameras the shutter is automatically cocked as the film is advanced.
View original page 6Page 7 · Read text
To Take  Flash  Pictures  (Shutter without Scale Nut but with  Syn-
 chronizer Lever)

W i t h Class F lamps, such as SM or SF flash lamps:

        1. Insert the  l a m p  i n the reflector.

        2. Cock the shutter  i n the usual way. *

       3. Release the shutter. Do not use the synchronizer lever.

W i t h Class M lamps, such as No. 5 or No. 25 flash lamps:

        1. Insert the  l a m p  i n the reflector.

        2. Cock the shutter  i n the usual way.*

       3. Press the synchronizer lever clockwise as far as  it w i l l go.

        4. Release the  shutter.

FLASH SHUTTERS WITHOUT SCALE NUTS OR SYNCHRONIZER LEVERS
Flash Kodon Shutter:

   W i t h Class M lamps, set shutter at " B . "

   W i t h Class F lamps,  set shutter  at    "  I   .  "

Kodak Flash Dakon, Flash Diomatic, and Flash 200 Shutters

   W i t h Class M lamps, set shutter  at 1/25, " T , " or " B . "

   W i t h Class F lamps, set shutter  at 1/25,  1/50, or 1/100.

Important: Be sure all contacts are clean, including the soldered one on
the  l a m p base.


Exposure

Always consult your camera manual for specific information that may
apply to making flash pictures w i t h your camera.
   T o  find  the correct exposure, select from the table on page 7 or on the
reflector  the exposure  guide number  for the   film,  lamp, and  shutter
speed. Divide this number by the distance  i n feet from the lamp to the
subject. T h e answer  is the recommended lens opening.

   For  example, the exposure  guide number  for the No. 5 or N o . 25
flash lamp  at 1/200 second w i t h K o d a k Plus-X Panchromatic  F i l m  is
80. A t 10 feet (lamp-to-subject distance), 80 divided by 10 =  8 o r / / 8 ;
at 5 feet, 80 divided by 5 =  16 or //16,  etc.

Caution:  Since lamps may shatter when flashed, the use of a Kodak 2- Way  Flash-
guard or other transparent protective device over the reflector is recommended. Do
not flash the lamps in an explosive atmosphere.

*On some Kodak cameras the shutter is automatically cocked as the film is advanced.

6                    donated to www.butkus.us
View original page 7Page 8 · Read text
FLASH LAMP EXPOSURE GUIDE NUMBERS FOR KODAK FILMS
                AND ONE FLASH LAMP NEAR THE CAMERA


        Lamp                  SM or SF                  No. 5 or No. 25


                       B to                       B to        Shutter
                             1/25    1/50   1/100   1/200    1/25    1/50   1/100   1/200        Speed

 Kodak Panatomic-X    50     50     45     40     100     80     75     60

 Kodak Verichrome      60     60     55     45     110     90     80     65

 Kodak Plus-X          75     75     65     55     140    110    100     80


 Kodak Super-XX      110    110     95     75     200    160    140    110

 Kodachrome Type A   45*    45*    40*    35*    701    60 f    55 f    401

 Kodacolor Type A      50     50     45     40     100     80     75     60


  •With SM lamps, no filter.
   With SF lamps, use a Kodak Light Balancing Filter No. 81A.
  tWith No. 5 lamps, use a Kodak Light Balancing Filter No. 81C.
   With No. 25 lamps, use a Kodak Light Balancing Filter No. 8lD.


  BLUE COATED FLASH LAMP EXPOSURE GUIDE NUMBERS FOR KODAK COLOR FILMS

                                     (For u » indoors  without   daylight)


             Lamp                      No. SB Lamps          No. 25B Lamps


               Shutter               B to                Bto
                                                   1/100   1/200            1/100   1/200
              Speed                     1/25                      1/25


  Kodachrome Film
     Daylight Type                     45      30     25     55     40     35


  Kodacolor Film
     Daylight Type                    70      50     40     70     50     40


  Kodak Ektachrome Film
     Daylight Type                    40     30     22     45     35     30


Note: Synchronization of flash pictures  at high shutter speeds requires

batteries w h i c h deliver at least 5 amperes when short-circuited. Batteries

w h i c h have been stored  for long periods, especially under  conditions

w h i c h permit them to d r y out, w i l l not be  satisfactory.

                                                            7
View original page 8Page 9 · Read text
THE 3-FOOT EXTENSION CORD
The Kodak  3-Foot  Extension Cord  for Kodak  Flasholder, which  is
available as an accessory, permits the Flasholder to be used far enough
away from the camera to secure improved modeling. This is of particular
advantage  in making flash pictures of people, which tend to be  rather
flat  in appearance when  the  light comes from  a position close  to  the
camera. Compare pictures A and B at right.  I t is also helpful w i t h many
other types of subject.
  T o use the extension cord, attach the bayonet connector to the  flash
terminal on the shutter or the camera. T h e n attach the cord from  the
Flasholder  to the other end  of the extension cord. These  connections
should be made  before a  flash lamp  is inserted in the  Flasholder.
     I n some cases, the Flasholder can be held in one hand and the camera


Three pictures
and how
they were made


    Flasholder at the cam-

 era. Flat lighting.


    Flasholder  with  3-foot
Extension. Harsh shadows.


    Flasholder  with  3-foot
 Extension and a reflector on
the shadow side. Well-bal-
anced illumination.

 8


                        donated to www.butkus.us
View original page 9Page 10 · Read text
i n the other, but  it is generally more convenient to compose  the picture
             w i t h the camera supported on a tripod, table, or some other firm  sup-
                   port. Often you can ask someone else to hold and aim the  Flasholder
                 while you hold the camera w i t h both  hands.
            W i t h  the extension,  it  is desirable  to use an  auxiliary  reflector  to
                     reflect some of the light from the Flasholder back onto the shadow  side
                      of the subject. For this purpose, a large white card, a sheet, or a projec-
                 tionscreen can beused; the resulting improvement is shown in picture C.
                 Such an auxiliary reflector is most effective when the light reaches the
                  subject at an angle from the camera-subject  axis. I n most cases, it is also
                  desirable to hold the Flasholder about two feet higher than  it w o u l d be
                                if  it were attached  to the camera;  in this way, shadows, which might
                otherwise be objectionable, can be thrown downward, out of the picture.


U


L
View original page 10Page 11 · Read text
5HORTING PLUG

The coin-slotted shorting plug  i n the side of the head, opposite the point
where the cord comes out, must  be in place whenever the Flasholder  is
used alone. W h e n a Kodak Flasholder Extension U n i t M o d e l B is used
w i t h the Flasholder,  the shorting plug  is replaced by the cord from  the
Extension U n i t . Complete instructions for connecting and using K o d a k
Flasholder  Extension Units M o d e l B are included w i t h each unit.

SUPPLEMENTARY FLASH FOR OUTDOOR COLOR PICTURES

W i t h  bright sunlight and  a clear blue sky, the contrast of the  natural
light  is frequently too high to permit best results on color  films,  particu-
larly w i t h nearby side- or backlighted subjects. No. 5B or No. 25B  flash
lamps provide  a convenient means of illuminating shadow areas w i t h
light approximating daylight in color quality. Thus the lighting contrast
between highlights and shadows can be reduced to a more suitable  ratio
for color pictures. A No. 5B or No. 25B  flash lamp used at a distance of
about 8'/2 feet provides a desirable lighting ratio.

 10
                      donated to www.butkus.us
View original page 11Page 12 · Read text
SUPPLEMENTARY FLASH TABLE

                      For Use HI Bright Sunlight with Front or Sido Lighting

                                   Sot Shuttor of 1/50 Second


   Kodacolor Film Daylight Type


   Kodachrome Film Daylight Type                  Between f/5.6  and//8

   Kodak Ektachrome Film Daylight Type               //6.3


The F l a s h K o d a g u i d e  is a four-page,  pocket-size,  dial-type calculator
designed especially for computing the proper lens setting to make pic-
tures—indoors or o u t — w i t h one or two  flash lamps.
  O n  the back page of the Flash Kodaguide  is a comprehensive  table
of exposure guide numbers  for the most frequently used K o d a k Films,
both  black-and-white and  color, and common  flash  lamps  used  at
various shutter speeds. Obtainable from Kodak  dealers.


    EASTMAN K O D A K  C O M P A N Y  • ROCHESTER  4, N. Y.


6-50-GLP-AEX                                                 L I T H O G R A P H E D IN T H E U N I T E D S T A T E S O F A M E R I C A

                                                            11
View original page 12From the M. Butkus archive. Original publisher and archive notices are retained.
Check the model and edition against your equipment.
PDF verified 2026-10-10.