Film cameras
Kodak Folding 4a User manual
User manual for Kodak Folding 4a. 56 pages in English. Read the original PDF, download or print a copy without registration.
56 pagesEnglish2.5 MB PDF
Loading your manual…Open PDF directly
Document details
- Brand
- Kodak
- Model / document
- Kodak Folding 4a
- Document type
- User manual
- Language
- English
- Pages
- 56
- File size
- 2.5 MB
- Category
- Film cameras
- Document date
- Not specified in catalog
Contents
- kodak_folding 4a 11
- kodak_folding 4a 22
- kodak_folding 4a 33
- kodak_folding 4a 44
- kodak_folding 4a 55
- kodak_folding 4a 66
- kodak_folding 4a 77
- kodak_folding 4a 88
- kodak_folding 4a 99
- kodak_folding 4a 1010
- kodak_folding 4a 1111
- kodak_folding 4a 1212
- kodak_folding 4a 1313
- kodak_folding 4a 1414
- kodak_folding 4a 1515
- kodak_folding 4a 1616
- kodak_folding 4a 1717
- kodak_folding 4a 1818
- kodak_folding 4a 1919
- kodak_folding 4a 2020
- kodak_folding 4a 2121
- kodak_folding 4a 2222
- kodak_folding 4a 2323
- kodak_folding 4a 2424
- kodak_folding 4a 2525
- kodak_folding 4a 2626
- kodak_folding 4a 2727
- kodak_folding 4a 2828
- kodak_folding 4a 2929
- kodak_folding 4a 3030
- kodak_folding 4a 3131
- kodak_folding 4a 3232
- kodak_folding 4a 3333
- kodak_folding 4a 3434
- kodak_folding 4a 3535
- kodak_folding 4a 3636
- kodak_folding 4a 3737
- kodak_folding 4a 3838
- kodak_folding 4a 3939
- kodak_folding 4a 4040
- kodak_folding 4a 4141
- kodak_folding 4a 4242
- kodak_folding 4a 4343
- kodak_folding 4a 4444
- kodak_folding 4a 4545
- kodak_folding 4a 4646
- kodak_folding 4a 4747
- kodak_folding 4a 4848
- kodak_folding 4a 4949
- kodak_folding 4a 5050
- kodak_folding 4a 5151
- kodak_folding 4a 5252
- kodak_folding 4a 5353
- kodak_folding 4a 5454
- kodak_folding 4a 5555
- kodak_folding 4a 5656
Search available document text
Find a term, then jump to its page in the original PDF. Image-only pages may not be searchable; check the PDF for exact wording and diagrams.
Page 1 · Read text
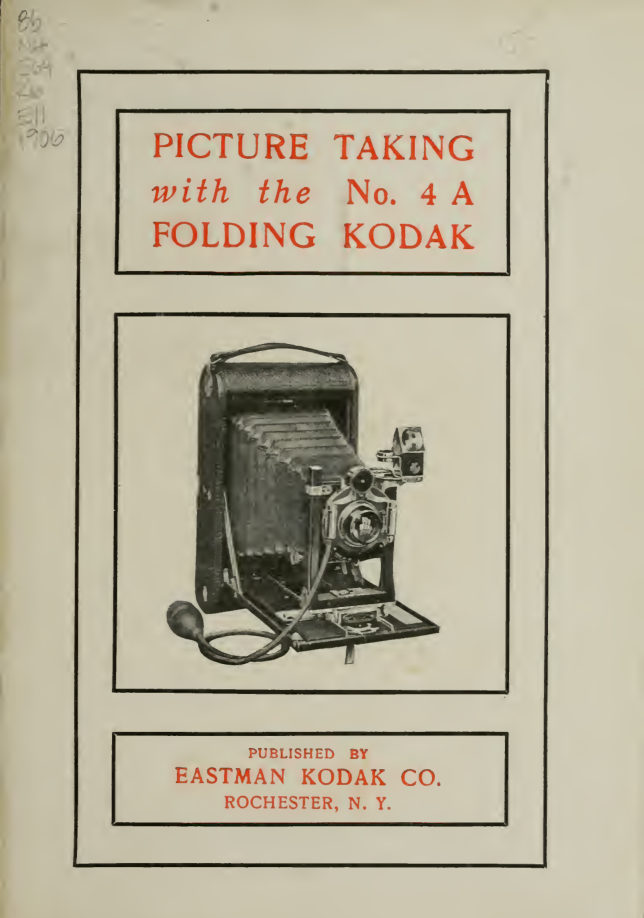
PICTURE TAKING
with  the  No.  4 A
FOLDING KODAK


          PUBLISHED  BY
  EASTMAN KODAK CO.
      ROCHESTER, N. Y.
View original page 1Page 2 · Read text
KODAK
                 Trade Mat

        EASTMAN KODAK COMPANY
               ROCHESTER, N    .  Y.


MANUFACTURERS OF
            Kodaks,
            Brownie Cameras,
            Cartridge Roll Holders.
           Kodak Tank Developers,
           Kodak Developing Machines.
          Kodak Dry Mounting Tissue.
            Eastman's Solio Paper
            Eastman's Sepia Paper,
            Eastman's Ferro-Prussiate Paper,
            Eastman's Royal Bromide Paper,
            Eastman's Standard Bromide Paper,
            Eastman's Enameled Bromide Paper.
            Eastman's Matte-Enamel Bromide Paper.
            Eastman's Platino Bromide Paper
            Eastman's W  D. Platinum Paper.
            Eastman's Transparent Film,
            Eastman's Dry Plates,
            Eastman's Transparency Plates,
            Tripods and
            Other Specialties.


May, /906.
View original page 2Page 3 · Read text
PICTURE TAKING

              WITH THE
      No. 4A
FOLDING KODAK


      PRICE, 10 CENTS.


           PUBLISHED BY THE
    EASTMAN KODAK COMPANY
            ROCHESTER, N. Y.
View original page 3Page 4 · Read text
CONTENTS.


Part  I.
      Loading.
           Section i.  Loading with Film.
           Section 2.  Loading with Plates.
Part  II.
     Making the Exposures.
           Section 1.  Operating the Shutter.
           Section 2.  Instantaneous Exposures.
           Section 3.  Time Exposures.
           Section 4.  Flashlight Exposures.
          Section 5.  The Rising and Sliding Front.
Part TIL
     Removing the Film.
Part IV.
      Developing.
Part V.
       Printing.
Part VI.
      Mounting.
View original page 4Page 5 · Read text
PART  I.

              SECTION  I.
     LOADING WITH FILM.
  The film for the No. 4A Folding Kodak
is  furnished  in  light-proof  cartridges and
                        therefore,                  can,the     instrument                              be  loaded                      ISin daylight.                               should,                   operation                                 how-           The
ever, be performed in a subdued light, not
in the  glare  of bright sunlight.   It should
also be borne in mind that after the seal  is
broken  care  must be taken  to keep  the   THE FILM,
black paper taut on the  spool,  otherwise
it  may   slip  and  loosen   sufficiently  to  fog  the  film.


                                 FIG.   I.
                           Removing the Back.
View original page 5Page 6 · Read text
EASTMAN KODAK COMPANY.

     I.  To load the Kodak, take a position at a table where
the daylight is somewhat subdued and remove the back by
pressing the catches inward and upward  as indicated in
Figure I.


                               FIG.  II.
                           Springing Out a Spool Pin.

     II.  The Kodak having been opened, an empty spool
having  a  slit  in  it will be seen in the winding end of the
camera.  This forms the  reel on which the film  is wound
after exposure.  The full spool is to be placed in the recess
at the opposite end of the Kodak.  To accomplish this turn
the little cam levers (as indicated by arrows)  at each end of
the recess, thus drawing out the center pins.  See Fig.  II.
     III.  Drop the film cartridge into this recess, as shown
in Fig. Ill, being careful to get the top of the spool at the top
of the camera.  The top is the winding side of the camera.
Each cartridge is marked on the end.

   Note:    If the cartridge  is inserted wrong end up. the black paper
instead  <>f the film will be brought next the lens, resulting, of course, in
the absolute loss <>f the pictures.
View original page 6Page 7 · Read text
NO. 4A FOLDING KODAK.
f^S                              FIG.  III.

                                   Inserting the Cartridge.

   IV.  Turn back the two cam levers until they are fixed
in position by the embossed stops.   It will be noted that this
centers the axis pins in ihe spool which  is to revolve upon
them.


                              FIG. IV.

                        Threading up the Black Paper.

   V.  Cut the gum slip  that  holds  the end of the black
paper  ; pass the paper over the two aluminum rollers and
thread into the slit in reel, as shown in Fig. IV.  Be careful
in so doing that the paper draws straight and true.
View original page 7Page 8 · Read text
EASTMAN KODAK COMPANY

   YI.  Give the key one or two slight           enough                                       turns—just
to bind the paper on the reel—and no more.  See Fig. V.


                               FIG. V.
                    Turning the Key  to bind paper on  reel.

  The paper should nowlow bebe  /"~~"\j                                                                                                                            |
in   position  indicated   iiin Fig -
VI.          Li        \P
   VII.  Replace the back on               FIG. VI.
Kodak, being Careful tO put it       Showing position of paper.
on right side up, (i. e. get the top at the top, the window being
at the winding side) and snapping the springs at top and
bottom  fully  into place.  Care should always be taken to
handle  the back of Kodak carefully, especially when  it  is
detached from camera, as even a slight bend would make it fit
badly, resulting very probably  in  a leakage  of  light and
consequent loss of film.

   Throughout the foregoing operation, from the time the
gum  siip  is  cut on the fresh roll of film until the back  is
once more in place, keep the black paper wound tightly on
the roll.  If it is allowed to loosen, light will be admitted
and the film fogged.
View original page 8Page 9 · Read text
NO. 4A FOLDING KODAK,


                               FIG. VII.
           The  film  is now  in  position for taking the  first picture.

   VIII.  The  roll of film  in  the camera  is covered with
black paper and this must be reeled off before a picture can
be taken.  Turn the key slowly to the  left and watch the
little red celluloid window at the back of the camera.  When
15 to 18 turns have been given, the number  1  will appear
before the window.   Fig. VII.


              SECTION  2.
    LOADING WITH PLATES.

     I.   In using glass plates the plate holders must be loaded
in a dark room—that  is, a room from which  all white light
has been excluded, as described on page 39.
     II.  Provide also

           No. 4A F. Kodak Glass Plate Adapter.
           No. 4A F. K. Plate Holders.
                   1 dozen Eastman's Extra Rapid Dry Plates, i,% x 6J£.
         Kodak Dark-room Lamp.
        A shelf or table on which to work.
     III.  Light the lamp and place it upon the table.
    IV.  Remove the dark slides from the plate holders.
   V.  Open the box of plates by running a thin knife blade
around the edge of the box.
View original page 9Page 10 · Read text
EASTMAN KODAK COMPANY.

   VI.  To load holder, remove slide and press inward the
end of brass catch on top of holder, this permits the holding
spring to recede to receive the plate.  Take out one of the
plates and place it in one side of the holder, face up.  (The
face is the dull side.)  Then press down on brass catch and
secure same by catching hooked end under brass stop screw.
Brush gently over the face of the plate with a camel's-hair
brush to remove dust.
   VII.  Replace the dark  slide  in the holder   ;  then load
other side of holder in same manner.
  VIII.  Repeat the operation  until  all  the plate holders
have been  filled, then close up the remaining plates in the
box, wrap up securely and put them away in a dark drawer.
   The remaining operation may be performed in daylight.
   IX.  Remove the back from  the camera as before de-
scribed.  (See page 4.)
   Note.—There must, of course, be no film in the Kodak when opening
it for use with plates.


                                FIG.  I.
                      Showing Focusing Shade Raised.
View original page 10Page 11 · Read text
NO. 4A FOLDING KODAK.

   X.  Snap the plate adapter into place, taking care that
the springs at each side engage with the catches and that the
back is right side up,  i. e., the plate holder should draw from
the winding side of Kodak.  The plate holders and ground
glass are inserted or removed in the usual manner.
   XI.  To focus on ground glass push shot bar near base
of adapter,  to  the  left,  which  releases  the ground glass
shade.  See Fig.  I.  (See page 8.)
   XII.  After focusing close the shutter, remove the ground
glass by pressing down on catch  at lower right hand corner
of adapter, which will permit of  its being withdrawn, and
insert one of the plate holders.
   XIII.  Pull out the dark slide.  The plate is now in posi-
tion for making the first picture, and the exposure should be
made the same as for films.  After making the exposure
re-insert the dark slide in plate holder.  Remove the plate
holder from the camera by means of leather lug, pressing
back slightly on same to start  it.
  To prepare Focusing Scale so that  it may be used
(instead  of Ground  Glass) with  Plates,  proceed as
follows  :
  As the focal plane for film and the focal plane for plates
are not the same,   it  will be necessary to mark the scale
especially for use with the plates.  To do this  is a simple
matter, but  it should be done with care, as future results
depend upon   it.  Measure off a distance of six  feet from
some plainly defined object, focus carefully, using the largest
stop  ; note the position of the pointer over the focusing scale
(it will be about ^ of an inch back of the corresponding
mark for film); mark the scale for six feet by scoring the
face  of the scale plate  lightly with a sharp pointed  awl.
Repeat the foregoing operation for eight, ten, twelve, fifteen,
twenty-five and  fifty  feet, then focus on some object one
hundred feet or more away.   In the  latter case the actual
measurement is not necessary.
View original page 11
Page 12 · Read text
)


         PART  II.

   MAKING THE EXPOSURES.
    Before making the exposure with the 4A Folding Kodak,
either time or instantaneous, be sure of four things   :
   First—That the shutter is set properly.
   Second—That the diaphragm stop  is set at the proper
opening.
   Third—That the camera is focused.
   Fourth—That an unexposed section of the film is turned
into position.  (Or a fresh plate is in position.

              SECTION   1.
   OPERATING THE SHUTTER.
    Perfect  familiarity with  the  shutter  is  essential to  suc-
cessful  picture  taking with any  camera.  The  following
directions  should  there-
fore be carefully read and
the shutter operated
several times before
threading the film up for
use.
   Nona—To attach the tube
D, simply moisten  the end  a
trifle and   it  will be found to
slip into place readily.


    •'   SNAP SHOTS."
  First— Set revolving
disc E so that small hole
in  face of same  is over
tuts or sV tne proper time
for instantaneous  ex-
posures
View original page 12Page 13 · Read text
NO. 4A FOLDING KODAK.                   II

  Second— Set lever C at No.  S.
   Note.—For instantaneous exposures when the sunlight  is unusually
strong and there are no heavy shadows, such as in views on the seashore
or on the water or in tropical or semi-tropical climates, use the diaphragm
No. 16. With light clouds or slightly smoky atmosphere use No. 4.  With
heavy clouds do not attempt instantaneous exposures.
   Third—This shutter is automatic in action and is always
set for an exposure which  is made by compressing rubber
bulb on tube D,  or pressing down release R, makes the
exposure.
           TIME EXPOSURES.
   First—Set the revolving disc E at the point T (time).
This adjusts the shutter for time exposures.
   Second—Set the lever C at Xo.  16, 32, 64 or  128.  See
instructions for use of stops, p. 22.
   Third—Press the bulb.   This opens the shutter.  Time
exposure by the watch.  Again press the bulb.   This closes
the shutter.  Shutter may be opened by touching release R
and closed by a second pressure if desired.
       SHORT TIME EXPOSURES.
   Time exposures of  o 1- second, I, % second or  1 second
may be made automatically.
   First—Set the disc E at the number on the scale, indi-
cating the desired exposure.
  Second—Set the lever C controlling the stops at No.  16,
32, 64, or 128 as desired.
  Third—Press the bulb.  This opens the shutter and  it
will  close automatically  at the expiration  of the time for
which the shutter has been adjusted.
           BULB EXPOSURE.
   Short time exposures may also be made  if desired by a
"bulb exposure."
                                " B " (bulb).  This adjusts the   First—Set the disc E at
shutter for bulb exposure.
  Second—Set the lever C controlling the stops at Xo. 16,
32, 64, or 128 as desired.
View original page 13Page 14 · Read text
12           EASTMAN KODAK COMPANY
   Third—Compress  the bulb to open  the  shutter,  and
release  it to close the shutter.   This makes the exposure.
The shutter will remain open as long as the bulb  is under
pressure.
   Note.—This method will not answer for a lone: time exposure for the
reason that when the compressed air has leaked out the shutter will close
of  itself.
  Do not oil any part of the shutter.
    In case of accident return shutter to your dealer or to us
for repairs.
   As a general rule make exposures with the bulb instead
of with the release R as the pneumatic release  is less likely
to jar the camera.
   NOTE.—This shutter  is automatic and  is always  set ready  for an
exposure so do not press bulb or finger release unless you wish to make
an exposure.
      SECTION 2.
 INSTANTANEOUS
   EXPOSURES.
      "SNAP SHOTS."
  To take instantaneous pictures
the object must be  in the broad,
open  sunlight,  but  the  camera
should  not.  The sun should be
behind  the  back  or  over  the
shoulder of the operator.
 1.—FOCUS ON THE SUB-
          JECT.
      I.   Press the concealed button
as shown  in  (Fig.  I.) and push
down  the bed  of camera  to  the
limit of motion.
     II.  Grasp the springs  at bot-
tom of front board  ;  pull out the
                                                       FIG.   f.
front until the pointer on the lower         Opening ihc Front.
View original page 14Page 15 · Read text
NO. 4A FOLDING KODAK.                  13

left hand side of front board is over the figures on the index
plate nearest the estimated distance of the principal object to
be photographed in feet.   Fig. II.
   Notk.—The index plate is scaled both
by feet and by metres and care should be
taken not to confound them.

    It  is not necessary to estimate
the  distance with any more than
approximate accuracy ; for instance,
if the focus  is  set at 25 feet (the
usual distance for ordinary street
work ) the sharpest part of picture
will be the objects at
that distance from the
camera, but everything
from  15 to 35 feet will
be in good focus.  For
general   street  work
the focus may be kept
at 25 feet, but where
the principal object is
nearer or farther away,
the  focus  should  be
moved  accordingly.
The index plate  is  dl-                              Extending the BeilowsV'ided for  5, 5^,  6,  J,  ^^^^^Bk^        and Focusing.
8, 10, 12,  15, 20, 25, 50
and 100 feet.  Everything beyond the 100 feet is in the 100 foot
focus.

      AUTOMATIC LOCKING DEVICE.
  An automatic locking device which is on the right side of
camera bed will be found a great convenience in focusing.
By means of this device the front locks automatically at 8,
 10, 15, 20, 25, 50 or 100 feet focus.
View original page 15Page 16 · Read text
'4            EASTMAN KODAK COMPANY

   To  set  the  focus,  press down on  lever A, shown  in
                                     diagram, and set catch
                                              in the slot marked for
                                        the distance desired, S,
                                                  10,  15, 20, 25, 50 or 100
                                            feet (the scale  is also
                               marked   in  metres).
                              Then pull out front of
                                 camera to limit of mo-
                                          tion and  the  camera
                                             will be in focus for the
                                       distance at which you
    Showing Automatic Locking Device.        have set the catch
                            When not in use the
lever of locking device should be shoved to extreme right.
            WITH PLATES.
  When  using plates, the ground glass may be employed
for focusing  if desired.  The automatic  locking  device  in
this  case  cannot be  used.   Insert ground  glass  in  plate
adapter.   Raise  the focusing  shade.  Open  the  shutter.
Focus  carefully with  the largest  stop before the lens and
when  the  lines show  sharp and  true  close  the  shutter.
Remove the ground glass and insert plate holder.
           2.-USE STOP NO. 8.
   For  all ordinary out-door work when the sun  is very
bright use stop No. S.    If a smaller stop be used, the light
will be so much reduced that  it will not sufficiently impress
the image on the him and failure will result.
   In views on  the water when the sunlight  is  unusually
strong and there are no heavy shadows, or in tropical or
semi-tropical climates, diaphragm No. 16 may be used.
     If a smaller stop opening than No. 16 be used for snap
shots absolute failure will result.
View original page 16Page 17 · Read text
NO. 4A FOLDING KODAK.                  15


         3.—LOCATE THE IMAGE.
  Aim the camera at the object to be photographed and
locate the image  in the  finder.  For a  horizontal picture
hold the camera as shown in Fig. III., reversing the finder
View original page 17Page 18 · Read text
i6           EASTMAN KODAK COMPANY.

as indicated.  Always look into the finder from directly over
it, not at an angle.   (Of course, when the focusing screen is
employed the image will be located on that instead of in the
finder.)
   For  a  vertical exposure  the camera must be  held as
shown in Fig. IV.  The finder gives the scope of view and
shows a fac-simile of the picture as it will appear, but on a
reduced scale.
  Any object that does not show in the finder will not show
in the picture.


                               FIG. V.

   Fig. V. shows how to hold the camera when making an
exposure  without the use of the bulb.  Grasp the bed  of
Kodak firmly with the left hand, steady it with the right and
with the thumb of the right hand lightly touch the exposure
lever.
View original page 18Page 19 · Read text
NO. 4A FOLDING KODAK.
          4.—HOLD IT LEVEL.
                                  The Kodak
                                 must be  held
                                                     level.
                                                                    If the oper-
                                             ator attempts to
                                      p h o togr a ph
                                           a  tall  building
                                       while  standing
                                         near it by point-
                                             ing  the camera
                                    upward  (think-
                                           ing  thereby  to
                                       center  it)  the
                                           result  will be
                                               similar  to  Fig.
                                           VI.
                                This  was
                               pointed too
                                  high.  This
                                            building should
have been taken from the middle story window of the build-
ing opposite.
  The operator should hold the camera level,  after with-
drawing to a proper distance,  as indicated by  the image
shown in the finder on the top of the camera.
   Note  :  The rising front may be used in helping to center high objects
on the plate.  See page 26.
     If the object be low down, like a small child or a dog, the
Kodak should be held down level with the center of the
object.
        5.—COMPRESS THE BULB.
         Hold the Camera Steady,
         Hold it Level and
          Compress the Bulb.
    This makes the Exposure.
View original page 19Page 20 · Read text
EASTMAN KODAK COMPANY


                               FIG. VII.
  Turn a new section of film into position   :  Turn
the key in top of camera slowly to the  left, until the next
number appears before the red window.   Three  or four
turns will be sufficient to accomplish this.  See Fig. VII.
   Repeat the foregoing operations for each picture.


              SECTION 3.
      TIME EXPOSURES.
                INTERIORS.
     i.  Put the Kodak in position.
                                 Set  camera  in  such  a
                                 position that the finder will
                           embrace the view desired.
                           The diagram shows the
                          proper  position  for  the
                           Kodak.    It should not be
                              pointed directly at a window
    Diagram showing position of Kodak.   as  the  glare  of  light  will
blur the picture.    If all the windows cannot be avoided, pull
down the shades of such as come within the range of the
Kodak.
View original page 20From the M. Butkus archive. Original publisher and archive notices are retained.
Check the model and edition against your equipment.
PDF verified 2026-10-10.