Film cameras
Kodak Folding Cartridge Hawk-Eye User manual
User manual for Kodak Folding Cartridge Hawk-Eye. 21 pages in English. Read the original PDF, download or print a copy without registration.
21 pagesEnglish2.3 MB PDF
Loading your manual…Open PDF directly
Document details
- Brand
- Kodak
- Model / document
- Kodak Folding Cartridge Hawk-Eye
- Document type
- User manual
- Language
- English
- Pages
- 21
- File size
- 2.3 MB
- Category
- Film cameras
- Document date
- Not specified in catalog
Search available document text
Find a term, then jump to its page in the original PDF. Image-only pages may not be searchable; check the PDF for exact wording and diagrams.
Page 3 · Read text
www.orphancameras.com
       ..KODAKERY''
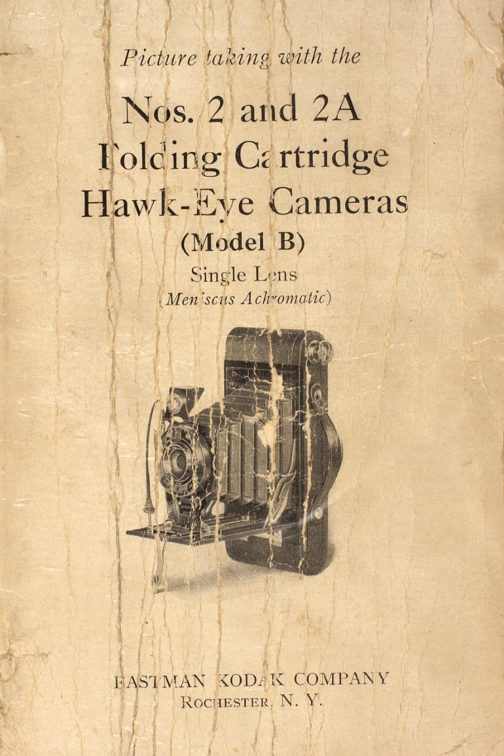
                                                          P'icture taking w'ith thernHIS    most  interesting ?nd  profusely
  l-  illustrated  monthly  magazine shows
how to make better pictures, and describes                           Nos. 2 and 2A
many novel and unusual methods of making
photographs. Anyone who buys an Eastman        Folding Cartridge                     'Kodakerv."camera is entitled to                free of
charge.                       Hawk-Eye .Cameras
  Return the post card included with  this                  Model B
manual, properly filled out, and your name
will be put on the mailing  list, to receive                    Hawk-Eye Lens
"Kodakery."
  "Kodakery"  will be sent for six months on
this offer. A post card will be enclosedwith
the fifth copy;  if this post card is filled out
and returned to us, it will entitle you to an
additional six months, free of charge. After
that  the subscription price will be sixty
cents for one >/ear, or one dollar  for two
years, but you are under no obligation to
renew.
  Send us the card promptly,  and  start                                                                                IIItIenjoying "Kodakery"  at once. There is no                                           t1
charge; no obligation.                                    {                       Published by
                                                                              ;          EASTMAN KODAK COMPANY
  EASTMAN  KODAK  COMPANY,                                                      ,{l                   RocnBsren,N.Y.
                    RocnBsrBn, N. Y.                                       il
                                                                                                                                                                                                                                           tt{{                                                                                                                         '                 \*                                           {l'"  "  --,
View original page 3Page 6 · Read text
www.orphancameras.com
   Important.'   The empty  spool or  reel           Press in and turn the winding k"y and
must be placed in the winding k"y end of         watch the red window. After a few turns,
the camera with  its slotted end, towards the         a warnittg hand will appear, then turn the
wind'i,ng key.                                     key slowly until the figure 1 is in the center
  Push the full spool into the other pocket             I     of the window.
as f.ar as  it  will  go, so that  the tension
spring grips it.
  Press in and turn the winding k"y  until              I
 it  fits into the slot in the empty spool or
reel.

                                              The film  is now in position for the first
                                                 exposure. After each exposure be sure to
                                               wind the film, bringitg  the next number
                                                            into place. This prevents makittg two pic-
                                                      tures on the same section of film.


  Af ter the camera is loaded, replace the
front,  first inserting the end opposite the
lock; the edge of the box must  fit into the
groove on  this end  of  the  front. Press
the end on which the lock is fastened into
place, and push over the lock.
View original page 6Page 8 · Read text
www.orphancameras.com
           Time  Exposures                       To Focus rHE Ceupne
  Move the indicator A to the letter "T"          On the bed of the camera is a focusing
(time).                                               scale,with slots marked 8,25 and 100 feet.
  Move the lever B to U.S. 8, 16,32 or 64         The  scale is marked  both  for  feet and
depending on the time of the exposure and          meters and care should be taken not  to
the nature  of the subject. See tables on          confuse the figures.
pages14, t5,27,28 and 32.                                        When the lens standard is drawn out  to
  Press the push-pin of the cable release D           the slot marked 100 feet, the camera is in
or press the exposure lever C. This opens          focus for anything 100 feet or beyond.
the shutter. Time the exposure by a watch.
Again press the push-pin or the exposure          To adjust the focus for subjects at dis
lever. This closesthe shutter.                       tances nearer than 100 feet, press the spring
                                                   catch or locking device on the side at the  For short time exposures of ten seconds                                                bottom of the lens standard, and draw outor less,"Bulb" Exposuresare recommended.                                                      the standard to the slot marked 8 or 25,             ttBulbtt                 Exposures                    depending upon  the  estimated  distance
                                               between  the  camera  and  the  princ'ipal  Move the indicator A to the letter "B"                                                       object to be photographed, see Depth  of(bulb).                                            Focus Tables on page 13.  Move the lever B to U.S. 8, t6,32 or 64.
Seetables on pages 14, 15, 27,28 and 32.             The distance between the subject and
  Press the push-pin of the cable release D         camera can be estimated without measur-
or press the exposure lever C, to open the            ing, unlessthe subject is closeto the camera;
shutter, and release it to close the shutter.               foi instance, if the focus is set at the slot
This makes the exposure.                        marked 25 feet (the usual distance for ordi-
                                                   nary street scenes), everything-from about  IVever make T'ime or "BuIb"  Exposures                                                      fouiteen feet to about seventy-five feet willwith the carneraheld,'in the hand,s.                                              be  in  good  focus. When  the camera  is
  Important:    Neztero'il the shutter.                  focused-in this manner,  it may be used as
   In case of accident, return  the camera          a regular fixed focus camera' see-page 12'
to your dealer or to us for repairs.                   \,Vheh the principal object is nearby or at a
                      10                                                          LT
View original page 8Page 9 · Read text
www.orphancameras.com
great distance, the focus should be changed               DBPTH OF FOCUS                                                                                                             .accordingly.                                                Depth  of focus is the distance from the
  For distant  views, set the indicator  in            treareit  to  the  farthest  objects that  will
the  slot marked 100 feet, and when the         appear sharp in the negative or print. The
subject is about eight feet from the lens,          d-epth of focus of any lens depends upon the
set the indicator  in the slot marked eight           siz-eof the stop opening used. The smaller
feet. When the camera is focused for eight           the stop opening the greater the depth of
feet, the subject can be about five feet from           focus. See the following tables for the depth
the camera if the smallest stop opening is            of focus or range of sharpness of the Nos. 2
used, see table on page 13. A time exposure        and  2A  Folding  Cartridge  Hawk-EYe
will be necessary when using the smallest        Cameras:
stop opening. The  subject can be closer                   Table  for use with  the No. 2 Hawk-Eye  Carnera
than five feet to the lens if a Kodak Portrait               Srops      U.S. 8     u.s. 16     u.s. 32   u.s. 64
Attachment is used, see pages 30 and 31.                    Distance          RANGE  OF SHARPNESS
                                                                               Focused
 How  to Use the No. 2 or the No. 2A                 Upon                        Ft.         I.-t.  Ft.      Ft.                                                                  100 Ft.                   t7   to Inf.  13   to Inf.
     Folding  Cartridge  Hawk-Eye                      25u Ft.Ft.              Ll%6   toto Inf.13   9%5)4 totolnf.l8
       as a Fixed Focus Camera                               Table  for use with  the No. 2A Hawk-Eye  Camera
  SBr rnB Focus  tr  25 FBBI.                               Srops      U.S. 8       u.s. 16   u.s. 32   u.s. 64
  MovB Srop Oppxrxc LBvBn ro U.S. 8.                DistanceFocused          RANGE  OF SHARPNESS
  UsB SpBBo 25.                                          Upon
                                                                  100 Ft.
  When using the camera as a fixed focus              258 Ft.Ft.
type, nearby subjects must be in  bright                            "Inf."    is the  abbreviation    for  Infinity-meaning      an unlimited
                                                                                       distance  from  the  lens.sunlight, to obtain fully exposed negatives.
  The range of sharpnesswhen your Hawk-                   Srop OpBurNcs
Eye is adjusted as a fixed focus camera 'vill          The stop openingsregulate the amount
be found in one of the tables on page 13,             of light passingthrough the lens. The open-
                            t2
View original page 9Page 10 · Read text
. f                                   www.orphancameras.com
ings are enlarged or reduced by moving the           views at the seashore and on the water,
lever B, see page 9.                               use speed 50; for ordinary  landscapes, in
                                                        bright  sunlight, with  clear sky overhead,
  These stop openings are marked with the          use speed 25; also for Interior Time Expo-
"U.S." or Uniform System which is based           sures, the time  for which  is given  in the
on the relation betrn'eenthe area of the stop      t      table on page 28.
and the f ocal,l,engthof the lens. Stop U.S. 8         Iis the largest opening and admits the most             U.S. 32-For  instantaneous exposures of
                                                   extremely distant landscapes,marines, snowlight. U.S. 16 is half the size of U.S. 8 and      i
admits just  half as much  light and so on          scenes with no prominent dark objects in
for each higher number (smaller stop open-           the foreground, and clouds only, in bright
itg).                                                    sunlight, use speed 25; also for portraits
                                                     outdoors, see pages 29 and 30, and other
  The exposures must be doubled for each         Time Exposures.
succeeding higher number  (smaller stop
opening). For example:  If  the correct ex-             U.S. 64-For  Time Exposures Outdoors
posure using stop U.S. 8 is speed 50, the          on cloudy days, see page 32. For portraits
equivalent exposure using stop  U.S.  16           outdoors, seepages29 and 30 ; and for Interior
will be speed 25. See comparative expo-         Time  Exposures, see page 27. Neaer for
sures using different stop openings given           instantaneous exposures.
on page 27.                                     The smaller the stop opening the greater
                                                     the depth of focus, see page 13.  U.S. 8-For   all ordinary outdoor pictures,
such as nearby landscapes showing little or               Fa'ilure will result, if stop U.S. 64 is used
no sky, groups and street scenes,when the              f.or instantaneousexposures.
subject is in bright sunlight, use speed 25;
for moving objects in bright sunlight, use             Al1 the exposures given for outdoor sub-
                                                           jects are for the hours between two and aspeed 50.
                                                             half hours after sunrise and two and a half
  U.S. 16-For  open views, when the sun-          hours before sunset.  If  earlier or later the
light  on  the  subject  is unusually  strong          exposures must be longer. For subjects in
and there are no heavy shadows, such as           the shadow, under porches or under trees,
                            1 4
View original page 10Page 11 · Read text
t                    www.orphancameras.com
no definite directions can be given;  experi-                    THB FrunBR
ence only can teach the correct  exposure                                               The finder shows what will appear in theto give.                                                            picture, but on a much reduced scale.
  No. 2 Folding  Cartridge                  ng Cartridge
        Hawk-Eye                 Haw k-Dye
    ,^,(   ) u.s.8          u.s. I   \_/          .l
   (   )  u.s.16                     u.s.16 O  us.se              \,/o  O  u.s.64        u.s.32

      C O P Y R T G H T   I 9 2 2  B Y      E A S T M A N  K O D A K  C O .          u.s.64            Co         -W
  These circles are the same size as the
stop openings of the shutters on the Nos. 2
and  2A  Folding  Cartridge  Hawk-Eye
Cameras, when they  are  fitted  with  the             Look  into  the finder from  directly  over
Hawk-Eye  Lens. They show the  relative             the center of  it and include what is wanted
sizes of the stop openings and how  their           by turning  to the right or left, see illustra-
areas differ.                                                tion on page 18.
                                               To make a vertical  pic-
                                                              ture,  hold  the camera as
                                            shown  above.  The  view
                                                     included will appear in that
                                                          part  of  the  finder  repre-
                                                  sented by the white portion
                                                                  in the diagram.
                                                                                                                                                                                t 7
View original page 11Page 12 · Read text
www.orphancameras.com


                                                            To  make  a  horizontal
                                                                            picture, turn the finder and
                                                                   hold the camera as shown
                                                              above. The view included
                                                                                       will show in  that  part  of
                                                                      the  finder represented by
                                                                     the white  portion  in  the
                                                                diagram.

                                        MerrNG IxsrnNTANEous ExposuRBS
                                            OR STV,TPSHOTS
                                         When ordinary instantaneous exposures
                                                         or snapshots are made, the subject should
                                              be in the broad, open sunlight, but  the
  When making  instantaneous exposures         camera must not" The sun should be be-
or snapshotswith any camera, hold it firmly            hind your back or over the shoulder. If  it
against the body as shown. When pressing          shines directly into the lens it will blur and
the push-pin or the exposure lever, hold            fog the picture.
the breath for the instant.  If the camera                                                      Special instructions for makingis moved during the exposure, the picture                                                   -portraits                                                 are given on pages27, 29,30 and 31.will be blurred.

                            1 8                                                                        7 9
View original page 12Page 13 · Read text
www.orphancameras.com
       Horo  rHE CnuBn,t LBvEL                                   Turn the winding key
  The carnera must be held level.  If all the                              slowly, a few times, until
subject cannot be included in the finder                          No. 2 is in the center of
without  tilting  the  lens upwards, move                             the red window.
backwards until   it  is all included zv,itlt,th,e                                After  all the exposures
camere,/teld,leztel"                                             have been made, turn the
                                                    k*y  until the end of the protective paper
                                              passes the window.  The film is now ready
                                                               for removal from the camera.
                                                      CroslNG THE Cevrpna
                                                 Release the spring catch on the lower
                                                       part of the lens standard, from the slot in
                                                    the focusing scale, and slide back the lens
                                                  standard as far as it will go.
                                                   Place the cable release around the shut-
                                                                ter, press the arm locks at each side of the
                                                  standard and raise the bed.


         Efect produced by ti,lt'ing the camera.
    If the subject is below the normal height,
like a small child or a dog, the camera            Caution:  The  lens standard must be
should be held down level with the center         pushed back as far as ,it zu,illgo, or  it  will
of the subject.                                         interfere with the bed when closing.
                 20                                                                     2 l
View original page 13Page 14 · Read text
www.orphancameras.com
        RBvrovrNG THE Fruvr                       "Cinch"   Marks:   After removitrg the
   After the last section of film has been            film from the camera, do not wind  it tightly
exposed, turn  the winding k"y  until  the           with a twisting motion, or the film might
end of the paper passesthe red window.             be scratched.
   In a subdued light, remove the front  of
the camera as described on pages 3 and 4.


                                                                                                                                                                                                                                                                                                                        'Enr','n                    #*


                                            Wrap  up  the exposed film.  It   is now
                                                 ready for development. This rnay be done
                                                by a photo finisher, or by yourself. If the  Hold the end of the paper taut and turn                                                              latter  is desired, you may  write  to  ourthe k.y  until  all but about an inch of the                                                  Service Department, mentioning the  sizepaper is on the ro11. If  the sticker folds                                                           of the pictures made with  your camera,under the  roll, turn  the winding k"y  to                                             and we will send you a list of the necessarybring it up.                                                     materials which Can be ordered from yo,rt  Take hold of the ends of the paper and                                                      dealer.sticker to prevent paper from  loosening.                                                       Important:    Film should be developedDraw out the kev and remove the roll of                                                as soon as possible after  exposure. Thefilm. Fold under about half-an-inch of the                                                          quality of the image on all sensiti zed prod-protective paper, and fasten  it  with  the                                                     ucts  is retained by prompt  developmentsticker.                                                            after exposure.
                            2 2                                               2s
View original page 14Page 15 · Read text
www.orphancameras.com
  Remove the empty spool and place it in           the picture.  If  all the windows can not be
the winding end of the camera.                     avoided, draw the shades of those within
  Replace the front  of the camera as de-          range of the lens.
scribed on page 6.
  The camera is now ready for reloading.
    It  is a good plan to reload the camera as
soon as an exposed film has been removed,
to be ready for the next pictures. Load with
Kodak Film.
      TluB  ExposuREs-f  NDooRS
  Open the front of the camera as described
on page 8. For time exposures the camera
must always be placed on a firm support
like  a  tripod, Optipod,  table  or  ihair,
neaerhold it in the hands. It has two tripod
socketsfor use with a tripod or an Optipod.
                                                                                          If the camera is placed on a table, use
                                                     the  locking  lever  2, as a  support. The
                                            camera must not be more than two or three
                                                  inches from the edge of the table.
                                                     For horizontal pictures, turn the camera
                                                         finder and locking lever 2, as on page 26.
                                                Focus the camera as described on pages
                                                 n and 12.  Place the camera iq such a position that
the finder will  include the view desired.             Adjust the shutter for a time exposure,
The above diagram shows three positions          see page 10.
for the camera. It should not be pointed                 All  being ready, press the push-pin or
at a window as the glare of light will blur            the exposure lever carefully, once to open,
                            2 4                                                                        2 5
View original page 15Page 18 · Read text
www.orphancameras.com
tree, but with  clear and unobstructed sky           The exposure when using the Attachment
overhead. Place the camera on a tripod or              is the same as without  it.
other steady support, use stop U.S. 32 or                I-IseKodak Portra'it Attachment IVo.8 with
U.S. 64 and make a "Bulb"  Exposure of           the No. 2 Folding  Cartridge Hawk-Eye,
about one or two seconds. By  following          and use IVo. 3 with  the No. 2A Folding
this rule unpleasant and distorting shadows           Cartridge Hawk-Eye Camera.
on the face will be avoided.,                                             Kodak  Diffusion  Portrait  Attachment
     Kodak  Portrait  Attachment                  The Kodak  Diffusion  Portrait  Attach-
  The Kodak  Portrait Attachment makes         ment  is a supplementary lens used in the
head and shoulder portraits.  It can also be        same manner as the regular Kodak Portrait
used for photographing flowers and similar           Attachment.   It produces a true, soft-focus
subjects.                                                     effect.
  Place the Attachment  over the lens and                Ilse Kodak D'ifusion  Portra'it Attachme:nt
compose the picture in the finder.                   No. 8 with  the No. 2 Folding Cartridge
                                               .Hawk-Eye, and use -ly'o.3 with the No. 24,  The subject must be at one of the dis-
tances from the camera, given in the table           Folding Cartridge Hawk-Eye Camera.
below. Measure the distance carefully from              "Ar HouE wrrq  rrrB KooAK"  is a book-
the lens to the face, and place the focusing              let containing many diagrams and illustra-
indicator according to the table:                        tions showing various  lighting  effects. It
   DISTANCE BETWEEN         THE FOCUSING                gives suggestions for making  pictures,  in
   SUBJECT AND LENS           INDICATOR               and around the home.       MUST BE           MUST BE SET AT
   2 feet 9 inches           8 feet                    "Prctune  Ter<rNc AT NIGHT" is a book-
   3 t ' 9 " 2 5 "                                                     let that describes in detail the methods of
   4 " 2 " 1 0 0 ' '                                  making  flash-light  exposures, camp  fire
                                               scenes, fireworks, lightning, moonlight  When making portraits, the most pleas-                                                            effects. silhouettes and  other  novel anding results are obtained with  the subject                                                unusual pictures.four feet two inches from the lens and the                                               These two booklets are free, and copiesfocus set at 100 feet. For flowers and simi-                                                             of them  will be sent upon request to ourlar subjects the shorter distances will be                                                   Service Department.more satisfactory.
                  30
View original page 18Page 19 · Read text
www.orphancameras.com
     Trprp ExposunBs-OutDooRs                   scribed on page 8. Wipe the front and back
  When the smaller stop openings (U.S. 32           of the lens with a clean handkerchief. Never
or U.S. 64) are used, the  light  passing        unscrew the lens.
through the lens is so much reduced that                                              Keep Dust Out  of the Cameravery  short time exposures outdoors may
be made.                                     Wipe  the  inside  of  the  camera and
  For  short  time exposures as described         bellows, occasionally, with a slightly damp
below, use the "Bulb" Exposure,seepage 10.           cloth, especially if the camera has not been
  With  Light  Clouds-From   one to three         used for some time.
secondswill be sufficient.
  With  Heavy Clouds-Four   seconds to
eight seconds will be required.
  With   Sunshine-Time    and  "Bulb"
Exposures should not be made.
          CrBaN tnNsBs
  These pictures  illustrate  the difference
between results with a dirty and clean lens.


           ?6tu:trk
    "@@

    Madewith  Dirty Lens. Mad.ewith Clean Lens.
  Lensesshould be cleaned as follows:
  Remove the  front  of  the camera. see
pages 3 and 4, then open the front as de-
View original page 19Page 20 · Read text
www.orphancameras.com
            Pnrcp Lrsr                             Kooar   Nrcerrvo   ALnuu,   to  hold  100                                              2%  * 3/   or smaller negatives             $ 1.25
Kooar< Frru CInTRIDGE, No. 120, 2/a x3/,                    Koonr<  NBcerrvs   Ar-BuM,  to  hold  100
  s i x e x p o s u r e s . . . .                                     . . . .  $  .25          2% x 4/,  or smaller negatives              1.25
Kon.q.r Frr.u CanTRIDGE,No. 116, 2% x4%,
  twelve exposures                          .60          Kooar<  Tnrlrurnc   Boenl  No.  2, capacity
 Six exposures.  . .                           .30              7 x 7  i n c h e s .. .  .
CennvrNc Cesn for the No. 2 Folding  Car-                                 i     Koonx  Dnv MouwrrNc  Trssue, 2%  x 3%
   tridge Hawk-Eye  Camera                1.50         I         or 2% x 4/,   three dozen sheets               .10
CennvrNc  Cese  for  the  No.  24'  Folding                           I     R"ooBs  Ar-euxr, flexible leather cover, size
  Cartridge Hawk-trye  Camera.   . . . . :.  . . . .   1.60             7 x 11, loose-leaf, 50 black leaves.           2.75
Kooer<  Ponrnert   ArrecnuBNr,    No.  8,  for                     Cloth cover, size 7 x 11.  .                    1.25
  the  No.  2 Folding  Cartridge  Hawk-Eye
  Camera                                                                                                                                     . / J             Verox  TnawspenpNr  \,VarBn Colon  SrAues,
                                                                    booklet of twelve colors                        .50 No.  3, for the No.  24, Folding  Cartridge                                        '
  Hawk-Eye  Camera                                               . 7 5          VBrox  Waron  Colon  Ournlt,  consisting of
Kooar<  Drrr'usrox   Ponrnart   AttAcuueNr,                             Artist's  Mixing   Palette,  three  Camel's
  N o . 8                                1.25              Hair Brushes and one book of Velox Trans-
 N o . 3                                 1.25              parent Water Color Stamps (twelve colors)    1.00
Kooer< Sr<v FrrrBn,  No. 8.  . . .                                               . / J        r,-r n   "How  ro MaxB Gooo PICTUnES," an illus- N o . 3                                   1 . 1 5               trated  book  of  helpful  suggestions.    It
                                                                  describes various methods  of making  ex-Kooar< Cor,on Fu,ten,  No. 8                                                                   . / J                                                                 posures, developing,  printing,  enlarging,
 N o . 3                                   1 . 1 5               coloring., making  lantern  slides, and other
Kooar< Morar,  Tnrroo,  No. 0               2 . 75                interesting subjects                             .50
 No. 1                                 4.50
 No. 2                                  5.00                                     All  brices  subject  lo change withou.t  notice.
Lrernen  CannvrNc Cese, for Kodak  Metal
  Tripod  Nos. 0,  I or 2                     2 . 7 0            EASTMAN KODAK COMPANY,
Oetteoo,  for attaching camera to the edge of                                      RocuBsrpn, NBw Yonx.
  a table, chair, fence, etc..  .                1 . 2 5
Kooeroo,   for  attaching  camera  to  a  tree,
  fence or similar rough surface            r.7s
Koler<  SBrr  Trlrpn.   fits on the cable release
  and  automatically   presses the  push-pin
  enabling the photographer  to be included.    1.25
View original page 20Page 21 · Read text
www.orphancameras.com
    SERVICE                       IMPORTANT
                                                      Read  this manual  thoroughly  before you make DEPARTMENT                any pictures.
       AnnruoNer- AssrsrANcE FoR                     While loading and unloading the camera, be very
                                                                     careful to keep the protective paper wound  tightly
       Merrxc  BBrrBn Prcrunps                    around the film to prevent  light  striking   it.

 A   LTHOUGH  we give  in  this manual            shutterBeforeis makingadjusted anproperly,exposureusingbe thesurecorrectthat stopthe
.(  \  the essential directions  for using the           opening and speed. The camera must be focused and
camera it accompanies, there are amateurs          an unexposed section of film in position.
who wish for further knowledge of photog-            The sun must be behind your  back or over the
raphy.                                                      shoulder.  If  the sun shines directly  into  the lens
                                                                                                                     it  will blur and fog the picture.
  The  Service Department  is  at  their      q I       Hold  the camera level.
                                                                                                                                                                                                                                                                     Iservice, your service.                                                             Hold  the camera steady when making  instanta-                                                                                                                                                                                                                                                                                                                                      i
  Do not hesitate to call on us for infor-            -!.j    neous exposures or snapshots. The camera should                                                         be held firmly  against the body and when pressing
mation on any photographic subject.                   the push:pin  or the exposure lever, hold the breath
                                                                             for the instant.   If the camera  is noved  during the
     We are at your seraice,write                    exposure, the picture  will be blurred.
           to us-there,is  no charge,                       Turn  a new section of film  into position immedi-
             no obligation.                                ately  after making an exposure. This  will  prevent
                                                        making two pictures on the same section of film.
               Address all Communications                          Never  oil the shutter.
                                                      Keep the lens and inside of the camera clean.
    SERVICE DEPARTMENT                         Instructions  for making  time txposures, indoors
                                                                                                                 in this manual.L]ASTMAN KODAK COMPANY          and outdoors, are included
      RocnnsrER, N. Y., U. S. A.                     EASTMAN KODAK COMPANY,
                                                                             RocunsrBn, N. Y.                                                                                          6-29-KI'-40
View original page 21Related documents and language editions
From the M. Butkus archive. Original publisher and archive notices are retained.
Check the model and edition against your equipment.
PDF verified 2026-10-10.