Film cameras
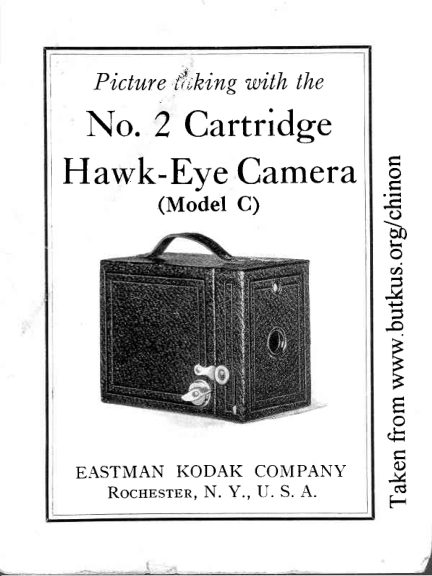
Kodak Hawk-Eye C User manual
User manual for Kodak Hawk-Eye C. 36 pages in English. Read the original PDF, download or print a copy without registration.
36 pagesEnglish0.8 MB PDF
Loading your manual…Open PDF directly
Document details
- Brand
- Kodak
- Model / document
- Kodak Hawk-Eye C
- Document type
- User manual
- Language
- English
- Pages
- 36
- File size
- 0.8 MB
- Category
- Film cameras
- Document date
- Not specified in catalog
Search available document text
Find a term, then jump to its page in the original PDF. Image-only pages may not be searchable; check the PDF for exact wording and diagrams.
Page 3 · Read text
A  PRACTICAL  book for the amateur.    It
ff.    describes in a  sirnple, understandable
way e\iery phase of photography  that the am-
ateur is likely to be interested in, such as de-
veloping, printing, etc.  Prof usely illustrated.
    EASTN{AN KODAK  COMPANY
At your dealer's         RocspsrBn, N.  \'

      www.orphancameras.com
View original page 3Page 4 · Read text
,.KODAKERY"I
 i  A monthty  magazine   that  teaches how  to
) make  better  pictures,   uill  be sent FREE OF
 CHARGE  to anyone who obtains one  ol these
 i affiateur  cameres,   il  this  blank   is filled  out
t,snd  sent  to us uithin  3O days from  the date
, the camera pss receiyed. KODAKERY    pill  &e
 sent Jor one year only on this  ofrer, alter  that
, the  subscriptiofl   ptice  will be  sixty cents Jor
 one year or one dollar  for  two years, but you
) are under no obligation   to renep.
           EASTMAN  KODAK  COMPANY.
 To THE EASTMAN KoDAK CoMPANY,
                  RocHESTER,NEwyoRK:
   Accepting  your  ofrer, please put  my  naffie
 on the mailimg   litt for "K}DAKEF.Y,'  <with the
 understsnding    thst  there   is to be nocost  to
 me),   I having  obtained  a


                                ( Iiind   of Clanlera)
 (rnni         .


 n l l      .
                      (Date  Here)
    Print   your  name   and  address   plainly   on
               reverse  side  of  this  page.
 F o r m N o . 5 1 3 . 2 6 .
View original page 4Page 5 · Read text
P,icture tak,ing la'ith the
 No. 2 Cartridge
Hawk-Eye Camera
          (Model C)


              Published,by
  EASTMAN KODAK COMPANY
      Rocnrsron, N. Y., U. S. A.

     www.orphancameras.com
View original page 5Page 6 · Read text
Order Film by Number

   All Kodak  Filn.rs are distinguished  b1, the
numbers on  the  encls of  the  cartons.  This
number  is also on the cartridge, and on thc
camera.
  120 is the nurnber of the film for the No. 2
Cartridge Harvk-Eyc Camera.
View original page 6
Page 7 · Read text
Before  Loading

   Before  taking  any   picturcs   with   your
.an)era, read the follorring instructions carc-
 fully.   N{ake  yourself   familiar   with   the
calnera, taking especial care to learn hou,to
operate the shutter (see page 12).
  The  first  thing  to  remerrber   is that  the
light, rvhich irnpresses the photographic image
upon  the  sensitive  film  in  a  fraction  of  a
second when  it cornes through  the  lens, can
destroy  the  filrn as quickly  as  it makes the
picture.   \Vhile  loading  and  unloading  the
carnera, be very careftrl to keep the protective
paperrvound   tightly  around the  film  to pre-
vent  the  light  striking   it.


      www.orphancameras.com
View original page 7Page 8 · Read text
CONTENTS
Loading the Camera                   \
Making  the Exposures             t 2
Removing the Film         2 l
Finishing the Pictures      25
View original page 8
Page 10 · Read text
Fi.'  TT

   2.   Ptrll up the  rvincling ke1' as sholr,n ir.r
Fig. II.
  3 .  R c n r o t e t h c  l o l l h o l , l e r ,a s  i n F i g .  l l l .
    It  rvill be seen that  at each forrvard corncr,
therc is a recess to hold a spool of filnt.
  There  is an empty  spool in the recess on
the winding side; this is to be used as the reel.
  The winding side rnay altays  be disrin-
guished by  rh1 round opening in  the  rull
holder,  directly  behind  the  exposure  levcr.
The winding key is inserted in the reel through
tnls openrng.
                              6
View original page 10Page 12 · Read text
Fit  the spool pins into the holes at each end
of the spool, so the spool of {ilm  will revolve
upon the pins.
           Important
            "TOP,"  The word           r,vhich is printed on the
protective  paper near the  top  of the  spool,
nrust be next  to the side of the  roll  holder,
u'-hich has the round opening through  which
the key  is inserted  in the  reel.    [f the  car-
tridge  is inserted the rvrong way, the protec-


                      Fis. V

                              8
View original page 12Page 13 · Read text
tive  paper  rvill cone  between the  lens and
the film and no pictures could be made.
   5.  Remove the band that  holds the oro-
tective paper: pass lhe paper owr the rollers
and across the opening in the back of the roll
holder  (Fig. V).    llnfold  the end of thc pro-
tective paper and thread  it through the longer    -
opening of the  slit in the reel as far as it  will
go, as shown in Fig. VI,  being aery careJul to
                                                                                                   t-
                                         u
                                              *
                                                             BFB

                                                                                            . H
                                                      -
                                                                    Cw
h,aaethe paper d,raun straight.  Give the spool  3two or three forward turns to make the paper
hold securely on the spool.
                     9

     www.orphancameras.com
View original page 13Page 14 · Read text
Caution
    If  too much  of  the  protectivc  paper  is
turned  off, before the cafirera is closed, some
of the filnr will be uncor-ered, fogged and ruined.
   6.  The camera rnust now be closed.  Re-
insert  the  roll  holder  in  the outside bor  so
that the slotted end of the $'indine reel which
shows lhrough the round hole ln  rhe  roll
holder,  will come next  to  the  winding  ke1'
in the outside box.  Fasten the  roll holcler
to the outsicle box rvith thc trvo catches A-A
illustrated in Fig.  I, page 5.


                             Fig.  \rII
                          10
View original page 14Page 15 · Read text
7.  Press in, and  at the satne time  turn
the winding  key  until  the rveb at the  lorver
end of the key  fits into the  slot  in the spool
end.  Fig. VIL
   R     T'  'rn +Le  l.ow
about  fifteen turns
" . f  i  l         .     r "  ' " r .  i n o
hand appears in the
red  rvindorv,  then
turn   slorvlv   until
the figure 1 appears
in the center of the
rvindou'.
   'fhe          filrn is norv in
position for the first
plcture.
  Pressin the wind-
i n g k e y  s l i g h t l l '
when turning   it  to
make sure that  the
web on the key stays
within  the  slot  in
the spool.


      www.orphancameras.com
View original page 15Page 16 · Read text
Making the Exposures
            t'Snapshotst'
tTtHtr No. 2 CartridgeHawk-EyeCamera
  I      is  a  fixed-focLrs canlera.  therefore.
objects nearby and  at  a  distance  will  be
sharp.  Subjects  that  are  abor-rt eight  feet
and  farther  fron  the camera  will be sharo.
and even those as nexr as six feet, while not
as sharp, will be sharp enough for all practical
purposes.  Do  not attempt  to take  pictures
of  subjects  nearer  to  the camera  than  six
feet, v'ithout  using a Kodak  Portrait  Attach-
nent,  see page 19.
  The  shutter  of  this camera  is released bv
pushing lhe exposure lever B (Fig. l), eirhei
up or down with  the thumb.   Push the lever
slowly ancl in one direction only.
    If  the  lever stands at  the top  of the  slot
simply  push  it  to  the bottom,  or   if   it  is at
the bottom push  it to the top.
                        1 2
View original page 16Page 17 · Read text
Fig.  I

    If the lever is not pushed all thelvay  to the
other end  of  the  slot,  the  shutter  will  not             "click"move, no             will  be heard and no ex-
posure made.  Push  the  lever as  far  as  it
rvill go.
  When making snapshots, the subject should
be in the broad, open sunlight, but the camera
must  not.  The sun should be behind your
back  or  over  your  shoulder.    If   it  shines
directly  into the lens  it  will  blur  ar-rd fog the
picture.
                        1 3

    www.orphancameras.com
View original page 17Page 18 · Read text
Point the camera at the subject to be oho_
toqraphed and.looking inro the fin,1"l-irorrl
olrecuy over the ccnter of  it, inclurle rvhat
 ) o u   \ r a n t   l r y - t t r r n i n 3 t h e c a m c r a e i t h e r t o
rne rlght or lctt.
    . O n l v  r h e o b j e c t s r h a r s h o w  i n  r h e  f i n t J c r
\\'ili snow rn the ptcturc.
   All being ready:
.  H,old rhe canrcra steady.and ler.el a" shou.n                    (!                  rg.                                      I | ) and                       push                               rhe                               exposurell   ]l,urjrlllgnlevcr       blJ(ll{.                pagc,                        I,                       1J)                            on(c,                               as fai                                     as  it
wUr go.     I tus makcs the exposure.
                       1'+
View original page 18Page 19 · Read text
-f
              lre t'rposure ler-er nrusl Lrt,pusherl s/oz:,1v.            ,.
        lt.,lhc cirnera,is nor heid steadily rhc pictrric
         u'lrt De blurrerl.
  l'II      Turn a New Section of Film'I ,$                into ppsition
          .. P,rcs,.in rhc. uindirrg kcy slighrly ancl rrrnr
           r r s t o \ ' t v u n l l l   l h e n e \ r n u n l b e r a p p c a r s i n
       the center of the red ninclou,.
        The rvarning hand appcars only before No. 1 .
        Repeat these operations after each exposure.


1


   I
I

           www.orphancameras.com
View original page 19Page 20 · Read text
Important
  When  makin$  snaPshots  with  anY
carnera, hold   it  firmly  a$ainst the body
                        1 6
View original page 20Page 21 · Read text
as shown.  When pushing  the exposure
lever, hold the trreath for tbe instant.
                        1 7

    www.orphancameras.com
View original page 21Page 22 · Read text
Hold Camera Level
  The camera must be held level.    l{  all of
the subject cannot be included  in the finder
without   tiltine  the camera  upwards, move
backrvards  .,t.ttil  it  is  all  included   uitll  thc
comera held Jetel.


                        Fig. lII
       EFFECT  PRODTICED  BY  TILTING   TIIE  CA\{ERA
                         1 8
View original page 22Page 23 · Read text
Tilting  the camera  to bring  in the top  of
a  tall  building  produces the  distorted  effect
shorvrtin Fig.  IlI.   Sometimes a tall building
can be photographed from a building opposite,
at a level with  its center.
    If the subject is below the nonlral height,
like a surall child or a dog, the camera should
be held dorvn  level  rvith  the  center  of  the
subject.
   Kodak Portrait Attachment
  The  Kodak   Portrait  Attachment    is  arr
extrzr lens, which,  rvhen slipped  in  the  lens
opening  in  the  front  of the camera, makes
large head and shoulder portraits.
  Place the Attachment  in the lens opening.
Compose  the  picture   in  the  finder.   Ire
subject must be 3)4 feet from the lens.
  The Attachnrcnt cdn also he userl u'hen
making   pictures   of   flou'ers  :rnd   sinrilar
subjects.
  Use Kod,ak Portroit Attachment -1y'0.1 with
the  No.  2  Cartridge  Hawk-Eye   Clamera
(N{odel C).

                                                 t 9

      www.orphancameras.com
View original page 23Page 24 · Read text
Kodak Diffusion Portrait
          Attachment
  The  Kodak   Diffusion   Portrait   Attach-
ment is a supplementary lens used in the same
manner as the resular Kodak  Portrait Attach-
ment.     It  produ-es  a  true,  soft-focuseffect                         "fuzziness"free fronr objectionable               or out-of-
focus appearance. By using this Attachment,
portraits  are made rnore artistic, due to  the
softening effect of diffusion.
   \Vith   the  No.  2  Cartridge  Hawk-Eye
Camera  (Model  C), use a Kod.ah Difusion
Portrait Attachment No. 1.


                   20
View original page 24From the M. Butkus archive. Original publisher and archive notices are retained.
Check the model and edition against your equipment.
PDF verified 2026-10-10.