Film cameras
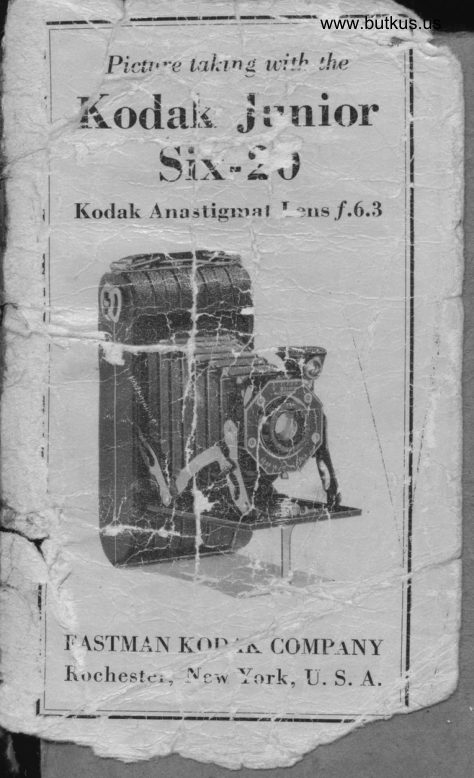
Kodak Junior Six-20 User manual
User manual for Kodak Junior Six-20. 41 pages in English. Read the original PDF, download or print a copy without registration.
41 pagesEnglish6.0 MB PDF
Loading your manual…Open PDF directly
Document details
- Brand
- Kodak
- Model / document
- Kodak Junior Six-20
- Document type
- User manual
- Language
- English
- Pages
- 41
- File size
- 6.0 MB
- Category
- Film cameras
- Document date
- Not specified in catalog
Search available document text
Find a term, then jump to its page in the original PDF. Image-only pages may not be searchable; check the PDF for exact wording and diagrams.
Page 2 · Read text
I        Kodak Anastigmat Lens    -The               Iiron-                  this Kodak                    Fr'        is as fine an alastigmat  lerrs as scienfifis   f
     research and modern machinery *,rr*    been able to produee.                                                ;        I  It was designed for use in thit  I
          particular Kodak by experts irr
          optical mathematics.               -E-
    2 It is made up of trvo kinds of Jena-
          glass, barium crown and flint- S
       each of ttre highest quality ob-          tainable.             I
     3 It was fashioned by-skillc#ens
       makers on machines thrt grind                                                           {,        and polish to within 1-50000 of au                                                                       I         inch of perfection.
     4 It has passed rigid examinations          ti
       and optical tests required to meet
         the Kodak standard of quality.                           Ir.-r
     '  5 Itwascarefullyfittedandmounte'
         in its shutter by exPerts so thrr
\-.         it will function at its best.                                     '
     By using yt)ur Kodak according  t,o
    the instntetions in this manual, y-ru
     will make con.'''tently fine pictures.
    EASTMAN KODAK COMPANY,
                        Rocnesr'trR,
View original page 2Page 4 · Read text
Venmo @mike-butkus-camera  Ph. 2083
PayPal Name  Lynn@butkus.org      www.PayPal.me/lynnbutkus
View original page 4
Page 5 · Read text
Tno CevrnRe


Mike Butkus    Digitally                                                DN:ou=butkus.org,Date:cn=Mike2023.10.31signedButkus,email=mike@butkus.org,by15:35:04Mikeo=ButkusButkus-04'00'camera manuals,c=US

     Lock for Back     6. View Finder      -,/
     Locking Lever     7. Metal Frame Findt-rf
     and Support                        8. Tripod Socket    Bed
     Shutter           9. Bed Braces
     Lens             10. Winding Key
         A-Speed Irrdicator
         B-Stop Opening Lever
          C-Exposure Lever
         D-Focus Poinier


                                                                                                             'tJ
View original page 5Page 6 · Read text
-\
                               www.butkus.us                t
        IMFORTANT
 pE!'ORE loading your Kodak with  I-D film,                 befoie- taking any pic-         -and  tures with it, read these instructibns
 carefully. Take especiai care to learn
 how to operate the shutter.
   While loading                           _ and unloading, be
 very careful to keep the prote-ctive
 paper wound tightly arourrd the film
 ' to prev-entlight striking it. The Kodak
 can be loaded or unloaded in daylight.
 This should be done in a .,r"Ua"rr.a light, not in direct sunlight.
 J        ro LoAD   '         Use film number:
 __V     6?0, SS 620, F 620 or 620 for the Kodak Junior Six-20.


                    Push the but-
                  ton of the lock
              towards the
                      arrow.


d'i{:.      -dflr".
View original page 6Page 7 · Read text
Picture taking with the


               Open the back.


                             Lift up the
                     spool holder
        www.butkus.us                    in the recess
                       adjoining the   .,,-                    hinge of the
                    back and put
                          the roll of film
in it, springing out the flanges until
the pins engage the holes in the spool.
Make sure that the word "TOP" on
the paper is on the side opposite the
winding key.
                       4
View original page 7Page 8 · Read text
www.butkus.us  \--,
                    Kodak Junior Six-20


  Remove the paper band and pass the
 protective papbr ouer the two^ rollers.
        the paper through the longer T.ht.u4
 slit in the empty reel, as far as it will go.


  Turn the winding key once or twice
to bind the paper on the reel, and be
sure that the paper is started straight.
View original page 8Page 9 · Read text
Picture taking with the
       Close the back, pressing it so that
     the spring lock snaps into place, se-
     eurely fastening the back.
               Push the round slide
                  that covers the red win-
             dow on the back of the
             Kodak in the direction
                   of the arrow.
     Turn the winding k.y, watching
     the red window. After a few turns, a
    warning hand will appear; then turn
     slowly until the figure 1 is in the center
     of the window.


     Push back the slide over the red
    window. This slide prevents fogging
    when using Super Sensitive Panchro-
    matic or Panatomic Film, and makes
      it unnecessary to use the adhesirre
      fabric included with each roll of the film.
     The film is now in position for the
      first exposure. After each exposure

\
View original page 9Page 10 · Read text
www.butkus.us ")
                        I(odak Junior Six-20
 wind the film to the next number.
 This prevents making two pictures on
 the same section of film.
      OpoNrNG THE FnoNr
                    Raise the
                      locking lever
               and draw
                   down the bed
                          until it locks;
                              this brings the
                          lens and shut-
                         ter intO posi-
                             tion.
                To Focus
                       The various
                     distances at
                which the
Kodak may be focused are enqraved
on the beveled edge of the lens rirount.
  The scale is marked for b, 6,8, 10,
12, 75, 25, 50 and 100 feet.
  To bring the Kodak to the correct
focus revolve the lens mount by turn-ing it to the right or left until the
{grre repres_enting the distance from
the s_ubject to lens is under the pointer D
at the top of the lens, see page 8.
View original page 10Page 11 · Read text
Picture taking with the
  , When facing .the Kodak, turn the  tens mount to the right for distant
  graduations on-the sca"l",     turn to                       -ra the left when focusing                       *"rUf  close subjects.          ""          ",


  The distance               _between the subject
 and Kodak can be estimated withbui
 measuring, when the subject is Uryiii
fifleen flgt;^for instance, i? the focis is
 set at 25 feet (the usual distance for
ordinary- street scenes)- tnu .frurp..i y?r,t,   tlq picture will'be tfre oU;'uct*at that"l distance from the came.u, brrt
gvgtyt}.rjls from about 16 to aUo,it-Oti
Ieet, wlll be. in good focus.
   r or orcunary-  street pictures-{eet, the
focus may be kept at iS-      but
                         8
View original page 11Page 12 · Read text
www.butkus.us  \
                    Kodak Junior Six-20
 y'he_re the principal object is nearer or
 farther away, the focus should be
 changed accordingly.
  For distant views turn the lens
       beyond the 100-foot mark, Tngun! bringing tlt. pointer D against the                            - stop on_ the lens mount.                          Nothing
 nearer than five feet can be focused
 without the use of a Kodak portrait
 Attachment, see pages 82 and BB, or a
 small stop opening, see page lb.
        THn SHurrBn


A-Speed Indicator     C-Exposure Lever
B-Stop Opening Lever D-Focus Pointer                                          I
                               I                                                                  i
                                                                                                                              I

                                                                    1
View original page 12Page 14 · Read text
www.butkus.us
                       Kodak Junior Six-20
          "Bulb" Exposures
     Move indicator A to the letter "8."
     Move lever B to /.6.3, 8, 11, 16,22
    or 32. See tables on pages 12, 13,29,
     30, 34 and 35.
      Press lever C to open the shutter
    which will remain open as long as
     lever C is held down.
     Time and "Bulb" Erposures must
     neuer be made with the Kodak held in                    ,:l
     the hands.                                                                                                                                                                                                         !
     Important: Neaer oi,l the shutter.
    In case of accident, return the camera
    to your dealer or to us for repairs.
     Cable Release: A cable release
    (No. 29) can be used with this Kodak
      if desired, but the camera should not
   be closed without first removing the
    cable release.
     To attach the cable release, remove
    the screw directly behind the lever C
   and replace it with the cable release.
    After using the cable release, detach it
   and replace the screw in the opening.
   The screw may be loosened and tight-
    ened with a small coin.
I                                  1l

                                                                      tdI
View original page 14Page 16 · Read text
www.butkus.us
                       Kodak Junior Six-20
       _, t.t6-For open views,.when the sun-     light on the subject is unusually strong
    and there are no heavy shadows, sucfi
    as views at the seashore and on the*,     water, use speed 50; for ordinary land-
     scapes, il bright sunlight, with clear
    sky overhead, use speed 25; also for
     Interior Time Exposures, the time for
     wh-ich is given in the table on page 80.
         | .22-F or instantaneous exposuies of
    extremely distant landscapes, marines,
   snow scenes without prominent dark
    objects in the foreground, and clouds
    olly,^in bright-sunlight, use speed 2b;
    also for Time Exposures.
                                  Out-     _ f .32-For Time Exposures-see    doors on cloudy days,     table on
    pages 34 and 35. For Interior Time
    Fxposures, see pages 2g and 80. I{euer
     f orinstantaneou s erp o sur es.
      Failure will result, if stop/.32 is used
           f ovinstantaneou s erp o sur e s.
    The smaller the stop opening the
    greater the depth of focus, see pages
   14 and 75.
      All exposures given for outdoor sub-   ^    jects are for the hours from one hour
   after sunrise until one hour before
    sunset, when using Kodak Verichrome,

                                   13
View original page 16Page 17 · Read text
Picture taking with the
 Super Sensitive Panchromatic or Pan-
 atomic Film. If Kodak N. C. Film is
 used, exposures can be made f.rom 2ft
 hours after sunrise until ZLhhours be-                                           .
 fore sunset. If earlier or later, the ex-   ?
 posures must be longer.                 ?


                                                                                                                                                                                                                                                                                                           I   For a subject in the shade, under                       I
 the roof of a porch or under a ttee, a                                            I
 time exposure must be made, see pages   a
 34 and 35. When making pictures
 under these conditions, the camera         i-I
 must be placed on some steady, firm
 support.
       Dnprn oF Focus                                                                                        i,                                                                    f'
   Depth of focus is the distanee from
 the nearest to the farthest objects that
 will appear sharp in the negative or
 print. It depends upon the size of the
 stop opening used. The smaller the
 stop opening the greater the depth of         ,tl
 focus. See the table on page 15 for
 the depth of focus or range of sharp-               t
 ness of the Kodak Junior Six-20.                                     o
        Tgn,f." SysrEML  A lens is said to work at a certain
 "speed;" this means that the lens will
 give a sharp image from corner to
                            t4
View original page 17Page 21 · Read text
Picture taking with the
      TnB Vrnw FrNoBn
  The view finder 6, page 2, shows
 what will appear in the picture, but on
 a much reduced scale. It can be turned
quickly for either vertical or horizontal
pictures.


  Look into the finder from directlv
over the center of it and include whal
is wanted by turning to the right or
left, see illustration on page 20.
             To make a vertical
                                                        $             picture, hold the
                                                                                I         Kodak as shown
             above. Only what is    a
              seen in that part of
             the finder shown as
               white in the diagram,
will appear in the picture.

                          18
View original page 21Page 22 · Read text
www.butkus.us
                       Kodak Junior Six-20


f   To make a hori-
    zontal picture, turn
    the finder and hold
    the Kodak as shown
    above. Only what is
    seen in that part of
    the finder shown as
    white in the diagram,
     will appear in the picture.
       TtrB Morer Fneuo FrNnnn
     In addition to the brilliant view
                                        an   finder the camera is equipped with
                        page 2, attachedft   metal frame finder 7,'    to the side of the Kodak. To use this
[   finder raise the rear frame by th;'   button and both parts of the finder
    will spring into position. Hold the
    camera with the siqht or rear frame
    as close to the eye as possible with the
    camera held lightly against the face,
                                   l9
View original page 22Page 23 · Read text
Pieture taking with the


  When making instantaneous exposures or
snapshots with any Kodak, hold it  firmly
against the body as shown; or against the
face if using the metal frame finder. When
pressing the exposure lever, hold the breath
for the instant. If the Kodak is moved during
the exposure, the picture will be blurred.
                         20
View original page 23Page 24 · Read text
www.butkus.us
                       Kodak Junior Six-20
    and frame the picture within the front
    frame of the finder. All vertical lines
     in the           _subject should be kept parallel
    with the vertical sides of this- frame,
    when holding the camera either in the
     vertical or horizontal position.
      MnrrNc INsrnNrANEoUs
      ExposuRES oR SNepsHors
     When ordinary instantaneous expo-
     sures or snapshots are made, the sub-
    ject should be in the broad, open
    sunlight, but the camera must not.
   The sun should be behind your back
    or over the shoulder. If it shines di-
     rectly into the lens it will blur and fog
    the picture.
       Special instructions for making por-
     traits are given on pages 29 to 83.
      Horo rHE Koner Lpvrr,
     The Kodak must be held level. If
     all the subject cannot be included in
f   the finder without tilting the lens
    upwards, move backwards until it is
     all included with the camera held leuel.
       If the subject is below the normal
    height, like a small child or a dog, the
                                2l
View original page 24Page 25 · Read text
Picture taking with the


        www.butkus.us

      Effect produced by tilti,ng the Kodak.
Kodak should be held down level with
the center of the subject.
  After an exposure
has been made, turn
the winding key
slowly, a few times,
until No. 2 (or the
next number) is in
the center of the red window.
      Cr,osrNG THE Kooer
  Before closing the Kodak, it should
be focused for 100 feet, then press the
                        22
View original page 25Page 26 · Read text
www.butkus.us
                   Kodak Junior Six-20


knurled flanges on each side of the
front standard, and close the bed. The
front and bellows fold automatically.
Be sure the finder is in the upright
position.
   After the bed is closed, be sure it is
properly locked.
      RBvrovrNG THE Frr,vr
  After the last section of film has
been exposed, turn the winding key
until the end of the paper passes the
red window.
  fn a subdued light, open the back
of the Kodak, see pages 3 and 4.
  Hold the end of the paper taut, see
illustration at top of page 24, and turn
the key until all the paper is on the
roll. If the sticker folds under the roll,
turn the key to bring it up.
View original page 26Page 27 · Read text
Picture taking with the


  Take hold of the ends of the paper
and sticker to prevent the paper from
loosening. Draw out the key and re-


move the film. Fold under about half-
an-inch of the protective paper, and
fasten it with the sticker.
View original page 27
From the M. Butkus archive. Original publisher and archive notices are retained.
Check the model and edition against your equipment.
PDF verified 2026-10-10.