Film cameras
Kodak No. 0 Brownie - Single page per scan -127 film camera User manual
User manual for Kodak No. 0 Brownie - Single page per scan -127 film camera. 75 pages in English. Read the original PDF, download or print a copy without registration.
75 pagesEnglish3.2 MB PDF
Loading your manual…Open PDF directly
Document details
- Brand
- Kodak
- Model / document
- Kodak No. 0 Brownie - Single page per scan -127 film camera
- Document type
- User manual
- Language
- English
- Pages
- 75
- File size
- 3.2 MB
- Category
- Film cameras
- Document date
- Not specified in catalog
Search available document text
Find a term, then jump to its page in the original PDF. Image-only pages may not be searchable; check the PDF for exact wording and diagrams.
Page 1 · Read text
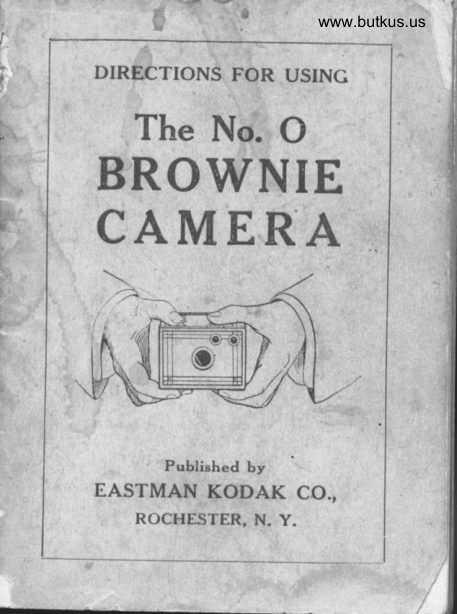
www.butkus.us

DIRECTIONS FOR USING
  The No. O
BROWNIE
CA..MERA


        Published by
EASTMAN KODAK CO.,
    ROCHESTER, N. Y.
View original page 1Page 2 · Read text
4
                      I{ODAI{
                    Trade Mark,'1888
       EnsrvrAN.Kone.r Cot
            ROCHESTER, N. Y.            .    1
       MervurecruRERs oF
          Kotlaks
           llrorvnie Cameras
           Iiodiopticons
        Kodak Film Tanks
         Velox Paper
         llastman Film        Kodak Dry Mounting Tissue             i
         llastman Solio Paper
            Irlastrnan Ferro-Prussiate Paper
                          Bromide          lJastman                  Standard                                  PaPer      4                                Paper                 Royal l3rornide         IJastman
           I,lastman Velvet Brontide Paper                                                    t!
                                                                                                                                ,x           Ilastrnan Ilrilliant Veivct Ilrotrtide Paper
         l{astman Platino Brornicle Papcr
          I!astrnan Ilnamele<l Rromicle l'aper
           .tlastman Mattc-IDnamel Bromitle I'aper
                   F) erstm an Tran sparency Plates
           'Ieqted Chcmicals
             'I'ripods and Other Specialties.
          Trade Marks Reg. U. S. Patent OIIice     .{
         June.1916.
View original page 2Page 3 · Read text
www.butkus.us
     BEFORE LOADING
   Befoge taking any pictures with the No. O
 Brrwnie Camera read the following instruc-
       carefully, and make yourself perfectly*tions
 familiar with the instrument, taking especial
 care to learn how to operate the shutter.
 Work  it  for both time and instantaneous
 exposures several times before threadingup
 the film.
  The first and most important thing for the
 amateur to bear in mind is that the light
 which serves to impress the photographis
 image upon the sensitive film in a small frac-
 tion of a second when it comes through the
 lens, can destroy the film as quickly as it
 makes the picture. After the film has been
 devel o ped and alI deu e loper  t lzor oug h I lt zu as h ed
 out, it may be quickly transferred in sub-
 dued white light to the fixing bath without
 injury.  Throughout  all the operati6ns ot
 loading, and unloading, be extremely carefun.
 to keep the duplex paper wound, tightly
 around the film to prevent the admisiion of
 light.
        EASTMAN KODAK CO.,                                  j                          Rochester, N. Y.
                         ,L)
View original page 3Page 4 · Read text
OR.DER FILM
  BY NUMBER
  All Kodak Films may be distin-
guished       Py ttt" numbers on the ends
of the cartons.
         L27
is the number for films for this cam-
era ( No. O Brownie). The num-
beT appears on both carton and'
cartridge.
View original page 4Page 5 · Read text
www.butkus.us
        PART I
  Loading the Brownie Cemera
 .The film for the Brownie'Camerais put up in light-tight
 cartridges, and the Camera
can, therefore, be loaded in
daylight. This operation
 s h o u ld , however, be per-       ,l
formed in a subdued light,
not in  the glare of bright                   ''.
sunlight.                             The Film
                                      No. 127
              To Load
                          1. Take a position at
                   a table as far as possi-
                       ble from any window,
                   place the camera on
                  the table before you
                and pull out on the
                   winding key as shown
                        in Fig. l.

     Frc. I.
                       3
View original page 5Page 7 · Read text
www.butkus.us

f1


                         Frc. IV.
         4. Examlne this roll holder carefully and
             it will be seen that at each forward, corner
        there is a recess which will just hold a spool
         of film. In the recess on the right side will
       be seen an empty spool, which is to be used       as the reel.
        5. On the top and over the recesses to
      hold the spools will be found two metal
View original page 7Page 8 · Read text
t
      lpool retainers. Lift up the retainer at the        left hand side, after releasing it by pushing      outwards on catch in the front as shown in
        Fig. V.  Insert spool and push the retainer


                         Frc. 5.
     back into place so that pin at end of film
       spool will fit into the hole in the reta.iner.
                Important
      Be sure and get the top of spool at top of       roll holder when inserting, otherwise your
       film will come on the wrong side of the      duplex paper, when reeled off, and total       failure will result. fnsert the full spool so
       that the slit in the end of spool will be at the
      bottom, while at the same time the slit at     end of the empty spool, (which is used as
       tbe reel) is at the top of the roll holder.     You can readily tell fhe top side of  roll       holder, as it is marked. " Top." Each cart-
      ridge is also marked, the word "Top" will
      be found printed on the duplex paper near
       the top of the spool.
                                 6
View original page 8Page 9 · Read text
www.butkus.us


                 Frc. VI.
  6. Now break the gummed slip that holds,
down the end of duplex paper, and pass the
View original page 9Page 11 · Read text
www.butkus.us
holder in the outside box, remember that
 the slotted end of winding reel which shows
through round hole in spool retainer in top
 of roll holder, must be uppermost, so as to
come opposite the key in outside box.
  8. Press down on, and at the same time,
turn the rvinding key until it fits into position,
the web at lotrrer end of the key fitting into
 slit in spool end. This is a reversal of the
operation shorvn in Fig. I, page 3. See Fig.
VIII.
  9. Turn the key to the lef t for about fifteen
turns until an index hand appears before the
little red window in back of the camera, this
hand is a warning that you are approaching
Fig. I, then turn key very slowly until Fig. I
appears before the red windorv, (Fig. IX).


                  Fig. IX.
 The film is norv in position for taking the
first picture.
View original page 11Page 12 · Read text
PART II
    Making the xPosures
 Sec. l-Instantandous ExPosures
           ("SNap-Srrors")
  The shutter of the No. O Brownie Camera
is ai*avs iet, and.is operated b-ypushing theie".i            to iicht or left with thethumb."iteinately
   If the lever stands at the right hand sideof slot, simply push it to lef t and aice-uersa'
   If tha spring strould be pushed the wrong:way, the sftutter would simply remain un-
mo"'"a, and no "click" would be leard, thusinai""ting ittat it should be pushed in the
opposite direction.


  To take instantaneous pictures the obj-ect                                  sunlight, but                    open             the broad sfroufa     -"attt.rate in                                        be                             sun,should            should                  not. l'he in. [r"fti"a-tt" back or over the shoulder of the
 operator.--Aim       the camera at the object to be photo-
                          10
View original page 12Page 14 · Read text
Frc. 3
   Efrect produced, by tilting the Camera.
Ing the camera upwards (thinking thereby to
center it) the result will be similar to l'ig. 3.
                       L2
View original page 14Page 15 · Read text
www.butkus.us
       SECTION 2
    Time Exposures fndoors
    Pr.ece trro CenrpRA rN PosrrroN.


                                                                                                                                                    I
                         I                                ft
                   Fig. I
  Diagram, Showing Positions for Camera.
  IJse some firm su,pport, like a chair or
table and set Camera in such a position as
to embrace the view desired.
 The diagram (Fig. I) shows the proper
position for the camera. It should not be^
pointed directly at a window, as the glare"
of light will blur the picture.  If allof the'
windows cannot be avoided, pu1l down the,
shades of such as come within range of ther
camera.
                         13
View original page 15Page 16 · Read text
Pull out the time slide on left-hand. side of
j',amera   front, as shown by A in Fig. II.
  When this slide is pulled out the shutter


                                                                                      ,?x
                                                                                                                                                                                             i.;l


                "     Fro. II.
   rtdkes it as lt passes the lens, stopplng half
  way across with the opening opposite the
    lens.
     All being in readiness, steady the camera
   with one hand and push the lever to open
   the shutter; give the proper time (using a
  watch if more than two seconds) and press
   the lever in the opposite direction to close
   the shutter.
    Turn a new film into position as described
   before. (See page 11.)
    For interiors, the following table is a good
   gulde:

                          14
View original page 16Page 17 · Read text
www.butkus.us
   Time Needed for fnterior
          Exposures
Vfhlte walls and more than one window'l
      bright sun outside, 2 seconds  :
     hazy sun, 5 seconds   ;
     cloudy bright, l0 seconds;
     cloudy dull, 20 seconds.
White walls and only one window:
      bright sun outside, 3 seconds;
     hazy sun, 8 seconds;
     cloudy bright, 15 seconds  ;
     cloudy dull, 30 seconds.
Medium colored walls and hangings and
 more than onewindow:
      bright sun outside,4 seconds;
     hazy sun, 10 seconds;
     cloudy bright, 20 seconds;
     cloudy dull, 40 seconCs.
Medium colored walls and hangings, and
  only one window:
      bright sun outsid.e, 6 seconds;
     hazy sun, 15 seconds;
     cloudy bright, 30 seconds;
     cloudy dull, 60 seconds.
Dark colored walls and hangings and morc
  than one window:
      bright sun outsid.e, 10 seconds;
     hazy sun,20 seconds;
     cloudy bright, 40 second.s;
           . cloudy dull, I minute, 20 seconds.
                       t5
View original page 17Page 18 · Read text
Dark colored walls and hangings and only
  one window:
      brieht sun outside, 20 seconds;
     hazy sun, 40 seconds;
      cloudy bright, 1 minute, 20 seconds  ;
      cloudy dull,2 minutes, 40 seconds.
  The foregoing is calculated for rooms
whose windows get the d.irect light from the
 sky and for hours from three hours after
 sunrise until three hours before sunset.                                      :t, j
   If earlier or later, the time required will be
 longer.
     To Make a Portrait                                  t'l
  Place the sitter in a chair partly facing the
Camera (which should be located slightly
higher than an ordinary table) and. turn the
 f ace slightly towards the instrument, having
the eyes centered on an object at the same
level with the lens. For a bust picture, the
camera should be five feet from the figure;
 f or a three-quarter figure eight feet, and for
a full figure ten feet. The background should
form a contrast with the sitter.
  Kodak Portrait Attachment
  By means of a Kodak PortraitAttachment
used with the No. O Brownie Camera. head
and shoulder pictures of increased size may
be obtained.
 Use Kodak Portrait Attachment No. l with
the No. O Brownie Camera.
                         t6
View original page 18Page 19 · Read text
www.butkus.us
 Wtth the Kodak Portrait Attachment ln
position the subject should be placed'  3L/z
feet from the lens.
  The attachment is simply an extra lens
slippeclinlens opening in front-board, and
in no way affects the operatiou of the camera
except to change the focus. Price 50 cents.
Be sure to specify what camera the attach'
ment is to be used with when ordering.
Time Exposures in the OPen Air
  On cloudy days time exposures may be
mad.e in the oPen air.  'Wrrs         Lrcrrr Cr,ouos-The shutter can
 hardly be opened and closed' quickly enough
 to avoid. over-exposure.
  Wrtrr Hpevv Cr-ouos-Fiom one-half to
 oue second. will be sufficient.
  The above is calculated. for hours from
 three hours after sunrise until three hours
 before sunset and for objects in the open air.
 For other hours or for objects in the shadows
 under porches or under trees, no accurate
 oirections can be given  ; experience only can
 teach the exposure to give.
  Time erlosures cannot be madc zthile the aarnera is hetd in the hand. Aluavs llace
 it uPon some firm sullort, such as o chair
 or table.
                        L7
View original page 19Page 21 · Read text
www.butkus.us 1
  PnppenarroN FoR rrre Fr-esrr-The cam-
era shouldbe prepared for time exposure, as
directed. on page 13 of this rrnanual, and
placed. on some level supoort where it will
take in the viewdesired..
  Pin a flash sheetby one corner to a piece of
cardboard which has previously been fixed in
a perpendicular position. If the cardboard
is white it will act as a reflector andIncrease
the strength of the flash.
  The flash sheet should alwats be placed
two feet behind and. two or three feet to one
side of the camera.  If placed in front or on
a line with front of instrument, the flash
would. strike the lens and blur the picture.
It should be placed at one side as well as
behind, so as to throw a shadow and give a
little relief in the lighting. The flash should,
be at the same height or a little higher than
the camera, The support upon which the
flash is to be made should. not project far
enough in front of it to cast a shadow in front
of the camera. An extra piece of cardboard
a foot square placed. under the flash sheet
will prevent any sparks from the flash doing
damage. Ilowever, by using the Kodak
Flash Sheet I{older, all these contingencies
are taken care of, and we strongly advise
Its use'
                     19
View original page 21Page 22 · Read text
The Kodak Flash Sheet Holder
                   This holder may be held
                      in the hand, alutats betu'een
               tou and the flash sheet.
                  Or, it may be used on any
             Kodak tripod, being pro-
                vided with a socket for
                   this purpose. The sheet
                       is placed in position in the
                 center of the larger pan
                over the round. opening
               which has a raised saw-
tooth edge extending half way around  it.
Press with the thumb on the sheet, so a
slight break is made and a portion of the
sheet projects partially through the opening.
Then to insure the sheet being more secure-
ly fastened, press around the notched edge,
forcing this portion of flash sheet firmly into
position on the pan.
 Then to set oft the flash, merely insert a
lighted match, trom behind, through the
round, opening.
      Taking the Picture
 Having the Camera and the flash sheets
both in position and all being in readiness,
open the Camera shutter, stand. at arm's
                        z0
View original page 22Page 23 · Read text
www.butkus.us                  '-
length and touch a match from behlnd
through the round. opening ln the center.
  NoTE-It you are not using the Kodak Flasb
Sheet Holder, place the match ln a split stick at
least two leet long.
  There will be a bright flash whicb will
lmpress the picture on the sensitive film.
Then push the lever to close the shutter and
turn a fresh film into place with the key.
ready for another picture.
       The Flash Sheet
 The slze 6f the sheet required. to llght a
room varies with the distance of the object
farthest from the camera' and the color of
the walls and hangings.
           TABLE
  For 10 feet distance and llght walls and
hangings, use one No.l sheet.
  For 10 feet distance and dark walls and
hangings use one No. 2 sheet.
  For 15 feet distance and light walls and
hangings use one No. 2 sheet.
  For 15 feet distance and dark walls and
hangings use one No.3 sheet.
  IiOTE-Never usc more than one sheet at a tlmc,
ln the Kodak Flash Sheet Holder.
                       2l
View original page 23Page 24 · Read text
I
 To Mare e Ponrnart-Place the sitter in
a chair partly facing the camera (which
should. be located slightly higher than an
ordinary table) and turn the face slightly
towards the lnstrument, having the eyes
centered on an object at the same level with
the lens.
 The proper distance from the camera to
the subject can be ascertained. by looking at
the image in the finder. For a three-quarter
picture this will be about 8 feet, and for a
full figure about 10 feet.
 The flash should be on the side of the
Camera away from the face, that is, the
sitter should. not face it. The flash should
not be higher than the head. of the sitter.
  For using: the Portrait Attachment see
Dage 16.
  To L{exn e Gnoup-Arrange thechalrs in
the form of an arc, facing the Camera, so
that each chair'willbe exactly the same dis-
tance from the instrument. Half the per'
sons composing the group should be seated,
and the rest should. stand. behind. the chairs.
 If the group is large any number of chairs
may be used, but none of the subjects should

                       22
View original page 24Related documents and language editions

From the M. Butkus archive. Original publisher and archive notices are retained.
Check the model and edition against your equipment.
PDF verified 2026-10-10.