Film cameras
Kodak No. 1A Folding Pocket RR User manual
User manual for Kodak No. 1A Folding Pocket RR. 85 pages in English. Read the original PDF, download or print a copy without registration.
85 pagesEnglish7.1 MB PDF
Loading your manual…Open PDF directly
Document details
- Brand
- Kodak
- Model / document
- Kodak No. 1A Folding Pocket RR
- Document type
- User manual
- Language
- English
- Pages
- 85
- File size
- 7.1 MB
- Category
- Film cameras
- Document date
- Not specified in catalog
Search available document text
Find a term, then jump to its page in the original PDF. Image-only pages may not be searchable; check the PDF for exact wording and diagrams.
Page 1 · Read text
www.butkus.us


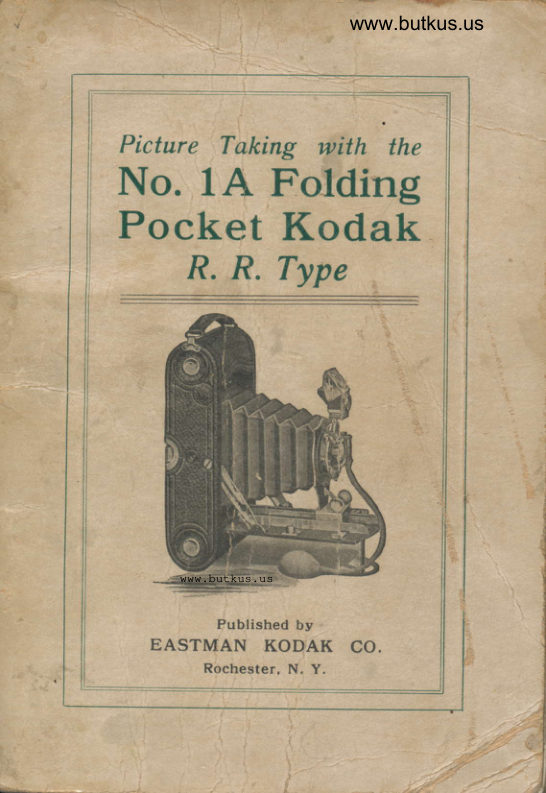
Picture Taking with the
No. 1A Folding
Pocket Kodak
    R. R. Type


        www.butkus.us
View original page 1Page 2 · Read text
I{ODAK
                       '      Trade Mark. t888.

      EASTMAN KODAK COMPANY,
              iOCHESTER, N. Y.

UANUFACTUiERS OF
           Kodaks,
          Brownie Cameras,
           Kodiopticons
         Kodak Film Tanks,
         Kodak Dry Mounting 'I'issue,
          Velor Paper
          Angelo Platinum Paper,                       :
          Eastman Solio Paper,
         Eastman Ferro-Prussiate Paper.
          Eastman Velvet Bromide Paper,
         Eastman Royal Bromide Paper,
         Eastman Standard Bromide Paper,
         Eastman Enameled Bromide Paper,
         Eastman Matte-Enamel Bromide Paper.
         Eastman Platino Bromide Paper,
         Eastman Non-Curling Film,
         Eastman Terted Chemicals.
.           Tripods, and
          Other Specialties.

TRADE MARKS REG. U. S. PAT. OFF.

Februaryt, rgrj.
View original page 2Page 3 · Read text
www.butkus.us

    Picture Taking with the
      No. lA
Folding Pocket Kodak
     R. R. Type


           .b


        PRICE, ro CENTS.


                 Published by the
     EASTMAN KODAK CO.
               Rochester, New York.
View original page 3Page 5 · Read text
ORDER FILM
    BY NUMBBR
   All Kodak Films may be distinguished
by the numbers on the ends of cartons:
           116
is the number for film for this Camera
(No. rA F. P. K., R. R. Typ"). The
number appears both on the carton and
on the cartridge.

               NOTICE.
  The Duplex paper (black on one side, red on
the other) now used in Kodak cartridges is
superior to the black papert in that it has no
deleterious effpct upon the keeping qualities of
the film and absolutely does away with number
markings.
  In watching for numbers through the red win-
dow, one should now lobk for black numbers
on red paper, instead of, as formerly, white
numbers on black paper.
  Wherever the term "duplex paper" is used
in this manual, reference is made, of course, to
this black and red paper.
View original page 5Page 6 · Read text
www.butkus.us


    BEFORE LOADING.

  Before taking any pictures with the rA Folding
Pocket Kodak, R. R. Type, read the following
instructions carefully and make yourself per-
fectly familiar with the instrument, taking
especial care to learn how to operate the shutter.
Work it for both time and instantaneous expos-
ures several times before threading up the lilm.
  The first and most important thing for the
amateur to bear in mind is that the light which
serves to impress the image upon the sensitive
film in a small fraction of a second when it comes
through the lens, can destroy the film as quickly
as it makes the picture. After the film has been
developed and all deueloper thoroughlt zuaslted
out, it may be quickly transferred in subdued
white light to the fixing bath without injury.
Throughout all the operations of loading and
unloading be extremely careful to keep thc
duplex paper wound tightly around the film to
prevent the admission of light.
    EASTMAN KODAK COMPANY,
                           Rochester, N. Y.


                                                                                           -l/1

                                                                                                               "r

                                                                                                                                                             )
View original page 6Page 7 · Read text
CONTENTS.

 Penr  I.
      Loading.
Penr II.
        I\faking the Exposures.
           Section r.  Opening the Shutter.
           Section z. Itrstantaneous Exposures.
.          Section 3. f ime Exposures.
           Section 4. Flashlight Exposures.
Penr II[.
     Removing the Film.
Panr IV.
       Developing.
Paxr V.
       Printing on Velox.
Penr VI.
      Mounting.
View original page 7Page 8 · Read text
www.butkus.us


      PART I.

            SECTION I.
     LOADING \VITH FILM.

  The film for the No. rA Fold-
ing Pocket Kodak, R. R. Type, is
furnished in light proof cartridges
and the instrument can, therefore,
be loaded in daylight. The opera-
tion should, however, be performed
in a subdued light, not in the glare
of bright sunlight. It should also TsEr-tLM.
be borne in mind that after the  No. 116.
seal is broken, care must be taken to keep the
duplex paper taut on the spool ; otherwise  it
may slip and loosen sufficiently to fog the
film.
   I. To load the Kodak, take a position at
a table where the daylight is somewhat sub-
dued, and grasping the instrument with the
left hand, remove the back by pressing in
simultaneously with the thumb and second
View original page 8Page 9 · Read text
Dustrtttut liodalt C om hony.


            www.butkus.us

                       FlG.  t.
                     Removing the BacL,.
finger of the right hand, as indicated in
Fig.  I.
   II. The Kodak having been opened, an
empty spool having a slit in it will be seen
in the winding end of the camera. This
forms the reel on which the film is wound
after exposure. The full spool is to  be


                       FIG.  II.
                    Sprinsing Out a Spool Pin.
placed in the recess at the opposite end of
the Kodak. To accomplish this, pull  out
spool pins as shown in Fig. II.
View original page 9Page 10 · Read text
www.butkus.us
    No. rA Fotding Pochet Kodak, R. R. Type. 7


                  Flc  lil
                         lnsertrng the Cartridge.


                                              recess'   III.  Drop the film cartridge into this
as shown in Fig. III., being careful to get tlte
top of the spool at the top of tlt'e catneta. The
top is the winding side of the camera. Each
cartridge is marked on the end.

   Nore:  If the cartridge is inserted wrong end up, the
duplex paper itrstentl of the frlm rvill be brought next the
lens, resultittg, of course, irl the absolule loss of the pic'
tures.

  IV. Push spool pins into place so that spool
revolves upon them.
 V. Remove the gummed slip that holds the
end of the duplex paper; pass the paper over
the two aluminum rollers and thread into the
View original page 10Page 12 · Read text
www.butkus.us

    No. tA Folding Pochet Kodah, R. R. Type. 9


                      FIG. VI.
                  Showing  position of paper.

  The paper should now be in position indi-
cated in Fig. VI.
  VII. Replace the back on Kodak, being
careful to put it cin right side up (the wide
catch at the top), and snapping the springs at
the top and bottom fully into place. Care
should always be taken to handle the back of
Kodak carefully, especially when it is detached
from camera, as even a slight bend would make
it fit badly, resulting very probably in a leakage
of light, and consequently loss of film.
   Tltrougltout lhe foregoing operation, ifrom
llte tim.e tlte gumrned slip is cut on tlteifresh roll
of f.lru unlil the back is oncc ntore in place.
I{eep the dupler paperwound tigltlly on tlze roll.
If it is allozaed to loosen, light will be admitted
and tlre fi|ru fogged.
  VIII. The roll of film in the camera is
covered with duplex paper, and this must be
reeled off before a picture can be taken. Turn
the key slowly to the left and watch the little


                                                             -)
View original page 12Page 13 · Read text
,
 10       Eastman Kodah Company.
red window at the back of the camera. When
15 to rSturns have been given, a hand pointing


                   FIG. VIT.

torvard the first number will appear; then turn
slowly until the figure r is in front of the red
window. Fig. VU.
  The film is now in position for taking the
first picture


                                                                                                                                                                                                ' 1
View original page 13Page 14 · Read text
www.butkus.us


       PART II.

 MAKING THE EXPOSURES.
  Before making an exposure with the No. rA
Folding Pocket Kodak, R. R. Type, either time
or instantaneoust be sure of four things  :
  Frnsr-That the shutter is set properly.
  SrcoNo-That the diaphragm stop is set at
the proper opening.
  Tnlno-That the camera is focused.
  FounTn-That an unexposed section of the
film is turned into position.


             SECTION  I.
   OPERATING THE SHUTTER.
  Pdrfect familiarity with the shutter is essentiai
to successful picture taking with any camera.
The following directions should, therefore, be
View original page 14Page 15 · Read text
Eastman Kodah Company.
                  l*orr*


                                                       f'       r
                                              ,,,   l',t"^' 't&lf^#


               carefully read, and the shutter operated several
              times before threading the film up lor use.
ilr              Norn-To attach the tube D, simply moisten the end
                a trifle and  it wilt be found to slip into-piace readily,

ilt                   Instantaneous Exposures.
            Frnsr-Set the lever A at 25, 50 or roo,
             according to the time of instantaneous exposure
                 clesired.
               Nota :  In bright light, set the lever at roo, the highest
              speed.  Ilr nrore subduecl lrghts, set at 50 or 25, but do not
                altempt to make ally lnstantatreous exposures in very dull
                     light.


                                                                 *   l
View original page 15Page 16 · Read text
www.butkus.us

     No. rA Folding Pochet Kodok, R. R. Type. 13
  SncoNp-Set the lever B at No. 8. Lever B
controls the trts draphragm and No. 8 is the
proper opening for ordinary instantaneous  ex-
posures.
   Nors: For instantaneous exDosures when tbe sun-
 light rs unusually strong and there'are no heavy shadows,
such as tn vrews on the seashore or on the water, or tn
 tropical or semi.troprcal  clrmates, use the diaphragm No.
16. Wrt}n ltght clouds or sltghtly smoky atmosphere use
 No. 4 at roo or No. 8 at 5o or 25. Wth heazry clouds do
not att em?t tnsl anl aneous erposures
  THrno-Compress the rubber bulb on Tube
D or press down the release C.  Tltis mahes
the erposure.
   NorB: Squeeze the bulb with a firm, quick move.rnent, as the least jarring of the camera will cause a
blurred negative.

          Time Exposures.'
  Ftnst-Set the lever A at the point T .--,-:e).
This adjusts the shutter for time exposures.
  SBcoNp-Set the lever B at No. t6, gz, 64 or
tz8. See instructions for use of stops,
page 3r.
  Tnrno-Press the bulb.   Tltis opens tlte
shutter. Time exposure by a watch. Again
press the bulb. Tlns closes tlte shutter. Shut-
ter may be opened by touching release C and
closed by a second pressure if desired.
View original page 16Page 17 · Read text
t4       Eastman Kodak Company.

               Bulb Exposure.
   When it is desirable to make a very short
  time exposure this is best accomplished by
  making a "bulb exposure."
    Frnsr-Set the lever A at the point ,,8"
  (bulb). This adjusts the shutter for bulb ex-
  posures.
    Spcor.lo-Set the lever B controlling the
  stops at No. 16, 32, 64 or rz8 as desired. See
  page 3r.
   Tnrno-Compress the bulb to open the shut-
   ter, and release it to close the shutter. This
' mahes tlte erposure. The shutter will remain
  open as long as the bulb is under pressure.

     Nore:  This method will not answer for a long tirne
  exposure for ttre reasoll that when the compressed i]r has  leaked out, the shutter wrll close oi rtself    .

   Do not oil any part of the shutter.
   In case of accident return shutter to your
  dealer or to us for repairs. As a general rule,
 make exposures with the bulb instead of with
  the release C, as the pneumatic release is less
  likely to jar the camera.

                                     face of the shutter reg.
   isters   -  Nore:each exposureThe indicatoras urade.on the
View original page 17Page 18 · Read text
www.butkus.us

     No. rA I;olding Pocltct I{odah, R. R. Type. 15

             SECTION  II.
  INSTANTANEOUS EXPOSURES.
                       " Snap Shots."
 To take instantaneous pictures the object
must be in the broad, open sunlight, but the
camera should not. The sun should be behind
the back or over the shoulder of the operator.


                        FIG.  I.
                    Opening rhe Front.
       1.-Focus on the Subject.
   I.  Press tne concealed button, as shown in
Fig. I., and push down the bed of camera to
the limit of motion.
View original page 18Page 19 · Read text
l6      Eastman Kodab C om ltany.


                                www.butkus.us  F


                                       Flc.  il.                                  ErtendingYthe Bellows and Focusrng
                   II.  Set automatic locking device (see page
              rZ) nearest the estimated distance ol principal
               object to be photographed in feet, grasp the
              springs at bottom of front board, and pull out
                 Iront to limit of molion. Fig. lI.
                Nore : The index plate is scaled both by feet and by
                 metres and care should be takerr not to coniound them.
              Except when working at distances ol ro feet
               or less. It is not necessary to estimate the dis-
               tance with any more than approximate accuracy;

L
View original page 19Page 20 · Read text
www.butkus.us
     No. rA Folding Pocket Kodah, R. R. Tyfe. 17
  for instance, if the focus is set at z5 feet (the
 usual distance for ordinary street work), the
 sharpest part of the picture will be the objects
 at that distance from the camera, but everything
 from l5 to 35 feet will be in good focus. For
 general street work the focus may be kept at z5
 feet, but where the y'rincipat object is nearer or
 farther away, the focus should be changed ac_
 cordingly. The index plate is divided foi 6, ro,
 z5 and roo feet. Everything beyond roo feet is
 in the roo-feet focus. Nothing nearer than 6
 feet can be focused without using a portrait
 attachment. See page 28.

       Automatic Locking Device.

  The automatic locking device on the left side
of the camera bed will be found a great con-
venience in focusing.
  By means of this device the front locks auto-
matically at 6, ro, 25 or roo feet focus.
  To setthe focus, turn knob until catch projects
through the slot marked for the distance desired,
6, lo, z5 or roo feet ; then pull out front of camera
to limit of motion and the camera will be in
focus for the distance at which you have set
the catch.
 When not in use, the knob of the locking
device should be turned so no catch projects.
View original page 20Page 21 · Read text
18         Eost trtort Kodalt C onr ltany,.


             Showing Automatic Locking Device.

         2.-Use Stop No. 8.
  For all ordinary outdoor work, when the sun
is very bright, use stop No. 8.  If a smaller stop
is used, the light will be so much reduced that
it will not sufficiently impress the image on the
film, and failure will result.
  In views on the water, when the sunlight is
u.nusually strong and there are no heavy
shadows, or in tropical or semi-tropical climates,
diaphragm No. 16 may be used.
   If a smaller stop opening than No. 16 be used
for ordinary snap shots, ab.solule fai/ure zuitl
rtsu.It.
 Aim the camera at the object to be photo-
graphed and locate the image in the finder.
For a horizontal piclure hold the camera as
shown in Fig. III., reversing the linder as
View original page 21Page 22 · Read text
www.butkus.us


                     FrG. ilt.

           3.-Locate the Image.
 indicated. Always look into the finder fronr
 directly over it, not at an angle.


                    FIG IV.
 For a vertical exposure the camera must
be held as shown in Fig. IV. The finders
View original page 22From the M. Butkus archive. Original publisher and archive notices are retained.
Check the model and edition against your equipment.
PDF verified 2026-10-10.