Film cameras
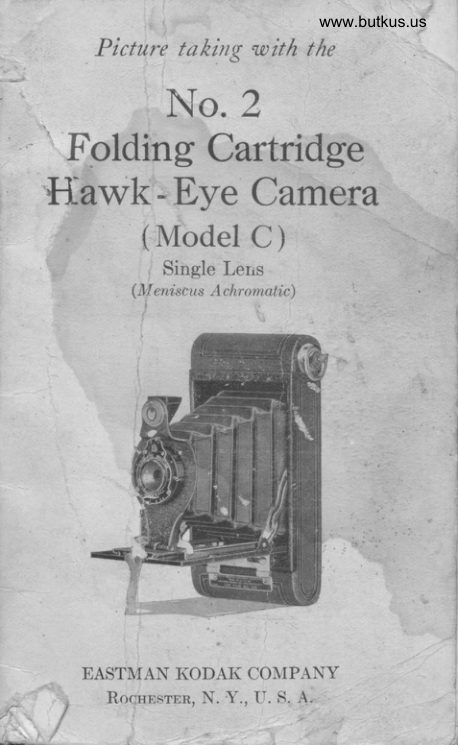
Kodak No. 2 Folding Cartridge Hawk-Eye Mode C User manual
User manual for Kodak No. 2 Folding Cartridge Hawk-Eye Mode C. 55 pages in English. Read the original PDF, download or print a copy without registration.
55 pagesEnglish5.7 MB PDF
Loading your manual…Open PDF directly
Document details
- Brand
- Kodak
- Model / document
- Kodak No. 2 Folding Cartridge Hawk-Eye Mode C
- Document type
- User manual
- Language
- English
- Pages
- 55
- File size
- 5.7 MB
- Category
- Film cameras
- Document date
- Not specified in catalog
Search available document text
Find a term, then jump to its page in the original PDF. Image-only pages may not be searchable; check the PDF for exact wording and diagrams.
Page 2 · Read text
The Kodak
  Portrait Attachment
       Fits 1'<lrr Hnvrk-l,lyc Carnera fol
   head ancl shoulder portraits-it
    brings the irnage into shurp focrrs
    at short range.

                              ,ll  tlottr rlrrtltr's

   IIAST\IAN IiODAIi CO\IPANY
                       .llocrrnsrr.:rr,  \.   \-.


Octobo'.  1 926.
View original page 2Page 3 · Read text
www.butkus.us
          6'KODAKERY''
    A monthly magazine that teaches how to
   mahe better pictures, will be sent FREE,OF
   CHARGE to anyone who obtains one of itur
    amateur cameras, if this blank is filled out    and sent to us within 30 days froni the date    the camera was receiued.
                             E., irMAN Kooer CouprtNy.
   To rnB EasruaN Kooer Co:              RocHEsrER, N. y.
               your      Accepting                          ofier, Dlease                                nome on the'                            Dut m!                ,'KODAKERY',     nailing                                            (iuith                                              tie understanding                       list -Jor     that there is to be no cost to me), I having obtained a


  Eli
 HIHi
  r-.     .l


 Hi
   1:    from.;     " " "    (Nr;;;;i'n;;i;)'Fi
      on' ...                                                            .....   .:.,.....
                            (Date llere)
                                    ..:
       Prlnt your name and address plalnly:


    i   NoIn:-KODAKFTRY  will be sent for one year only on tbic    i  ofrer. After that the--subscription price will be sixiy centr    i  for.one-year or one dollar for two yebrs, but you are uirde. no    :  obligation to renew.-E. K. Co.
                     :
 \.1,  fo*   No.610.26.3.
&
View original page 3Page 4 · Read text
Picture turting witlt tlte
     No.2
 Folding Cartridge
Hawk-Eve Cameta
      (Model C )
             Single Lens
                               ( M eni.scus A ch,r omatic)


                 Published by
 EASTMAN KODAK COMPANY
       Rocnpsrpn,N.Y., U. S. A.
View original page 4Page 5 · Read text
www.butkus.us
I

      Order Irilm by Number
        All Kodak Films are distinguished by
      the numbers on the ends of the cartons.
     The number also appears on the cartridge
      and on the camera.
       120 is the number of the film for the
      No. 2 Folding Cartridge Hawk-Eye Camera,
     Model C.


                                                                                                             lt
View original page 5Page 6 · Read text
Before Loading
  Before taking any pictures with your
camera, read the following instructions
carefully. Make yourself familiar with the
camera, taking especial care to learn how
to operate the shutter (see page 10). WorN
it for both time and instantaneous exposures
several times before loading the camera
with film
  The first thing to remember is that the
light, which serves to impress the photo-
graphic image upon the sensitive film in a
fraction of a second when it comes through
the lens, can destroy the film as quickly as
it makes the picture. While loading and
unloading, be very careful to keep the pro-
tective paper wound tightly around the
film to prevent the light striking it.
View original page 6
Page 9 · Read text
www.butkus.us
  In the rvinding end of the camera is an
empty spool, this is the reel. The roll of fihn
is to be placed in the opposite end.
  2. Draw out the winding key as far as
it will come, and remove the empty spool,
Fig. 3.
                             ,zf.^^
      D


                                     l'ig.  ;t
  3. Remove the band that holds the encl
of the protective paper, unfold the end and
thread the paper as far as it will go, rnto
the longer opening of the slit in the empty
spool. Each spool has one end slotted and
the protective paper must be inserted in
the empty spool so that the slotted ends are
View original page 9Page 10 · Read text
otl oppl.\ite edges of the paper.  Give the
enrpty spool three or four turns, enough to
 lrincl the paper on the reel.  Be careful


that the paper draws straight and true, and
that it does not loosen up on the full spool.
See Fie. 4.


  Mike Butkus        Digitally                                                            DN:org,Date:cn=Mikec=US2025.02.09signedButkus,by21:52:57Mikeo, ou=Butkus.org,Butkus-05'00'      email=mike@butkus.
  4. Unroll about four inches of the pro-
tective paper and place the two spools
into the film pockets at each end of the
eantera. Fig. 5.
View original page 10
Page 11 · Read text
www.butkus.us
  Important: The empty spool or reel
must be placed in the winding key end of
the camera with its slotted end towards the                    ((TOP"winding ke11. The word         printed on
the protective paper must be next to the
winding key.
  Push the full spool into the other pocket
as far as it will go, so that the tension
spring grips it.
                                      l"ig. tit:l
  5. Press in and turn the rvinding key
until it fits into the slot in the empty spool
or reel, Fig. 6.
  Caution' If too much of the'paper is
reeled off before the camera is closed, some
of the film will be uncovered, fogged and
ruined.
View original page 11Page 12 · Read text
6. When replacing the front of the
camera after it is loaded, first insert the end
opposite the lock, the edge of the box must
fit into the groove at the end of the front,
then drop the end on which the lock is
fastened into place. Push over the lock
and make sure that it is fastened securely.
  From the time the band on the roll of
film is broken until the camera is closed,
keep the protective paper wound tightly
on the roll. If it should loosen, light will be
admitted and the film ruined.
  7. Turn the key and
watch the red window.
After ten or twelve
turns, a warning hand
will appear, then turn
the key slowly until
the figure 1 is in the
center of the window.
  Press in the wind-
ing key while turning
it, to keep the key in
the slot in the end of
the spool.
  The film is now in position for the first
picture.
View original page 12
Page 13 · Read text
www.butkus.us

    Making the Exposures
DEFORE an exposure is made, four I-D things must be done:
  First-The shutter must be adjusted for
an instantaneous or time exposure.
  Second-The diaphragm lever plaeed at
the proper stop opening.
  Third-The camera focused.
  Fourth-An unexposed section of film
turned into position.
  Exposures are made by pressing the
exposure lever C. See diagram of shutter
on page 11.
        Operating the Shutter
  Familiarity with the shutter is neeessary
for successful picture-taking with any
camera. The following directions should
be carefully read and the shutter operated
several times before loading the camera.
      Instantaneous Exposures
                 'Snapshots"
  First-Move the lever A to "I."  Thisadjusts the shutter for Instantaneous
Expozures'
                              rn


                                                                                                                                                                        -      ,a      e;I--.--
View original page 13Page 14 · Read text
Second-Move the lever B to No. 1.
Lever B controls the iris diaphragm and
No. 1 is the proper opening for ordinary
instantaneous exposures, of subjects such
as street scenes, nearby views, etc., when
the subject is in bright sunlight. See in-
structions for using the diaphragms or
stops, on pages 18 and 19.
  Third-Press the exposure lever C.
This mahes the enposure. Be sure to hold
the camera steady, as a slight jar will cause
a blurred negative.

                                 11
View original page 14Page 15 · Read text
www.butkus.us
         Time Exposures
  First-Move the lever A to the point
"T" (time). This adjusts the shutter for
Time Exposures.
  Second-Move the lever B to Nos. 1,
2, 3 or 4, according to the time of the
exposure and the nature of the subject.
See instructions for the use of the dia-
phragms or stops given on pages 18 and 19,
also the table for making Interior Time
Exposures on pages 28 and 29, and the
table for Time Exposures Outdoors, page 33.
  Third-Press the exposure lever C.
This opens the shutter. Time the exposure
by a watch. Again press the exposure lever.
This closes the shutter.
  Important-Do not oil any part of the
shutter. In case of accident, return the
camera to your dealer or to us for repairs.
    Instantaneous Exposures
             t'Snapshotstt
 When making ordinary instantaneous
exposures or snapshots, the subject should
be in the broad, open sunlight, but the
camera must not. The sun should be
behind your back or over your shoulder.
If  it shines directly into the lens it  will
blur and fog the picture.
View original page 15Page 16 · Read text
Special instruetions for making portraits
are given on pages 30 and 31.
          Use Stop No. 1
and make an instantaneous exposure for all
ordinary outdoor work, such as nearby
landscapes showing little or no sky, groups
and street scenes, when the subject is in
the bright sunlight. If a smaller stop is
used for ordinary snapshots, the light will
be so much reduced that it will not make a
satisfactory picture.
  For ordinary landscapes, in bright sun-
light with clear sky overhead, use stop No. 2
and make an instantaneous exposure.
   If a smaller stop opening than No. 2 is
used for ordinary snapshots, total fatlurewill result, except that an instantaneous
exposure may be made using stop No. 3 for
extremely distant views, marines, snow
scenes and clouds only, in bright sunlight.
  For views at the seashore and on the
water, when the sunlight on the subject is
unusually strong and there are no heavy
shadows, make an instantaneous exposure
and use stop No. 3.
View original page 16Page 17 · Read text
www.butkus.us
       To Focus the Camera
   llaise the lever near the winding ke1',
Fig. 1, draw it forward and push down the
lled of the eamera.

                                          'tAltrt
              f


                Fie. 1.  Opertittg lht l"rurtl.
  On the bed of the camera is a focusing
scale with slots marked 8, "Fixed" (25 feet)
and 100 feet. This is for focusing the
camera. The scale is marked both for feet
and for meters and care should be taken
not to confuse them.
  Draw out the front of the camera by the
knob on the slide plate, to the slot rnarked
100 feet where the front will lock autornati-
cally, Fig. 2, page 15. To set the focus for
subjects that are nearer to the camera
than 100 feet, press the spring catch or
locking deviee on the side at the bottorn

                                 14
View original page 17Page 18 · Read text
of the front standard, and draw out the
front of the camera to the slot on the scale
that is marked nearest to the estimated
distance in feet, between the camera and
lhe principal objecl to be photographed.


            www.butkus.us It


  rhe dist                  ro rhecamera can ^^:";,:;;'Jnl''1"0,..,be estimated without measuring,
unless the subject is close to the camera. For
instance,  if the focus is set at the slot marked
"Fixed" (the usual distance for ordinary
street work), everything about fourteen feet
and beyond, will be in good focus. When the
camera is focused in this manner, it may be
used as a fixed-focus camera, and for
View original page 18Page 19 · Read text
www.butkus.us
ordinary shapshots use stop No. 1. When
the principal object is nearby or at a great
distance, the focus should be changed
accordingly. For distant views, set the
indicator in the slot marked 100 feet, and
when the subject is about 8 feet from the
lens, set the indicator in the slot marked 8
feet. If a time exposure can be made the
smallest stop can be used. This allows the
subject to be about five feet from the camera,
see table on page 17. The subject can be
brought closer to the lens if a Kodak Por-
trait Attachment is used, see pages 31 and
32.
    What Depth of Focus Means
  Suppose that the lens is used at its full
opening, No. L, with the focus at eight
feet, an object eight feet distant will be
sharp, but objects about six feet and about
twelve feet distant will not be sharp. Stop
the lens down to No. 2 and objects before
and behind the exact point of focus will
increase in sharpness and the area within
which all objects will be sharp is increased.
Go farther and use stop No. 4, and every-
thing about four and three-quarters feet to
about thirty-six feet will be sharp.
   It will thus be seen that the smaller the
stop the greater the depth of focus, that is,
the greater the power of the lens to define


                                                                                                                                                                                                                                         i
                                  ^]
View original page 19Page 20 · Read text
sharply, at the same time, objects nearer
    the camera and farther from the camera
    than the principal object in the picture,
    which, of course, is the object focused upon.
     It is obvious that with the small stops the
    exposure must be correspondingl5r increased.
     The following table gives the depth of
    focus or range of sharp definition with the
    No. 2 Folding Cartridge Hawk-Eye Camera,
   Model C; when focused with different
    stop openings.
                 No. I       No. 2      No. 3
      Distance        RANGE OF SHARPNESS      Focused
     Upon
       100 Ft.  22  toInf.  I 17  tolnf.l 13 tolnf.  | 9  tolnf.      "Fixed"   14  toInf.  I ll%toInf.l   9Yz toInf. I Zl4toInf.        8 Fr.     trltoll      | 6  to13 | 5r1 tot8  l+aato:O
                            ation for Infinity-meaning an unlimited

                      No.  I                 (,
                   No.2     O
                   No.3      C
       O No.4
                         ,YRIGHT I 922 BY EASTMAN KODAK CO.
      These circles show the actual sizes of the
    stop openings or diaphragms of the shutter
    on the No. 2 Folding Cartridge Hawk-Eye

                                    17


l
View original page 20Page 21 · Read text
www.butkus.us
Camera, Model C, when fitted with the
Single (Meniscus Achromatic) Lens. They
clearly show the relative sizes of the stop
openings and how their areas differ.
           Diaphragms
  The diaphragms, or stop openings as
they are sometimes called, are the openings
that regulate the amount of light passing
through the lens. The openings are en-
larged or reduced by moving the lever B,
see page 11.
 No. 1-For all ordinary instantaneous
ex,posures of subjects such as nearby land-
scapes showing little or no sky, groups and
street scenes, when the subject is in bright
sunlight.
  No. 2-For ordinary landscapes, in bright
sunlight, with clear sky overhead, make an
instantaneous exposure; also for Interior
Time Exposures, the time for which is
given in the table on pages 28 and29.
 No. 3-For instantaneous exposures,
when the sunlight on the subject is un'
rt"sually strong and there are no heavy
shadows, such ad views at the seashore and
on the water, also for instantaneous
exposures of extremely distant l,andscape.s,
marines, snow scenes and clouds only, in
bright sunlight; and for Time Exposures.
View original page 21Page 22 · Read text
No. 4-For Time Exposures Outdoors
on cloudy days, the exposures required are
given on page 33. I{euer forinstantaneous
6,nposures.- The smaller the stop the sharper
the picture, see pages 16 and 17.
                                      stop  Total fa'ilure will be the result, if
No. 4 is used for instantaneous erposures.
  Throughout this manual all exposures
given foi out-of-door subjects are for the
Lours between two and a half hours after
sunrise and two and a half hours before
sunset. If earlier or later the exposures
must be longer. For subjects in the
shadow, under porches or under trees, no
definite directions can be given; experience
only can teach the proper exposure to give.
  Using the No. 2 Foldin$ Cartrid$e
  Hawk-Eye as a Fixed Focus Camera
  SBr rsB Focus AT "FIxED."
  By setting the focus of your Hawk-Eye            -(25 at 'iFixed"      feet) it can be used as ?
 fixed focus camera, with the additional
 advantage of being instantly convertible to
 a focusiig ca-e.a when conditions call for
 it.  It must be remembered, however, that
 when using your camera as a fixed focus
 type, the subject must be in bright sun-
 light, to obtain a fully timed exposure.
View original page 22Page 23 · Read text
www.butkus.us
  The range of sharpness when the Hawk-
Eye is adjusted as a fixed focus camera will
be found in the table on page 17.
  Erplanation: A lens is often spoken of
as having a fixed focus. There is no such
thing as a fixed focus lens, but in certain   .l                                                           t.a^6tas, 3rA x 4r1 and smaller (equipped
with short focus lenses), the lens can be set
at a distance that is a compromise, as to its
focus, between far and near points. A    t
camera with a lens so focused, used in
combination with a relatively small stop, is
called a fixed focus camera.
         Using the Finder
  The finder above the shutter gives the
scope of view and shows the picture as it
will appear, but on a much reduced scale.

  [L
              Holding (amera in tertical positicn.       l
                            20
View original page 23From the M. Butkus archive. Original publisher and archive notices are retained.
Check the model and edition against your equipment.
PDF verified 2026-10-10.